Author’s Note: Since we visited Glacier in 2016, the Park Service has implemented a complex, ticket system for visiting the park in the summer. To be honest, I can’t make much sense of it as it involves multiple tickets being required to enjoy various activities around the park. For more information on this system, visit the park website and/or contact the park office.
Also, Just a word of warning, as this is a National Park, no dogs are allowed on any trails within the park (exceptions for Service Animals). They are only permitted in the campgrounds and parking lots.**
Otherwise known as the “Soul-Crushing Switchbacks Trail” 😮–thank you Mr. Trekker, for that!–the Apgar Lookout Trail traverses Apgar Mountain to the fire tower near the peak, and offers views of Lake McDonald, in Glacier National Park.
Where is the Apgar Lookout Trail?
The easiest way to reach the trailhead is from the West Glacier entrance on the west side of the park. Shortly after passing through the West Glacier entrance gate a road branches off to the left with signs for the Glacier Institute, a horse corral, and the Apgar Lookout Trail. At the next intersection, you’ll turn right towards the horse corral, then continue following the signs to the left which take you to an unpaved dirt road and the trailhead.
Hiking on the Apgar Lookout Trail
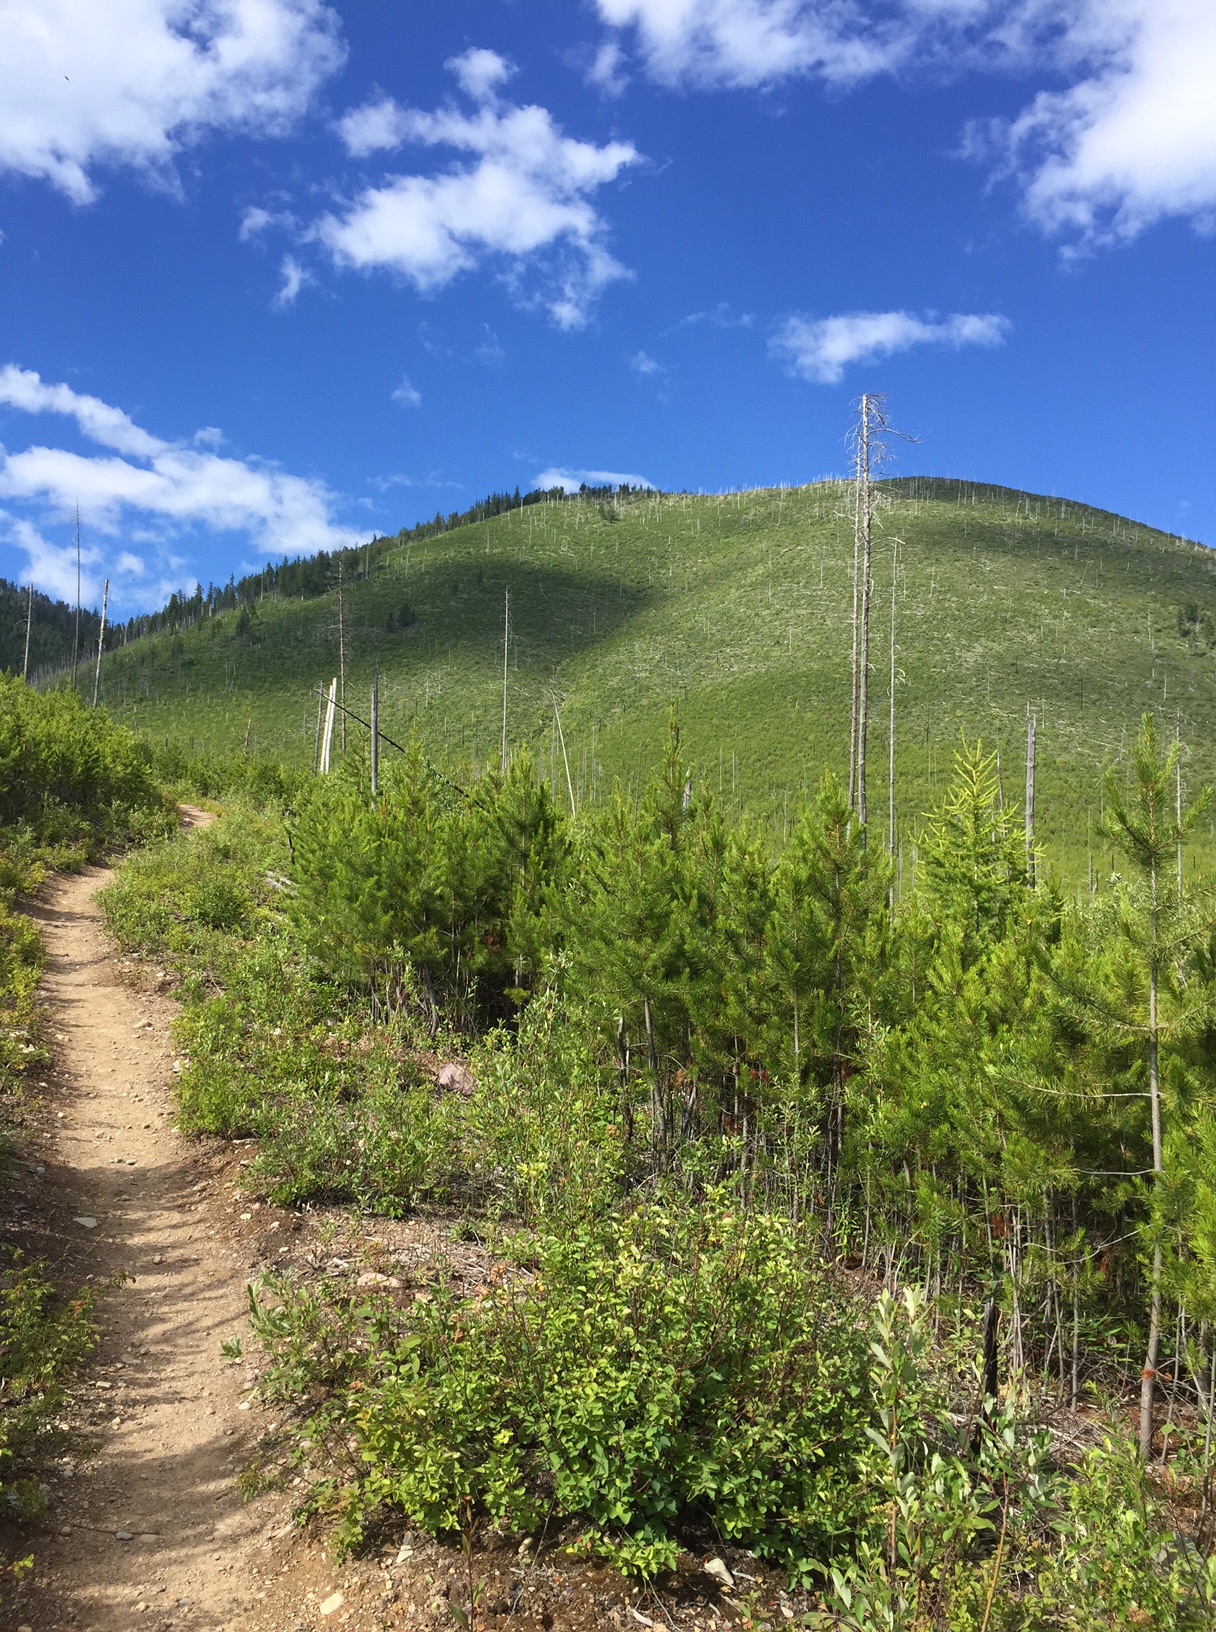
This trek was rough! The trail is interesting because it isn’t that long (only about seven miles round trip); it’s also fairly wide (enough so that two people can walk side-by-side in some cases), and it’s smooth (there aren’t many roots/rocks to trip you up). The first 3/4 of a mile is fairly flat but then the elevation gain begins. You gain almost 2000 feet of elevation in about three miles over a series of three, LONG switchbacks.
Related posts: Going to the Sun Road at Glacier National Park; Swiftcurrent Trail at Glacier National Park and 5 Other “Don’t Miss” Sites!; 5 Things you Don’t Want to Miss at Glacier National Park; Gunsight Pass Trail, Glacier National Park
We didn’t fully appreciate just how steep it was on the way up, it was the difficulty in keeping our balance on the way down that clued us in. Part of what makes it so difficult is that almost the entire trail runs through a burn scar left by a forest fire from several years ago; so it is completely exposed to the sun.
We got a late start (about 2 pm as we made the attempt shortly after arriving at the park) and it was hot and fairly humid that day (about 85 degrees). I should also note my body does not tolerate heat well. There’s a reason why I rejoiced in our move to the cool Northern Plains after living in the steamy South!
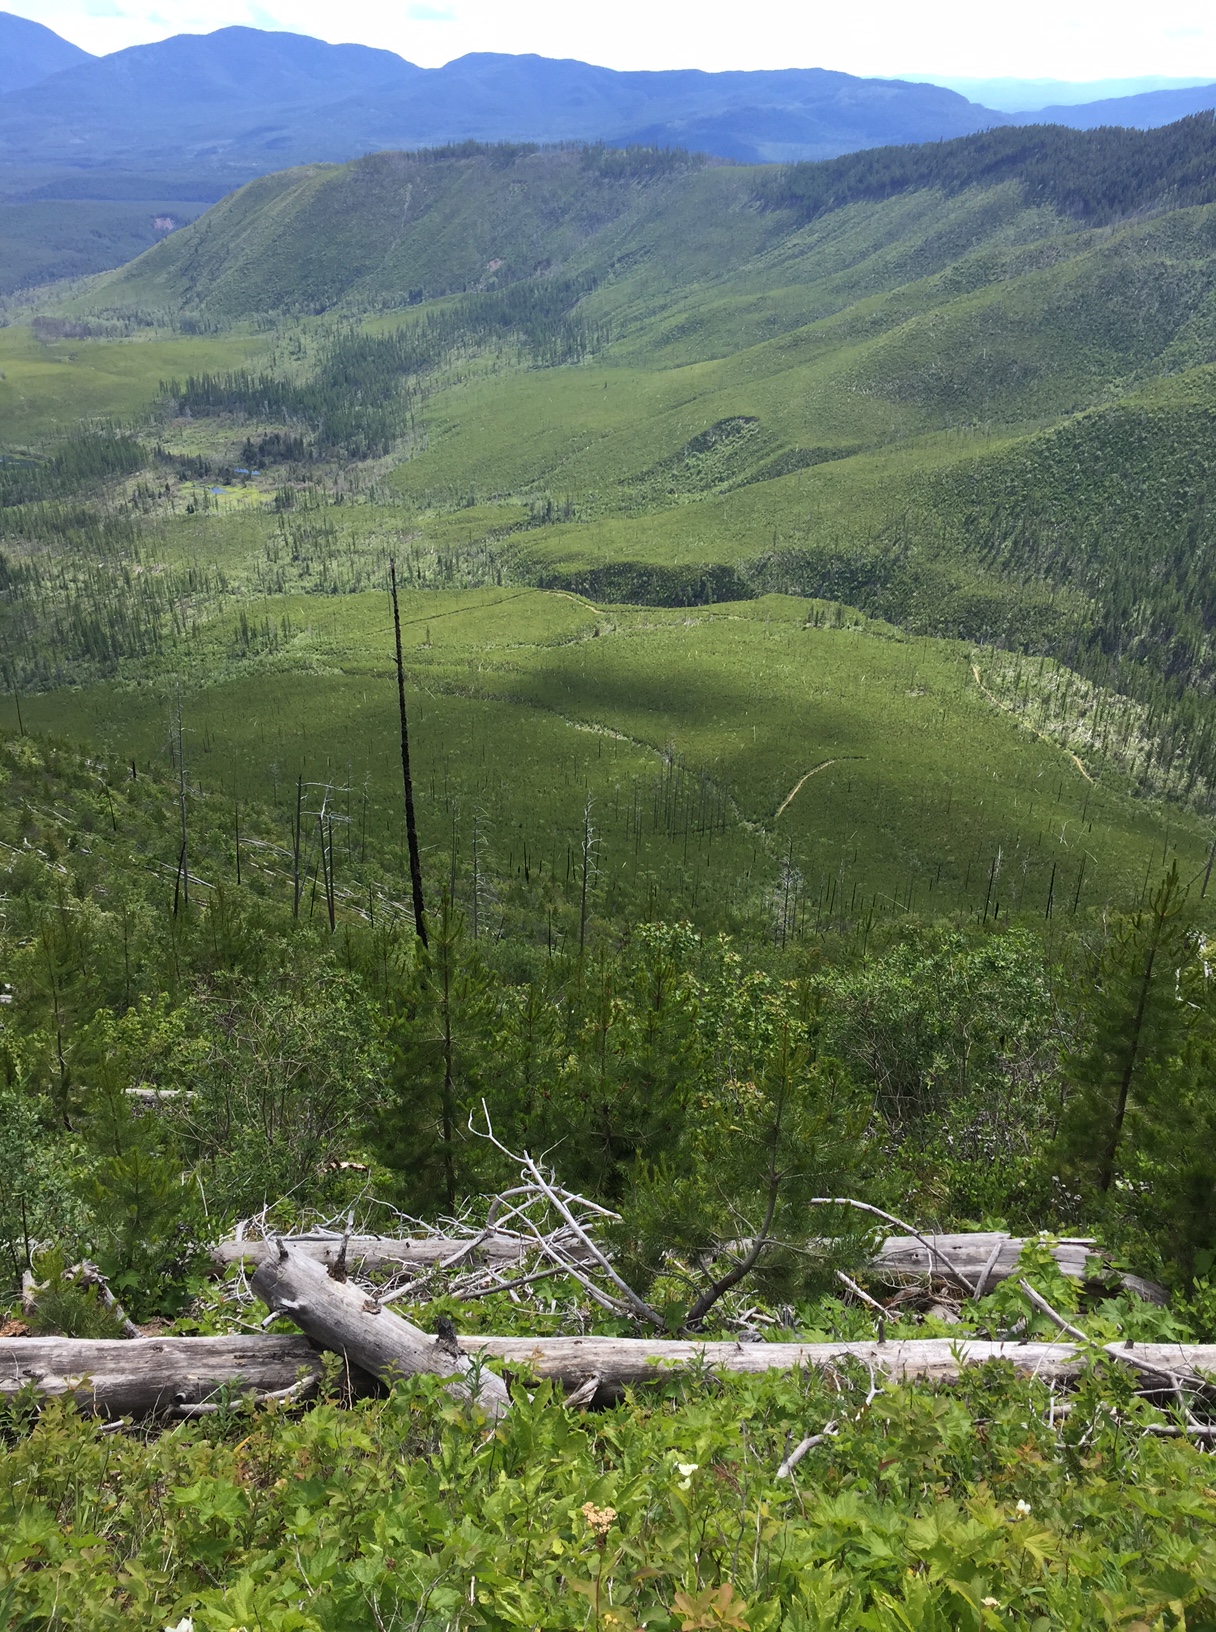
The lack of shade-producing foliage does offer one advantage…this trail allows for incredible views of the surrounding Flathead River Valley!
If you make it to the top, we were told the views of Lake McDonald bordered by the park’s mountains to the north are beautiful. (click here for the webcam view from the summit of Apgar Mountain.)
In my semi-delirious state, I half-heartedly named this “the Butterfly Trail” for the numerous (and lovely) flying insects we stirred up on our trek.
As I’ve mentioned in other posts for this park, beware of bears on this trail. We did not see any but some hikers that were exiting the trail as we were starting out did. Also, three days later, a mountain biker (and park ranger) was tragically killed when he surprised a grizzly on a bike path about six miles from this very trail (outside the boundaries of the park).

Know How Hard to Push Yourself When Hiking
I’m going to get on my soapbox a bit regarding an important safety tip: KNOW YOUR LIMITS in the outdoors! There is a fine line between pushing yourself to extend your stamina and increase your strength…and putting yourself into a dangerous/potentially deadly situation.
There are some well-known symptoms of exhaustion, dehydration, and heat stress but it also helps to know your body. This takes time and experience to learn what signals your body gives when it’s being stressed and what those signals mean.
As much as it pains my pride to admit it…we didn’t make it to the top of this trail. We decided to turn around about a quarter of the way through the 3rd switchback when the “bent-double” stomach cramps and nausea hit me. I’ve learned from past experience that this is a major sign of dehydration for myself and I didn’t want to push things too far.
Always remember, just because you get to the top, that’s only halfway, you still have to get back down and sometimes going downhill can be more difficult. Exhaustion combined with the pull of gravity on the return trip can prove disastrous–I’ve worn scrapes and bruises resulting from stumbles caused by this dastardly combination on more than one occasion.
So don’t spend all your energy on only half the trail or you may find you’re unable to complete the most important half…getting home!
It’s also important to note, for the benefit of your wallet, that some parks/states require you to pay for at least a portion of the cost involved in a Search and Rescue operation if one is deemed necessary. They’ll come to get you, but the financial toll may remain long after the physical injuries have long since healed. If concern for your own body isn’t enough to convince you to turn back, perhaps concern for your wallet will be.

Don’t be Afraid to Turn Back when Hiking
It’s difficult to admit we failed on this attempt, but I firmly believe we made the right decision in turning back. It’s easy to get “Summit Fever”, especially when you go into a situation expecting to succeed. The length of this trail was well within our average hiking range and it was fairly easy, technically speaking, so turning back definitely caused some wounded pride.
Don’t be afraid to admit you’ve bitten off more than you can chew though. A report from the years 2003 – 2006 found that 23% of Search and Rescue incidents included people in their 20’s and 66.3% of the victims were male. So the takeaway lesson is, that young males–the ones usually thought of as being the most healthy, strong, and capable–are also the ones most likely to run into trouble. If they struggle, the rest of us shouldn’t feel bad admitting we struggle too!
So guys, take note…find a hiking partner who wimps out before you do so you can turn back and still save face. 😉 I should note, that the cramps relented within minutes once I stopped climbing, found some shade, got some sustenance in me (food and drink), and cooled down.
If you’re looking for a challenging hike on your next trip to Glacier National Park, check out the Apgar Lookout Trail!
Have you attempted these infamous switchbacks? What was your experience like? Let me know in the comments!
Did you enjoy this post? Pin it!
Like what you read here today? Please feel free to leave a comment, like or share this post! Add your email at the bottom of the page, or the sidebar to the right, to be notified when a new post is published. By signing up for the email list, you will also receive a free copy of the Tranquil Trekker’s Top 10 Tips of Trekking Do’s and Don’ts!
You can also follow the blog on social media by clicking the links below!


I did the trail to the top in 2010, when I was 63 years old. I knew that I had climbed an unprecedented distance (for myself), and I was mightily surprised when I looked up the trail later on the internet, to find out I had gained about 1,860 feet. (That includes the stairs to the upper deck of the observation structure.)
I’ve still “got it” – just yesterday in Chicago and three near suburbs I did a walk of 15.3 miles and I’m now 76 years old. No significant elevation gain was involved (perhaps 100 feet or so?), but this is most likely the longest hike of my lifetime. I’ve charted 388 miles of hiking since I started keeping track a week shy of six months ago.
That’s awesome, and good for you! I hope I can still hike this trail when I’m 63!
I like the risk management you have promoted on this post. Hope to do more hiking in Glacier some day.
Thanks! I really hope we get back there someday, there’s so much to see! And we can plan for it better now that we’ve been there.