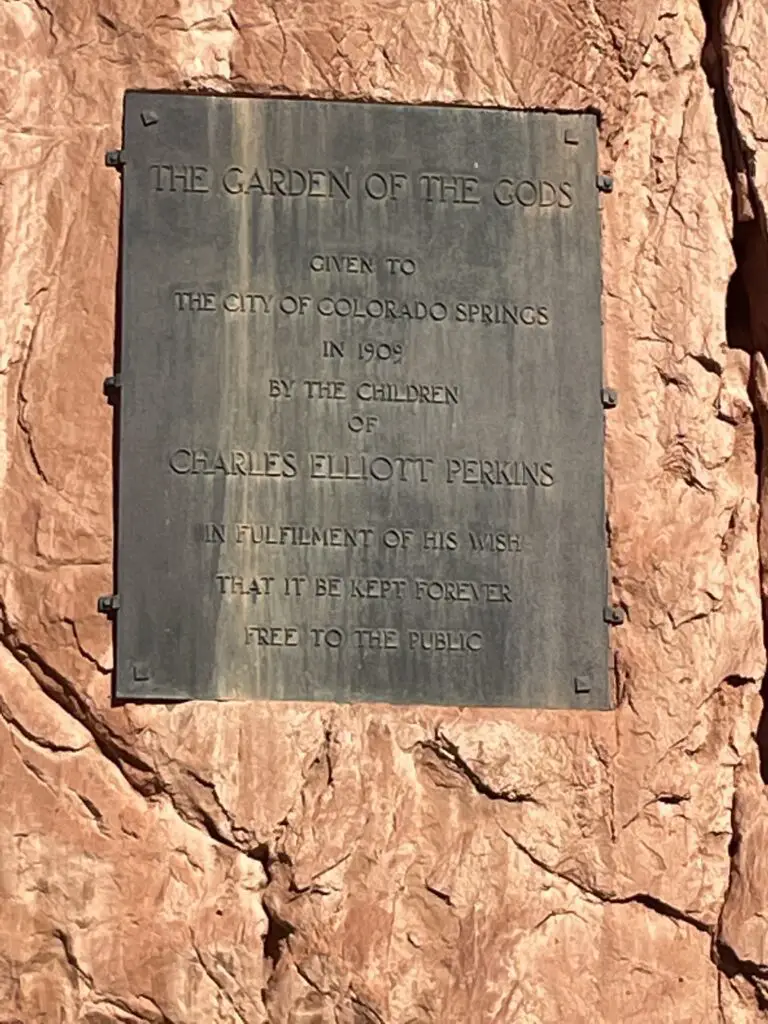
In this post, I discuss a summer adventure to this great, state park in western Nebraska
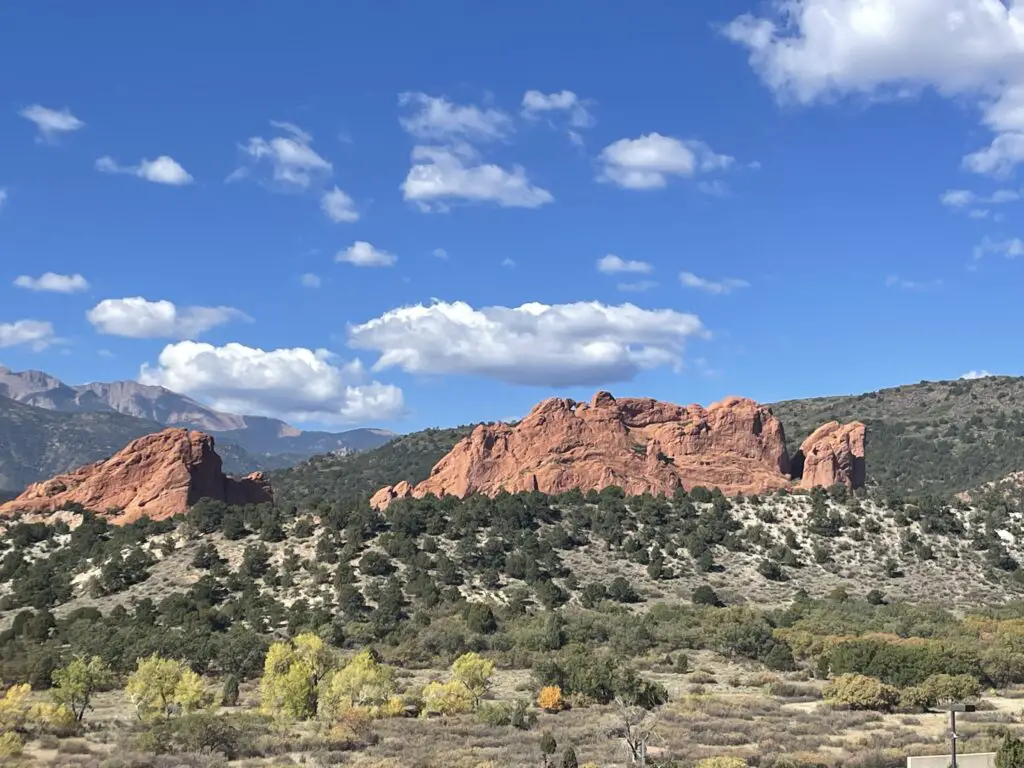
Nebraska isn’t all flat cornfields! Looking for some hidden gems for recreation? Check out Fort Robinson State Park and Toadstool Geologic Park, both located in the far, northwestern corner of the state!
Fort Robinson State Park
Fort Robinson State Park is a great place to visit! It is a former fort (hence the name 🙃) that has been transformed into a family-friendly rec area! It offers hiking paths, history, and many of the old soldiers’ Quarters were refurbished and are now available for vacation rentals. This is unique and allows Fort Robinson to actually be known as a great, family reunion destination.
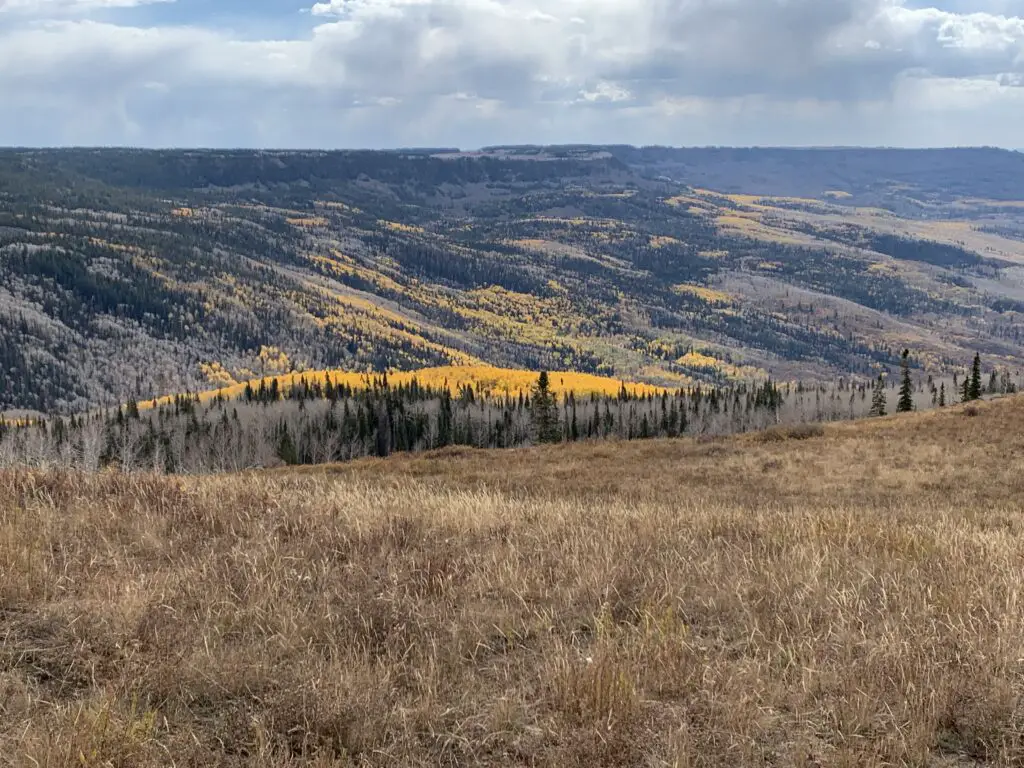
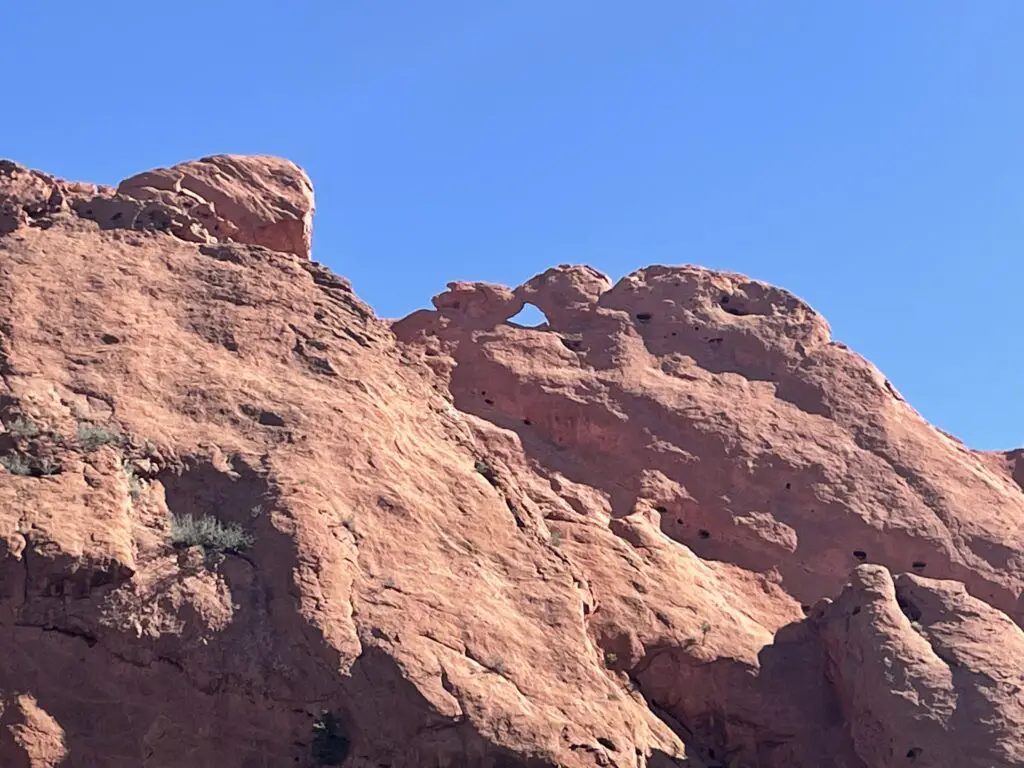
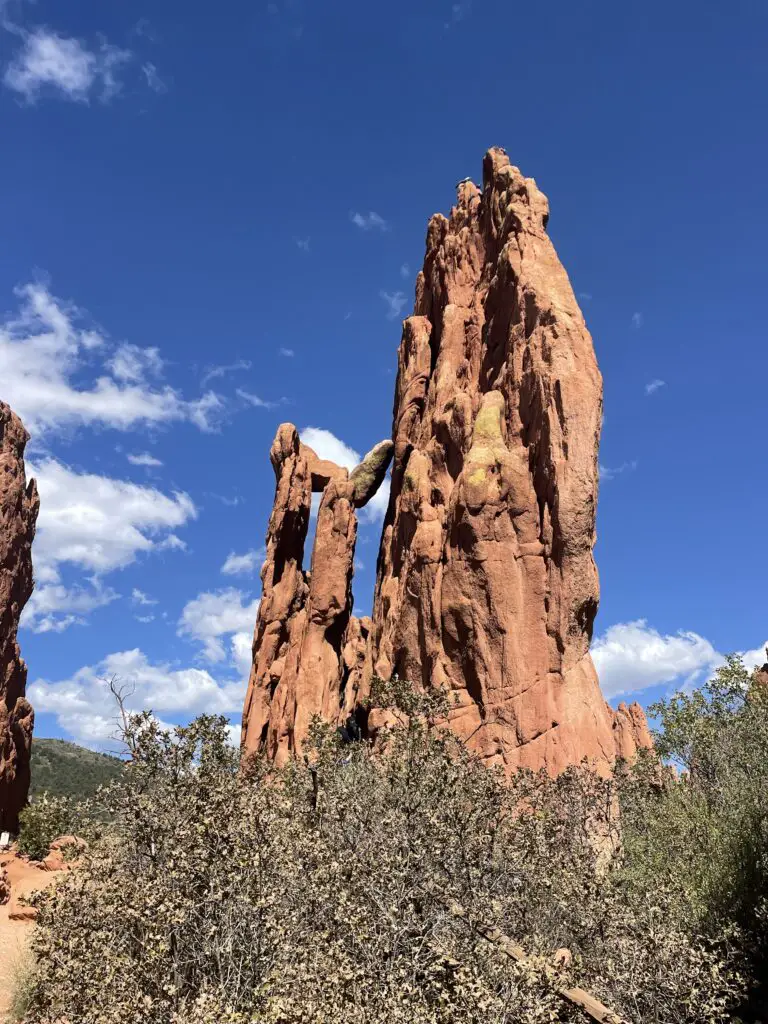
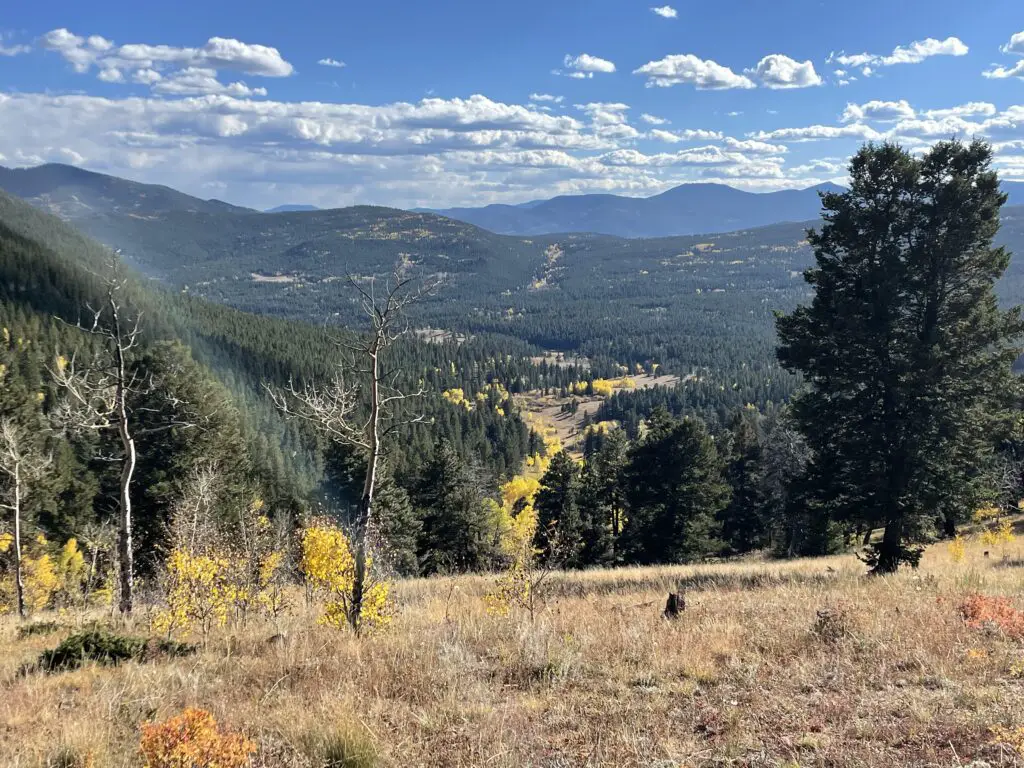
Sometimes called a “gem of Nebraska State Parks”, Fort Robinson was quite nice! (It’s a little-known fact that western Nebraska is actually very pretty! I recommend it over the rest of the state!) The park features LOTS of shade trees!
We did struggle with some ticks and bugs though at least it was quite green when we were there in late May. The mosquitoes weren’t bad though I’m sure they could be at times (and the tent-camping section was all grass, under trees, near the creek. It seemed fairly dark and damp–it looked like a great place to snag a few-hundred mosquito bites! 😝)
To be fair, we’ve only been to two of them, but this has been our experience with Nebraska state parks. We’ve never been impressed with their tent-camping areas (we had another disappointing, tent-camping experience at another Nebraska state park, on a Great Plains road trip, several years ago–though it did result in some Northern Lights viewing!)
For this trip, we actually chose to stay in the RV camping area. Though the sites were pretty tightly packed we were quite happy with this option.
Puppers checking out the old, fort poolThese were Officers’ Quarters that are now available for rent!Western Nebraska is quite beautiful!
Where is Fort Robinson Located?
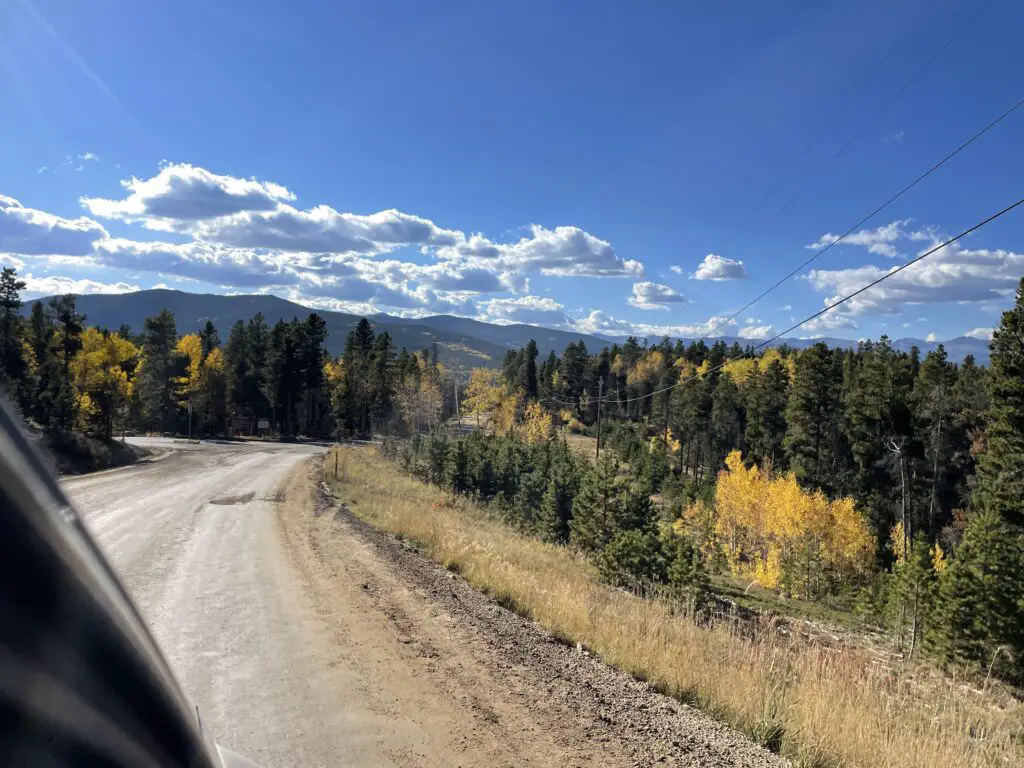
Fort Robinson sits right on US Hwy 20 in far, northwest Nebraska, less than five miles southwest of the small town of Crawford.
The park has quite a storied past. It started as a fort during the Indian Wars in the 1880s–this was actually the sad location of the death of Crazyhorse, the great Lakota warrior.
The actual site where Crazyhorse died
Fort Robinson also served as a large reservation for many American Indians including Red Cloud and his people.
The fort was also a “remount” location for Calvary horses (meaning the battle horses and their wounds were treated here and new mounts were provided). Fort Robinson was also a war-dog training camp and a German, Prisoner of War camp during World War II.
This is about all that remains of the former, German, POW camp
Horse vet center! That table moves to the vertical. They would strap a standing horse to it, sedate the animal and then move the table–with the horse strapped to it–back to the horizontal to perform procedures–not bad for 1940s technology!
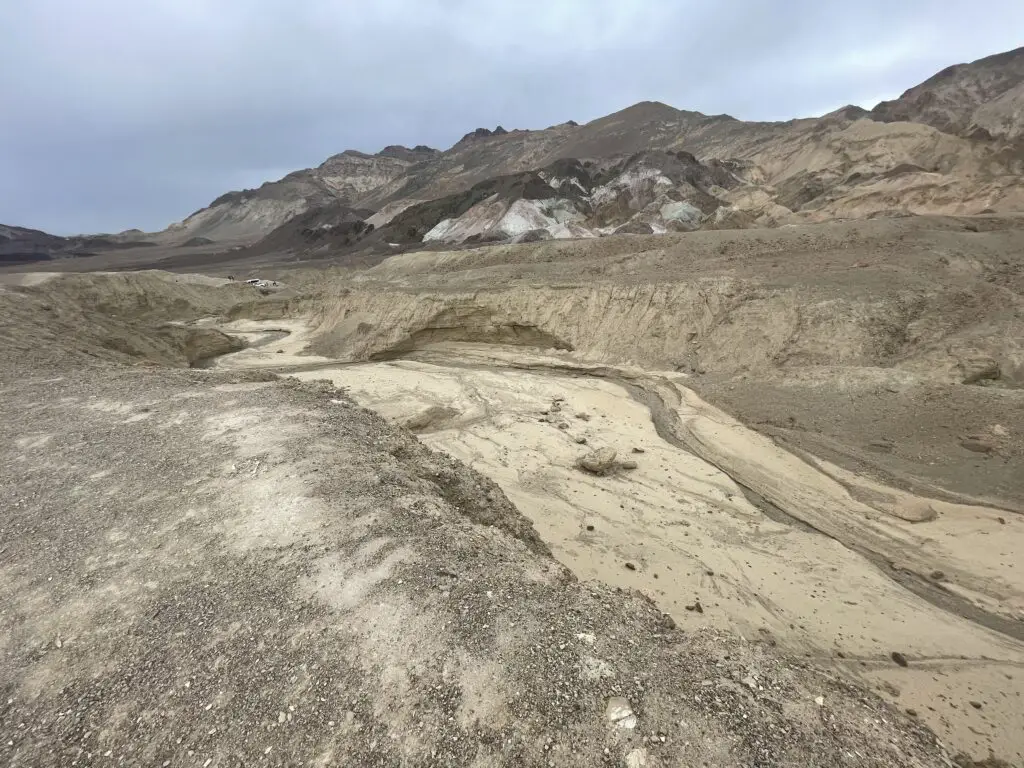
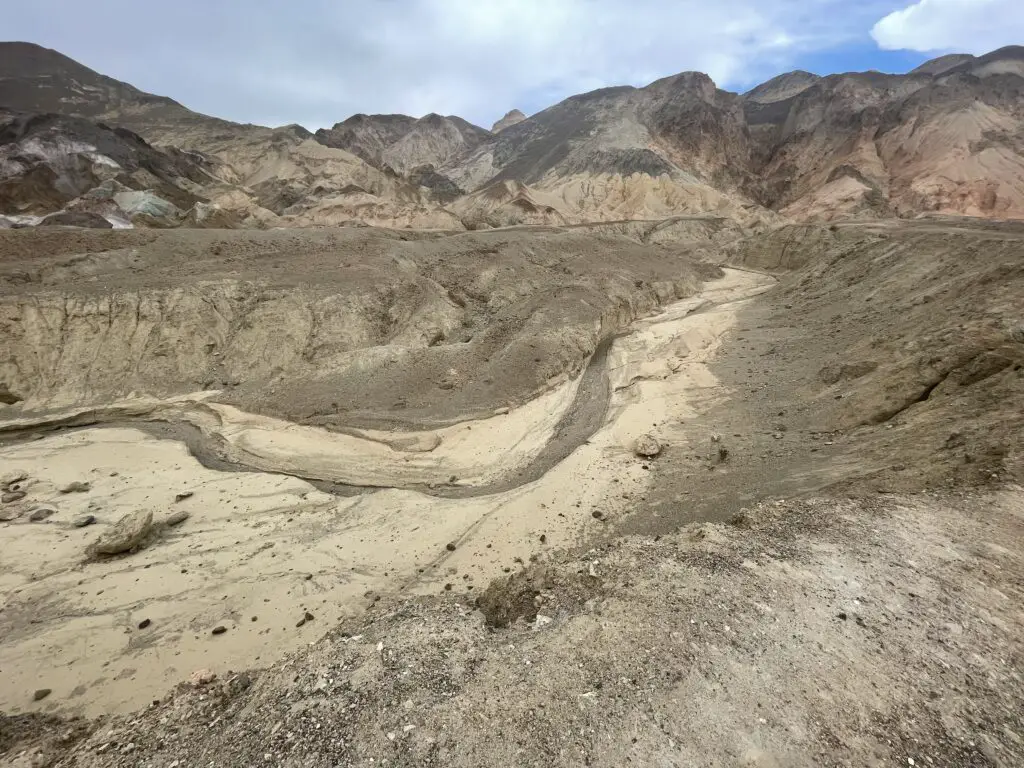
Toadstool Geologic Park
Toadstool Geologic Park is literally in the middle of nowhere! It is situated in the far, northwest corner of Nebraska, about 30 miles north of Fort Robinson, 20 miles northwest of the small town of Crawford and 40 miles west of Chadron, Nebraska.
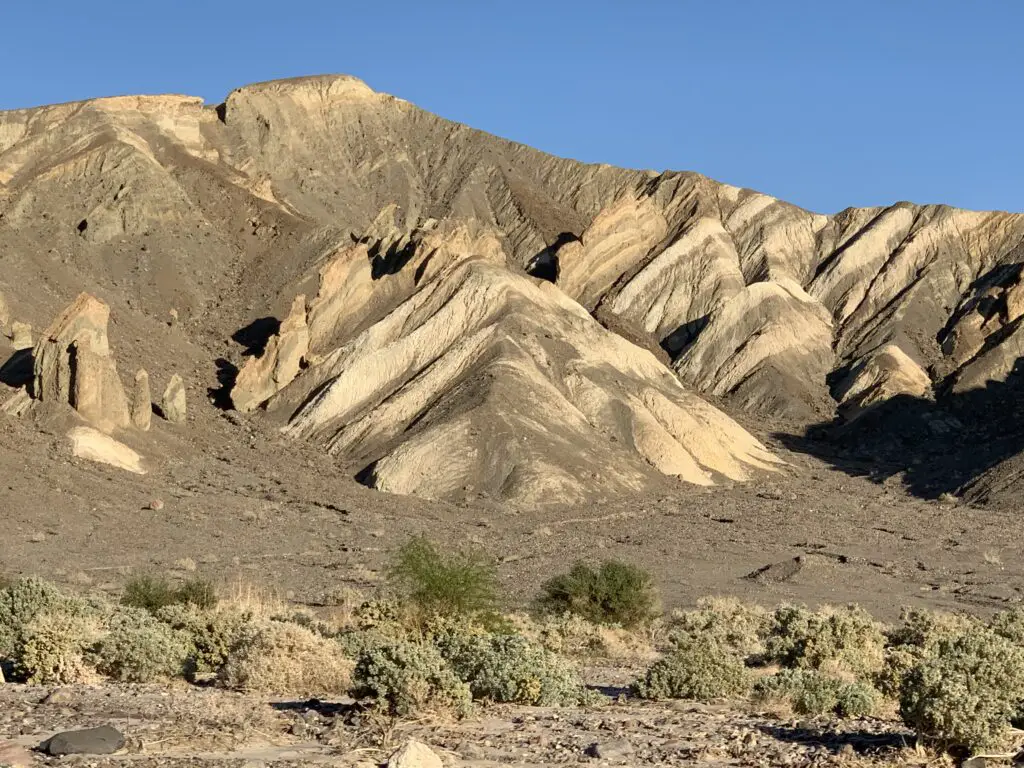
The park looks a lot like Badlands National Park in South Dakota or the North Dakota Badlands at Teddy Roosevelt National Park–you can read more on that hidden gem here!
Toadstool Geological Park is mostly a place for hiking though it does offer some camping options…
This was my first big hike after severely breaking my ankle a few months prior. It was a little tougher than we were first expecting for a “nature trail” but I finished the route thanks to my awesome trekking poles and help from Mr. Trekker!
The trail said it was a one-mile “nature trail” which are usually fairly easy. This hike wasn’t “difficult” but there was plenty of uneven ground and some scrambling on loose gravel as well as a few steeper ups and downs…
We learned later that I “may” have gotten a little too aggressive with twisting my ankle around on the uneven ground on this hike. A few weeks later, at my next ankle-surgeon checkup, we found out I broke one of my titanium pins! 😅 The doctor was like, “How did you manage that?!”–she had planned to take it out anyway 😇
This is a mockup of a sod house–these were common in this part of the country in the past
If you’re looking for some great, family-friendly outdoor and camping options in western Nebraska, check out Fort Robinson State Park and Toadstool Geologic Park!
Like what you read here today? Please feel free to leave a comment, like, or share this post! Add your email at the bottom of the page, or the sidebar to the right, to be notified when a new post is published.
In this post, I discuss what you’re missing from this national park you may not know exists!
**Author’s note: Just a word of warning, as this is a National Park, no dogs are allowed on any trails (exceptions for Service Animals). They are only permitted in the campgrounds and parking lots.**
The Trekkers have had Theodore Roosevelt National Park, in southwestern North Dakota, on our bucket list for quiet a while. We wanted to go fairly early in the season, so it would still be green, and in mid-June it was BEAU-tiful!
This was one of the first trips we took once I could start hiking again after I had been laid up for MONTHS thanks to surgery for an ankle that was broken in two places (along with being dislocated and a torn tendon) after a NASTY fall on the ice. 😝 I was finally able to start getting back out there!
Teddy Roosevelt National Park is named after the 26th President of the United States as he lived in this area for a while (before becoming President). He credits his time there as inspiring him to the Presidency.
I’ve come to decide “Teddy” may be my favorite President. They did call him the “Conservation President” after all! He originally came west to help him escape the pain of several serious, personal losses (one of the “loves of his life”, his first wife, died from complications after childbirth THE SAME DAY his mother died of typhoid fever! 😪)
Teddy helped create the US Forest Service and was a champion of protecting countless acres of land in the western US, as well as creating a number of national parks and monuments (many of which the Trekkers’ enjoy regularly.) He was also friends with John Muir (another of my favorites!) He was the OG #natureaddict/#natureboy!
A note on this park: the irony is the National Park named after the “Conservation President” sits on the edge of the Baaken Oil Fields!–For those who don’t know these are some of the largest oil fields in the US.
This really won’t affect your experience at Teddy Roosevelt National Park too much. You can see the flames burning off waste-natural gas from some of the overlooks and hiking trails in the North Unit. This is especially troublesome at night when they can affect the Dark Sky status of the park.
I don’t think Teddy would have liked to see his beautiful land in this state but who can stand in the way of progress? 🙃 “Black Gold, Texas Tea baby!” 😡
Where is Teddy Roosevelt National Park?
The park is situated in far, southwestern North Dakota about 130-ish miles west of Bismarck!
This park is also called the “North Dakota Badlands”. While somewhat similar to Badlands National Park in South Dakota, this area is wetter and greener…
Teddy Roosevelt National Park is divided into three separate units. The North Unit was our favorite. It is known for being less developed but also prettier, offers more wildlife and is less busy. The South Unit is more developed and busier but offers more hiking options. (The two units are about a one-hour drive apart–around 70 miles).
There is also a bit of a “satellite” unit centrally-located to the west of the other two, main units. It is called Elkhorn Ranch. This is where Teddy literally lived when he was in North Dakota and it is LITERALLY in the Middle of Nowhere! This one is pretty far out there–about a one-hour drive (around 54 miles) northwest of Medora…
The park basically isn’t near anything except the tiny town of Medora. The town is cute but small. It wasn’t too busy when we were there in mid-June but it can get MUCH busier later in the season.
Driving around North Dakota was kind of weird. 😅 All of their traffic light poles are bright yellow. Not sure if this is to highlight them against the snow they get all winter? Also, they don’t hardly have any good gas stations/Convenience-stores. All throughout Wyoming, rural South Dakota and Montana you have plenty of good, big, gas station stores (some are literally in the middle of nowhere with no other buildings in sight and double as catch-all grocery stores)–in western North Dakota these are HARD to find!
They have plenty of gas stations but they all look like they’re from about 1995–several we stopped at, while small, did at least have clean bathrooms! This was surprising to me because there aren’t a lot of gas stations up there, you’d think the ones they do have would be fairly good-sized and decent–even near major highways, like I-94, the stations were largely disappointing…
Teddy Roosevelt National Park North Unit
We enjoyed camping and hiking around the North Unit more. It was definitely quieter, and it offers a 14-mile scenic drive (each way). Just realize this is NOT a loop, you have to drive out and back!
Camping at Juniper Campground
Juniper Campground, on the North Unit of Teddy Roosevelt National Park, is MUCH easier to get sites at than the Cottonwood Campground on the South Unit. We got into a First-Come-First-Serve site at Juniper, in the middle of the week, in mid-June, with no problem!
The Little Missouri River ran JUST on the north side of Juniper Campground–basically barely across the road from our campsite!
I would not want to be standing there in a flash flood!
I LOVE this pic Mr. Trekker took, it’s SO moody!
There was even a buffalo that hung out with us IN THE CAMPGROUND–watch out for these! #dontpetthefluffycows!
Big boy! Imagine running into him walking to the bathroom in the middle of the night!
A note about buffalo: it is NOT ADVISABLE to get as close to a buffalo as we were in the picture above. However, in this case, we were literally sitting on the truck bed and he came up to us so this was a bit of an exception. He seemed calm and other campers said he’d been there before. As he was showing no signs of agitation we stayed still till he wandered off to a safer distance.
To be clear though, buffalo are known to be completely unpredictable and they can be DANGEROUS if they get irritated. So even in situations like this, DO NOT approach them, give them space, be calm and quiet and try to back off slowly but calmly if possible. DO NOT let dogs get near them (dogs can agitate them and they can easily kill a dog). ESPECIALLY, DO NOT APPROACHif they have babies!!! They may look oafish but these brutes can run at 30 mph–you CANNOT outrun them–and they’re equipped with sharp horns and a VERY hard head!
View from our GoFast Camper the next morning!
For more info on camping at Teddy Roosevelt National Park, click here!
Since the North Unit was so quiet we noted there was SO MUCH birdsong! Teddy actually mentions this in his book about being at his ranch, Ranch Life and the Hunting Trail. He describes the birdsong as:
“…the rider on the plains will hear bird songs unknown in the East…many are characteristic of this region. Throughout June the thickets and groves around the ranch house are loud with bird music from before dawn till well after sunrise.”
Your Moment of Zen: enjoy some birdsong from Teddy Roosevelt National Park (it was breezy too!)–turn UP the volume!:
Some hiking trails and good stops at the North Unit of Teddy Roosevelt Park:
We enjoyed several fun pull-offs and short hiking trails in the North Unit:
The Cannonball Concretions Pullout was the first one we came to and is just across the road from the entrance to Juniper Campground:
The Cannonball Concretions!Whaddya think…a bird or Mickey Mouse?
Buckhorn Trail starts from the Cannonball Concretions pullout. We only did a small portion of this trail, basically just up the hill from the pullout. It’s full length is more than 10 miles long and wanders throughout the North Unit of the park!
Riverbend Overlook was just a quick (but pretty!) jump out of the car:
Oxbow Overlook was an easy, pretty and short hike to and around the overlook–the shelter also makes a great place for a picnic or snack:
Teddy Roosevelt National Park South Unit
The Scenic Loop Drive circumvents the majority of the South Unit of the park. It is about 36 miles round trip though we couldn’t do the whole loop as the southern half was closed for construction…
Note: The time zone change between Central and Mountain time runs along the Little Missouri River. This results in the main, two units of the park being in separate time zones (the North Unit is on Central Time while the South Unit is on Mountain Time.) So the North Unit is one hour ahead of the South Unit–life is weird out West! 😀
This was one of the actual cabins Teddy lived in when he was in North Dakota!
You literally drive through the South Unit on I-94 which is kinda cool. One of the rest stops is literally part of the park and you can hike a bit from here!
This pic was taken from the rest stop on I-94. This is a portion of the Painted Canyon Trail. You can hike around down there and access it from the rest stop!
Painted Canyon trails: These trailheads are locate at the I-94 rest stop that sits in Teddy Roosevelt National Park.
The Painted Canyon Nature Trail is an easy trail, only about 1/2 mile long and it runs along the rim of the canyon, just behind and around the rest stop building. Pets can be on this portion of the trail!
The Painted Canyon Trail departs from this same area. It’s fairly steep to get down into the canyon. It’s about four miles in total length and be aware there is NO SHADE on this trail. It also connects to other backcountry trails throughout the northern portion of the park.
Moment of Zen 2: Buffalo at Teddy Roosevelt National Park!:
Some hiking trails and good stops at the South Unit of Teddy Roosevelt Park:
Boicourt Overlook/trail: The park website says this trail is only .3 miles and handicap accessible–this is “kind of” true. This description is true for the main trail but you can keep going further along the ridge for probably close to another 1/2 mile (that portion is not accessible).
Buck Hill: The entire trail is less than 1/2 mile but it’s quite steep! The steepest portion is paved (though I wouldn’t call it “accessible” as it’s so steep) while the rest of the route is a good, packed-dirt trail.
Wind Canyon Trail: This trail is about 1/2 mile in length. It has a few steep sections but overall this one isn’t too bad. It was a nice overlook of the river!
View of the Little Missouri River from the Wind Canyon Trail
For more info about hiking at the South Unit of Teddy Roosevelt National Park click here!
Teddy Roosevelt National Park Elkhorn Ranch Unit
There are a few ways to get to the Elkhorn Ranch unit:
The easiest (though it is longer) is to take Exit 1, on I-94 at Beach, and go north on Route 16. Then take Black Tail Road to the east until it becomes Belle Lake Road. Then take a left turn at Elkhorn Ranch Road. We went to the Unit this route and found it pretty easy to follow…
The actual location of Teddy Roosevelt’s ranch in western North Dakota
You can also take I-94 west from Medora, to Exit 10 for Belle Lake Road. Google will get you there going this way though it is out in the middle of NOWHERE with a lot of twists and jogs. We brought this route back to the highway and found it fairly easy to follow.
Note: while they were in great condition when we were there, be aware most of these roads are dirt!–Your car may get a little dusty!
View from our campground near Elkhorn Ranch
It’s all dirt roads to get there but they’re in pretty good shape and your sedan can make it, at least in good conditions. 🌞(In mud or snow, you’re on your own! 😇)
Enchanted Highway
On the way back to the Black Hills we checked out the Enchanted Highway!
Most people can only take so much Interstate driving (and that only gets you so far in North Dakota) and the straight, flat, state routes can get a little dull too. So spice things up with this interesting little stretch of highway that runs 32-miles north and south between Exit 72 on I-94 and the tiny town of Regent, ND and Route 21 (that’s right, western North Dakota is so rural they just identify places based on their corresponding exits on the highway!)
An enterprising, local sculptor put a series of large, metal critters (ants, grasshoppers and kinda freaky-looking fairy tale creatures) all along the highway. It’s worth a looksie if you’re heading that way anyway! (There are even signs on the highway to help you find this!)
We had a good time in NoDak! I’m not “dying” to go back again but Teddy Roosevelt National Park is definitely worth a drive to this random state that is often one of the last on everybody’s 50-state list! 😀
Like what you read here today? Please feel free to leave a comment, like, or share this post! Add your email at the bottom of the page, or the sidebar to the right, to be notified when a new post is published.
In this post, I discuss hiking trails, a scenic drive and amazing sites that we saw on our 15th wedding anniversary trip to this National Monument.
**Author’s note: Just a word of warning, as this is a federal, National Monument, no dogs are allowed on any trails (exceptions for Service Animals). They are only permitted in the campgrounds and parking lots.**
The Trekkers spent our 15th wedding anniversary trip in Grand Junction, Colorado hanging out at the Colorado National Monument! Funnily enough, for our 10 year anniversary we had visited Dinosaur National Monument which sits about two hours to the north. You can read about that adventure here and here.
Grand Junction/the Grand Valley:
The Colorado National Monument is found in the Grand Valley, which is located in far, western Colorado, only about 30 miles from the border with Utah. The Grand Valley is comprised of a number of small towns including Fruita, Palisade, and the much larger city of Grand Junction. This is the true, drier, more desert-like, western slope of the Rocky Mountain state.
While Grand Junction proper is smaller than Rapid City, the entire Grand Valley area is actually larger than Rapid so the end result was it felt busier/more crowded driving through town.
The streets in Grand Junction are hella weird! I’ve never experienced anything like it! You may have 25 1/2 street or 35 3/4. We even saw a 7/8 street once! What the heck does that even mean?! How do you have 7/8 of a street?! I was SO CONFUSED! 🥴
Little Book Cliffs that frame the northern side of Grand Valley shining in the evening sunThe Grand Valley
Hiking at Colorado National Monument:
There are a number of awesome hiking trails throughout Colorado National Monument. Many are short and relatively easy day hikes while others are lengthy and challenging hikes through some of the canyons. The few we enjoyed are outlined below:
Please note there is basically NO SHADE on most of the trails throughout the Monument. Also, you ARE in Colorado so even the “easier” trails sit at around one mile in elevation.
Devils Kitchen:
The Devils Kitchen trailhead is the first one you come to when you enter the park on Monument Road (from the Grand Junction side). It is less than a mile in each direction and is a simple, out and back hike.
It is fairly well-marked and largely flat as it traverses a canyon floor. Shortly before you reach the actual rock formations there is some scrambling required and the signage isn’t great. Basically just keep aiming for the rocks like what are shown in the picture below (there really isn’t anywhere else to go. 😊)
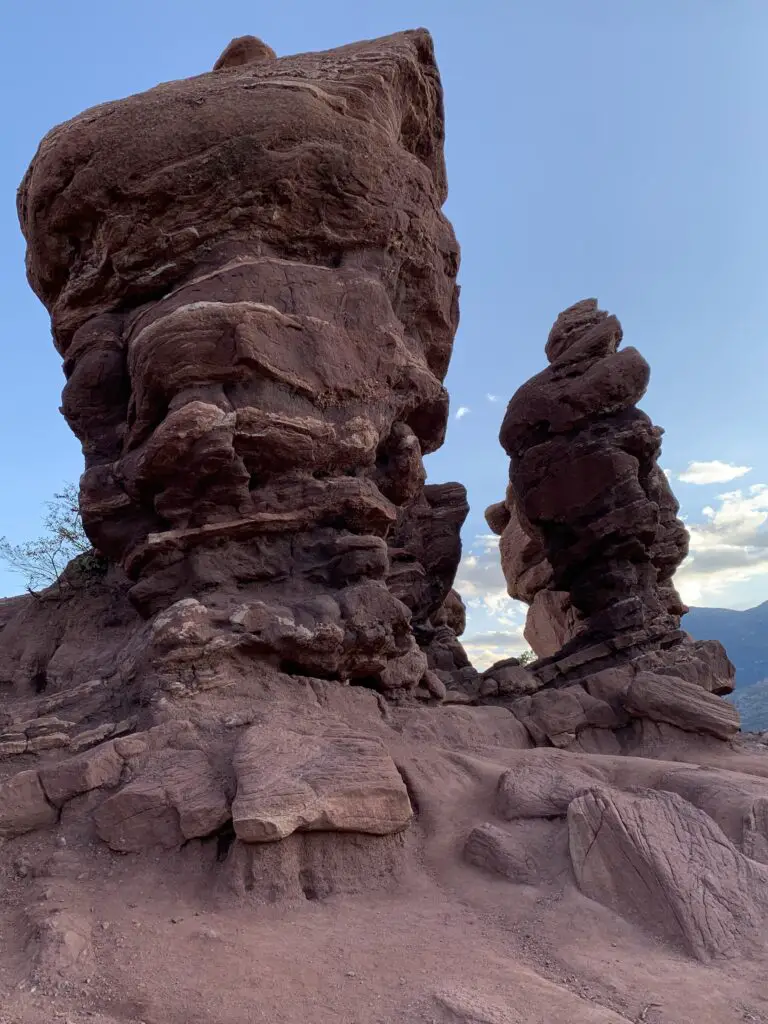
Devils Kitchen is basically just a small, rock circle made of rock spires. It’s pretty and pretty cool! This trail is family friendly for anyone who can handle basic walking/hiking and a little clambering. This is definitely a great trail for kids who want to scramble!
The Tranquil Trekker enjoys Devils Kitchen
The Trekkers take a break and enjoy the canyon view
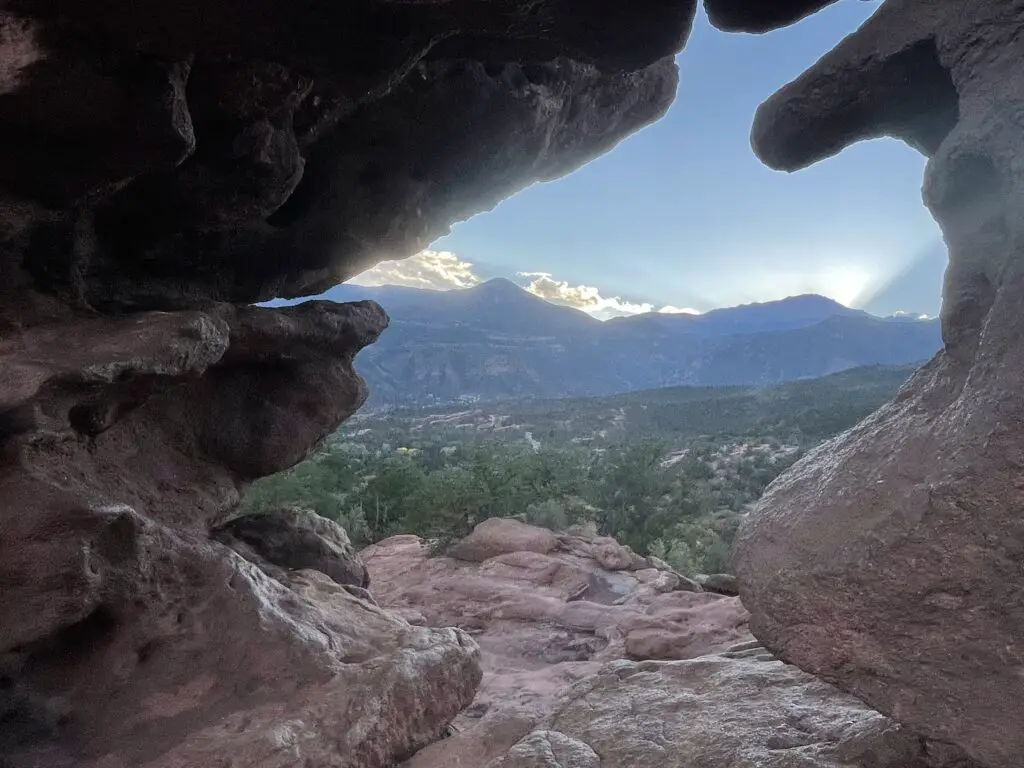
Serpents Trail:
Assuming you can find parking, you can do the Serpents Trail and Devils Kitchen the same day. The trailheads are directly across the road from each other–there is also a nice picnic area to enjoy here!
The Serpents Trail is about two miles one-way. It does connect with Monument Road again about three miles further down the road.
Serpents Trail was the original, dirt road that brought visitors into the Monument. It is now closed to vehicles and serves only as a hiking trail. It gets it’s name from the many switchbacks that the trail uses to “snake” it’s way up the side of the hill.
This trail is not overly difficult as you’re basically just walking on a gravel road. Depending on which direction you choose you will often be walking “up” the entire route.
Do you see what I see in this boulder? …come on now! 👽 🖖 (Mr. Trekker says I’ve been watching too much Ancient Aliens! 😇)This pic gives you an idea of the switchbacks that circle back on each other on Serpents Trail.I found this tenacious, little tree facinating!
Liberty Cap (the short–difficult–way!) with return on Corkscrew Trail:
The start of the short, fun, steep section of Liberty Cap trail. Yes, you hike all the way to the top in less than 2 miles!
This trail is on plenty of maps but it’s a little confusing to reach. To make it easier I’m going to quote the directions from the park website to reach the trailhead from the eastern side of the park–you can find this info on the Monument’s website here.(Note: this trailhead takes you to the quick, difficult, pretty portion of the trail! It begins near the Grand Junction entrance.)
“From the east entrance, proceed north on Monument Road 0.6 miles (1.0 km); turn left on South Camp Road; drive 2.6 miles (4.2 km) to its junction with South Broadway; turn left and go 0.5 miles (0.8 km); turn left onto Wildwood Drive and go 0.5 miles (0.8 km). Watch closely for a brown trailhead sign on the right at what appears to be a driveway; turn down this road to the trailhead…”
This trail made for a great loop! There are many different options to complete this trail section:
–Liberty Cap up, Corkscrew down
–Corkscrew up, Liberty Cap down
–Just take one of these two trails both up and down
We opted to take Liberty Cap up and Corkscrew down, partially because we hadn’t seen the Corkscrew trail yet, partially because we like loops and not returning the same way we started (already saw that part of the trail!) and also because Corkscrew is listed as “moderate” on the trail map while Liberty Cap is listed as “difficult”. Due to this, we figured Corkscrew would be less steep for the descent–we were right and I would agree with these difficulty designations.
You can just make out the steps in the rock trailing down the side of the hillThere is a trail there somewhere!
This is actually a lengthy trail if you do the whole thing. If you want to access the other trailhead it can be found on the western side of the park about halfway along Rim Rock drive. The majority of that route from the west is fairly easy and traverses a canyon within the central part of the Monument. The fun part then comes at the very end of the trail. (This is the beginning of the trail if you start where we did from the trailhead on the eastern side of the park near Grand Junction). If you want to hike it the way we did, the actual route is fairly short though you gain over 2000 feet in elevation in less than three miles! (it’s steep folks…but VERY fun!)
I wouldn’t recommend taking Corkscrew up because it’s a lengthy slog through soul-crushing switchbacks with NO SHADE. There is also a lot of black rock on this portion of the trail that will absorb/radiate the sun’s heat on hot days–and there are a lot of hot, sunny days in Grand Junction!
I also wouldn’t recommend taking Liberty Cap down if the trail is at all wet/snowy/icy/slippy-in-any-way. Not that it can’t be done, but there are a number of steep sections where you may end up crab-crawling your way down on a good day. In wet/slippy conditions this could become dangerous very quickly.
It’s a bit difficult to see the steep drop-off at the side of this cliff but a fall here could easily result in serious injury if not be fatal!
Please note: along with being steep this trail includes a number of steep drop-offs. My acrophobia was definitely triggered (but I made it!–and the view at the top is ABSOLUTELY worth it!)
This trail was especially momentous for me as it just so happened we hiked it exactly 10 months to the day after I had major abdominal surgery!It was completely reasonable that I had recovered enough to complete this hike in that amount of time. However, knowing where I was 10 months ago–when I needed hard-core, pain meds just to be comfortable enough to get out of bed to walk to the bathroom–and here, 10 months later, I was able to scramble on all fours; stretch, bend, twist and even crab-crawl my way down steep sections of trail and feel AMAZING doing it–this was such a feeling of accomplishment!
Also, not having any pain, heartburn or needing to desperately pee on the trail for the first time in years 🤣 (especially hiking a trail this difficult) reminded me of the new lease on life I had now that surgery was behind me! Turns out my doctors’ promises were right, I really am a new woman! 😁
Colorado is one of my favorite places to visit. Click here for more posts on this awesome state!
Rimrock Drive:
Rimrock drive is the main road through the park. It’s paved and an easy drive throughout. It offers INCREDIBLE views of the canyons/rock formations that make up the park. Numerous pull-offs are spread along the length of the route and there is a Visitor Center near the west entrance (the Fruita side). Numerous opportunities for hiking are also available off the road. The park also offers some camping options.
Independence RockIt almost resembles Monument Valley in Arizona!Monument CanyonFallen Rock–I wonder why they named it that? 😉
The road Broadway runs through several of the towns in Grand Valley and connects the two ends of Rimrock Drive between Fruita and Grand Junction. This road, along with the Rimrock route, make for a great loop drive!
Some other pics from our trip!
The Grand Mesa
We first visited Grand Mesa on our Southwestern Road Trip in 2017–we couldn’t do much because I was recovering from a TERRIBLE flu that I had caught on the trip and it was still so early in the summer much of the park had snow. Then we returned in summer of 2018 for our Colorado Road Tripand were able to enjoy a lot more hiking. It was fun to come back in fall of 2024 and see it again in a different season and from another perspective!
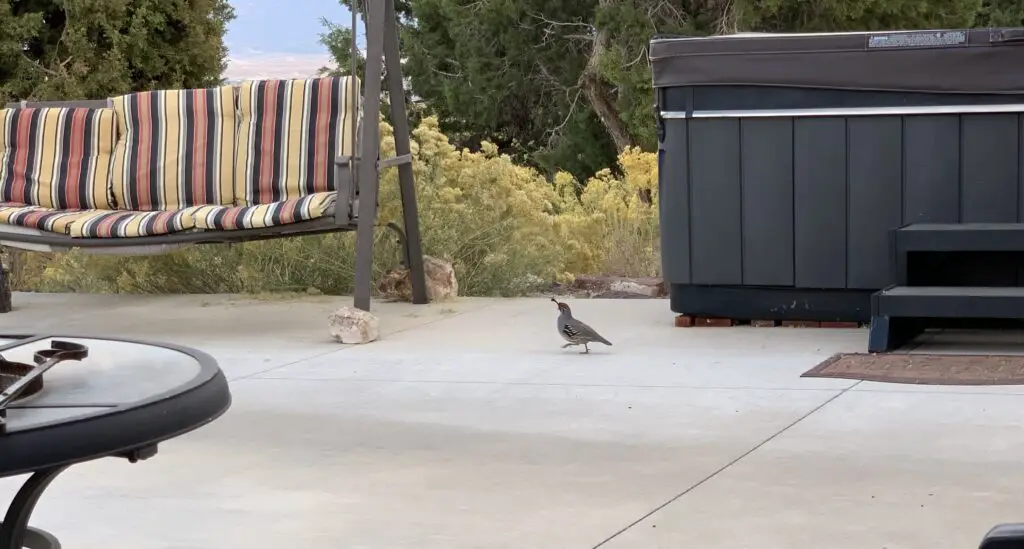
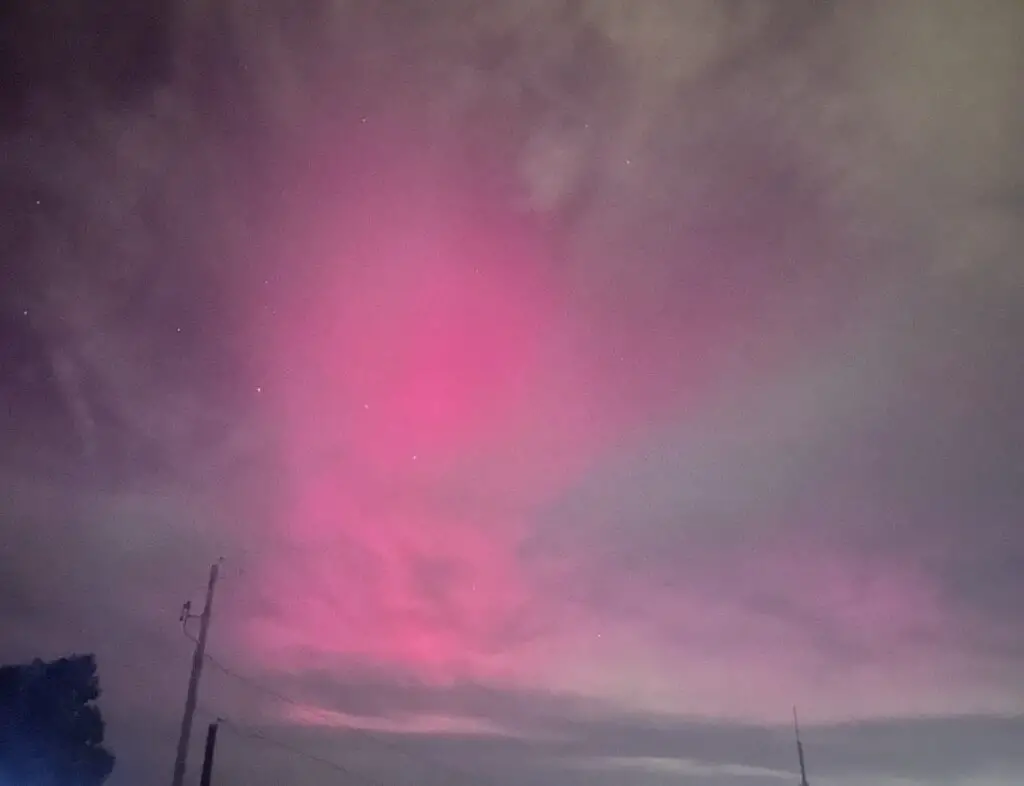
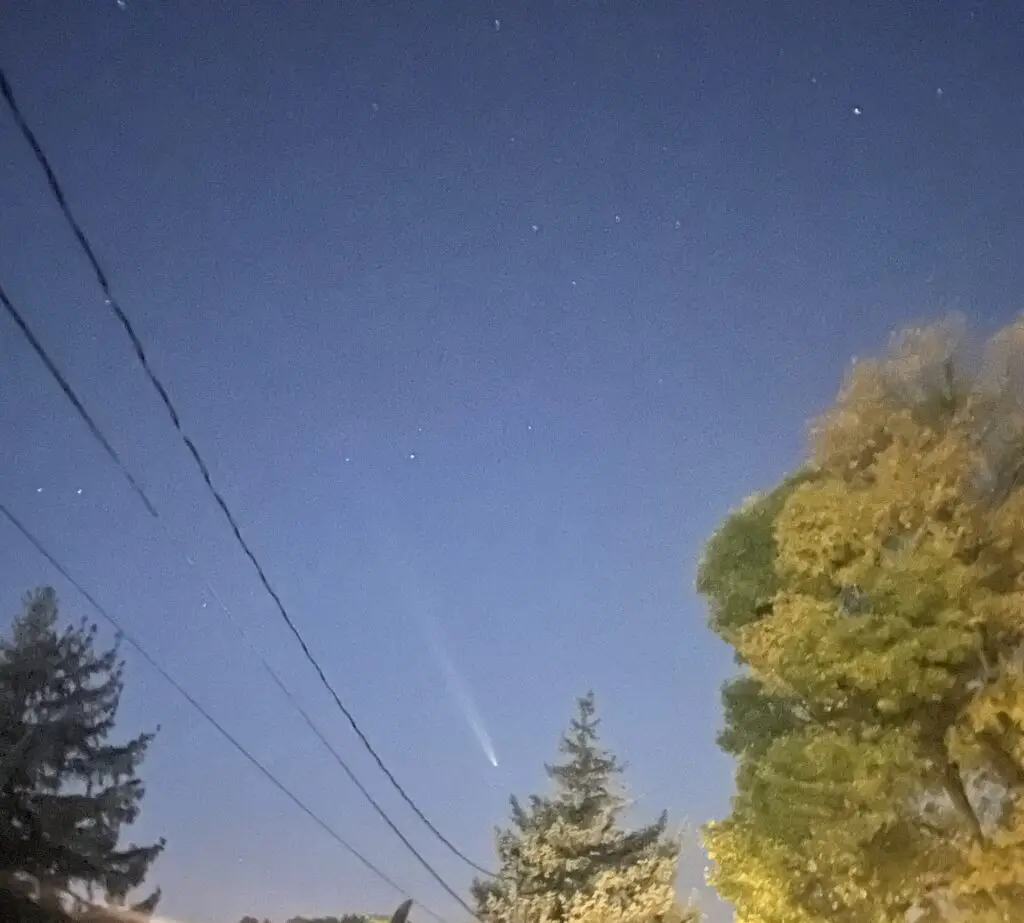
These quail were ADORABLE and ran all over the porch at the Air B&B we stayed at making squeaky noises.A surprise Northern Lights viewing!We caught the ATLAS Comet when we got home!
If you’re looking for a fun and beautiful place to visit, check out the Colorado National Monument on Colorado’s Western Slope!
Have you visited the Colorado National Monument? Tell me about your experience in the comments!
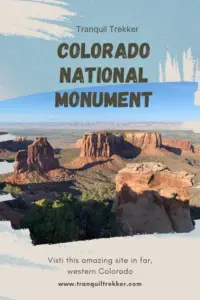
Did you enjoy this post? Pin it!
Like what you read here today? Please feel free to leave a comment, like, or share this post! Add your email at the bottom of the page, or the sidebar to the right, to be notified when a new post is published. By signing up for the email list, you will also receive a free copy of the Tranquil Trekker’s Top 10 Tips of Trekking Do’s and Don’ts!
In this post, I review our recent purchase of a Go Fast Camper!
*Author’s Note: This post is NOT sponsored and I have received NO compensation for it. I’m just REALLY excited about our new camper!*
In Summer 2024 the Trekkers achieved a major goal! After years of discussions, research…and more discussions…we FINALLY agreed on and acquired a Go Fast Camper!
Why a Go Fast Camper?
We started our camping experience with a simple, ground tent Mr. Trekker picked up during our college years, for about $30 at a local Walmart. Eventually we moved on to a fancier and bigger, REI, ground tent we acquired as a wedding present (and still use from time to time!)
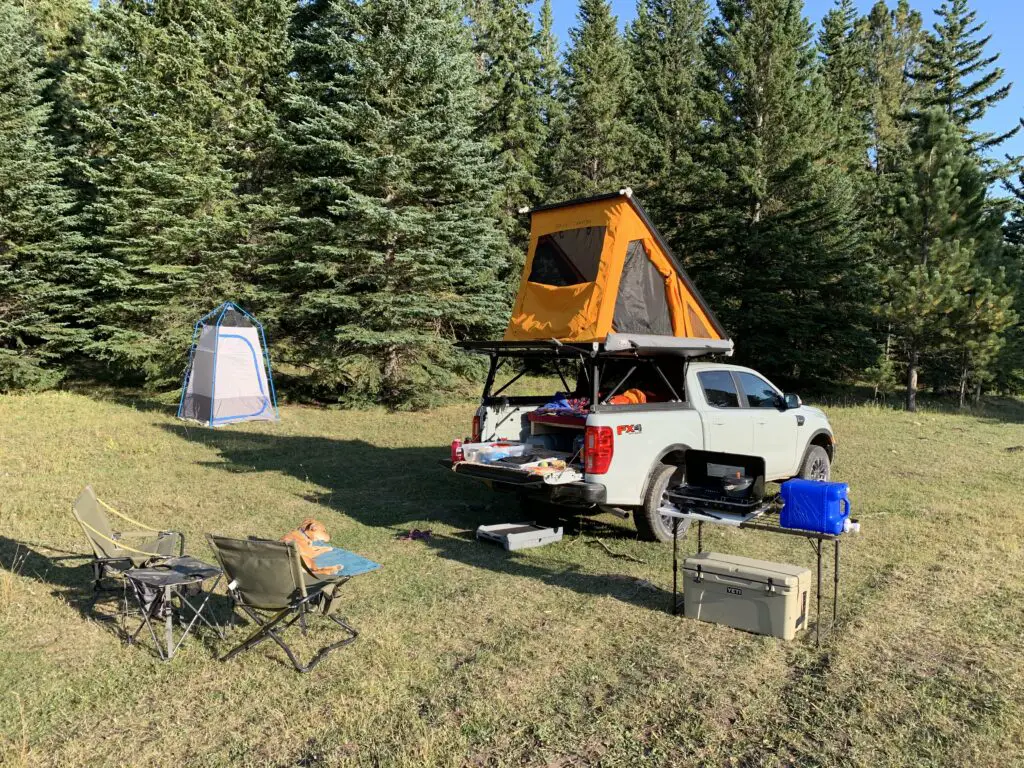
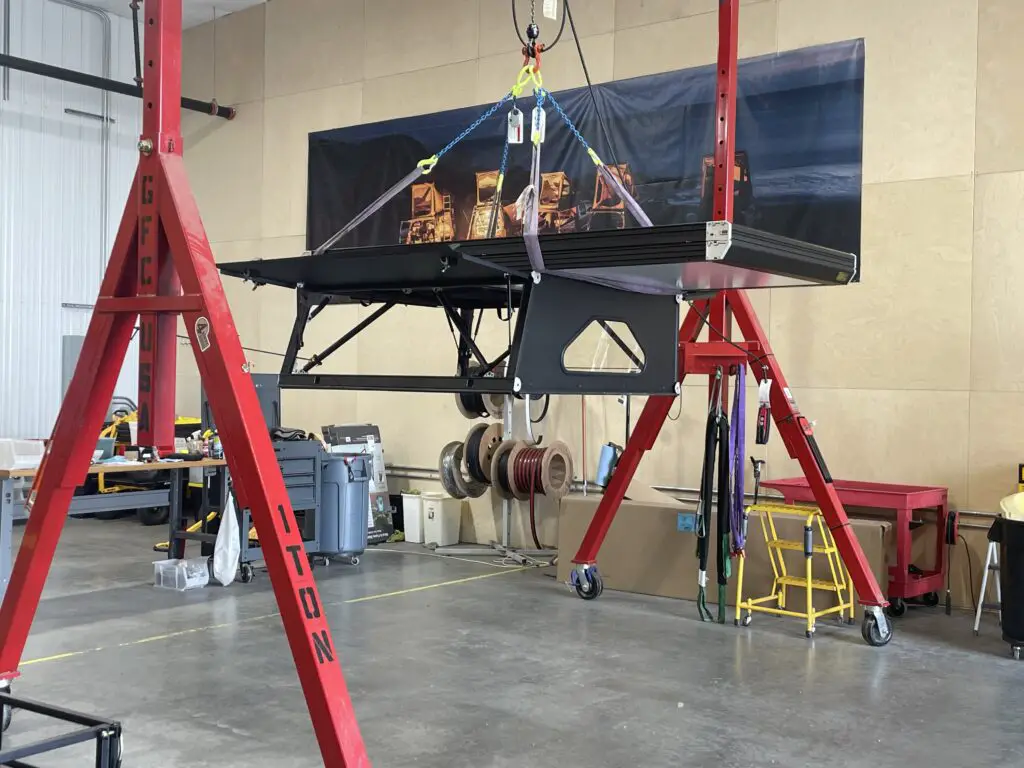
Go Fast Camper fully deployed in its natural habitat!
As we aged and our backs got a bit more grouchy 😉 we decided we preferred the FAR more comfortable foam beds offered by the fancier, above-ground tents. We also preferred being off the ground some (especially as we’re spending more time alone, in the Wilds, disperse-camping outside of established campgrounds–sometimes in Grizzly country!)
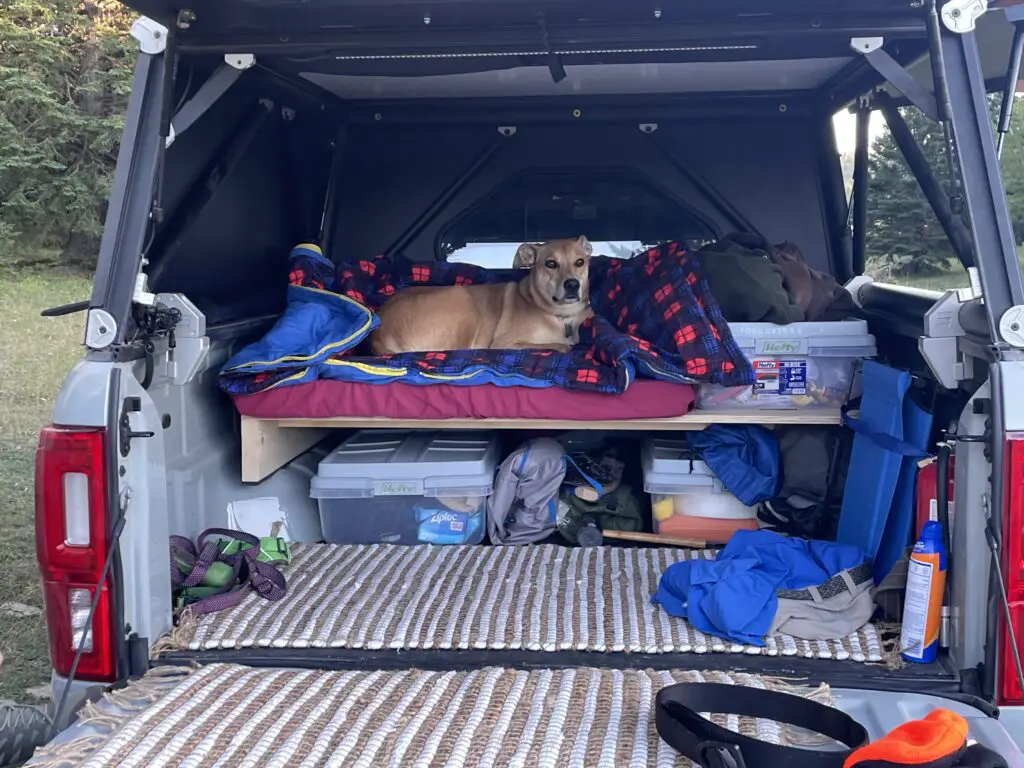
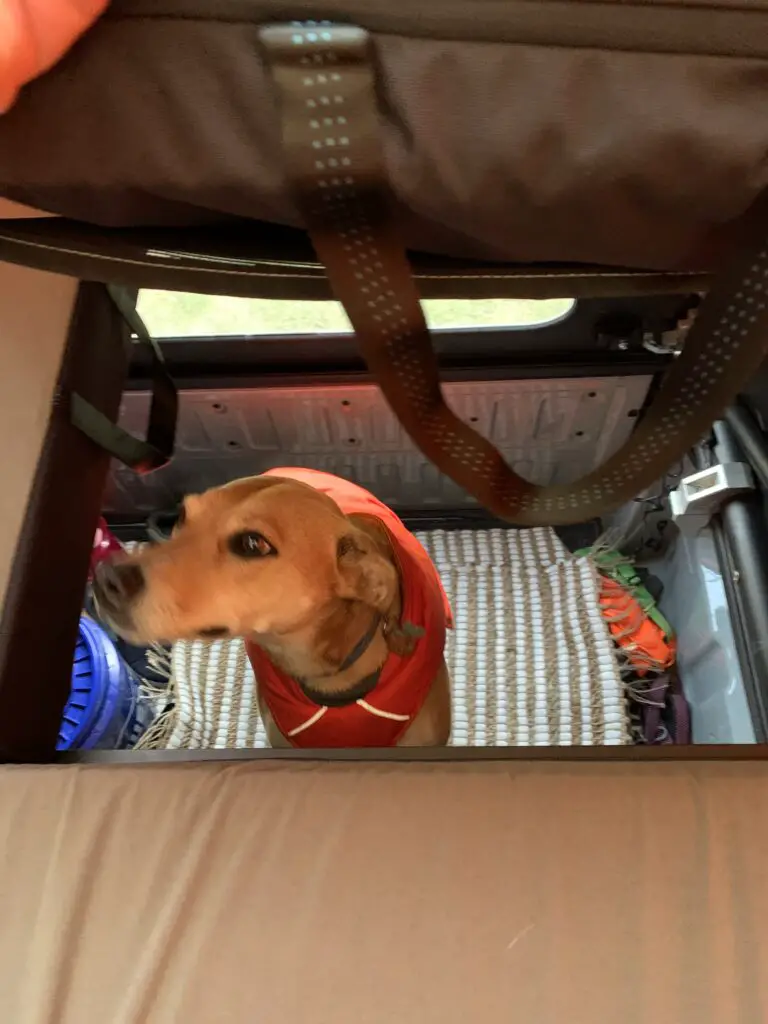
Our “stuff” packed in the truck bed. Puppers LOVED her bed! You’ll notice that the sides of the camper fold up so they can act like windows (and rain shields) when you’re stopped, they call it, “Cabana Mode”.
Initially we acquired and tried out a rooftop tent on a trailer for several years. While we liked this option it still took a little while to setup and the trailer got kind of annoying on some tight trails, or when trying to park in small, mountain towns.
We could have put the rooftop tent on the “rooftop” of the truck, but that would have meant we needed to acquire another truck capper that could handle the weight–to the tune of several $1000s. Also, rooftop tents are HEAVY and difficult to get on and off the truck so once they’re on, you tend to leave them there as much as possible–this puts a lot of strain on the truck not to mention kills your aerodynamics and gas mileage–all for equipment you only use a few times a year.
So we mostly decided we weren’t interested in another trailer of any sort, so then we considered a regular truck camper. However, we really enjoy the smaller footprint and better gas mileage of the mid-size trucks and the in-bed, truck campers that fit these are TINY–especially for two people and a dog. Also, even the smallest, most basic ones are PRICEY!
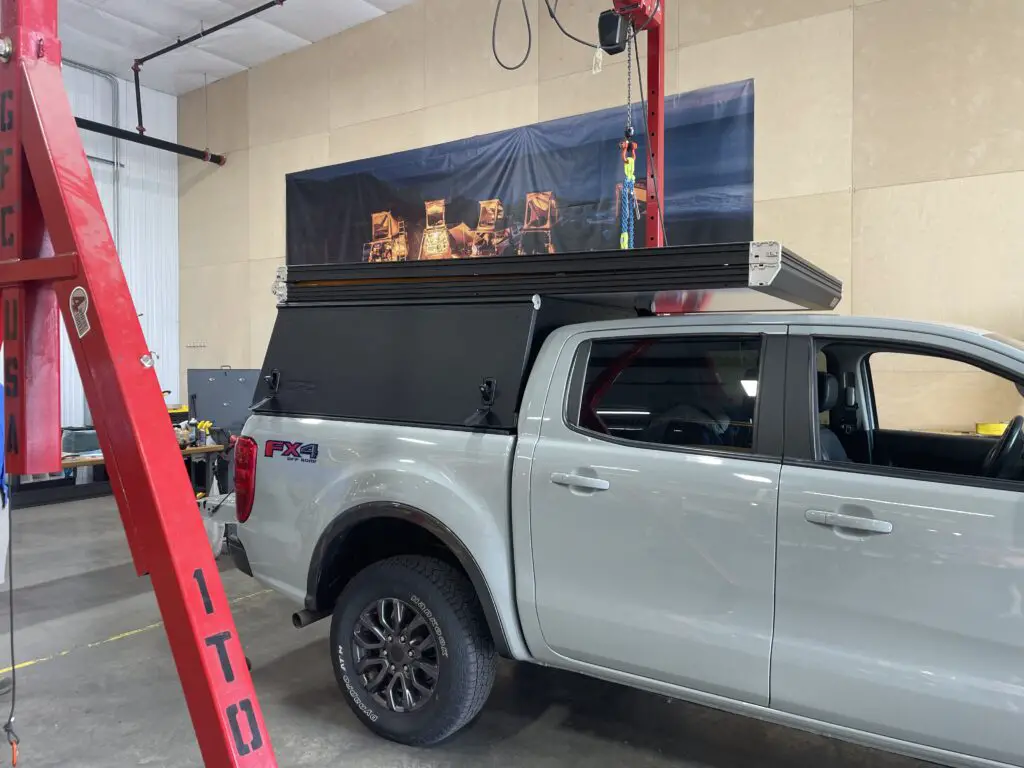
Inside the Go Fast Camper shop. What the Camper looks like on it’s own, when it’s folded up!Go Fast Camper all buttoned up and installed on the truck!
So finally we started looking at wedge campers! These offer the benefit and simplicity of a tent, while keeping you well above the heads of any critters that may be lurking around below you! Their footprint also matches that of the truck, meaning if you can fit the truck on a narrow trail or in a tiny parking space, the camper goes right along with it. The uniqueness of the Go Fast Camper also means you don’t lose the utility of the truck bed when the camper isn’t in use–you can literally have your cake (the use of the regular truck bed) and eat it too (the camper)!
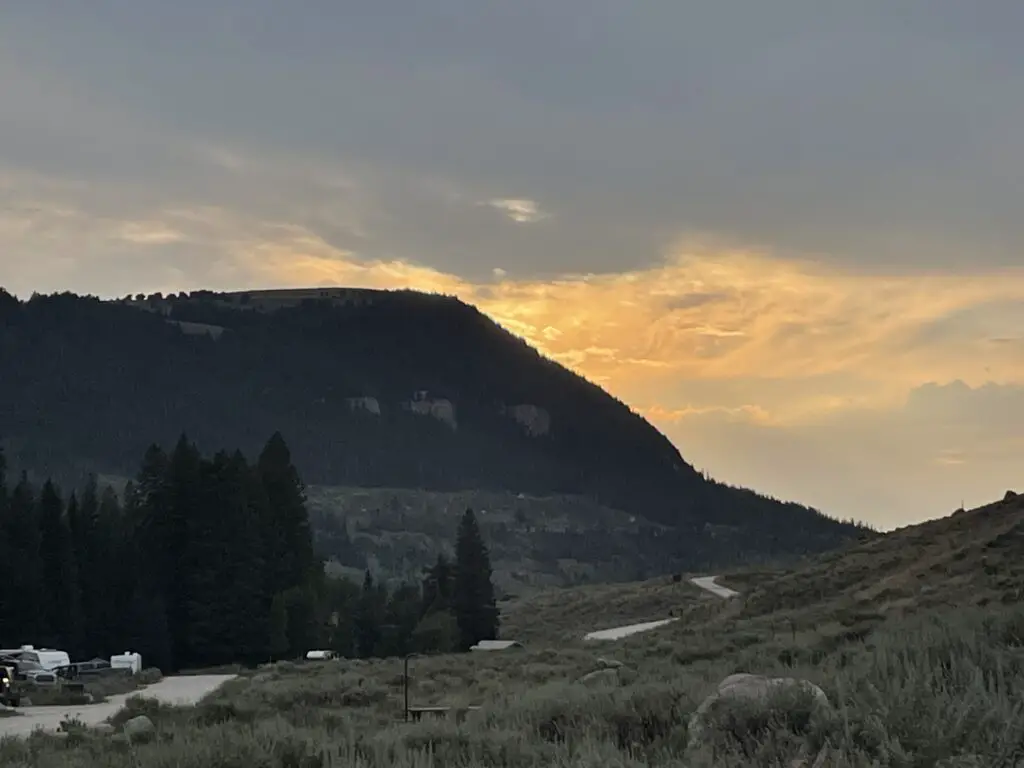
The only negative was, we had to travel to Western Montana one weekend to pick up our new toy…or darn! 😉And then we promptly enjoyed it while camping in the BigHorns for a night! 😀
Smoky campsite in the Big Horns the first night with the new Camper!
What is a Go Fast Camper?
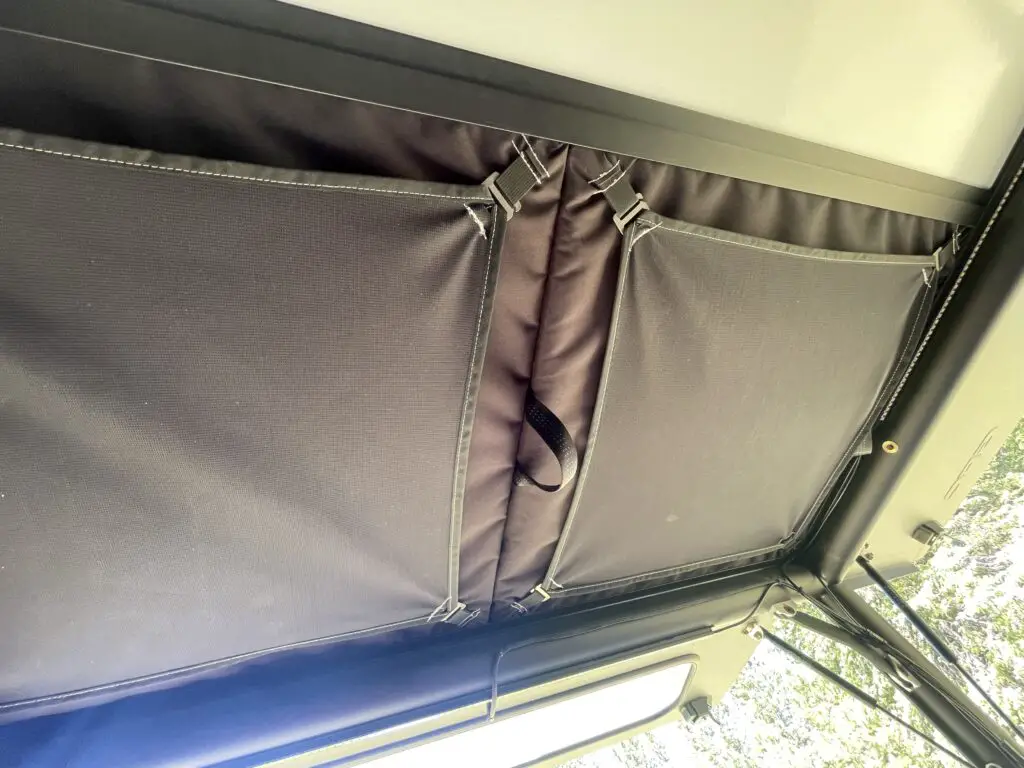
A Go Fast Camper is essentially a rooftop tent that sits and opens from the top of a typical, truck-bed capper. It is installed at a factory and stays on the truck permanently–unless you were to take the capper off. When the tent is down the truck bed can be used for any purpose you want as any normal truck bed and the bottom of the tent forms the top of the truck capper. Removable cushions/panels form a pass-through between the truck bed and the tent when the tent is open. Some models also allow for an outside ladder to be installed (like those on regular rooftop tents).
With this setup you are also free to design your truck bed however you want with a power pack, a fridge, or an in-bed drawer system if you want to use the truck more for camping-only.
View is from the truck bed below. These panels are removable and form the pass-through that you climb up through to get into the tent.
How do you use a Go Fast Camper?
Setup/tear down of this camper is incredibly quick! To open the tent you simply unlock it and let it rise on it’s own (it literally takes about 30 seconds!) Tear down takes about 1.5 minutes (grab the top, push the soft sides in, pull down and fold it up!)…LITERALLY, that’s all there is to it! (It takes longer to put the tent away because you have to make sure it folds in well and none of the fabric is pinched.)
Full disclosure: the price point of a Go Fast Camper can be a barrier for some. While not “cheap” per se, a Go Fast Camper is FAR more affordable than any other trailer or regular truck camper out there–comparable in price to a combination rooftop tent/new capper for the truck. This is 1/2 (or less!) the price of a typical truck camper and 1/4 (or FAR less!) than the typical cost of a camper trailer/RV.
View from above! Puppers is demonstrating the pass-thru from the truck bed into the tent (when a removable panel is moved)! It’s blurry because…you try getting an excited dog to hold still for a picture! 😇
The Go Fast team was also great to work with! They are based near Bozeman, Montana, meaning they are a small-town company that employs local, American workers! We have had great luck with this team and appreciate the regular communication and continued service they offer!
They also contract with several other dealers throughout the country including some on the West Coast, and a few in Colorado, Texas, Missouri and North Carolina.
Be aware, there is a fairly lengthy lead time between placing the order and receiving your product. We ordered our camper in March and didn’t receive it until early August. We were aware of this situation when we made the purchase and the Go Fast team stayed in regular contact with us about how our build was proceeding.
In the interim months they actually changed the build platform some from what we’d originally ordered. As our build was still in progress the Go Fast team went ahead and added the upgrades with little-to-no additional cost to us! There were a few upgrade items they weren’t able to add at the time due to supply-line issues. But, they kept us updated regularly on the status of those and shipped them along when they were available.
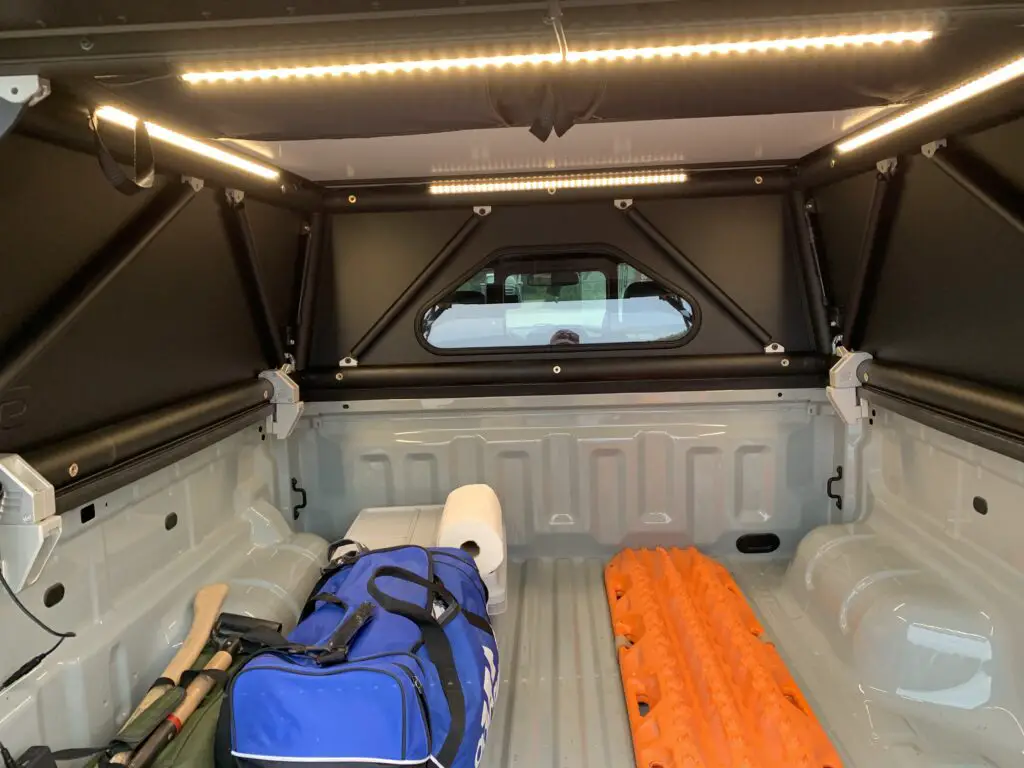
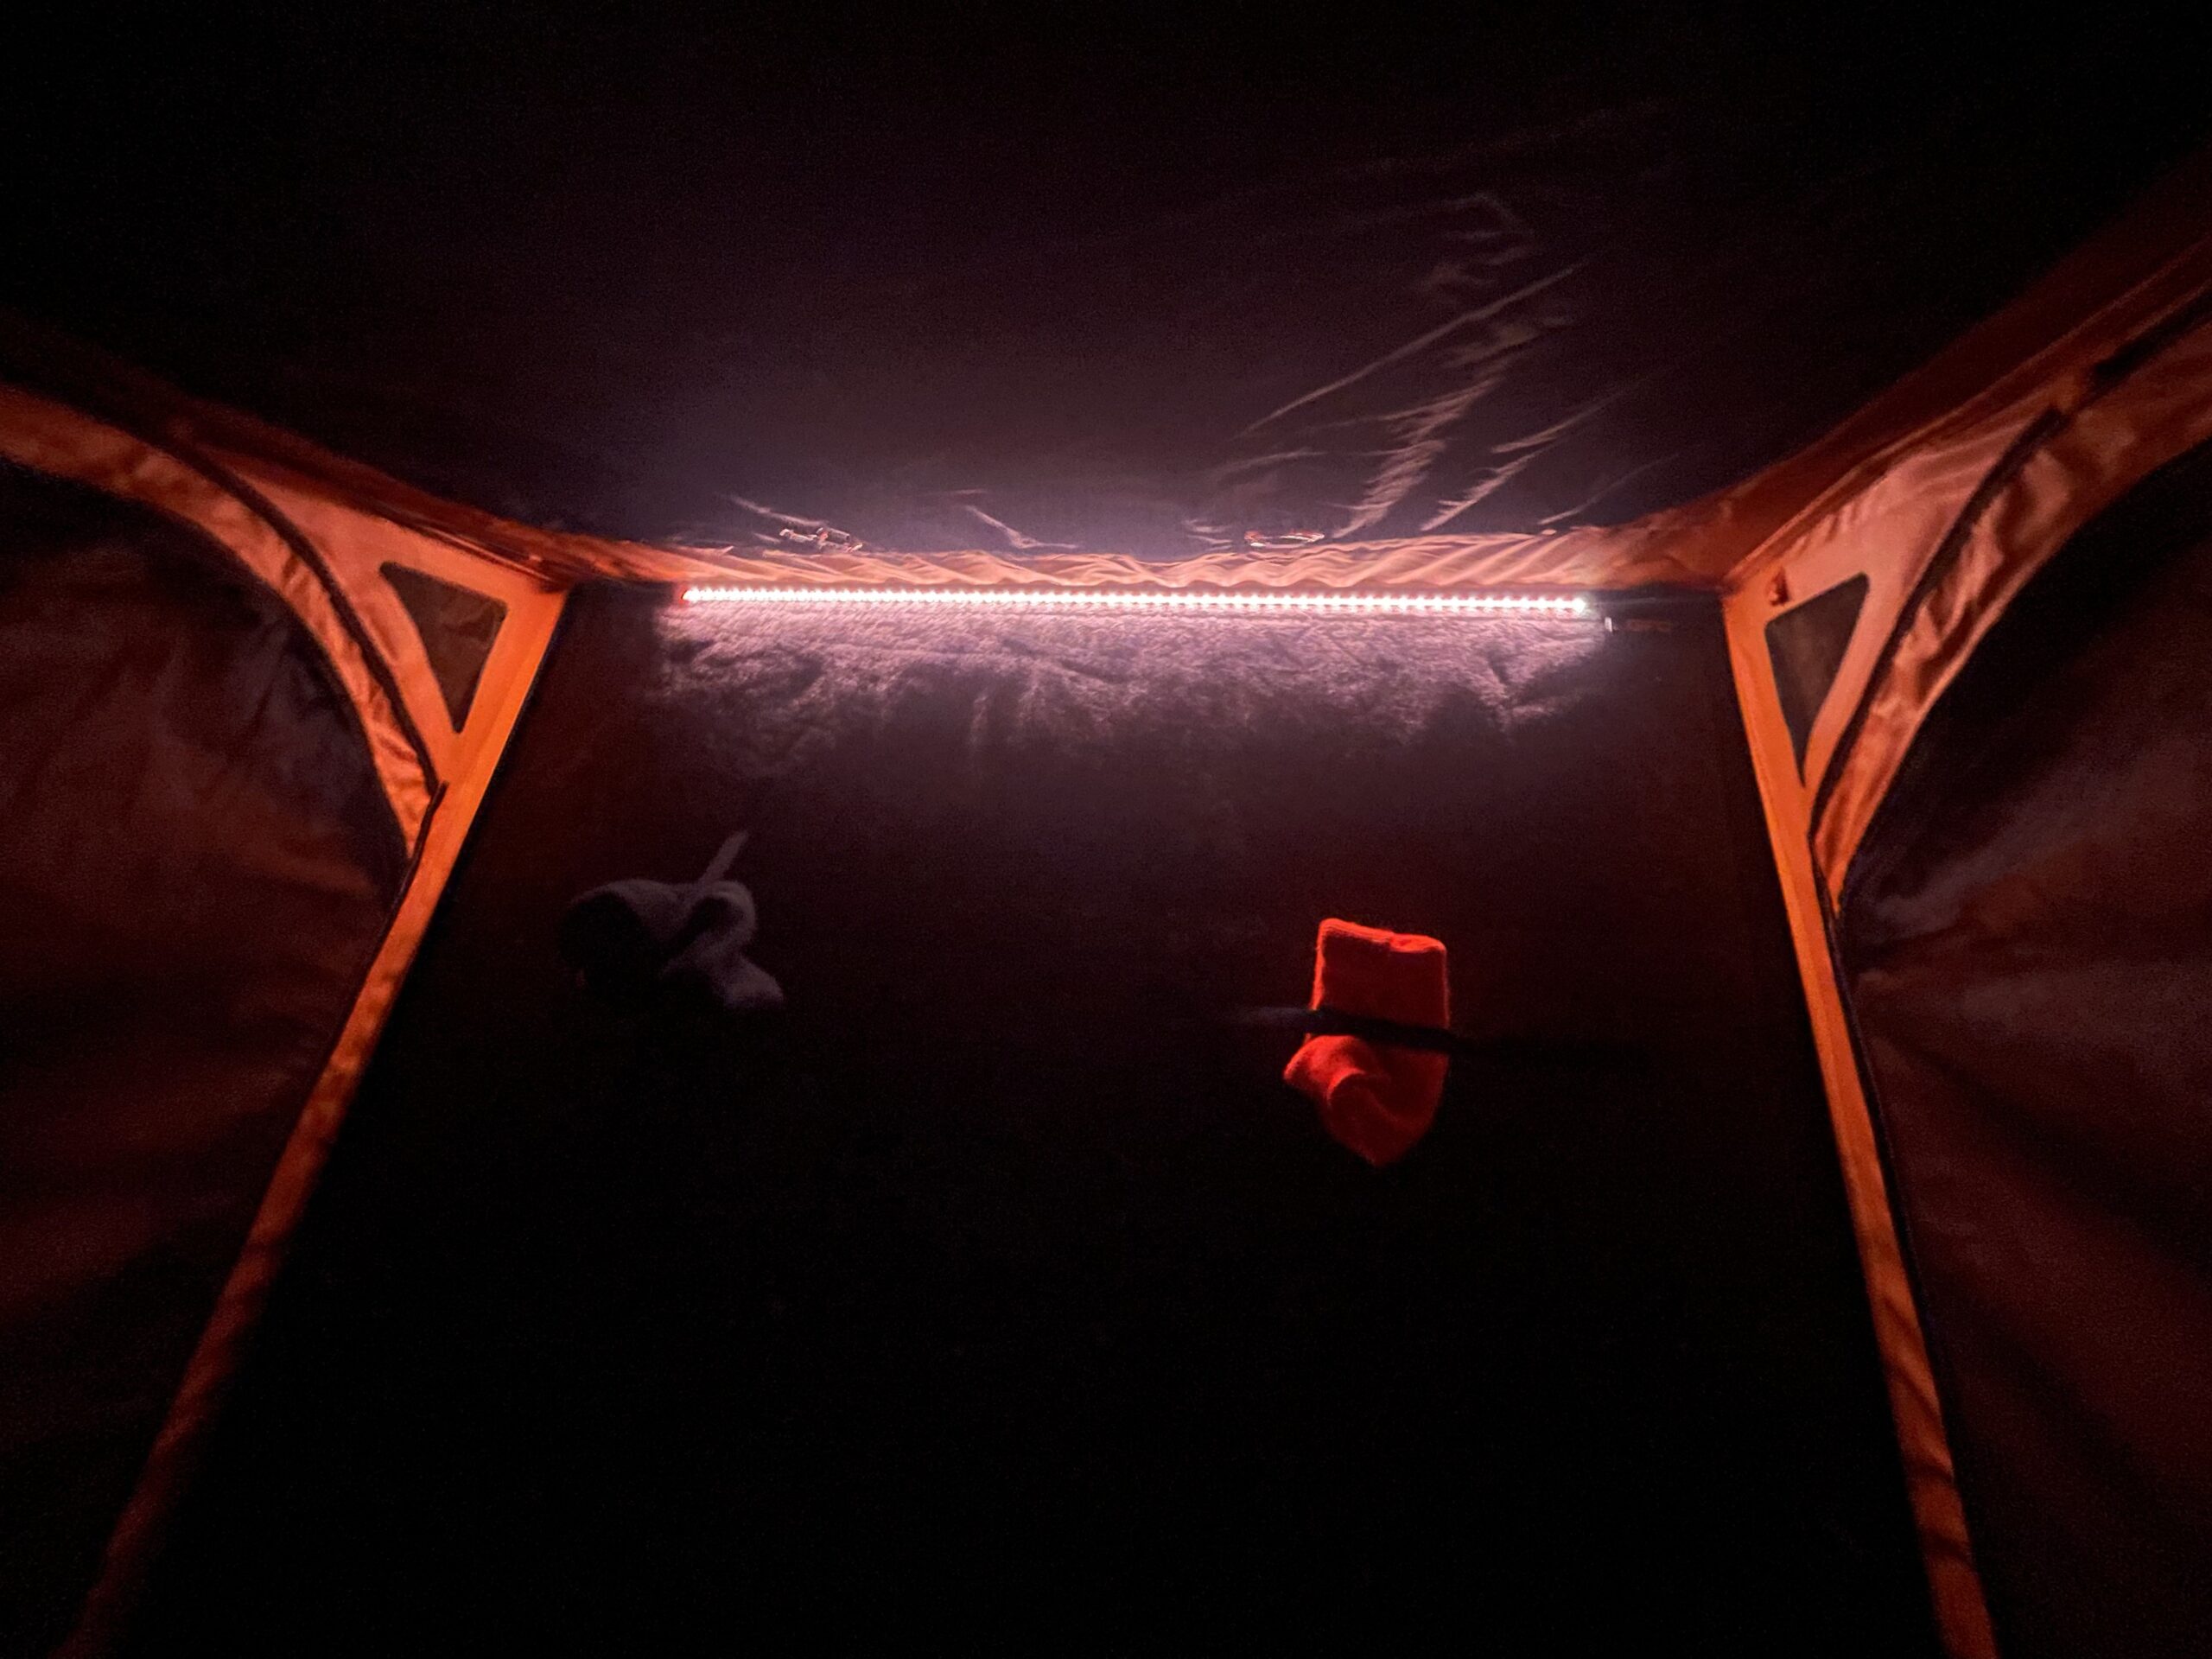
This requires a power source but these lights were one of the add-ons Go Fast Campers added for us! You can also see here what the regular truck bed looks like when the camper is down.The same lights inside the tent!
Since we got the camper late in the summer we were only able to use it a handful of times, though we’re looking forward to getting out in it quite a bit this coming summer!
Super secret, dispersed camping area in the Black Hills on Labor Day Weekend–though I have it on good authority this is a great place to get a Christmas Tree!
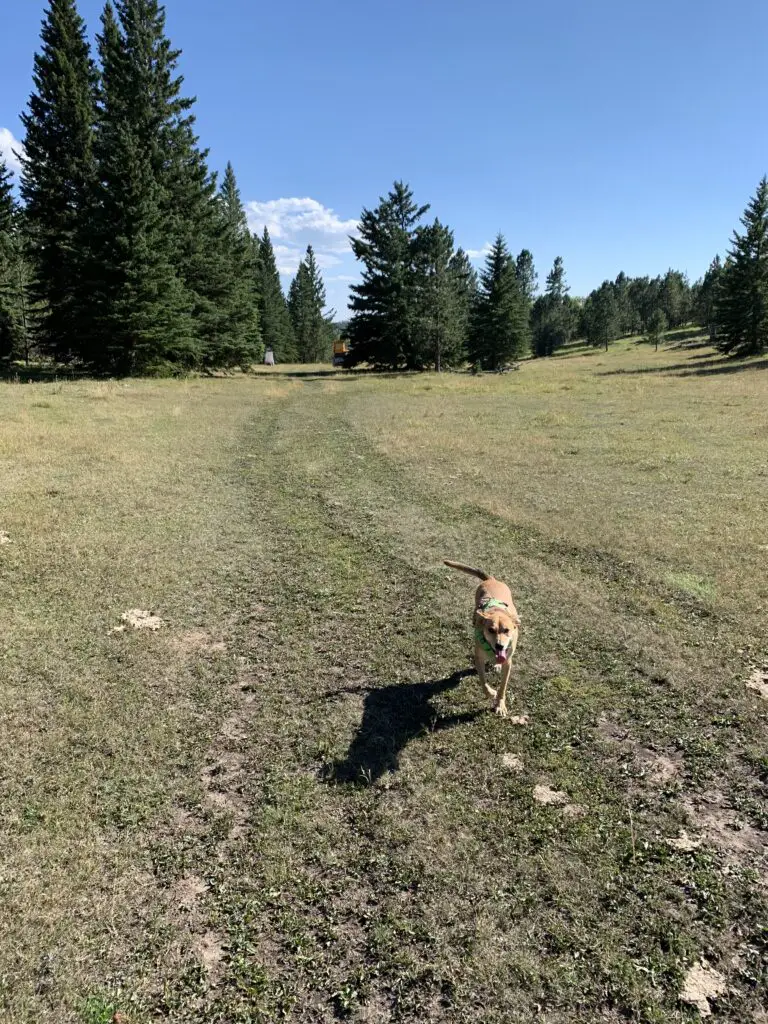
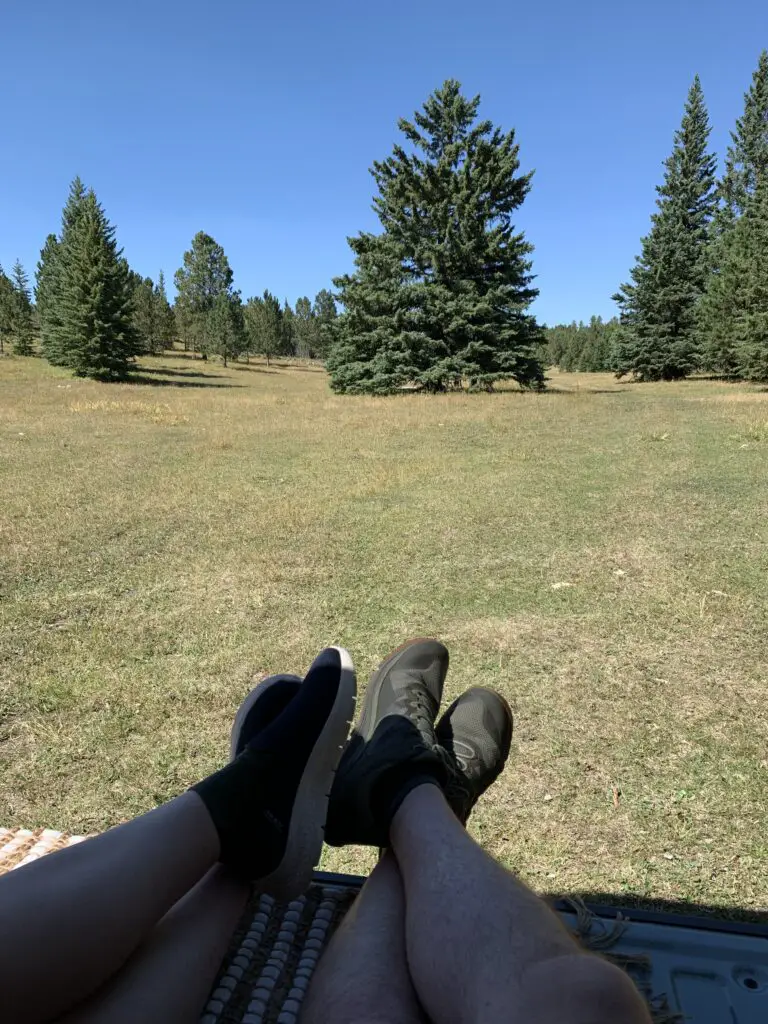
Puppers thoroughly enjoyed having the lengthy meadow to chase her ball!Trekker Feet enjoying the still-usable truck bed and relaxing in the shade on a hot day!
If you’re looking for a fun, affordable alternative to a full truck camper or trailer, consider a Go Fast Camper!
Do you have a Go Fast Camper? Or are you interested in one? Let me know about your experiences or any questions you may have in the comments!
Did you enjoy this post? Pin it!
Like what you read here today? Please feel free to leave a comment, like, or share this post! Add your email at the bottom of the page, or the sidebar to the right, to be notified when a new post is published. By signing up for the email list, you will also receive a free copy of the Tranquil Trekker’s Top 10 Tips of Trekking Do’s and Don’ts! You can also follow the blog on social media by clicking the links below!
In this post, I review our visit to the home of my childhood hero!
When the Tranquil Trekker was a little girl, I LOVED the Little House books by Laura Ingalls Wilder! (We watched the TV show some too, but I always liked the books better.) I read the entire series numerous times and had half the story memorized!
If you had told the Little Trekker that in 30 years I would be living in the SAME STATE as Laura I would have freaked! 😂
For the last decade that we’ve lived in South Dakota, whenever we drive down I-90 through the eastern part of the state and see the sign for the Laura Ingalls Wilder Historic Homes, I would say, “We really need to visit there sometime!”
Well, we had plans to travel for a conference for Mr. Trekker’s work one fall, and he suggested we leave a few days early and stop at “Laura’s House” on the way. I readily agreed!–The eight-year-old Tranquil Trekker was fangirling hard that day!
We knew I had surgery (and a lengthy recovery) looming in the next several months, so after our visit, Mr. Trekker got me several of my favorite Little House books for Christmas that year. I LOVED rereading them again during my convalescence!
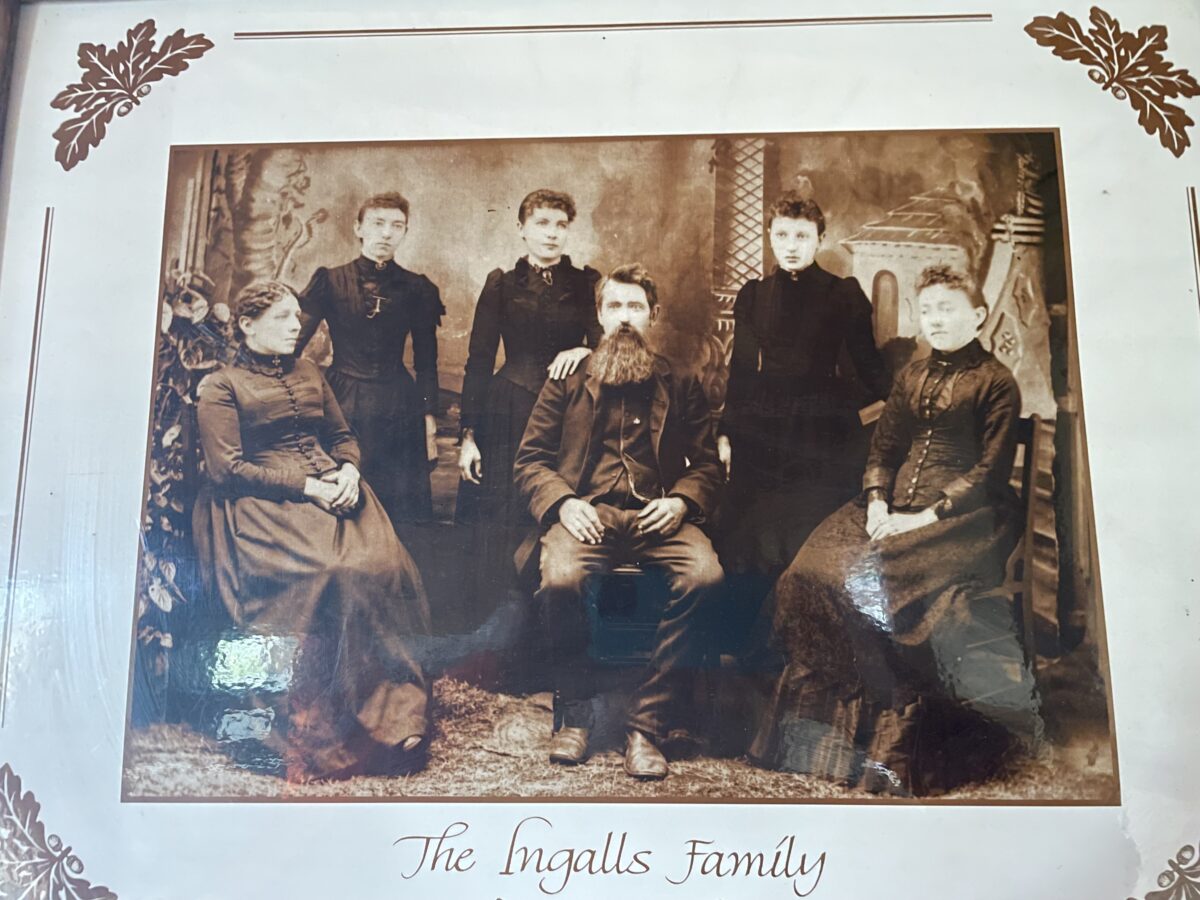
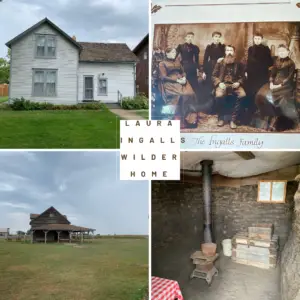
Laura and her husband Almanzo, later in their marriage
Where are the Laura Ingalls Wilder Historic Homes?
The Laura Ingalls Wilder Historic Homes museum is located in the tiny town of De Smet, in eastern South Dakota. The main museum and visitor center is found right off of US 14, almost downtown.
There are a few other sites related to Laura’s life scattered around the local area, as well. These include a marker to her husband, Almanzo, on Route 25 North and the Ingalls’ Homestead, an open-air museum, located off of 25 South.
You can also do a driving or walking tour through town and see where many of the buildings are (or used to be) from some of her later books. (If you stop at the main museum first, they have maps that show you all the other locations.)
For more information on visiting the museum, click here.
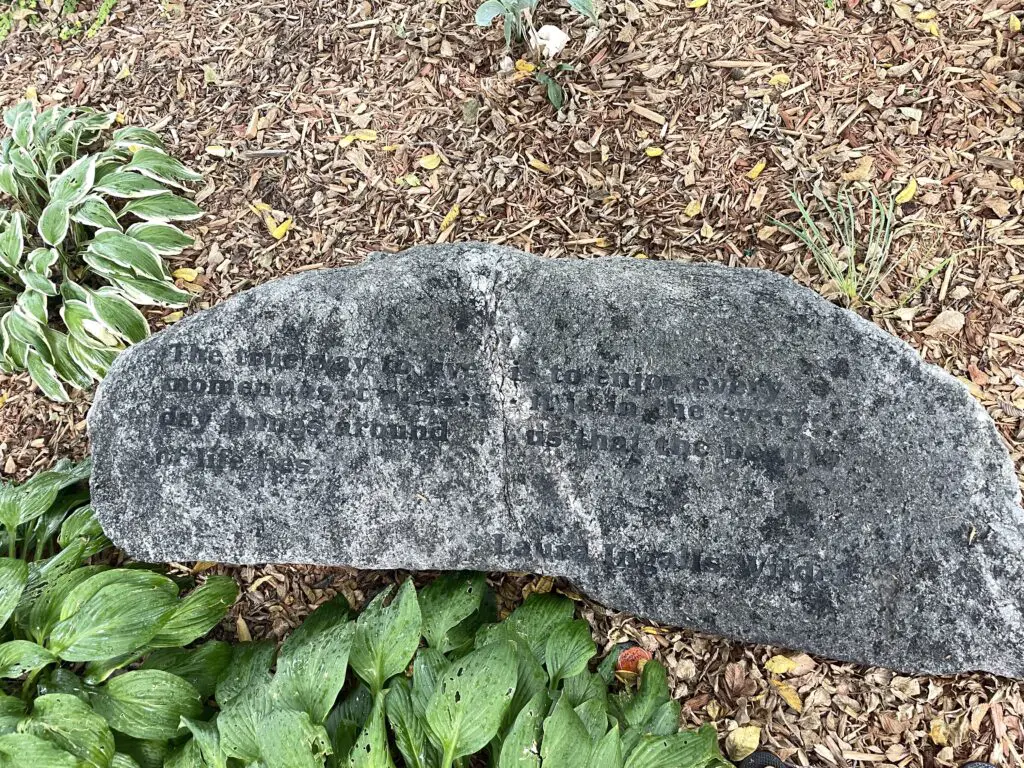
This rock was inscribed with a quote of Laura’s, “The true way to live is to enjoy every moment as it passes. It is in the everyday things around us that the beauty of life lies”–she was mindful! No wonder I liked her! 😁
What you will see at the Laura Ingalls Wilder Historic Homes
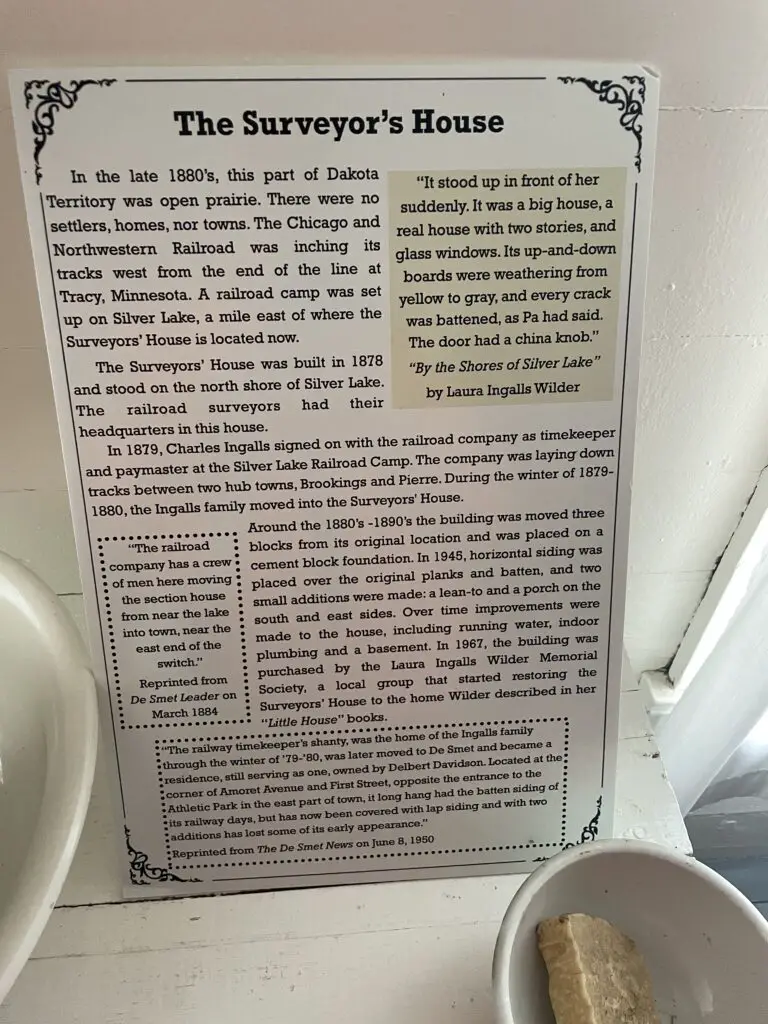
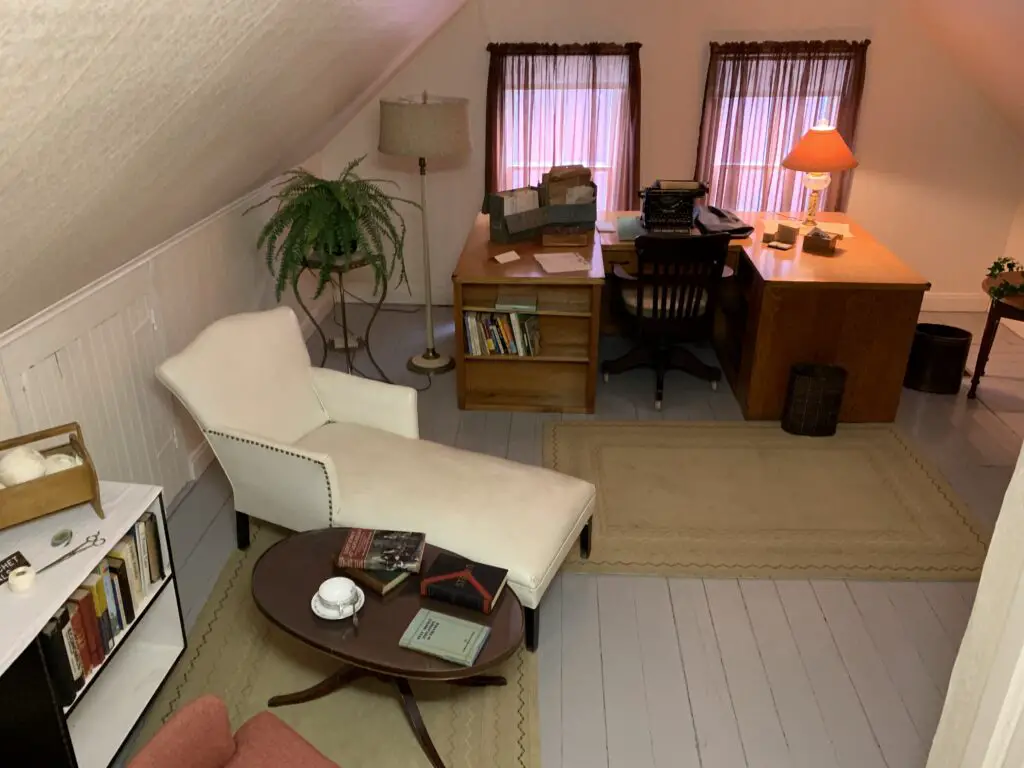
At the main, museum site you can tour the Surveyor’s House, where the family actually lived their first winter in De Smet. There are several other structures located on-site, as well that are available to tour, including a schoolhouse and a mock-up of a covered wagon.
While many of the structures are original this was not their original location. Some have been moved from their true location to the museum site to make touring easier. Others are re-creations and some are from a similar period even if they weren’t the actual buildings Laura and her friends used.
The Surveyor’s House:
The Surveyor’s House is the actual home Laura and her family lived in their first winter in De Smet. This story is portrayed in the book By the Shores of Silver Lake.
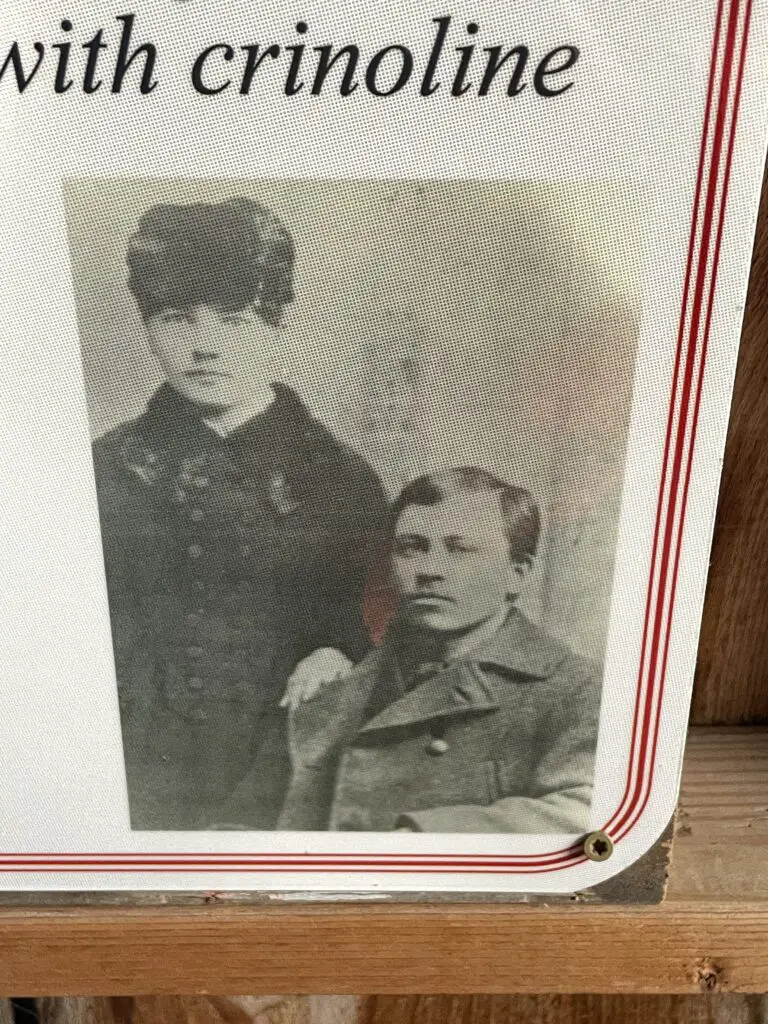
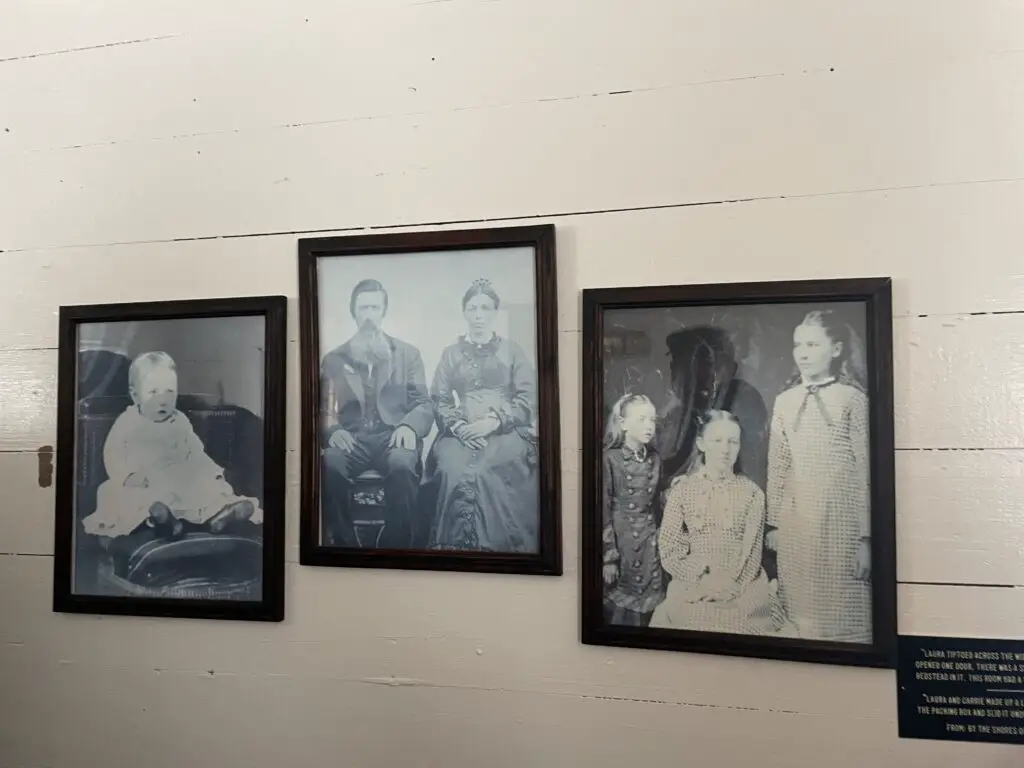
Photos of the Ingalls on a wall of the Surveyor’s House (Baby Grace is on the left, Pa and Ma are in the middle and Carrie, Mary, and Laura are in the 3rd picture–Laura is standing, Mary is sitting)
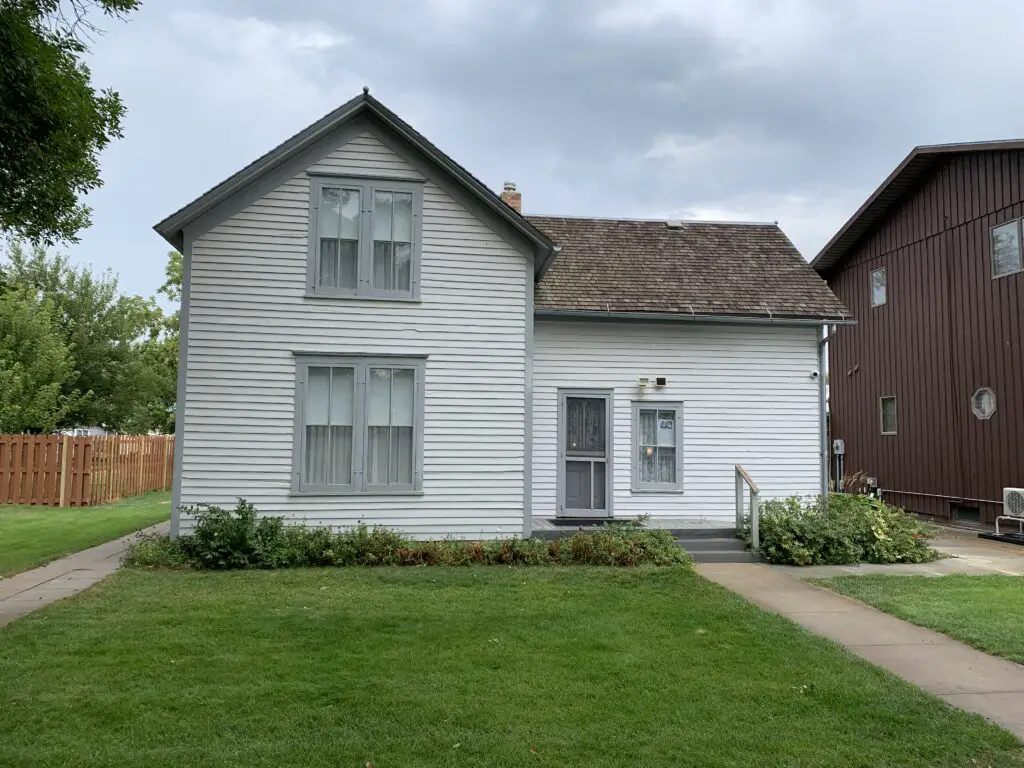
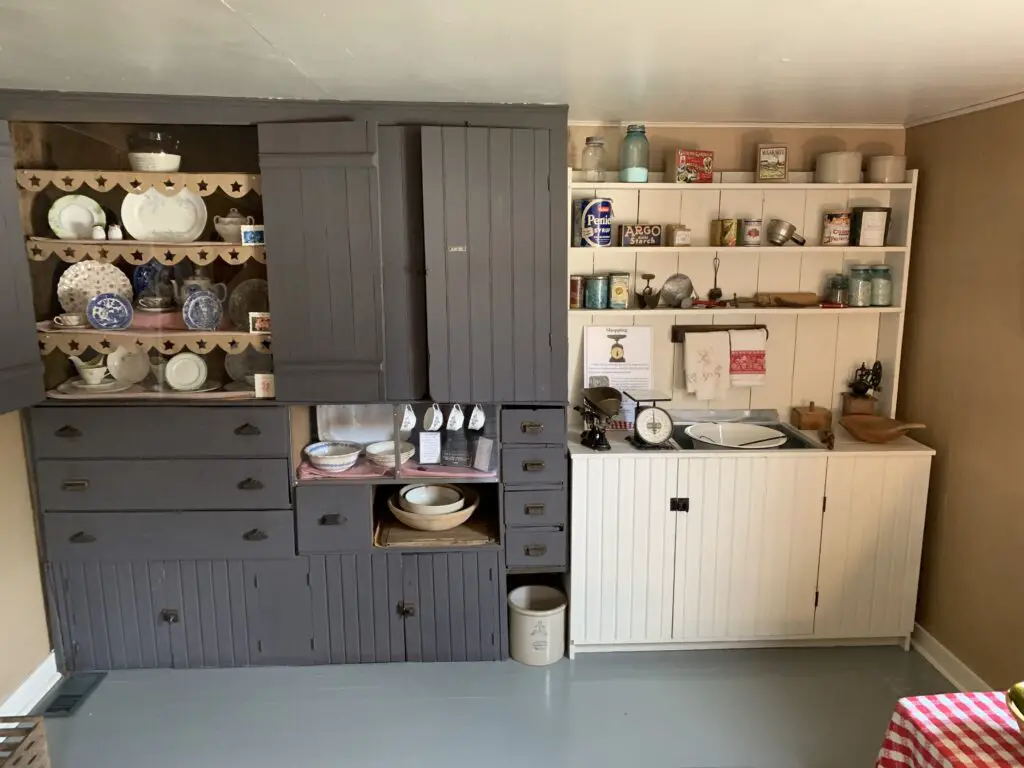
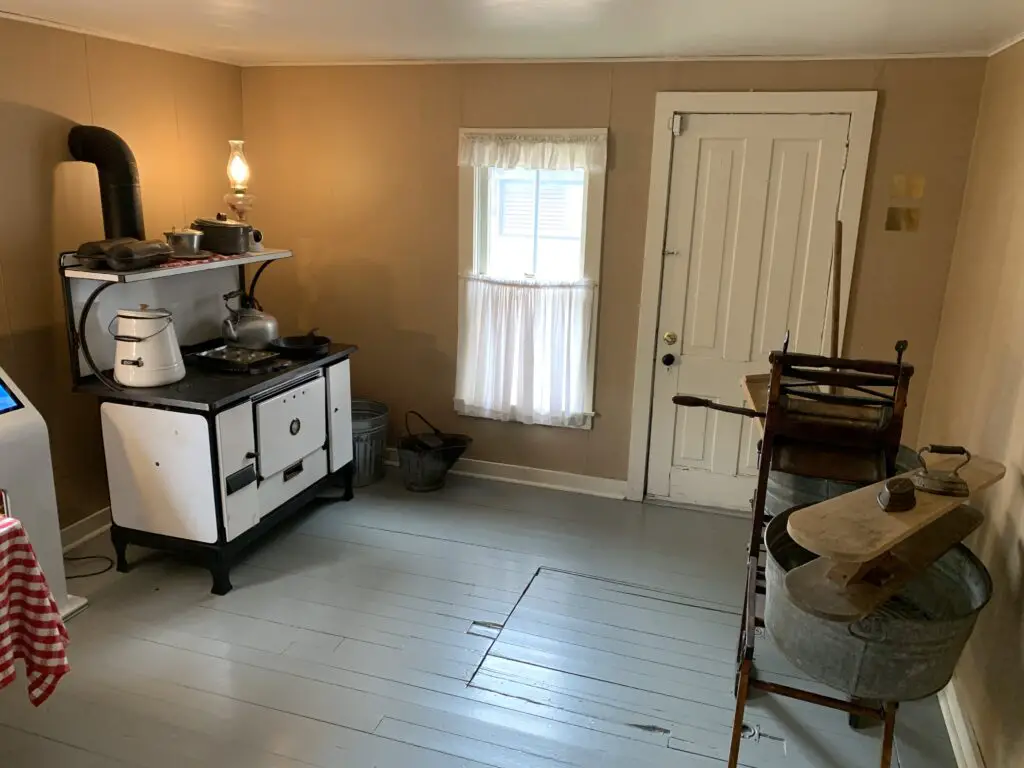
The Final, Ingalls Home
In town, a few blocks from the main museum is the final home the Ingalls all lived in as a family. The house still contains furniture, mementos, and pictures from when the family lived there.
The final home the Ingalls lived in together in De Smet
Ma’s kitchen where Pa built the cabinets by hand!
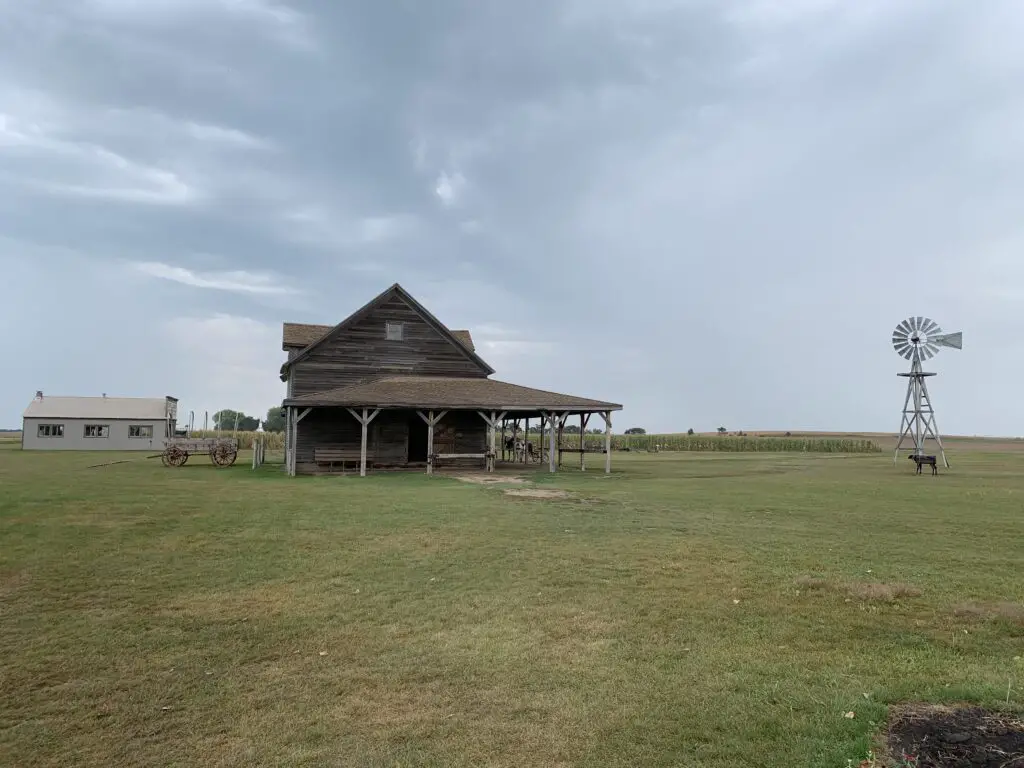
The Ingalls Homestead:
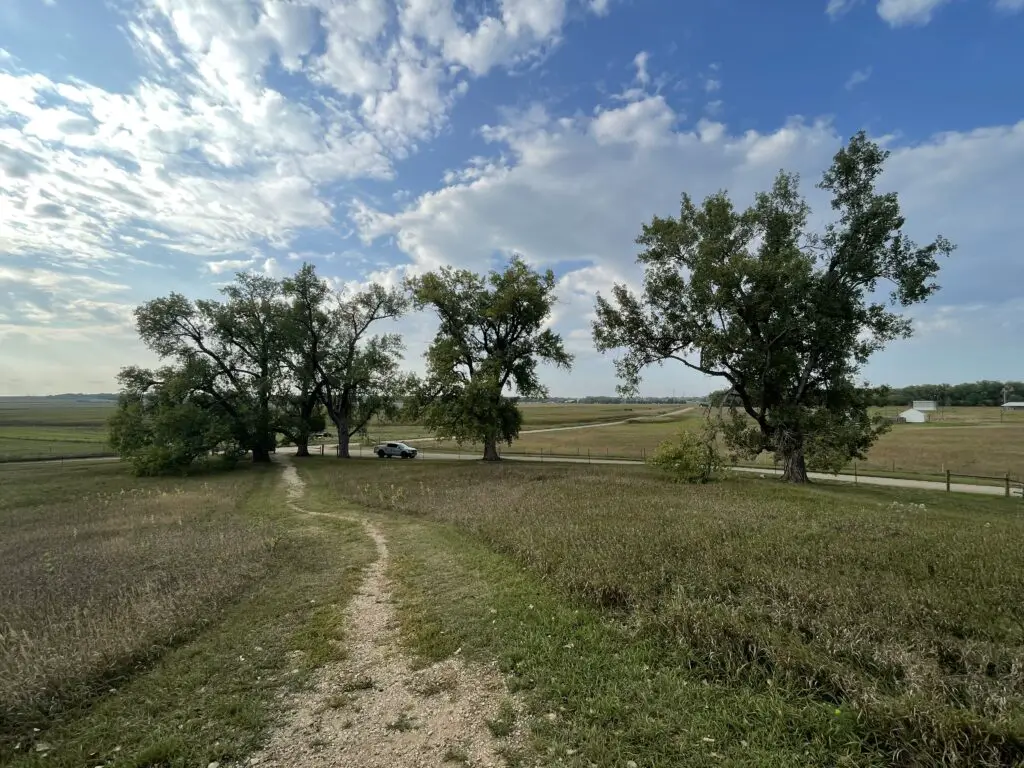
South of town, south of Big Slough, is the actual Ingalls’ homestead!
The actual, five cottonwood trees Pa planted for “his girls” in the book “On the Shores of Silver Lake” are all still standing!
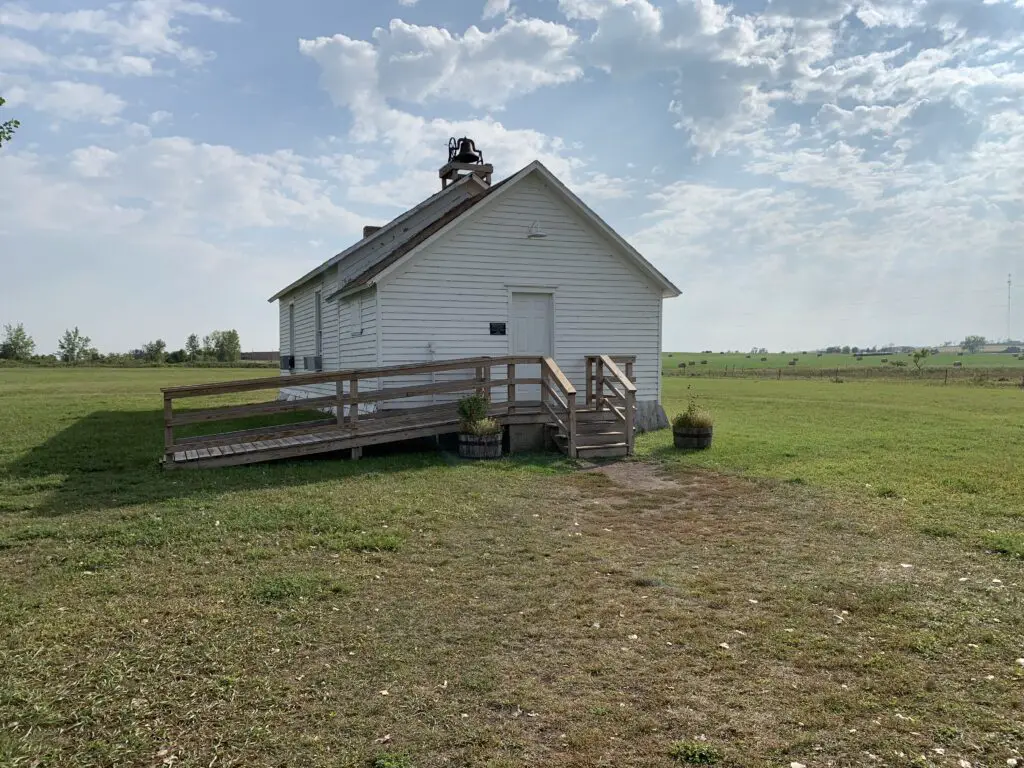
There is a mockup of a barn, a church, and a one-room schoolhouse, among other sites you can tour.
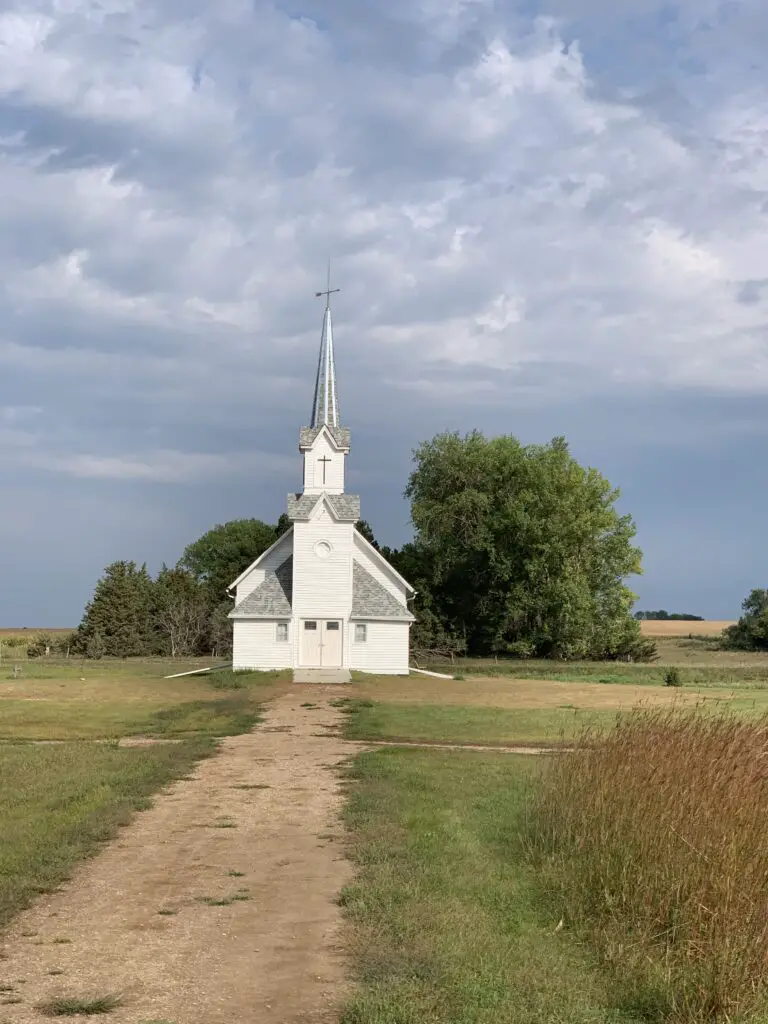
A model of the type of schoolhouse Laura would have attended and taught at
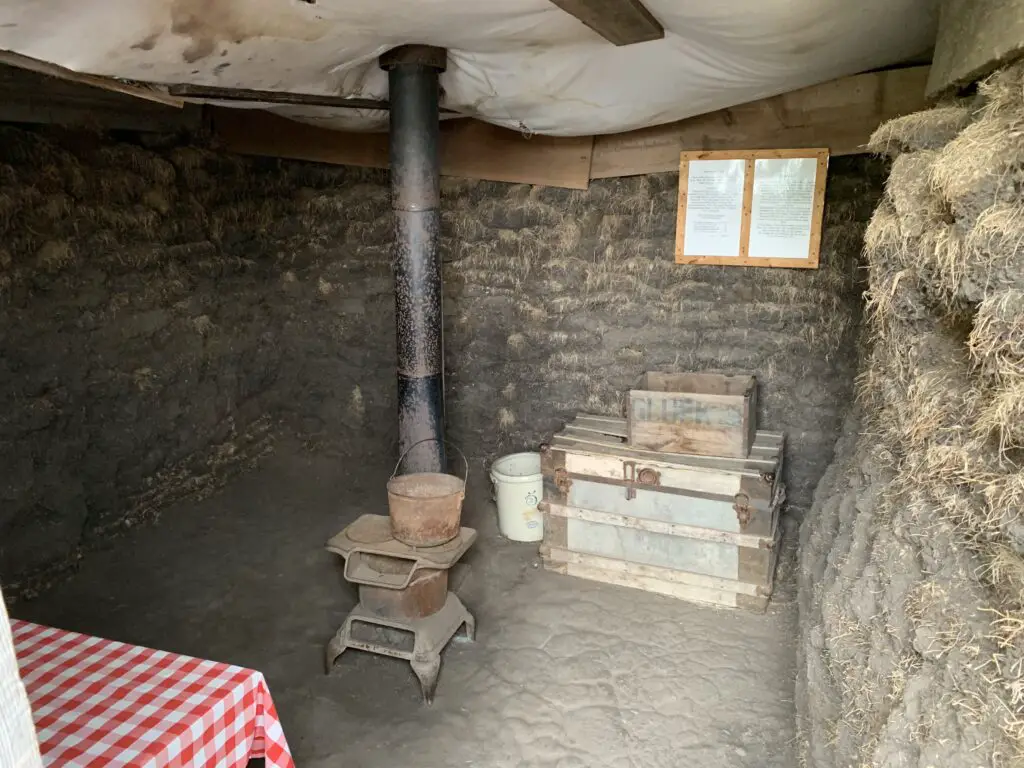
There is also a mockup of the shanty the Ingalls lived in on the prairie as well as an earthen dugout that some people used then (similar to what the Ingalls family lived in, in the book, On the Banks of Plum Creek.)
This is a model of the shanty houses used during the time of Laura’s booksA model of the type of dugout home Laura and her family lived in, in the book “On the Banks of Plum Creek”
There is a wagon ride that runs at certain times throughout the year that will take you to these sites.
This is also a decent walk/hike if you’re able and interested–this is a great way to release some energy for the two–and four-legged–“kids” in the family (just remember the four-legged kids have to stay outside the buildings).
This site is a great historical place to visit that is educational but fun too. I’ve talked to several parents who said their children still love the Little House books (boys and girls). While they are definitely “stories about girls” they are much more “pioneer stories” than they are “girl stories”.
So if you’re looking for something educational and active to do in eastern South Dakota, check out the Laura Ingalls Wilder Historic Homes!
Did you enjoy this post? Pin it!
Have you visited the Laura Ingalls Wilder Historic Homes in De Smet, South Dakota? Did the site bring back fond memories of the Little House books from your childhood? Tell me what you thought in the comments!
Like what you read here today? Please feel free to leave a comment, like, or share this post! Add your email at the bottom of the page, or the sidebar to the right, to be notified when a new post is published. By signing up for the email list, you will also receive a free copy of the Tranquil Trekker’s Top 10 Tips of Trekking Do’s and Don’ts! You can also follow the blog on social media by clicking the links below!
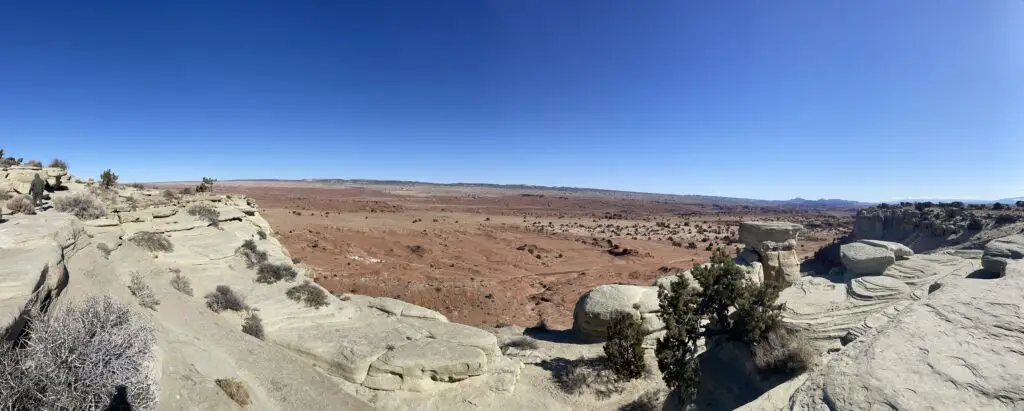
In this post, I detail some great places to hike and camp in the Snowys!
The Trekkers usually go to the Bighorn Mountains each summer. But this particular year the West had a VERY snowy and wet spring/summer (GREAT for avoiding wildfires, not so great for road conditions or mosquitoes). When we were making reservations all the roads/places we enjoy visiting in the Bighorns were closed due to mud and we figured the skeeters would be ATROCIOUS, so we thought why not try out the Medicine Bow Mountains (the Snowys) in south-central Wyoming instead?
Where are the Medicine Bows?
The Medicine Bows are a small area of mountains that run from north-central Colorado (near Rocky Mountain National Park) into south-central Wyoming (near Laramie).
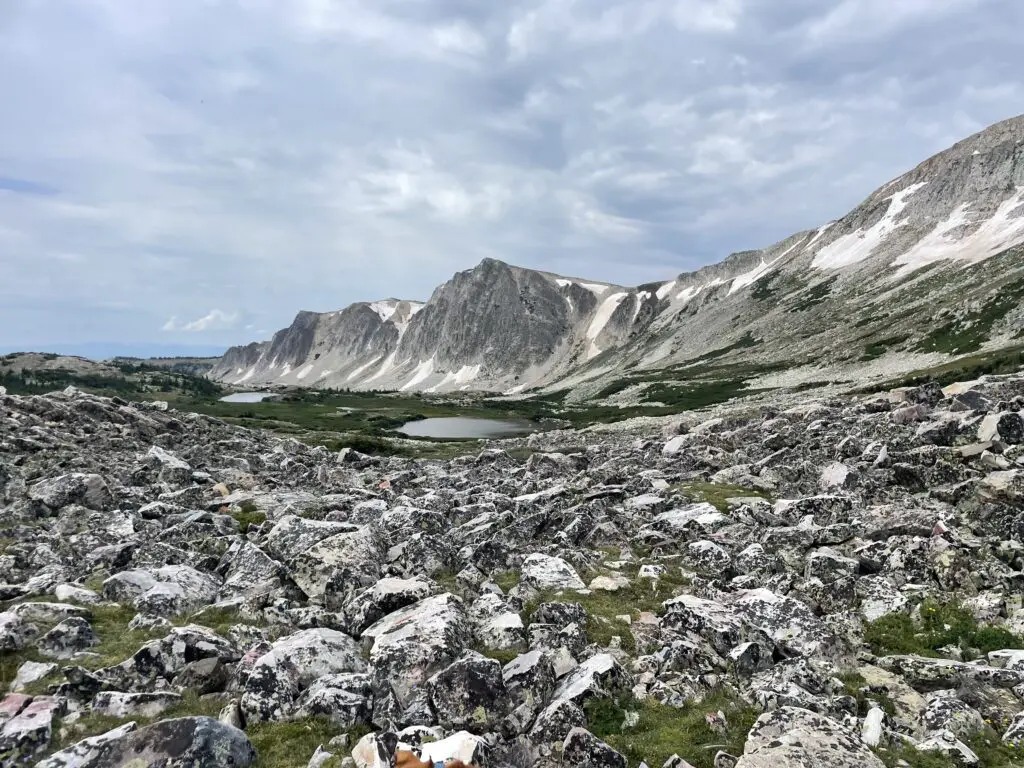
The Wyoming portion is what most people think of as the Medicine Bows. Here they are divided into three main areas: the Sierra Madres to the west, the Snowy Range (the Snowys) in the middle, and the Laramie Peak area to the east. Our trip focused on the Snowys…
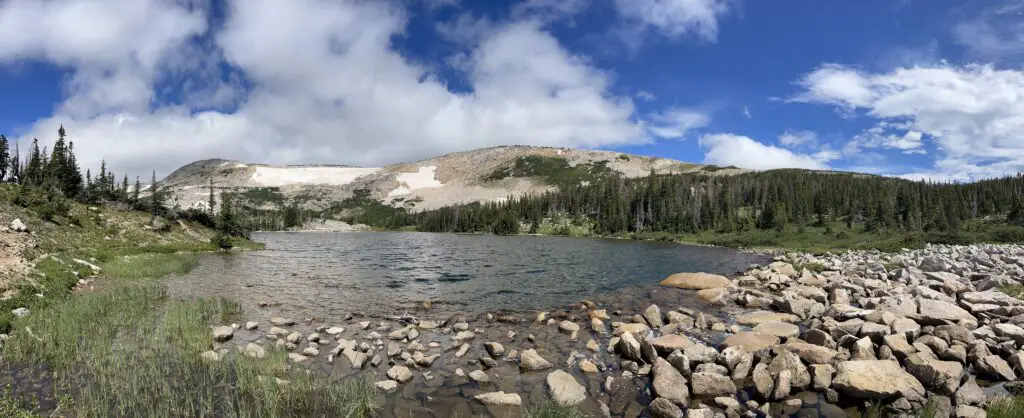
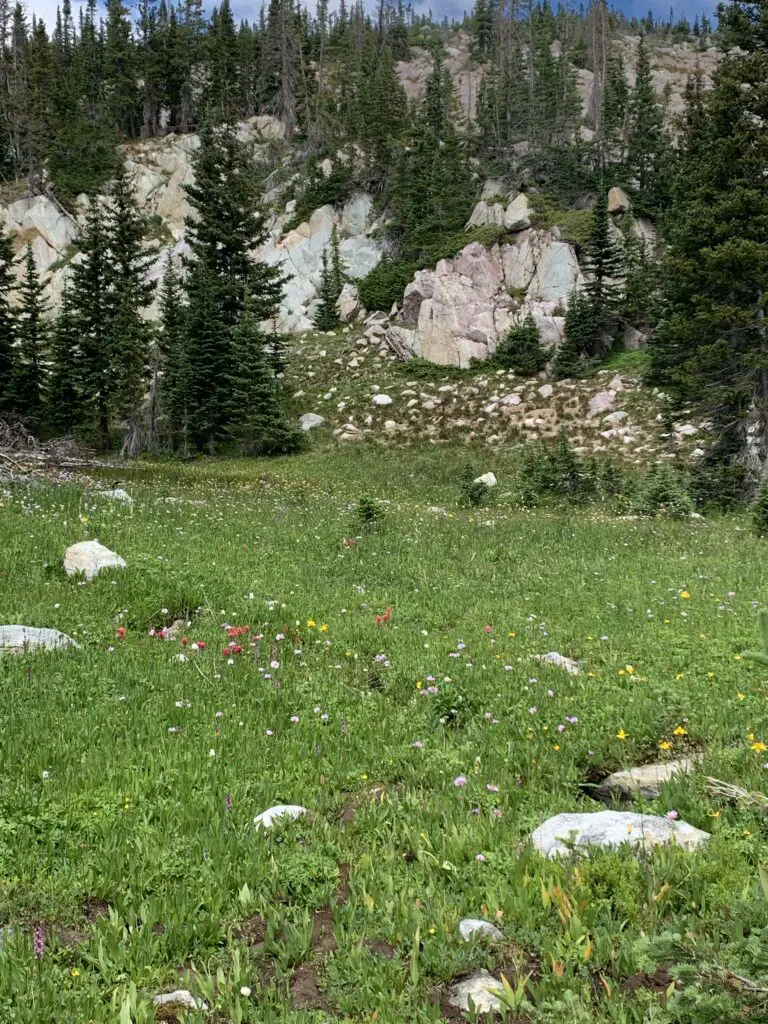
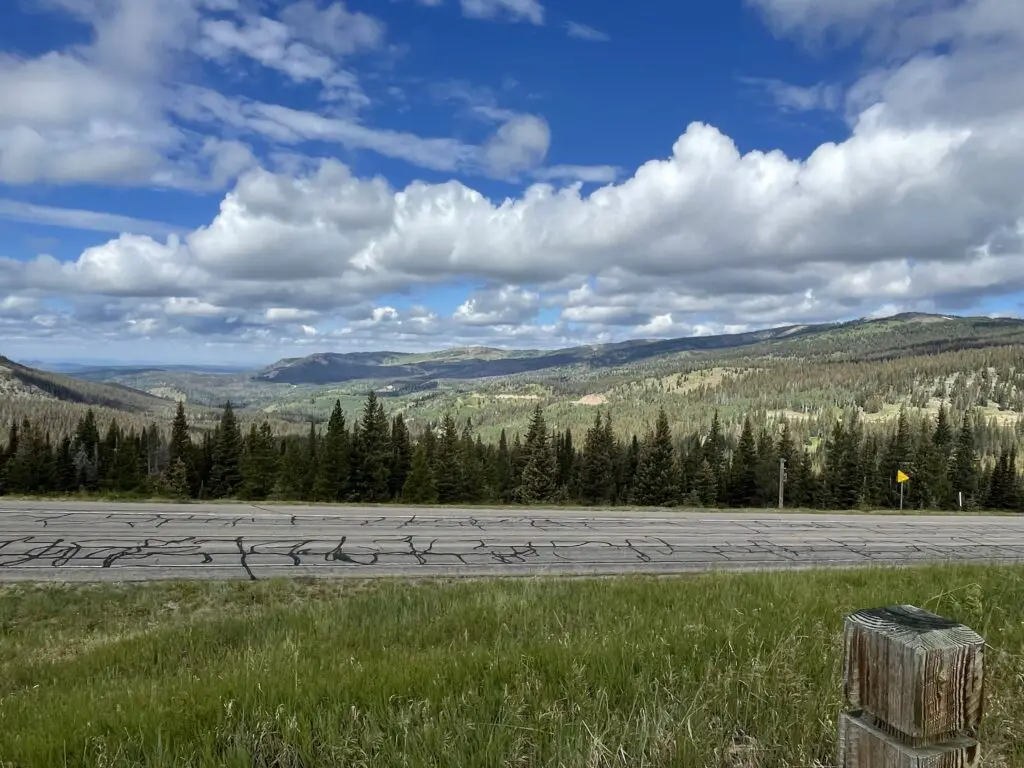
The Snowy Range reminded us of Colorado!
—This area felt a lot like that around Walden, Colorado, and State Forest State Park which makes sense as it’s the same National Forest. Also, less than 100 miles separates the two…
—There was still snow on some of the peaks. There is a reason they call this area “the Snowys”! 😉 Fortunately, the bugs weren’t too bad though!
There are multiple Forest Service campgrounds in the Snowy Range. We chose Ryan Park as it was lower than many of the other campgrounds in the Snowys (at “only” around 8,000 feet rather than 10,000 feet.) This proved an obvious benefit as it was slightly warmer (especially at night) and may have had less rain (but was still FAR cooler than the lower elevations of the surrounding plains!)
Our camp protector! (He was there when we arrived and we left him for whoever came next!)
To be clear, Ryan Park is still a Forest Service campground so it is rustic…
I’ve mentioned before that we REALLY enjoy US Forest Service campgrounds as they usually offer more secluded campsites and more rustic locations. Forest Services campgrounds are perfect for tent camping though most can accommodate RVs, as well (at least in some sites). Just be aware of what you’re getting into as most Forest Service campgrounds only offer:
potable water–at least in-season
decent campsites with fire grates and picnic tables (Always check local regulations to see if there are any current fire bans in place!)
…and that’s about it! 😀 Forest Service campgrounds also usually only offer vault toilets. (And, let’s be honest, a vault toilet is still just a hole in the ground that you pee in 😉but, the bathrooms at Ryan Park Campground were some of the cleanest and nicest-smelling outhouses we’ve ever been to! 😉)
I should do a post sometime about decent vault toilets we’ve visited around the country.Note: Yellowstone National Park and State Forest State Park, in Colorado, sport some of the NASTIEST! 🤥)
There wasn’t much shade at the campground. Sadly, this area has been hit BADLY by beetle kill in recent years. The Forest Service has done a good job of cleaning up all the dead trees near the Snowy Range campgrounds which is incredibly important for safety, it just means most of them are fairly bare of trees now. 😕This does equate to lovely views of the night sky and sunsets/sunrises though!
Hiking in the Snowy Range
We found some great hiking trails in the Snowys!
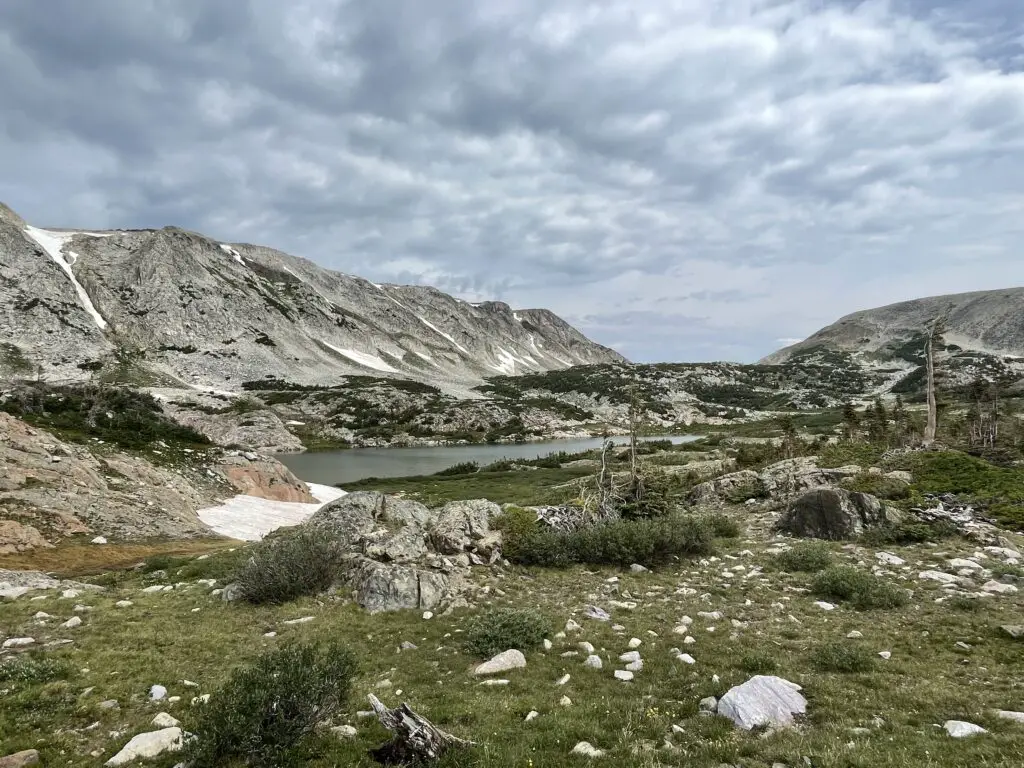
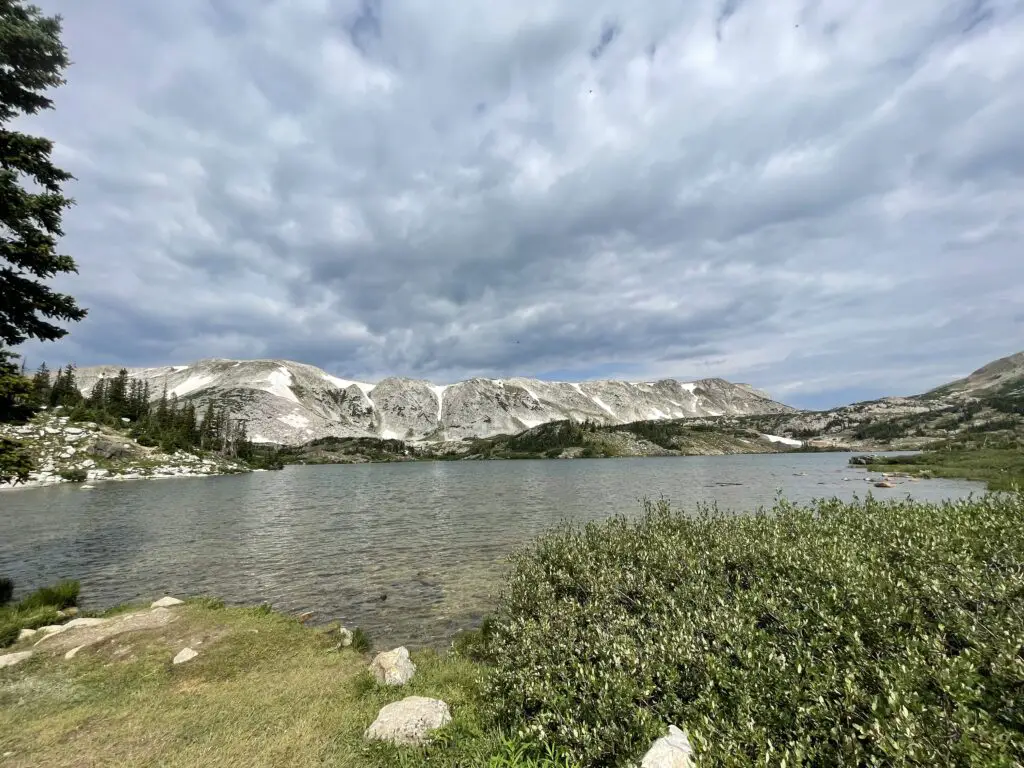
Medicine Bow Peak Trail
We hiked from the Sugarloaf trailhead near Lewis Lake. This is one of the shortest routes to Medicine Bow Peak, though we decided not to hike all the way to the peak–it was less than a mile from where we stopped but it was incredibly steep, rocky, loose, potentially slippy, and exposed on a shelf-like trail. (Thunderstorms were also forecast for the afternoon and we didn’t want to get caught out in such an exposed area.)
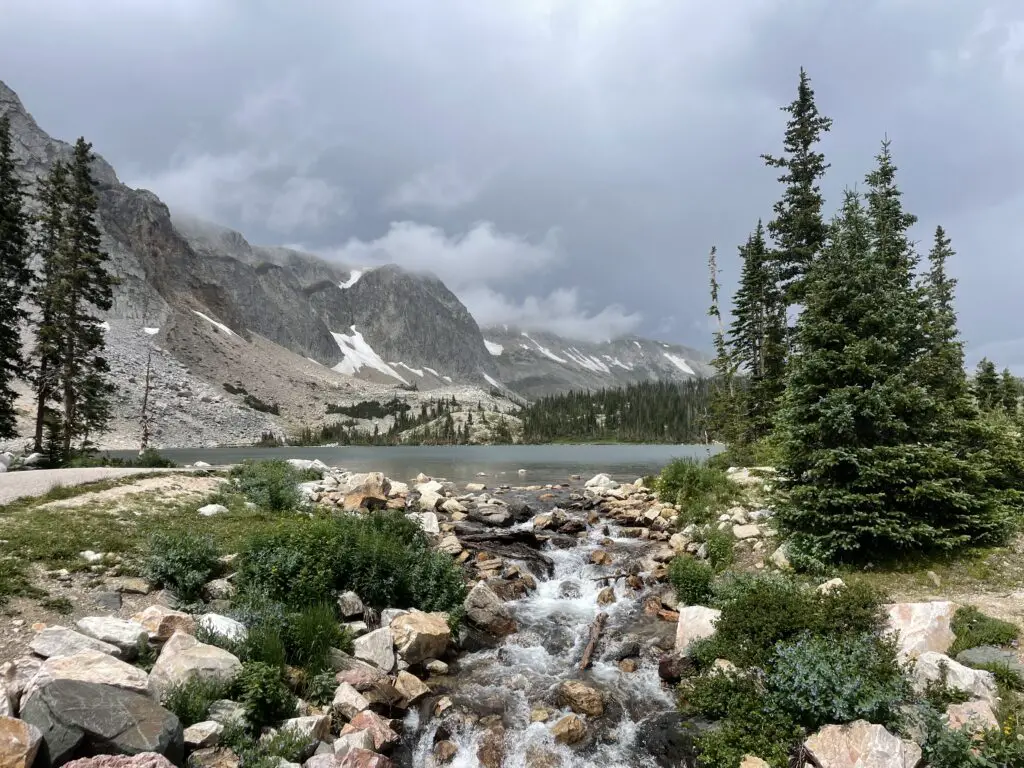
In addition to the Sugarloaf Trailhead, there are multiple trailheads you can use to access Medicine Bow Peak. The longest (but relatively easiest) is from Lake Marie. You can also access the trail from Mirror Lake and Brooklyn Lake, though these routes require a longer trek and combining multiple trails.
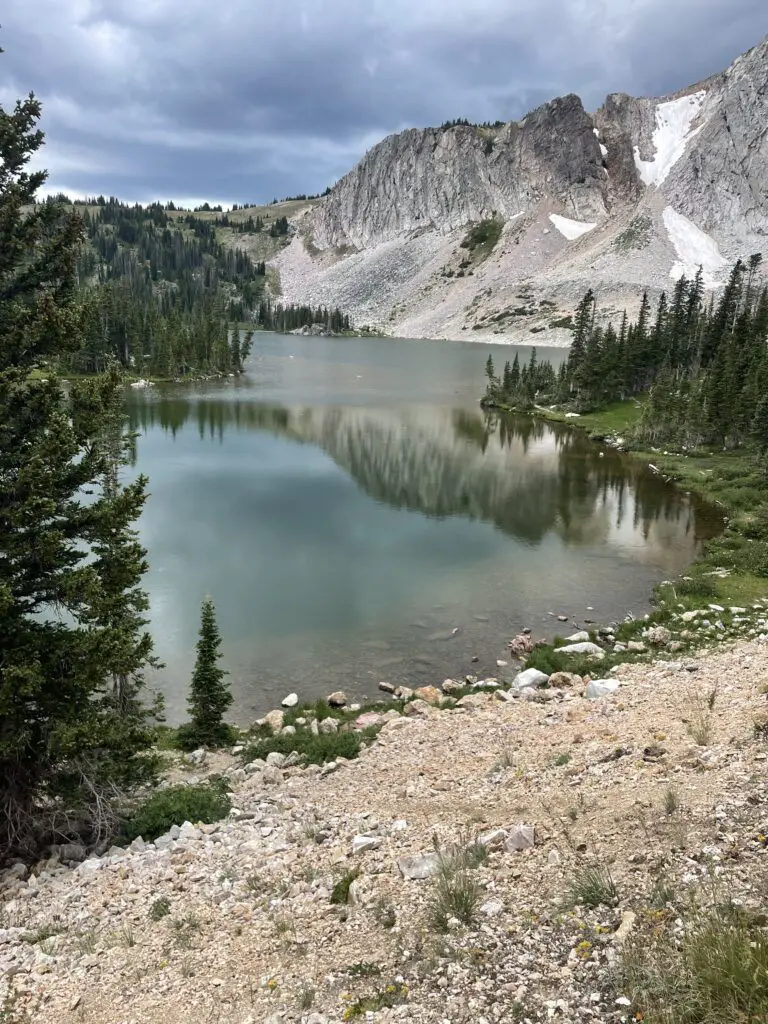
Lewis Lake
Is Medicine Bow Peak Trail Hard?
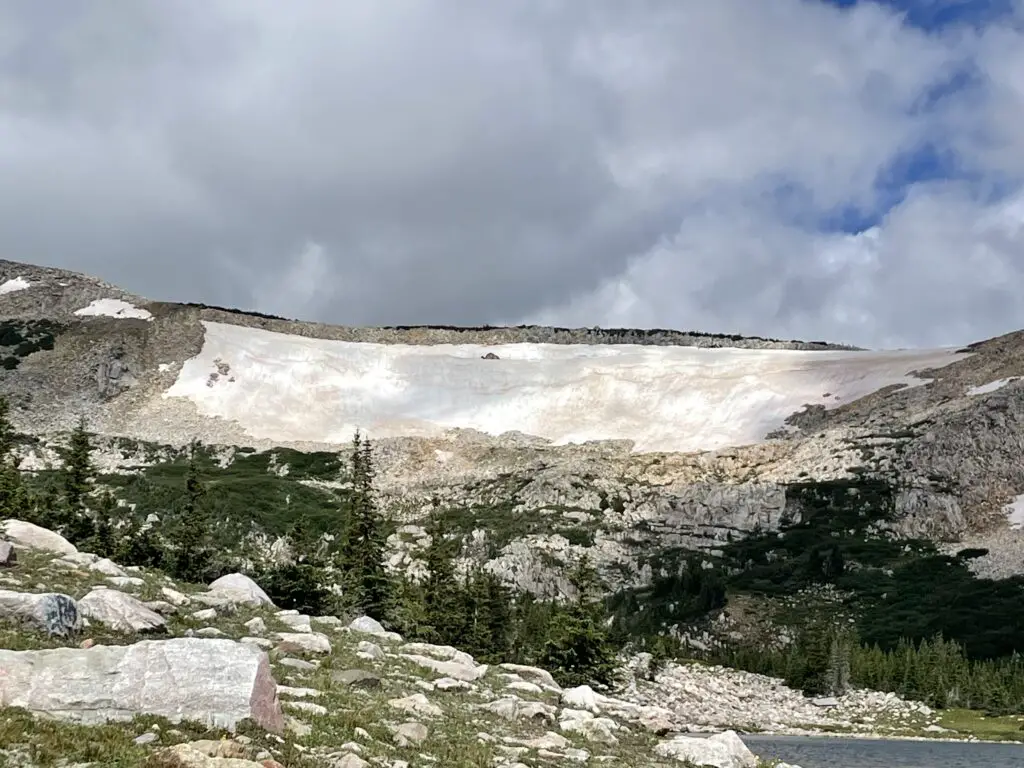
The trail from Lewis Lake is only about three miles long in total length but don’t let that fool you. It gains more than 1000 feet in elevation during the hike up. It’s also INCREDIBLY rocky and exposed, not to mention HIGH. (You start at over 10,000 feet and end up at almost 12,000 feet.)
Also, you’re above the tree line for the entire route so there is NO SHADE! This can also cause the trail to become INCREDIBLY slick in the rain, mist or snow–and note, snow and ice lasts LATE into the season and comes EARLY in the High Country. It can snow at any time of the year and thanks to monsoonal moisture, rain was forecast for our entire trip (it rained on us every day). Also, there is absolutely NO PROTECTION from lightning up here during the violent summer thunderstorms that frequently occur.
Libby Lake
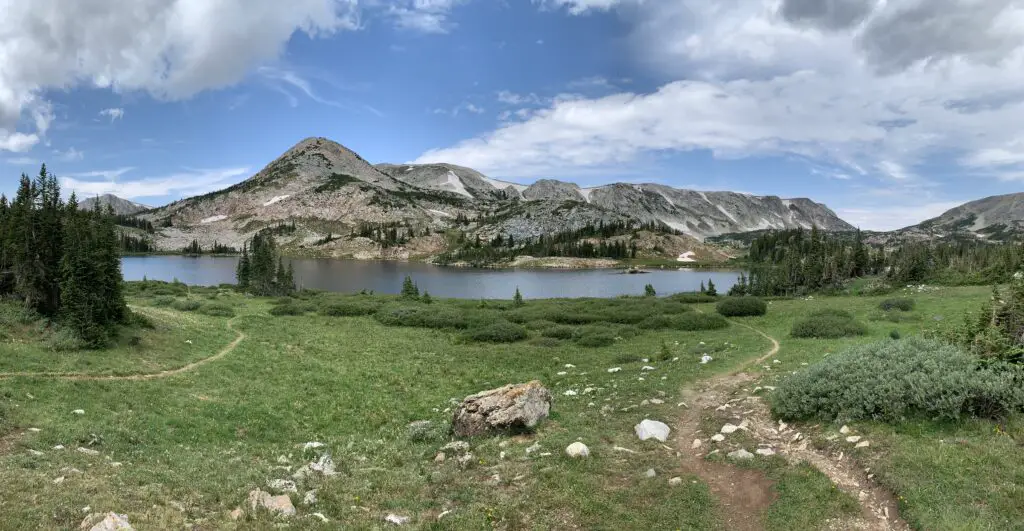
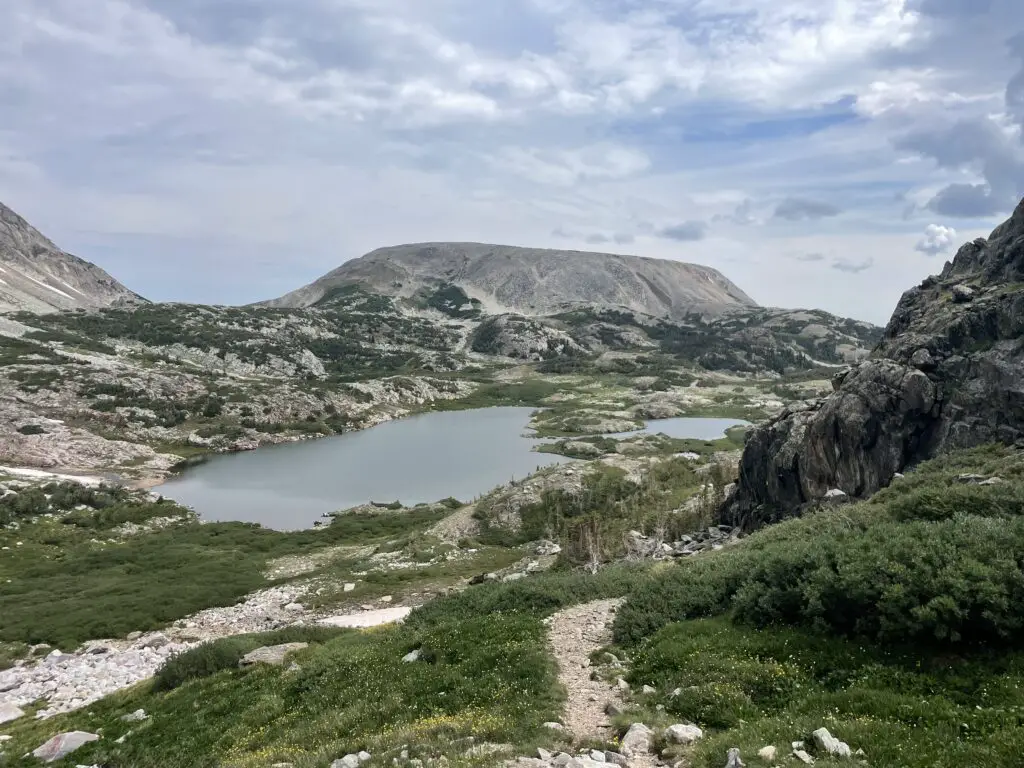
We chose to stop at a saddle where the HARD part of the trail starts. Here it also meets up with the other end of the Medicine Bow trail that comes up from Lake Marie. This trail is LOVELY though! You hike along the spine of the Snowy Range getting amazing views of the local lakes, the nearby mountains, and the surrounding landscape. At one point we could make out eight separate, small lakes!
This is the amazing view from the saddle. Medicine Bow Peak is to the right and the trail gets considerably more difficult from here…
I would rate the early portion of the trail (before the saddle) as moderate for sure. It isn’t overly difficult or long–we saw several families with young children. It is a bit rocky and there is some scrambling required in a few, short areas.
The most difficult part about this trail is just that it’s incredibly exposed and high (as I said before, entirely over 10,000 feet). There are no steep drop-offs directly from the trail though, so as long as you are a fairly capable hiker, you take it slow and you respect the conditions, you should do okay.
Though we didn’t have to navigate any actual snow in early August, there were still some snowfields along the trail. I can’t speak for how normal this is due to all the snow the West got that year (though they must call this area the Snowys for a reason!)
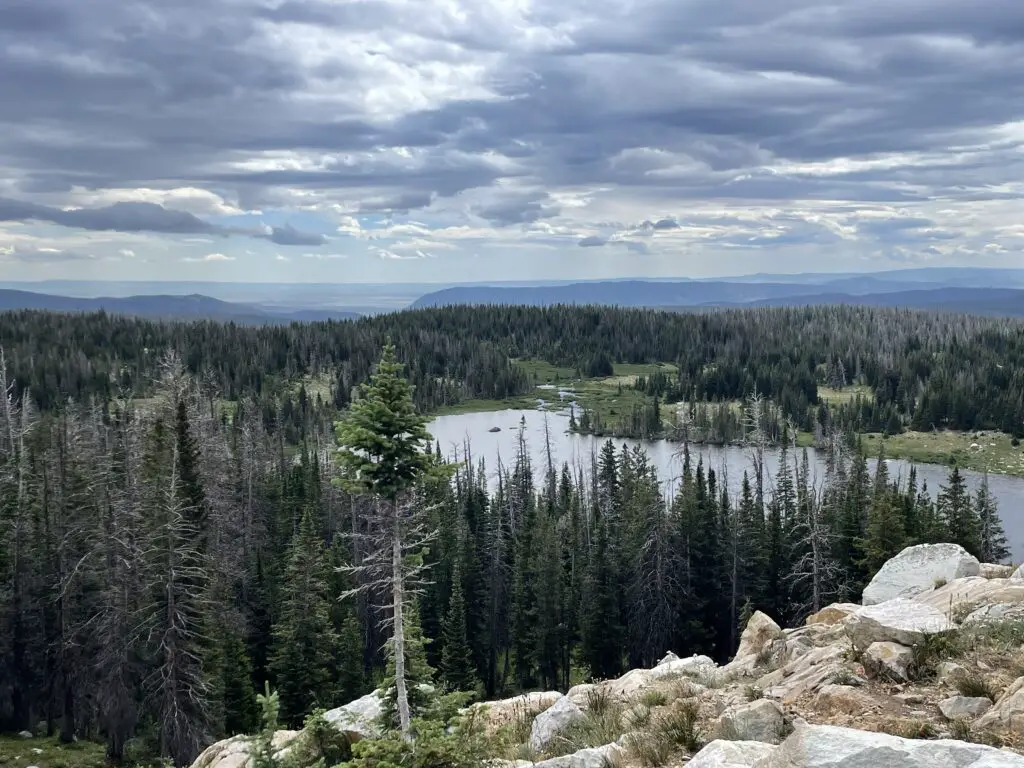
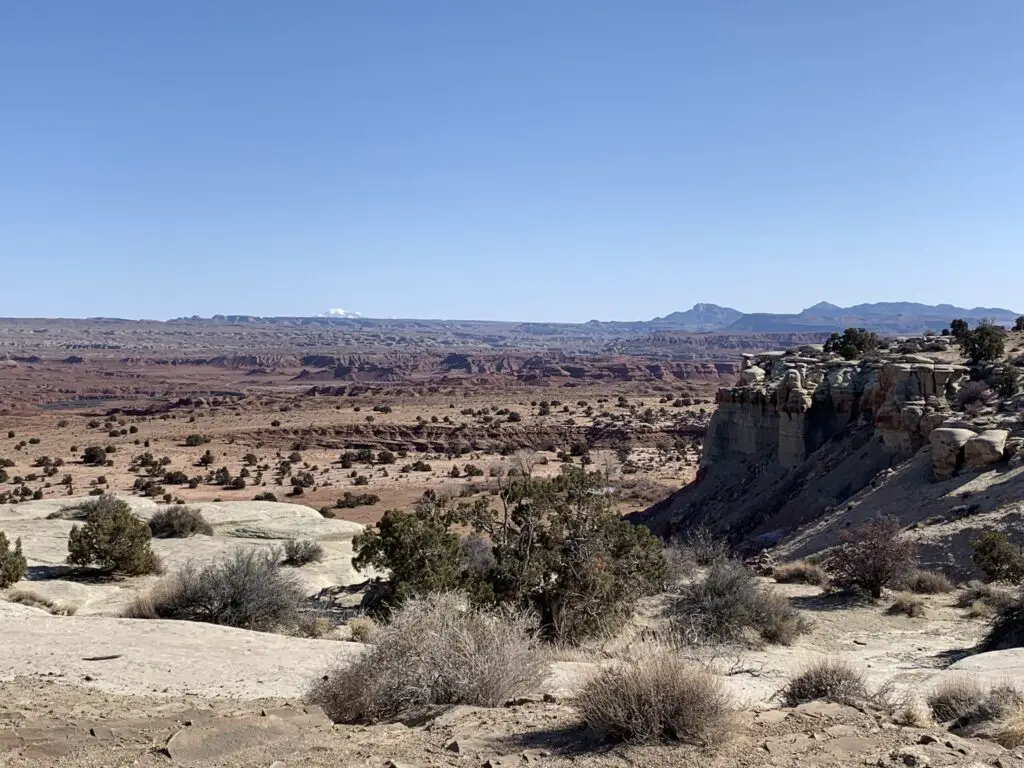
Lost Glacier Lakes Trail to Lost Lake
Lost Glacier Lakes trailhead is found on the east side of the Snowys. It starts from Brooklyn Lake and heads west. The route to Lost Lake is about six miles in total length (out and back).
From Lost Lake, the trail continues on to where it meets up with the Medicine Bow Peak trail at Lewis Lake and the Sugarloaf Trailhead (see above). The entire Lost Glacier Lakes Trail from Brooklyn Lake to Lewis Lake is a little over eight miles (in one direction).
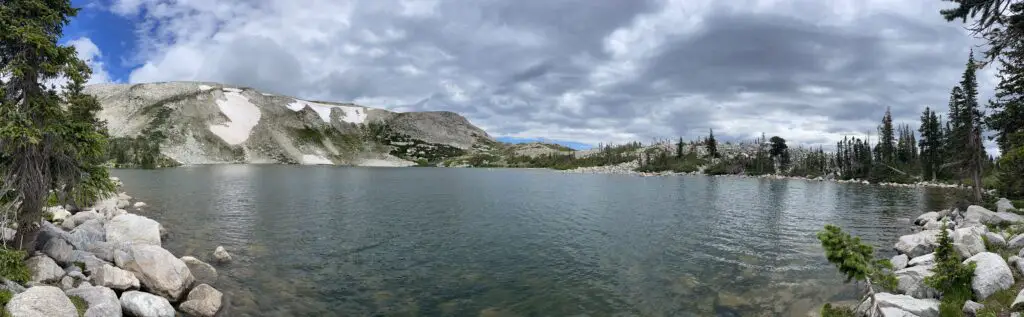
Lost Lake
Lost Lake was SO BEAUTIFUL! It reminded me of Lake Helen in the Bighorns!
One of the two Glacier Lakes
Is Lost Lakes Trail Hard?
The Lost Glacier Lake Trail is a lot of fun! It offers very little elevation gain and is mostly a wide, dirt path throughout. Be watchful for the occasional tree root and rock, but there is very little scrambling required. This is a kid-friendly trail! (Just remember the entire trail is still above 8,000 feet!) This trail is also below tree line so there is a lot more shade (and it’s much less exposed) than what you’ll find on the Medicine Bow Peak Trail.
Telephone Lakes as seen from the Lost Lake Trail
We really enjoyed this trail! It offered nice views of the lower lakes and plains of eastern Wyoming. On clear days you can also spot some of the high peaks of the Rockies down in Colorado.
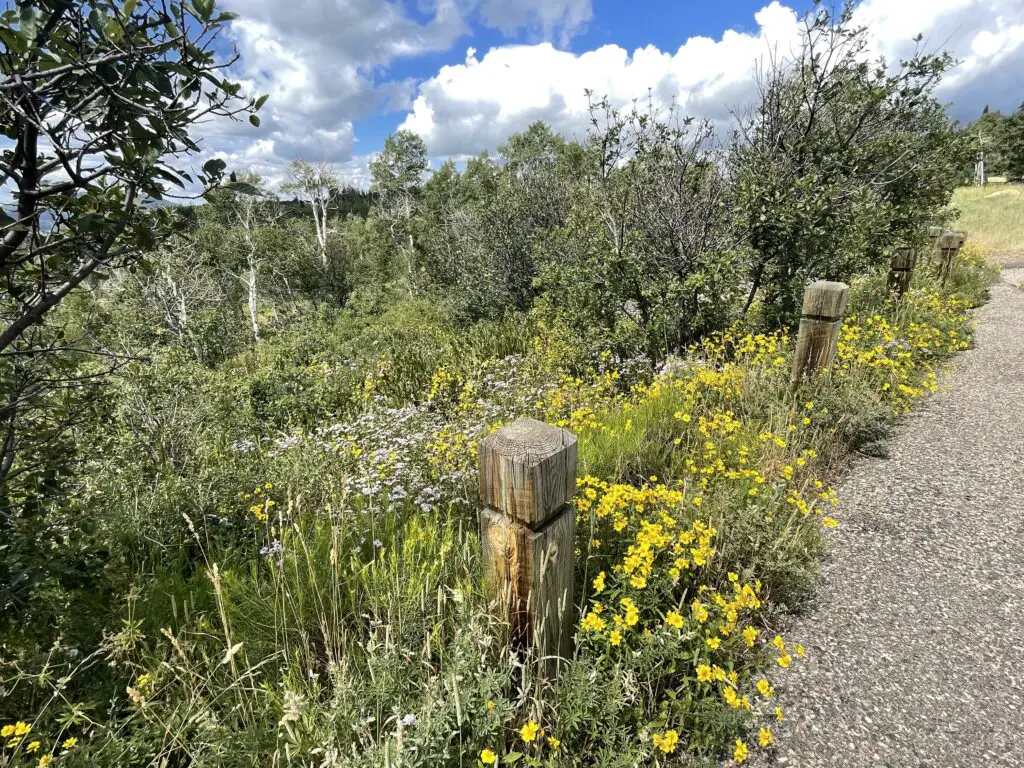
You can see why they are called The Snowys! (This was in early August!)
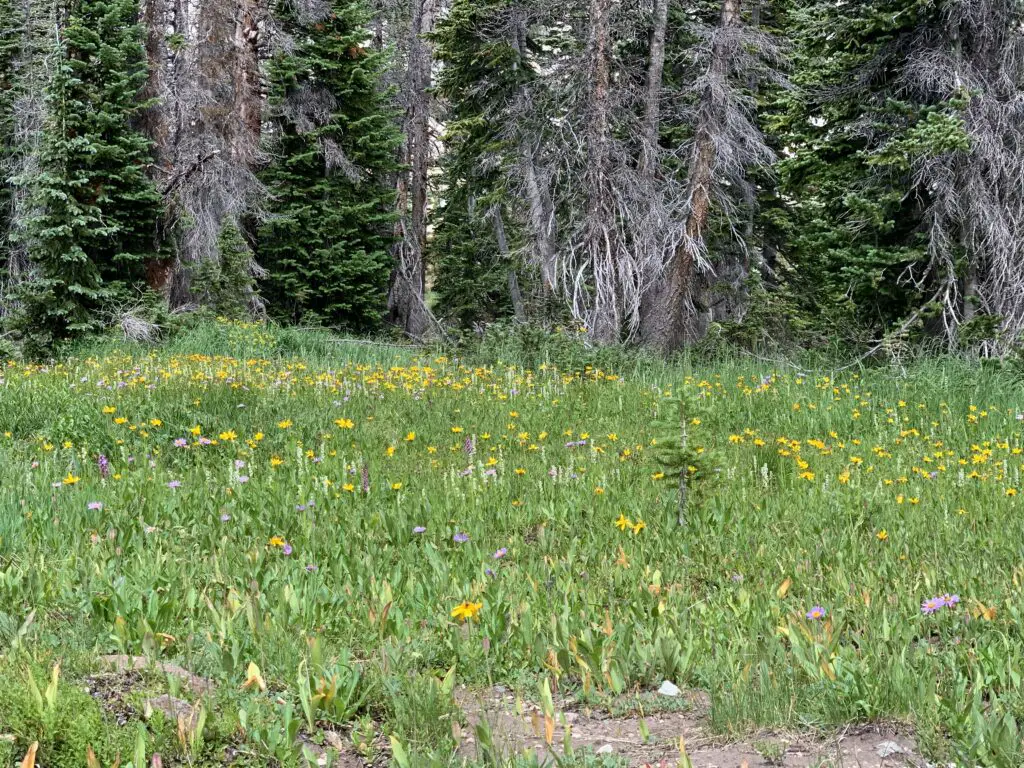
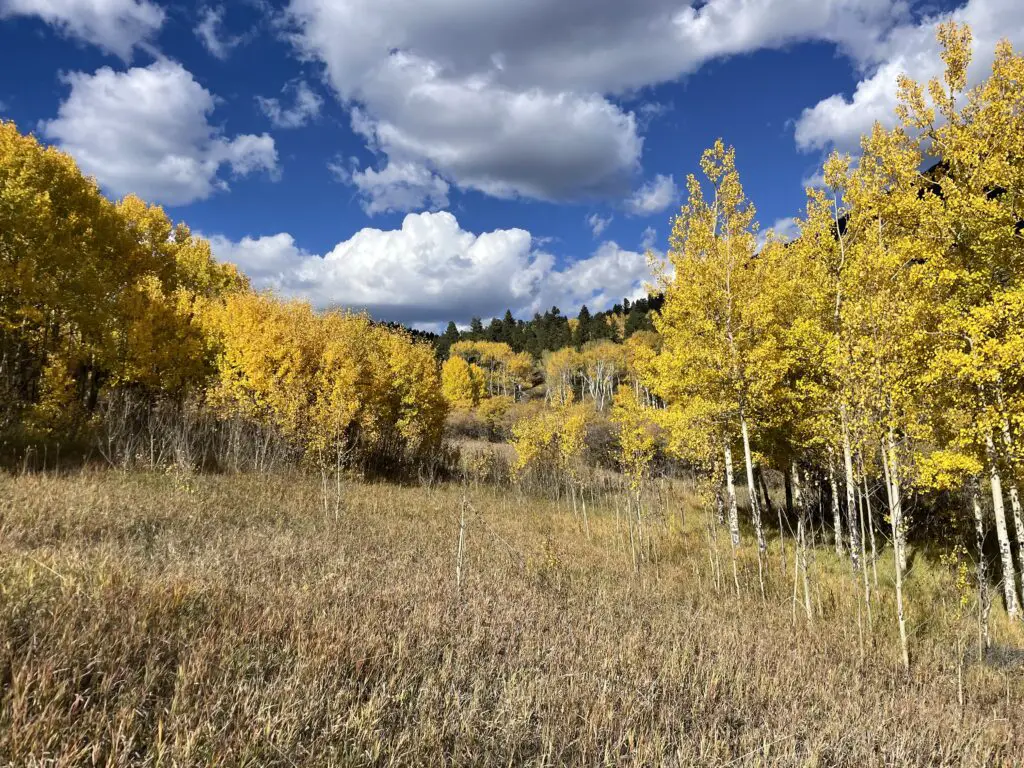
Below are some pictures of the wildflowers we saw on the Lost Glacier Lakes Trail. The pictures don’t do the colors justice, of course. The flowers were absolutely BEA-Utiful!
Camping in the rain!
As I mentioned earlier, our trip was at the start of Monsoon Season in that area so it rained every day of the trip. That’s okay though, part of “roughing it” in the wild is dealing with whatever weather Mother Nature decides to throw at you! A few tips on tent camping in the rain…
—-Spend money on a NICE tent (I recommend the REI brand) with a rainfly that covers the entire tent and reaches almost to the ground. Our tent stayed completely dry inside even though we got rained on all three days we were out!
—-Make sure nothing important is touching the walls of the tent (clothes, bedding, etc.) I can’t explain it but there is this phenomenon where if the tent is wet outside the water stays outside as long as nothing touches it from the inside. If something does touch it, that thing gets wet and the water seems to start seeping inside the tent.
This is probably some weird phenomenon of physics, but since I’ve never taken a physics class I can’t tell you any more about it. 😇
Scenic Byways!
We also drove several scenic byways in the Snowy Range! (Note: both of these routes are closed in the winter–they’re really only open May through November–and this is weather-dependent).
Snowy Range Scenic Byway
The Snowy Range Scenic Byway is Wyoming Route 130 that travels east-to-west through this portion of the Medicine Bow mountains. It runs from the Encampment/Saratoga areas in the West to Centennial, Wyoming in the East.
There are several nice pullouts along the Byway. Some of our favorites were:
Libby Flats: an open, meadow area in the higher elevations of the Snowys. It offers an observation tower and spectacular views of the surrounding countryside. We also saw a bunch of marmots here!
Lake Marie: a VERY pretty stop on the western side of the Byway. It offers a nice boardwalk and paved walking path that connects to the Mirror Lake picnic area just to the east. Other hiking trails break off from here, as well.
Lake Marie–this was one of my favorite spots in the Snowys!
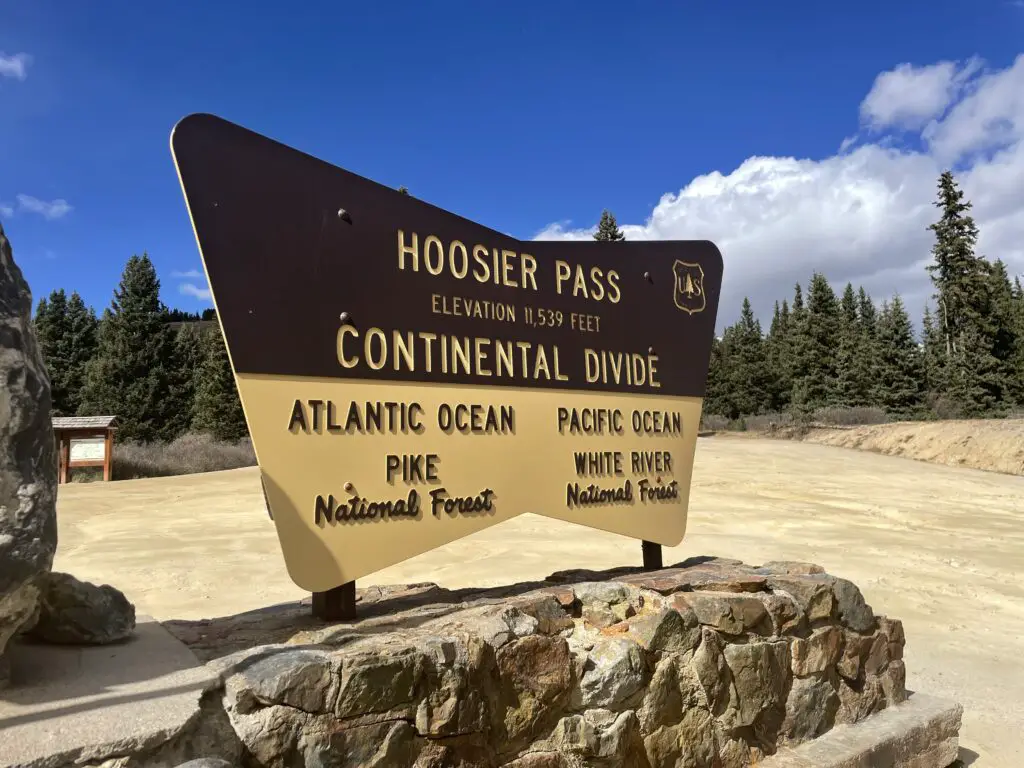
The Continental Divide! –Battle Pass Byway
Battle Pass Byway is Wyoming Route 70 that travels east-to-west through the Sierra Madre portion of the Medicine Bow mountains. It runs from Baggs, Wyoming in the West to Encampment in the East and crosses the Continental Divide.
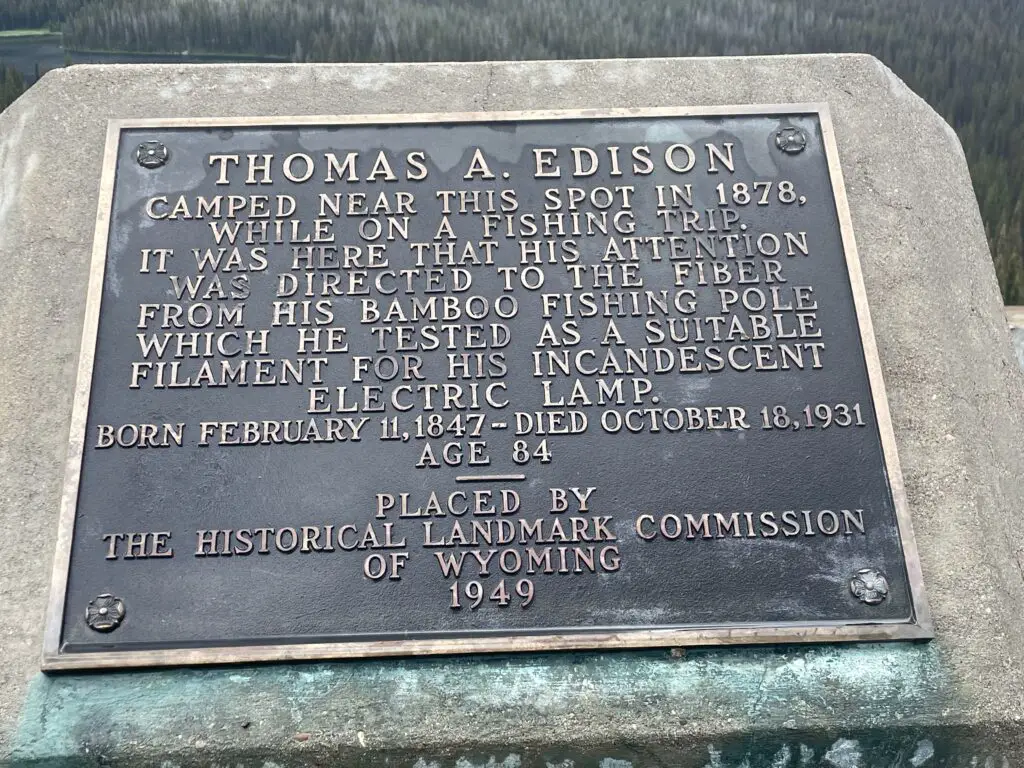
The Continental Divide! From this point, water either flows West to the Pacific or East to the Gulf of Mexico/the Atlantic.View to the west!Even more wildflowers!History happened here!
So, if you’re looking for a great place to hike and camp that’s just across the border from the crowded trails in Colorado, check out the Snowys!
Have you spent time in the Snowy Range? Tell me about your experience in the comments!
Did you enjoy this post? Pin it!
Like what you read here today? Please feel free to leave a comment, like or share this post! Add your email at the bottom of the page, or the sidebar to the right, to be notified when a new post is published. By signing up for the email list, you will also receive a free copy of the Tranquil Trekker’s Top 10 Tips of Trekking Do’s and Don’ts! You can also follow the blog on social media by clicking the links below!
In this post, I detail a Spring Break trip we took to Death Valley!
**Author’s note: Just a word of warning, as this is a National Park, no dogs are allowed on any trails (exceptions for Service Animals). They are only permitted in the campgrounds and parking lots.**
The final stop on our epic, Spring Break trip to celebrate the Trekkers’ 40th birthdays was Death Valley National Park! We’ve been wanting to visit Death Valley for a long time. We figured early March was hopefully a good (and cooler!) time to do it!
3 Tips for Your Visit to Death Valley:
–The heat in Death Valley!
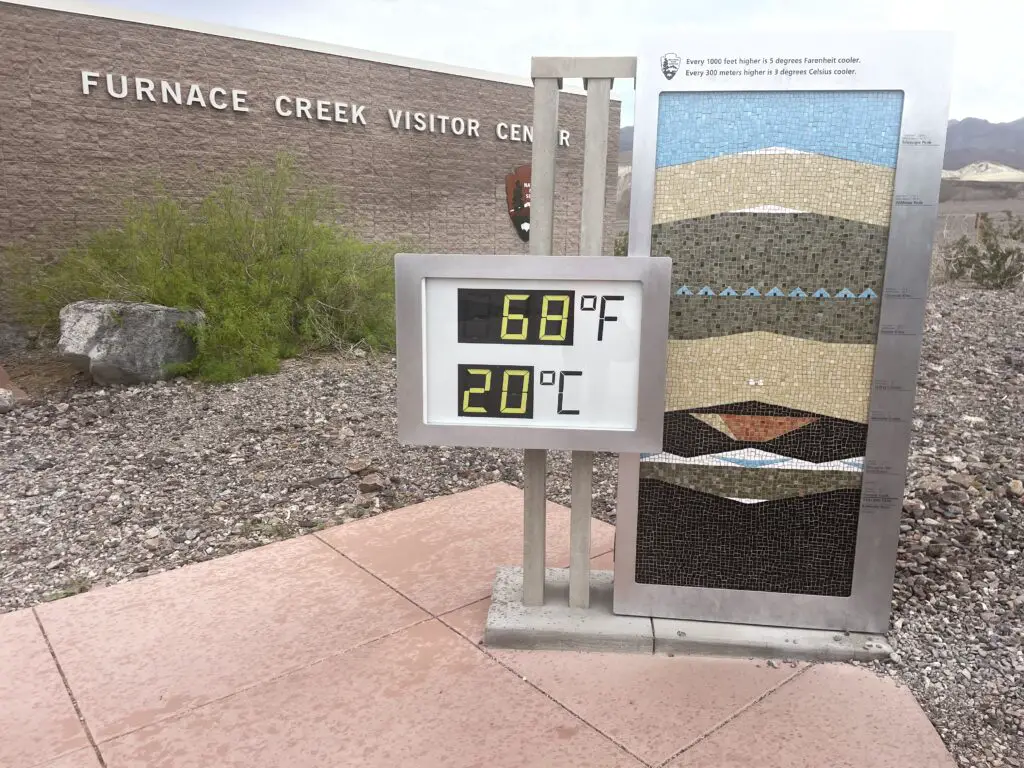
The heat in Death Valley is NOT a joke so PLEASE be careful! We were SO LUCKY that it was so cool when we were there (FYI, early March is a GREAT time to visit!) This place is literally on record as being the hottest place on Earth!
Death Valley is also extremely dry and can be very windy, which means you may be sweating (and getting dehydrated) and not even realize it. Some years, it has been known to be over 100 degrees here for almost HALF THE YEAR! I cannot stress enough the potential danger this type of heat can bring. Dehydration/heat stroke are very real dangers here for much of the year. This park can LITERALLY kill you!
Check out the name of the Visitor’s Center…Furnace Creek! This area is where the hottest temp ever recorded on Earth was taken. I doubt it’s rarely this “chilly” there.
The heat can also be VERY hard on your car, and if it breaks down in the middle of the desert, you’re now stuck in the heat. There are almost NO TREES in Death Valley so there is also almost NO SHADE. We even saw one remote section of road where signs told you to turn off your car’s air conditioning to take the stress off the car’s engine (the road was also going uphill)–again, this wasn’t an issue with the cool temps when we were there. 😂
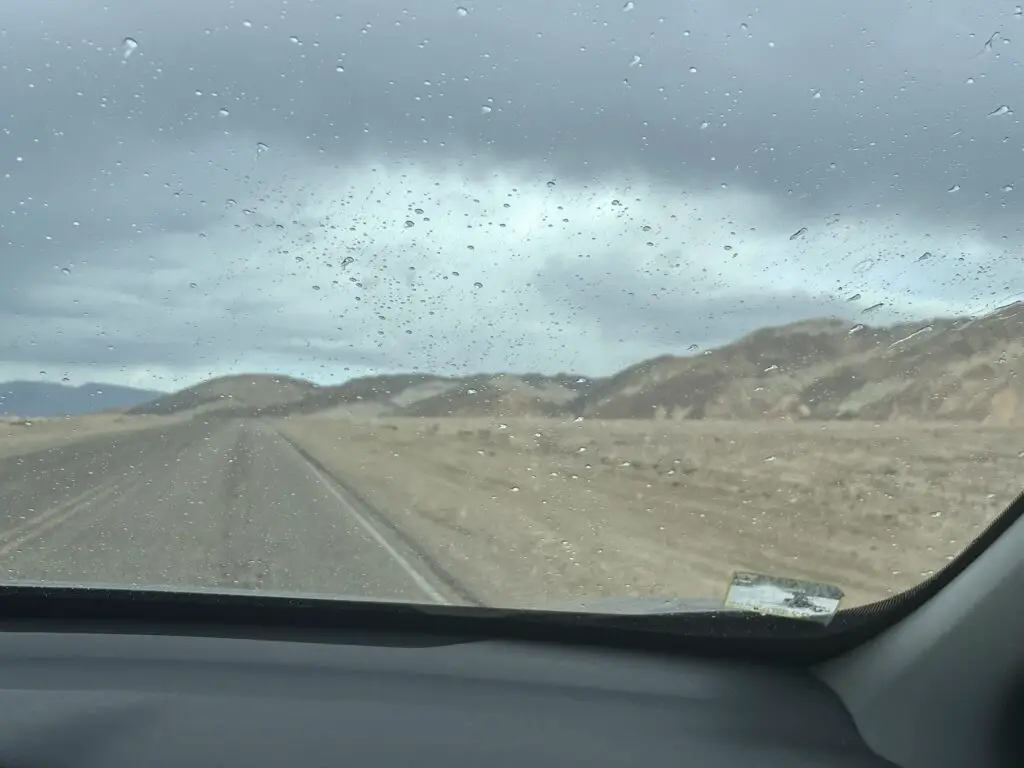
It rained on us…in DEATH VALLEY! (There was also sleet and a 30 mph wind. It was COLD during that storm…in Death Valley!)
–No cell coverage in Death Valley
One big thing to plan for when you visit Death Valley is that the park is HUGE! It covers more than THREE MILLION acres so you should plan to do A LOT of driving! Also, it is a valley (duh! 😉) surrounded by mountains, so there is very little cell coverage–this adds to the danger the park poses if you encounter a problem.
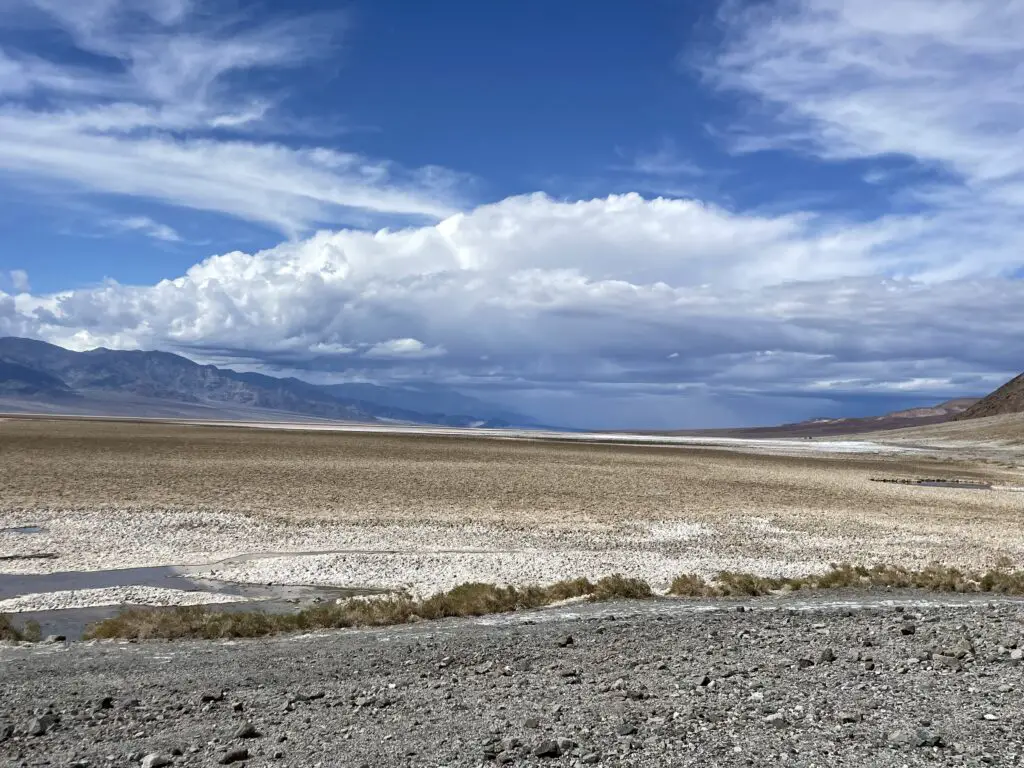
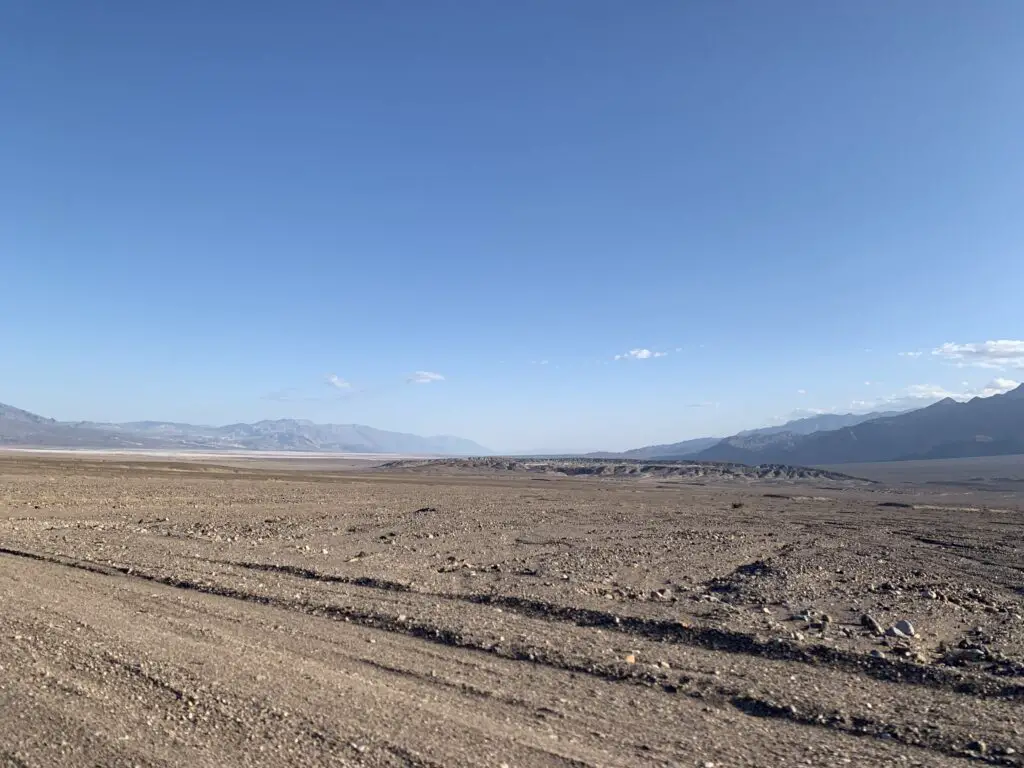
Also, something to be aware of, Death Valley isn’t the prettiest of our national parks. This comment is not intended to dissuade you from visiting in any way. I just don’t want you to be disappointed. Glacier NP this is not! 😇It’s called DEATH Valley for a reason! There isn’t much that grows or lives here! 😉
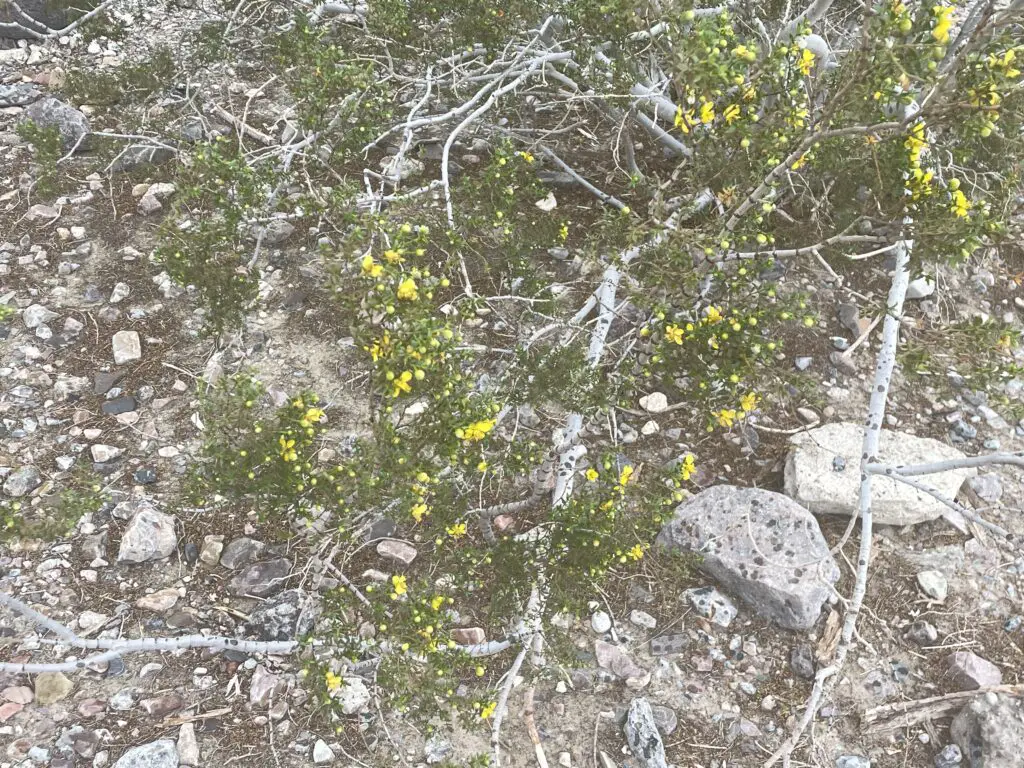
The only flowers we saw in Death Valley
Where is Death Valley?
Death Valley is located in southeastern California, right on the border with Nevada. The park is situated about 130 miles west of Las Vegas and a little more than 200 miles to the northeast of Bakersfield, California.
The easiest way to reach Death Valley is to bring Nevada Route 160 west from Las Vegas to Pahrump. Then take State Line Road west to the Death Valley Junction on California Route 127. From there you pick up Route 190 and take that into the park! (Don’t worry, there are signs. Also, these are basically the only paved roads out there! 😉)
You can also reach Death Valley from the north by taking US 95 south through Nevada to California Route 374, or from the west on California Route 190.
Places you don’t want to miss in Death Valley:
There are a number of awesome sites to see at the park!
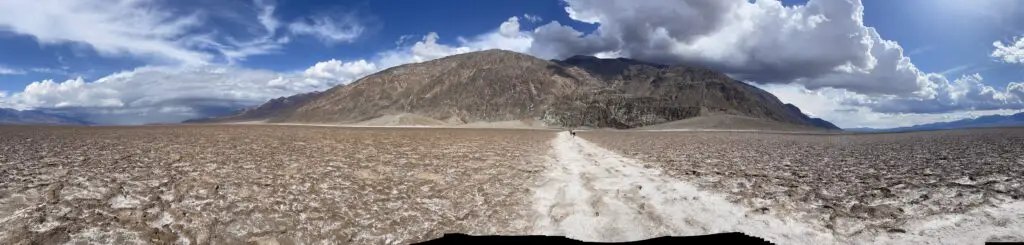
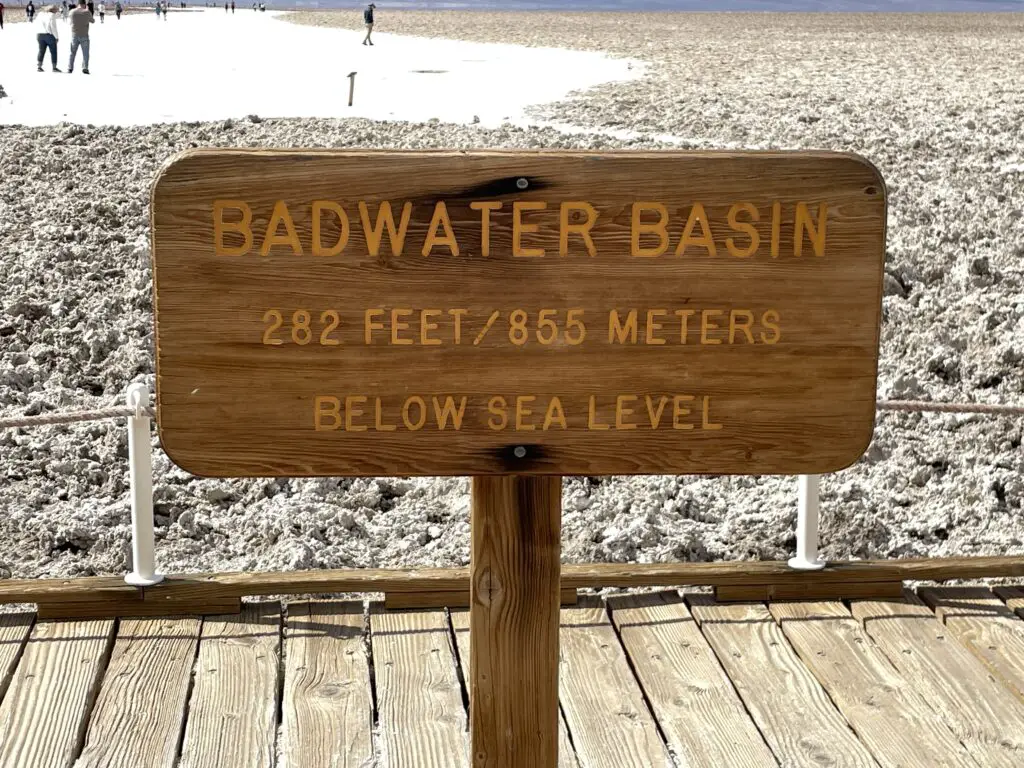
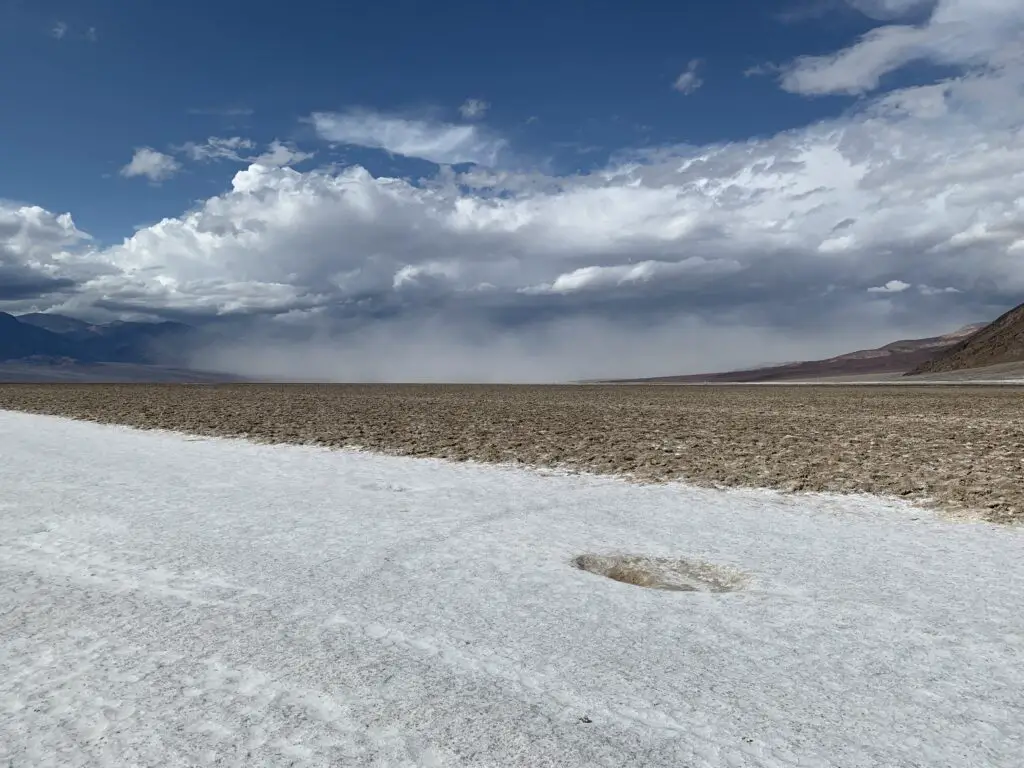
Badwater Basin:
Badwater Basin’s claim to fame is that it is THE lowest point in North America, at more than 200 feet BELOW sea level!
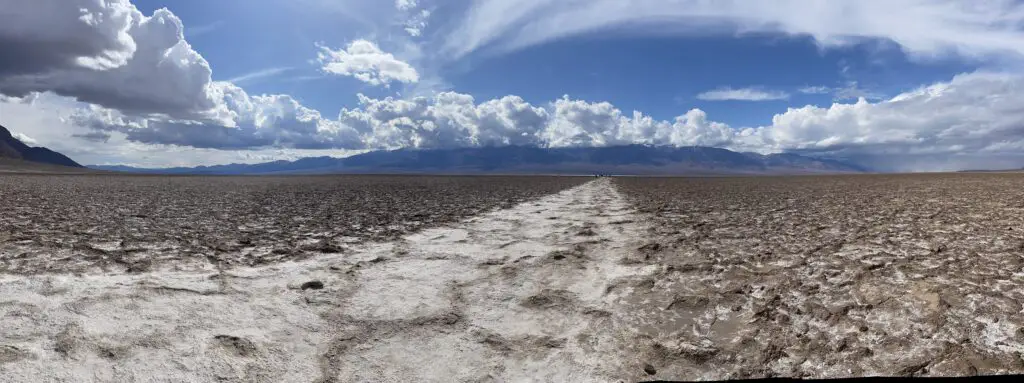
Panoramic of Badwater BasinDante’s Point is at the top of that mountain (this will be important later.)Badwater Basin is THE lowest point in North America!
The shiny stuff in the foreground IS the water in “Badwater Basin”! This is one of the rare places where water can regularly be seen in Death Valley.Death Valley!Haboob! (Dust storm)
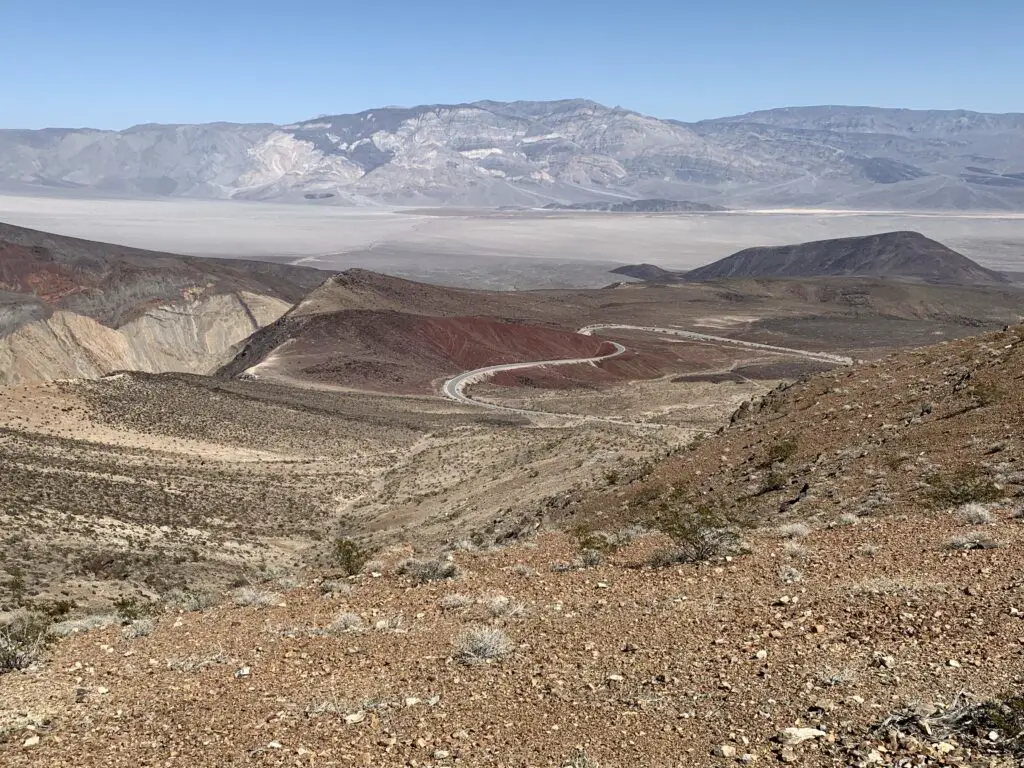
Father Crowley Overlook:
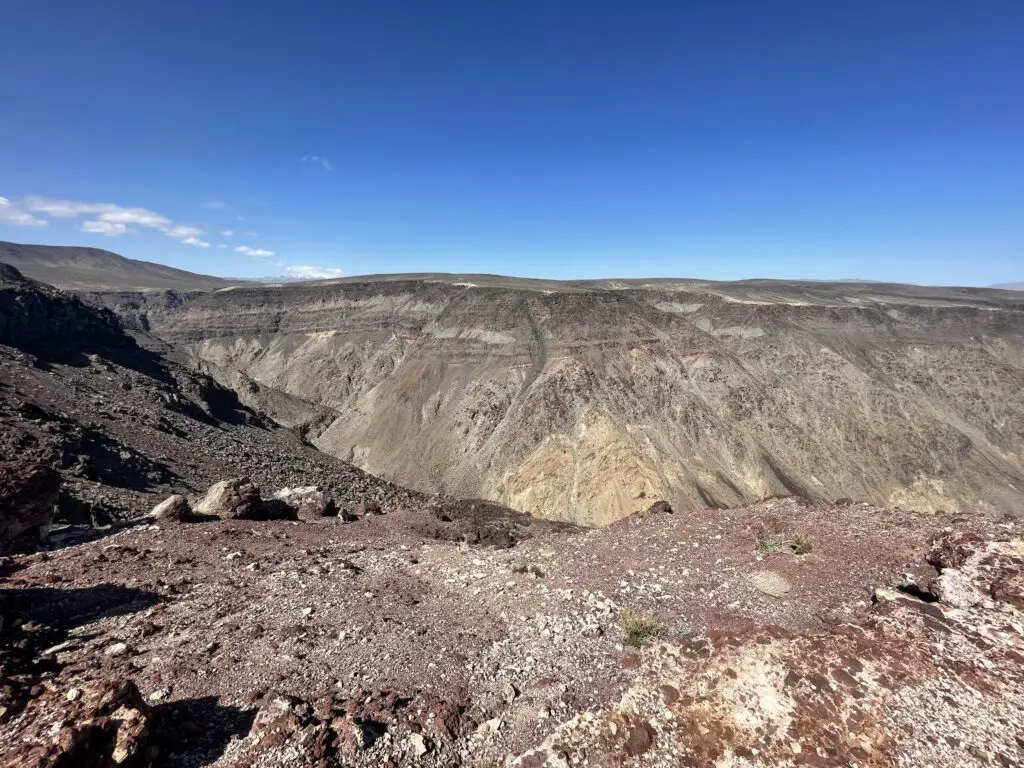
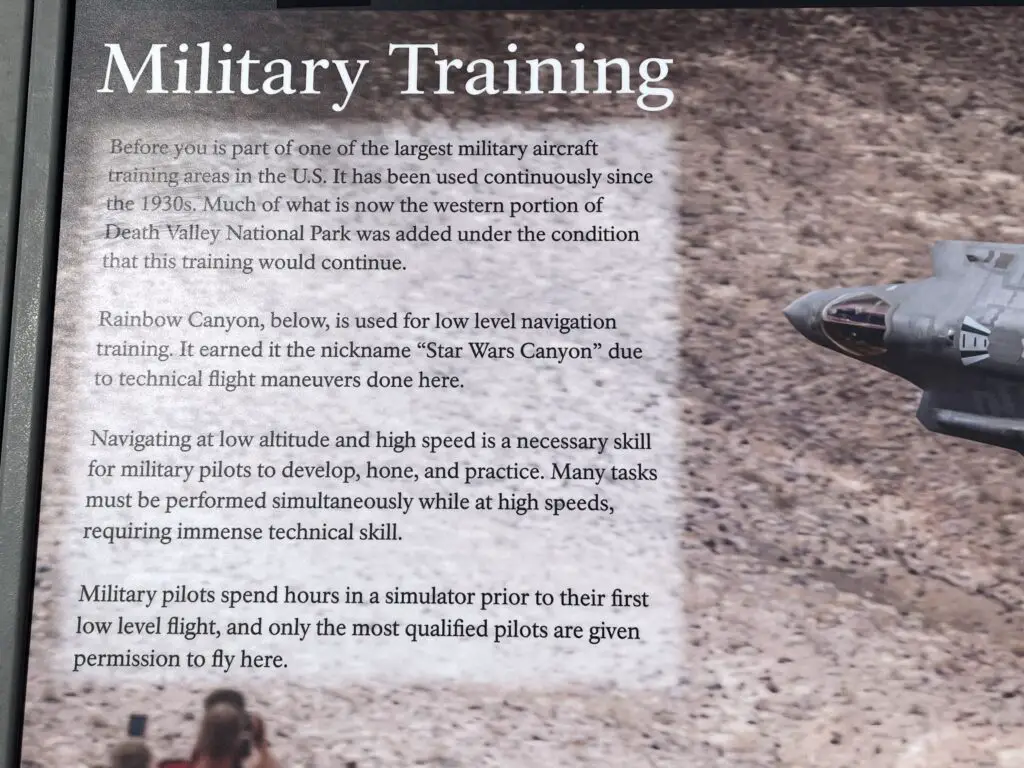
This locale is otherwise known as, “Star Wars Canyon”! Ironically this was NOT a Star Wars filming site (to learn more about those, scroll down!)–although portions of the new, Top Gun: Maverick were filmed here!
The proper name for this canyon is Rainbow Canyon, from the colorful rock and gravel that comprises it. However, it got its nickname as fighter jets have often practiced low-altitude moves here (the terrain mimics much of where they fly throughout other parts of the world.)
This has been a Bucket List item on both the Trekkers’ lists since Mr. Trekker heard you could see fighter jets here and I found out it was called Star Wars Canyon (and why!)This meshed well with our watching planes at Nellis Air Force Base in Vegas and touring the Extraterrestrial Highway earlier in the trip!
Rainbow Canyon, otherwise known as…Star Wars Canyon!
Sadly, several years ago there was an accident where the pilot was killed and spectators on the ground were injured so they’ve limited what all the planes can do here…but, you can sometimes catch a plane and…WE DID (two actually)! We didn’t get any pics or video (literally, we heard it, we saw it, it was gone, all in a total of about three seconds). 😁
View from Father Crowley Overlook! (We saw a fighter jet fly down that valley in the distance too!)
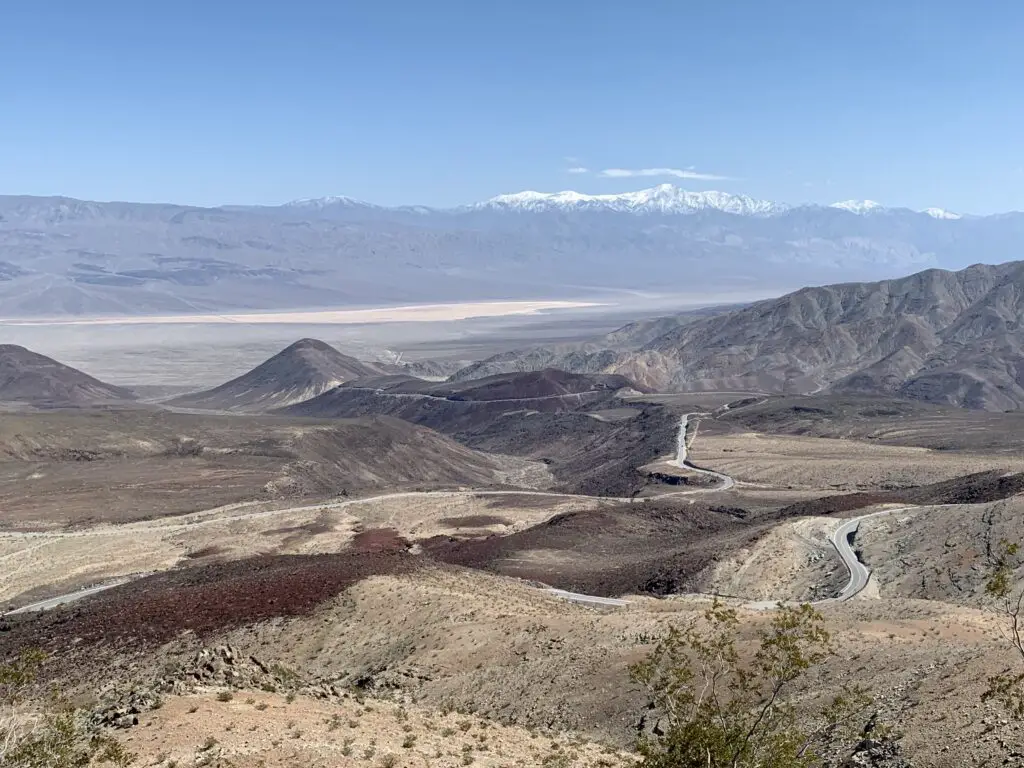
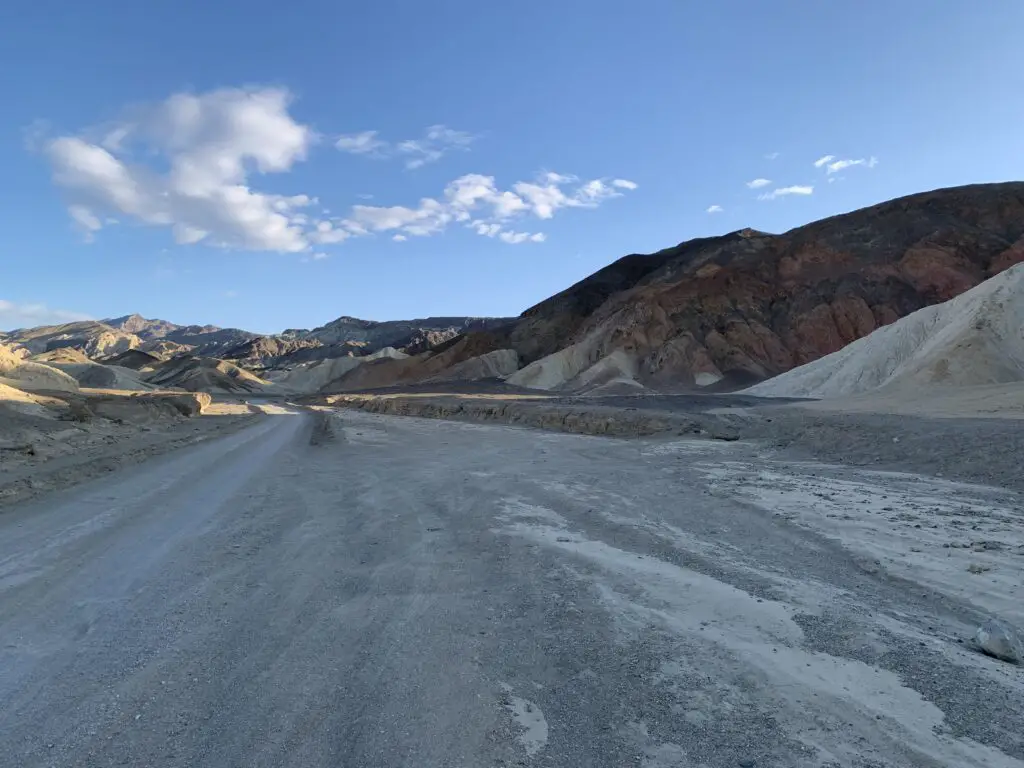
Panamint Valley
This GORGEOUS valley is situated just down the road (about seven miles) to the east of Father Crowley Overlook. This was my absolute, favorite spot in all of Death Valley (that we saw anyway). (We also saw a fighter jet flying through this valley (from the Father Crowley Overlook!)
One weird thing about this valley was that it was SO QUIET! All you could hear was the light breeze ROARING in your ears (and occasionally a fighter jet flying overhead! 😝) We realized what was missing, there were no birds and there weren’t even any bugs buzzing about. I’m not sure if this is unique to Death Valley or because we were there in early March (though a lot of literature on the park talks about the extreme quiet.)
My favorite place in Death Valley (Remember my love of long, empty roads on this trip?)Look at that sky! That is my favorite shade of my favorite color, blue! (Also, this pic is now the background for my work laptop! 😁)This is what a lot of Death Valley looks like. I told you it wasn’t super pretty. 😇
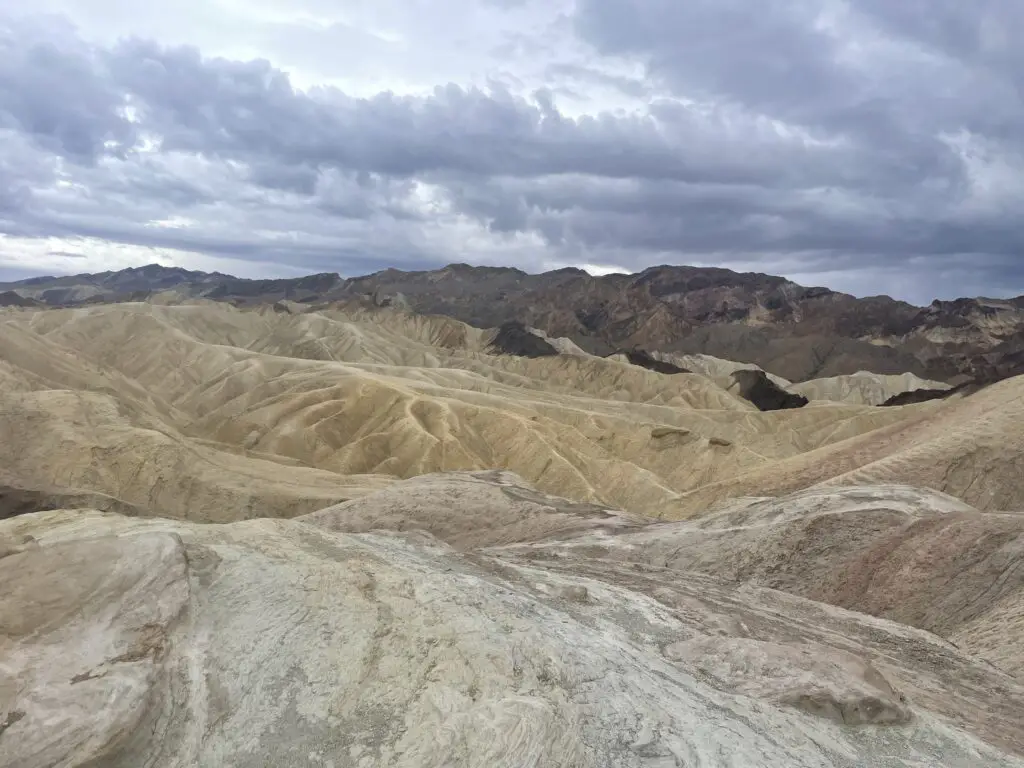
Zabriskie Point:
This is supposed to be a great place for sunrise/sunset with the varying colors in the rocks!
Star Wars Sites in Death Valley National Park
Many people don’t know this but several scenes from the ORIGINAL Star Wars trilogy were filmed in Death Valley! Most were from Star Wars, Episode 4: A New Hope (SW), but a few were also from Episode 6: Return of the Jedi (ROTJ)! Prepare yourself, my nerd flag is about to fly high! 😉
Note: There were no signs or literature that we saw at the actual park that show where filming sites are. There is plenty of info on Google about where to look, then you have to kind of use your imagination to put droids, Luke Skywalker, and Obi-Wan Kenobi there. 😉
Artist’s Palette:
The scene where the Sand People attack Luke in SW…
This area is especially known for the beautiful colors in the gravel
Mesquite Sand Dunes:
The droid scene near the beginning of SW was filmed here (where R2-D2 and C-3po walk through the dunes after their spacecraft, life raft crashes. Jabba the Hutt’s sail barge scenes from ROTJ were also filmed here.)
20-mule canyon:
The scene where the Jawas grab R2-D2 and where Obi-Wan’s home is located/where he meets up with Luke for the first time in SW. Also, the first droid scene from ROTJ was filmed here.
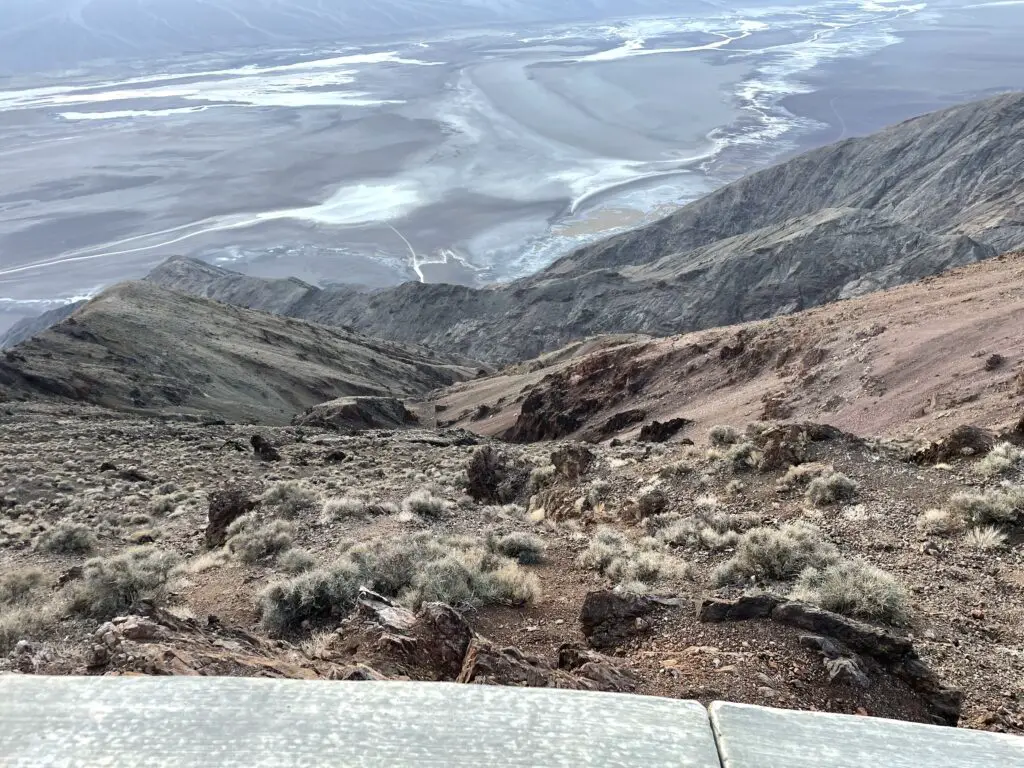
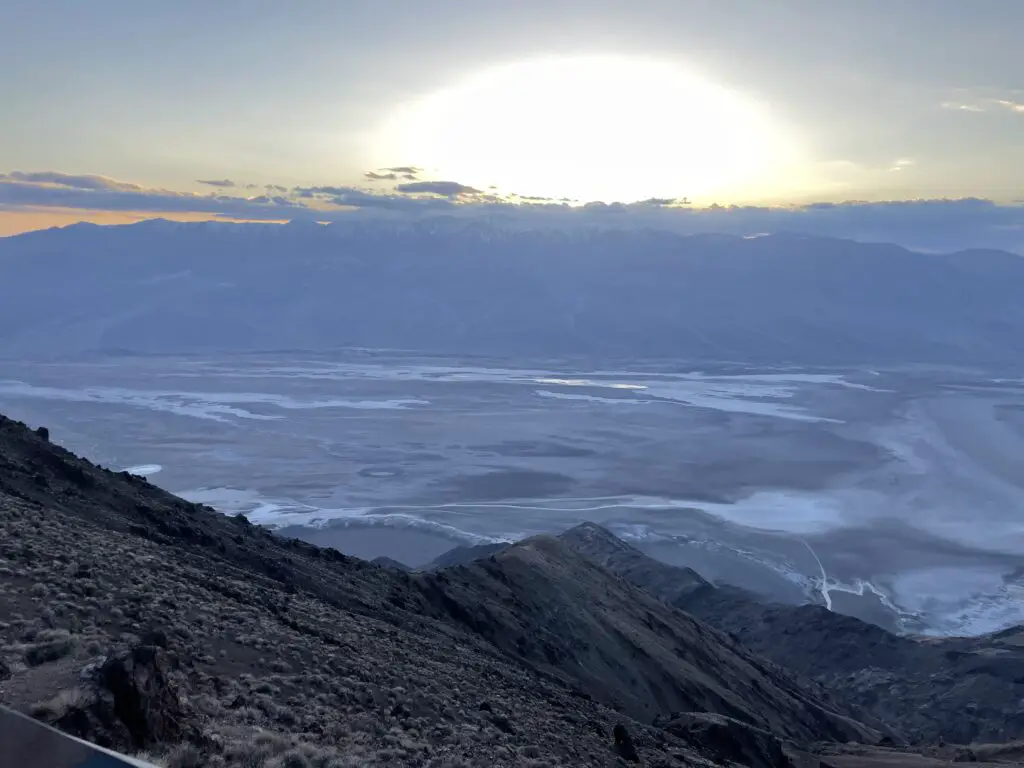
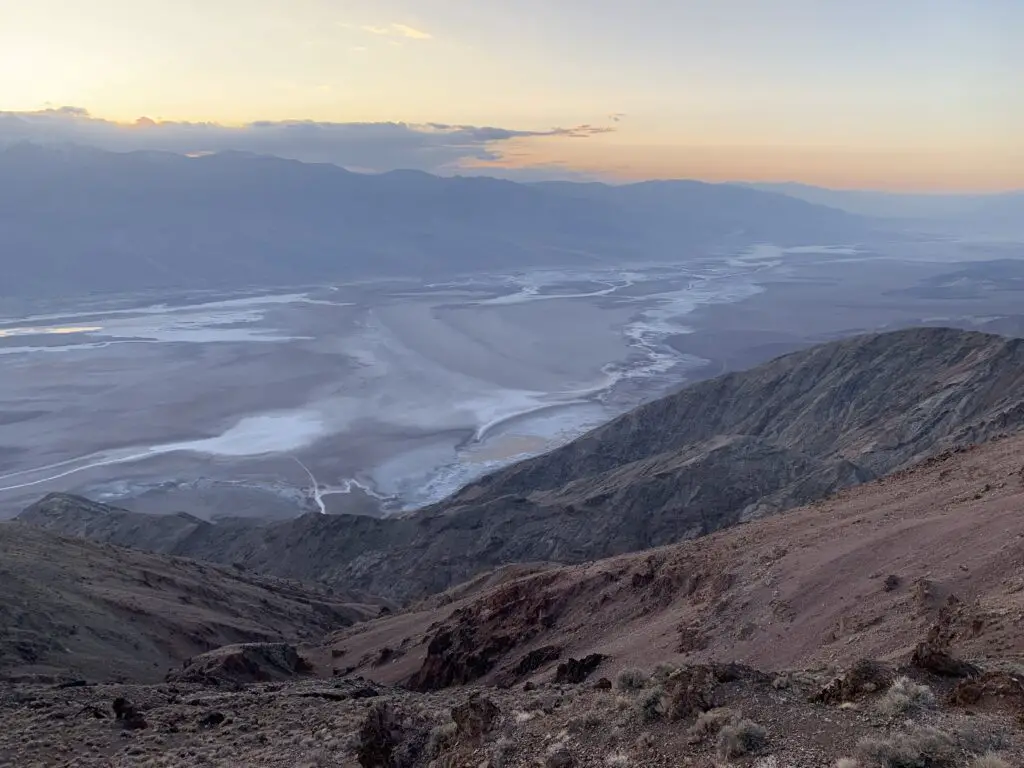
Dante’s Point:
The lookout on top of the Point gives you this view down into Badwater Basin (this was the filming spot for the Mos Eisley Spaceport in SW–“you will never find a more wretched hive of scum and villainy…” 😁)
This is from the top of the mountain I showed the view of from Badwater Basin earlier. Badwater Basin is at the bottom.Sunset over Badwater Basin
I-70 through Utah is GORGEOUS!
On our trip home, to South Dakota, we took I-70 through Utah. I’ve always thought I-70 through Colorado was pretty (and it is!) but the highway through Utah is INCREDIBLE! And literally, anyone can see these views, all you have to do is drive the highway!
This is at a rest stop on I-70!
Incredible views, Hollywood film sites, and potentially VERY hot temperatures. If you’re looking for a unique vacation check out Death Valley (but maybe not in the summer. 🥵)
Have you visited Death Valley? Tell me about your experience in the comments!
Did you enjoy this post? Pin it!
Like what you read here today? Please feel free to leave a comment, like or share this post! Add your email at the bottom of the page, or the sidebar to the right, to be notified when a new post is published. By signing up for the email list, you will also receive a free copy of the Tranquil Trekker’s Top 10 Tips of Trekking Do’s and Don’ts! You can also follow the blog on social media by clicking the links below!
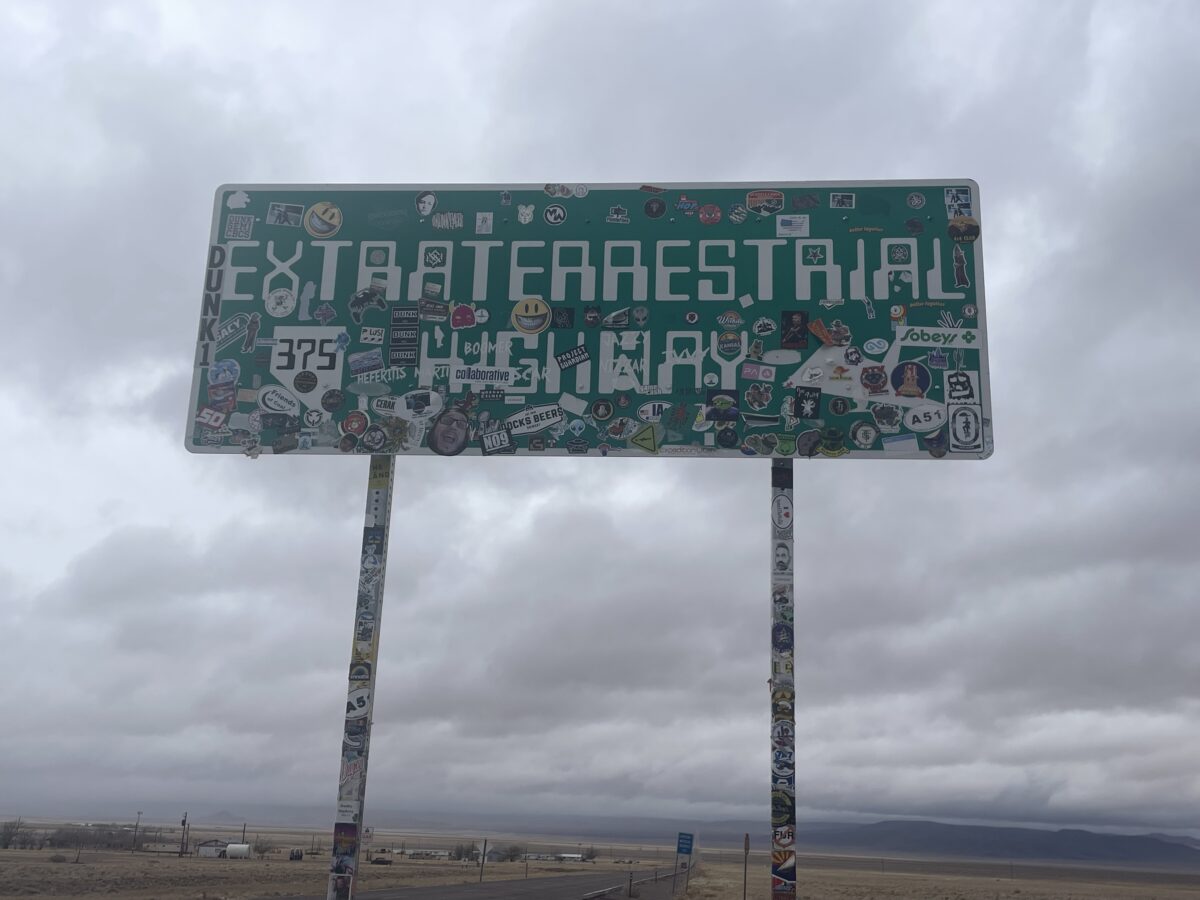
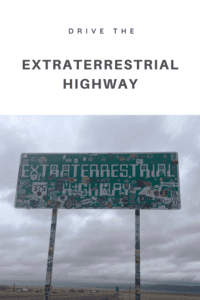
In this post, I detail our adventure through the Nevada desert on the ET Highway!
For me, the Extraterrestrial Highway was the highlight of our Epic, 40th birthday, Spring Break Trip! We actually somewhat designed the entire trip around THIS drive. 😁In fact, I enjoyed the ET Highway so much that I am dedicating an entire post to what amounted to only a few hours of our trip! Mr. Trekker gets nerdy about fighter jets (and the weather 😉), I get nerdy about aliens! 👽 🖖
The Extraterrestrial Highway has been a MAJOR Bucket List item for me for YEARS! It’s all thanks to one of my favorite movies, Paul! Paul is an amazing movie with awesome stars…that you’ve probably never heard of.
The movie came out in 2011 and is stupid-fun. 😁 It isn’t well-known and I have no idea why? It stars Simon Pegg, Nick Frost (if you are familiar with these two actors you can already guess what type of movie it is 😇); Kristin Wigg, Jason Bateman, and Seth Rogen voices the alien. It’s hilarious, fun, and literally one of my favorite movies EVER!
As you may have guessed from the actors, there is A LOT of swearing and adult humor in this movie. Depending on what kind of movies you let your kids watch I’d say it’s older teen-friendly. (It is rated R, for more info and a preview, click here!)
I won’t give away too many details but the basic plot of Paul is that an alien escapes from Area 51, finds a couple of nerds who he needs to help him get home and hilarity ensues. It’s kind of an ET for adults! 😁
Part of what makes the movie fun is that it spoofs so many other great alien movies: Star Wars, ET, Indiana Jones (ok, not an alien movie) Close Encounters of the 3rd Kind, and of course, Alien.
As part of the plot they visit a bunch of the “alien sites” in the desert southwest, and I’ve been wanting to see these since I first saw the movie. This trip was the perfect opportunity! (And it also inspired a book idea!)
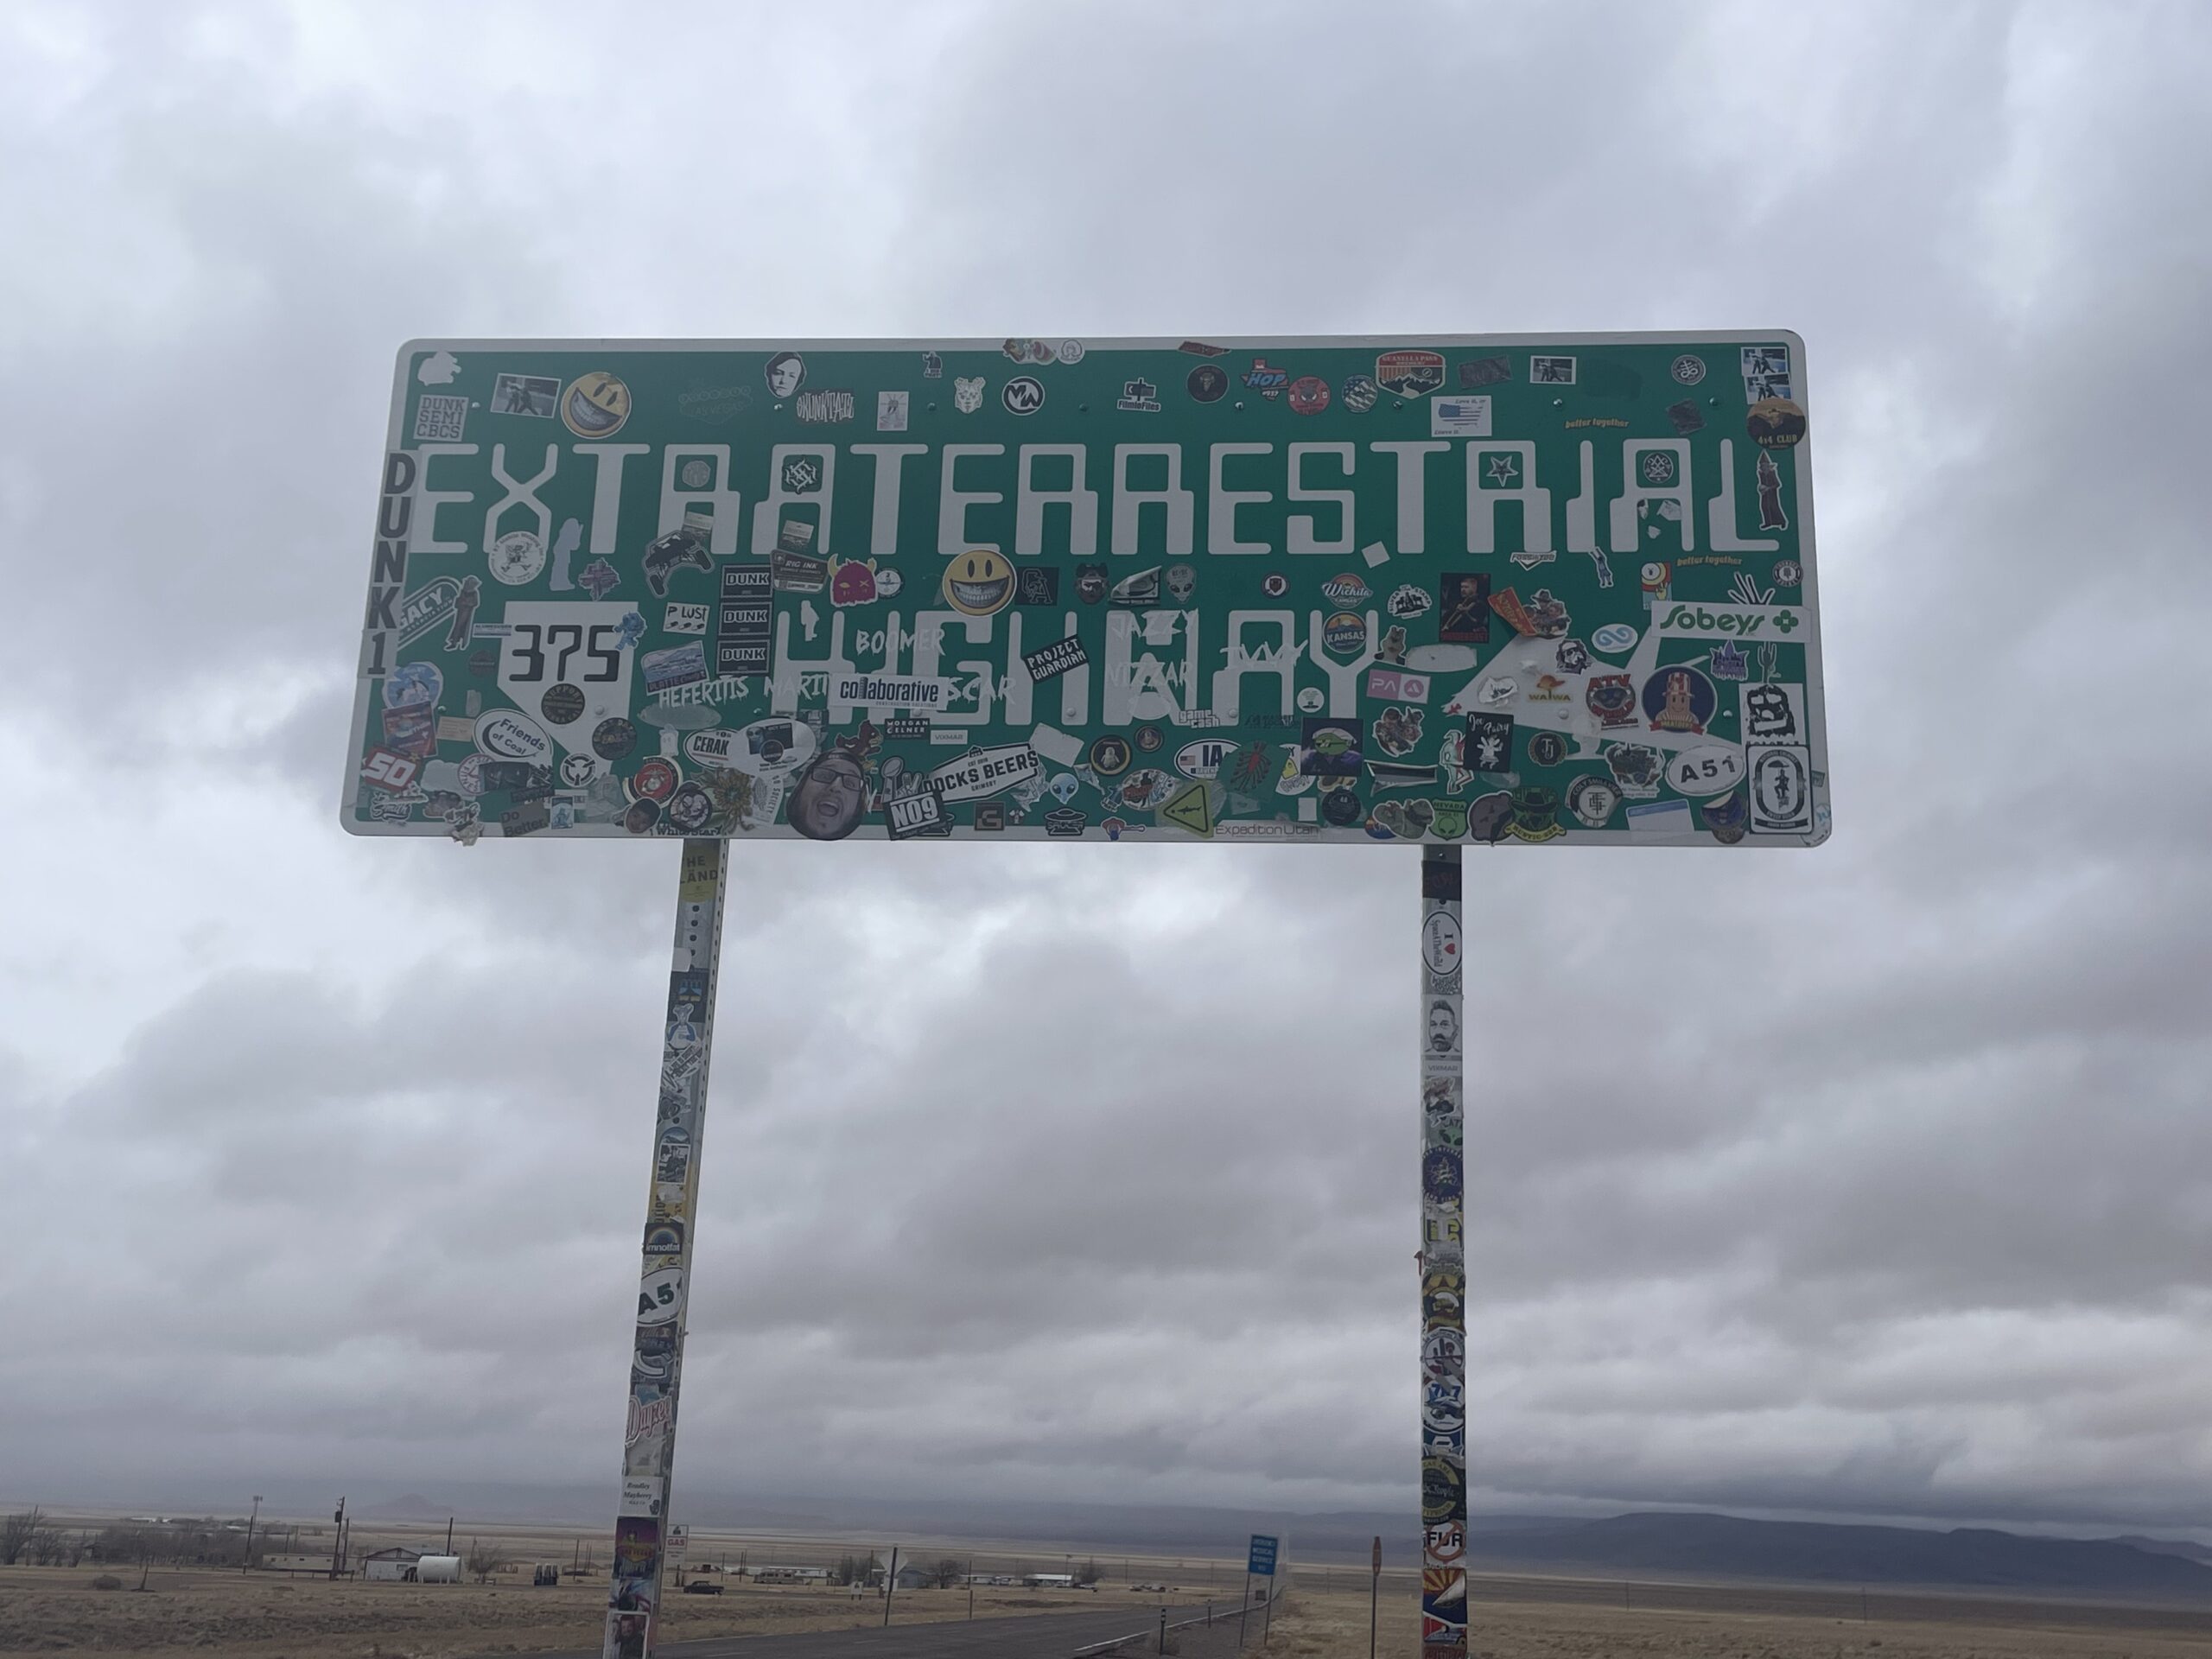
Where is the Extraterrestrial Highway?
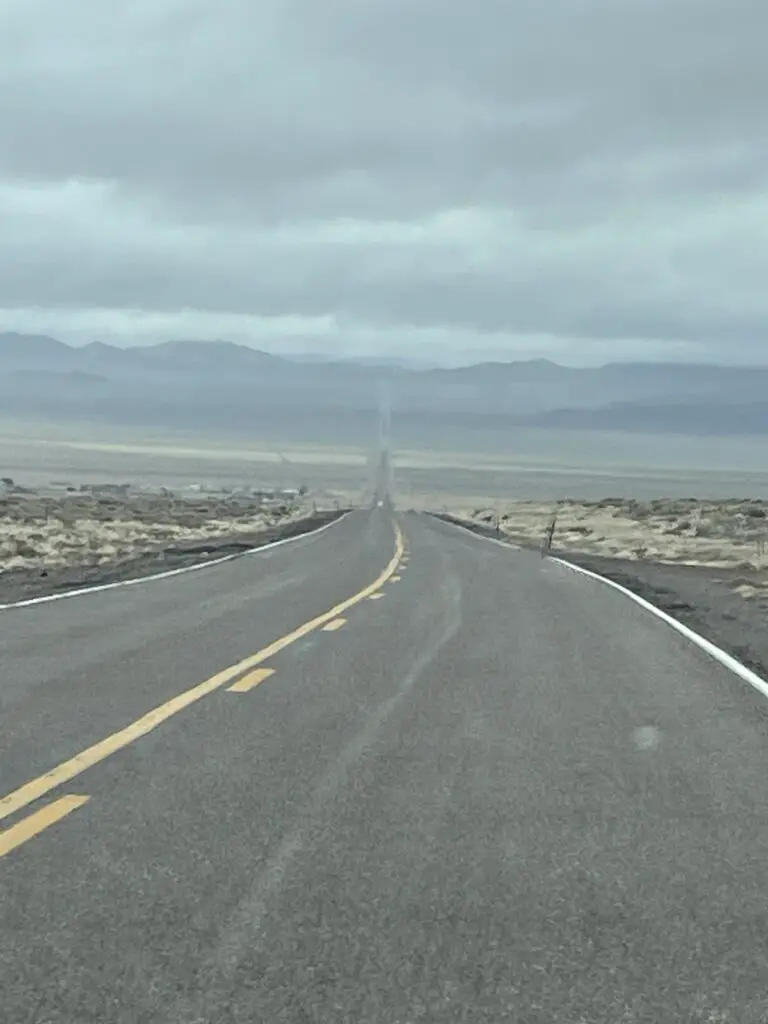
The ET Highway runs along the VERY rural Route 375 between Crystal Springs/Hiko and Warm Springs in southern Nevada!
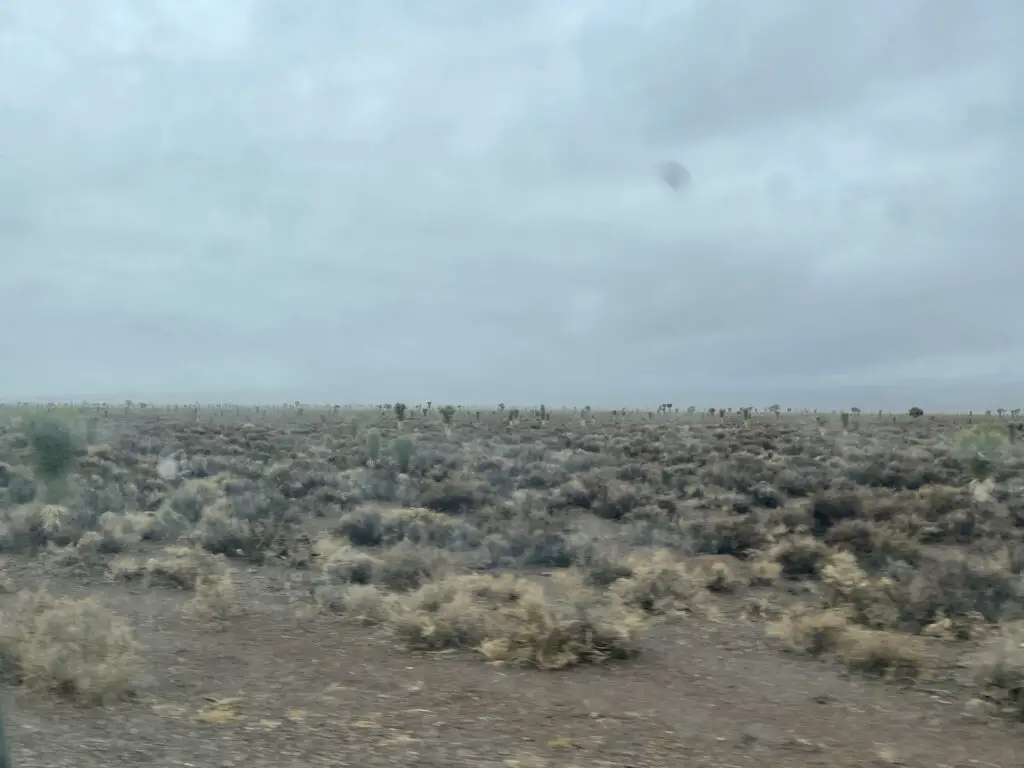
The road got its name because it runs very near the infamous Area 51. It is also located in an extremely rural area where people claim to see strange lights in the dark, night sky. (We did talk to some locals who say they’ve seen weird stuff that they can’t explain.)
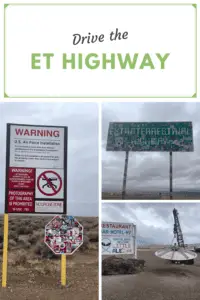
Alien Sites on the Extraterrestrial Highway
All of these sites can be found along and/or directly off of the ET Highway.
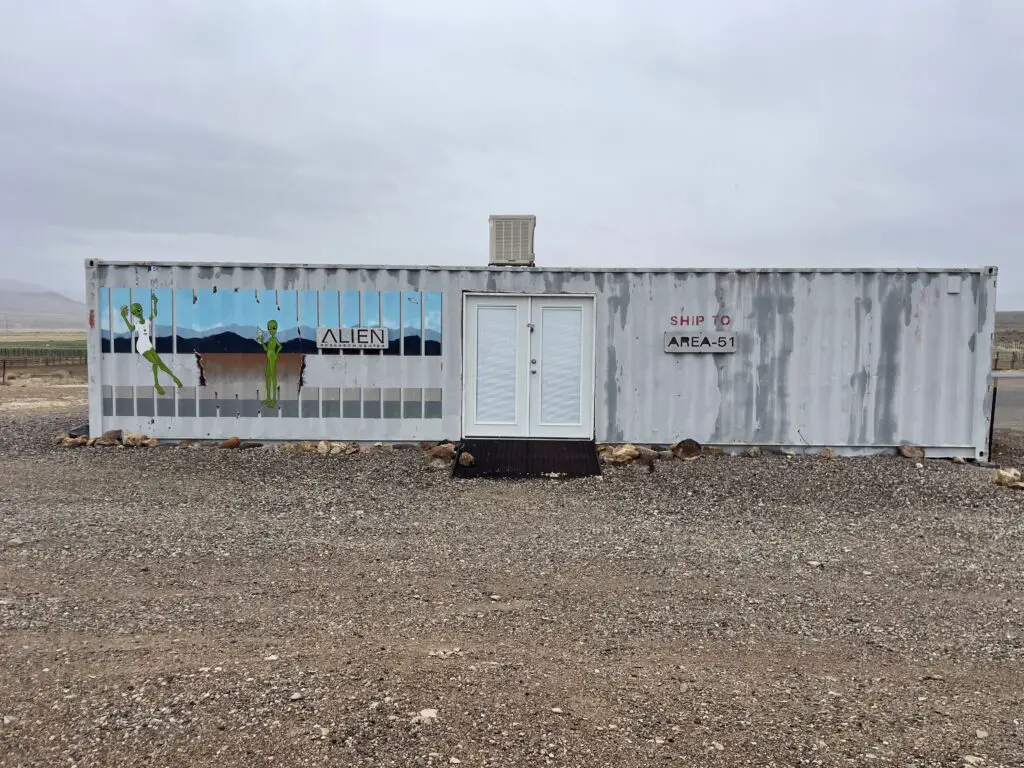
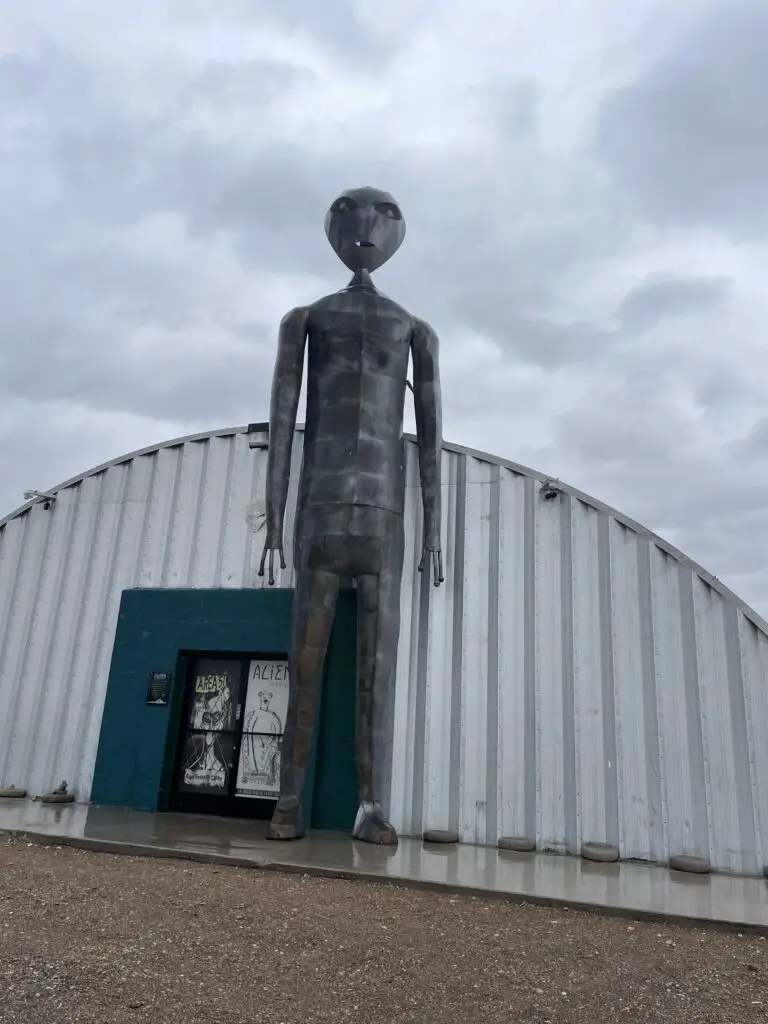
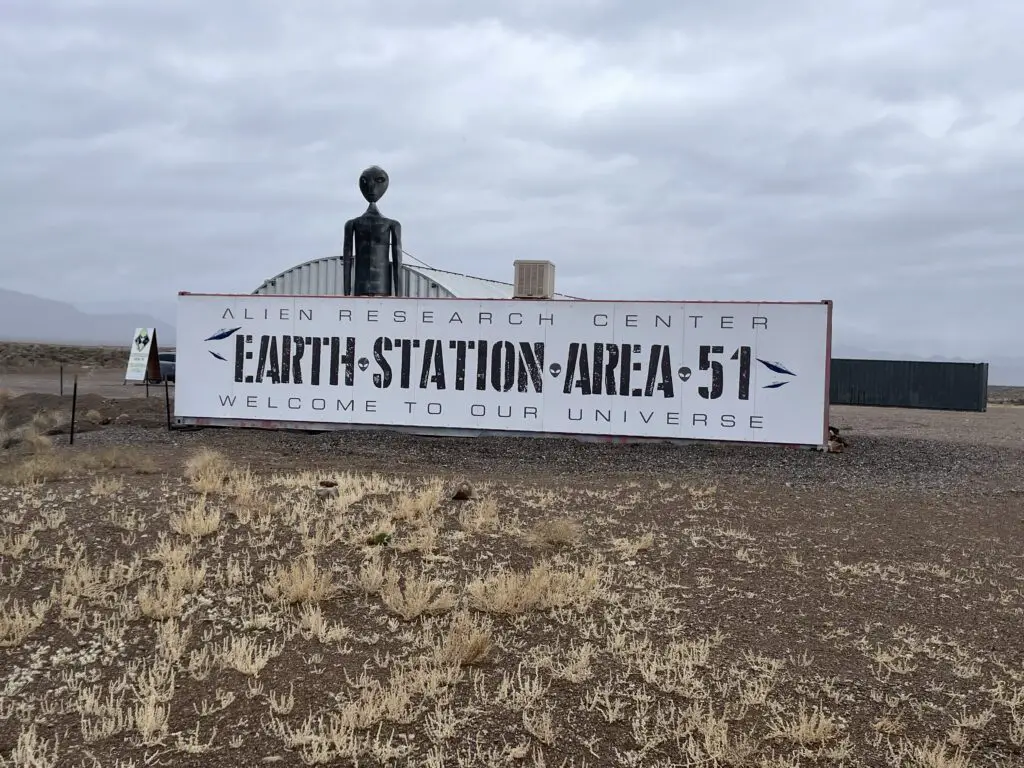
—Alien Research Center: This awesome place is located about seven miles south of Hiko, Nevada, and just to the west of Crystal Springs, on Route 375. (It’s literally the only thing in this spot, you really can’t miss it. 😉) It’s really just a tourist trap situated inside a Quonset hut. That being said, it is a MUST visit for any alien nerd. It is AWESOME! 😁
I love this guy!
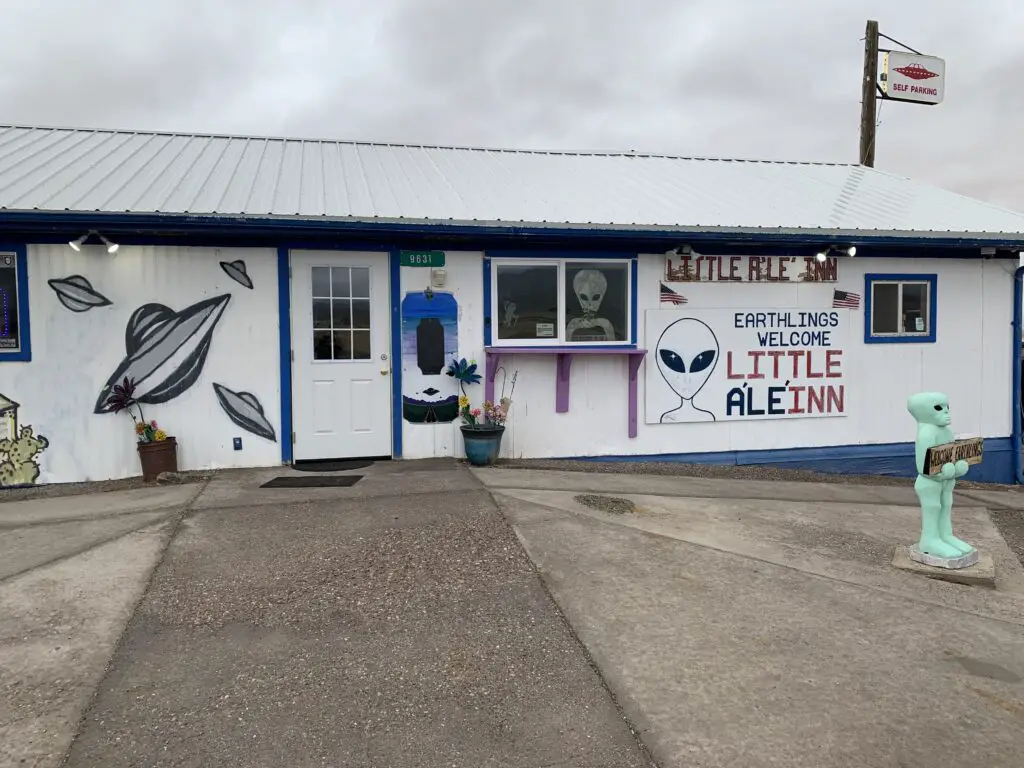
—Little A’Le’Inn: (pronounced “Little Alien”–get it? 😉) This is a small inn and cafe in the TINY “development”–can’t really call it a town–of Rachel, Nevada. It’s a good place for a potty break. The food is also good and the workers offer AWESOME tips on finding Area 51!
Some security guys from Area 51 were eating lunch there when we visited. How do we know they were from Area 51 you may ask? Well, they were wearing military fatigues, and driving creepy-looking, inconspicuous, government trucks (and the only government site for MILES around is, Area 51. 😁)
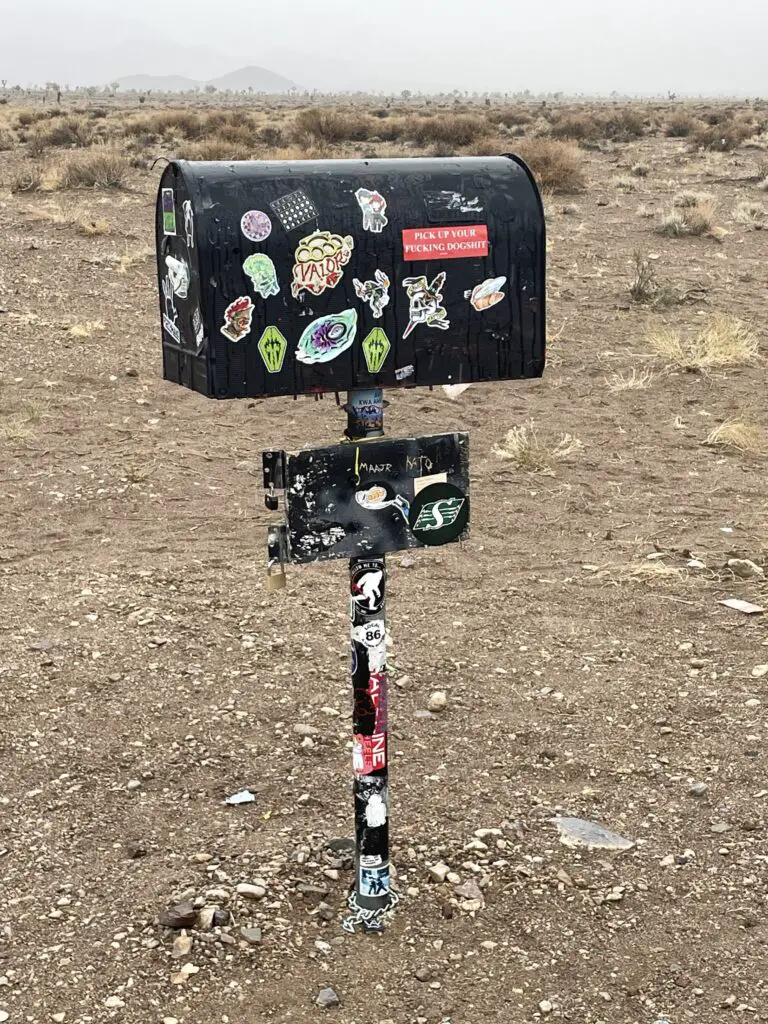
—The Black Mailbox: Rachel, Nevada–this is nothing but a dumb mailbox in the middle of nowhere but it’s fun! People put stickers on it and leave trinkets in it–it reminded me of the UFO Watchtower we visited on another Spring Break trip to the San Luis Valley of Colorado! The story goes that this is where secret, government mail for Area 51 was delivered (though there doesn’t appear to be ANY historical evidence this is true.)
The Black Mailbox
—Area 51 (Dreamland Resort): Has anyone not heard of Area 51? I mean really? Watch the History Channel for five minutes! 😉
Area 51 goes by several names. It is also known as Groom Lake as this was an ancient lake bed. It is factually known to be an area where military aircraft have been tested and military, practice drills still occur (the infamous SR-71 was tested here during the Cold War). If you are lucky you may get to watch (and hear) military aircraft practicing not far above your head!
This page gives you all sorts of info on Area 51, the local area, “unexplained sightings” locally, and possible military traffic you can watch for.
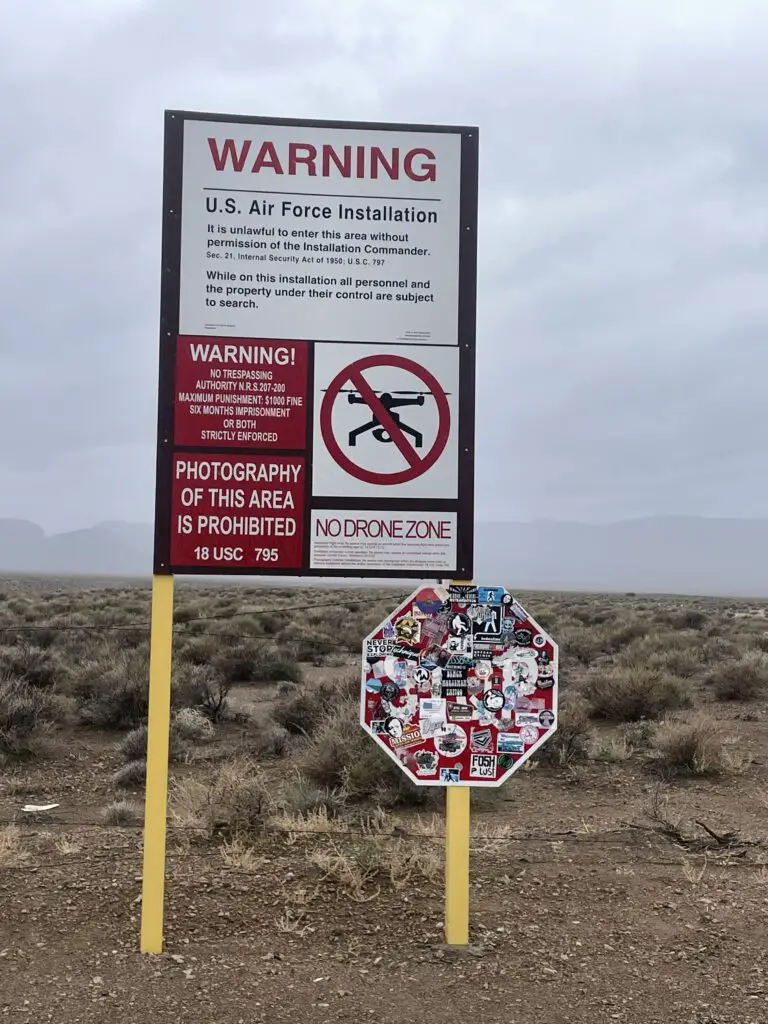
NOTE: This is NOT Area 51. It’s a sign in the parking lot at the Alien Research Center that is supposed to mimic the signs at the actual Area 51.
We “almost” made it to THE Area 51! We were basically right next to it, but since it was actively raining (and had been raining/snowing for several days–because why wouldn’t it, in the desert? 😝) we opted not to take my CRV down the rutted, muddy path to reach the actual site. 😇 We did see the two roads that take you to the infamous locale, though.
Note: if you venture to the site, you will be on a public road. Stop BEFORE you reach the gates. You will likely see security forces but they will leave you alone as long as you remain at a respectful distance. This is NOT a joke. From the stories we heard, these military police DO NOT have a sense of humor. 😝 For good tips on how to lawfully view Area 51 (and how to find it!) talk to the locals at the Little A’lé Inn.
Somewhere out there, amongst the Joshua Trees, IS Area 51.We saw SO MANY views of long, empty roads like this on the trip. I LOVE them! They even inspired a new book idea!
So if you’re in the mood for a Road Trip and some Out-of-This-World fun, check out the Extraterrestrial Highway!
Have you driven the ET Highway? Did you have any otherworldly experiences? Let me know in the comments!
Did you enjoy what you read here today? Pin it!
Like what you read here today? Please feel free to leave a comment, like or share this post! Add your email at the bottom of the page, or the sidebar to the right, to be notified when a new post is published. By signing up for the email list, you will also receive a free copy of the Tranquil Trekker’s Top 10 Tips of Trekking Do’s and Don’ts! You can also follow the blog on social media by clicking the links below!
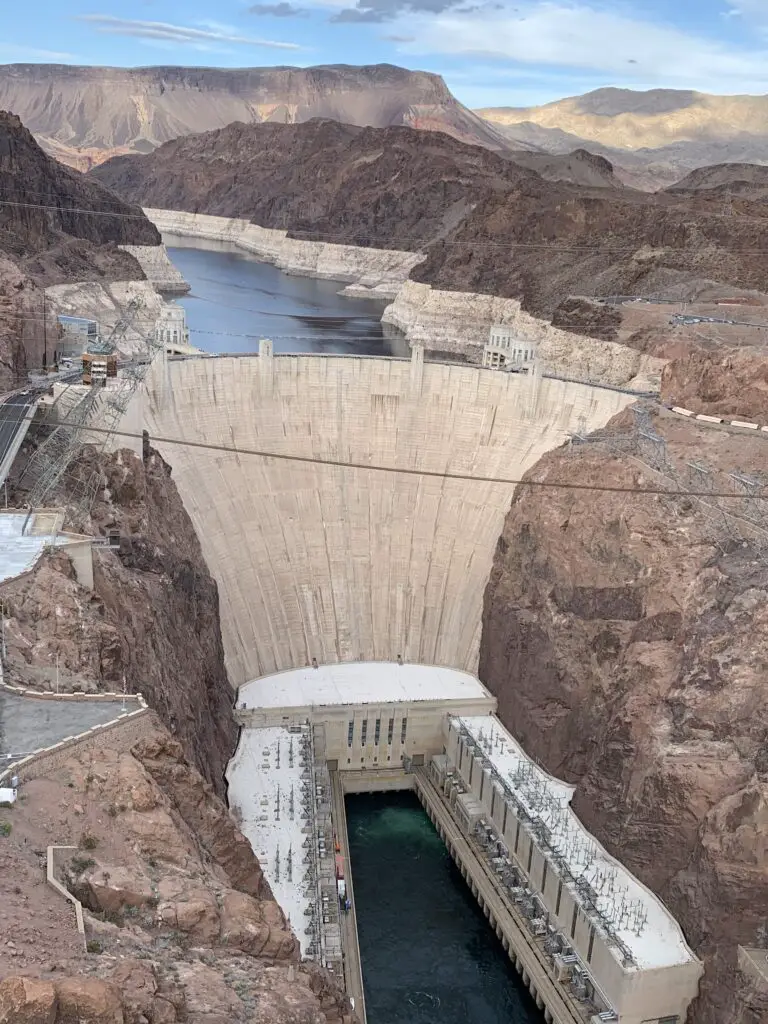
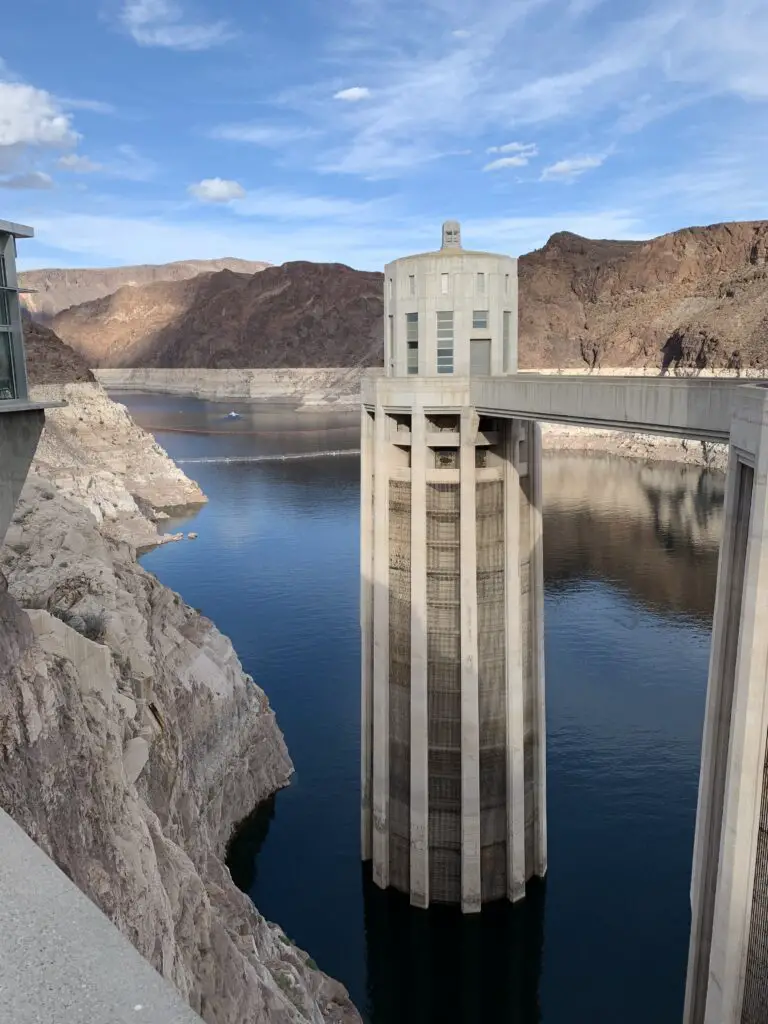
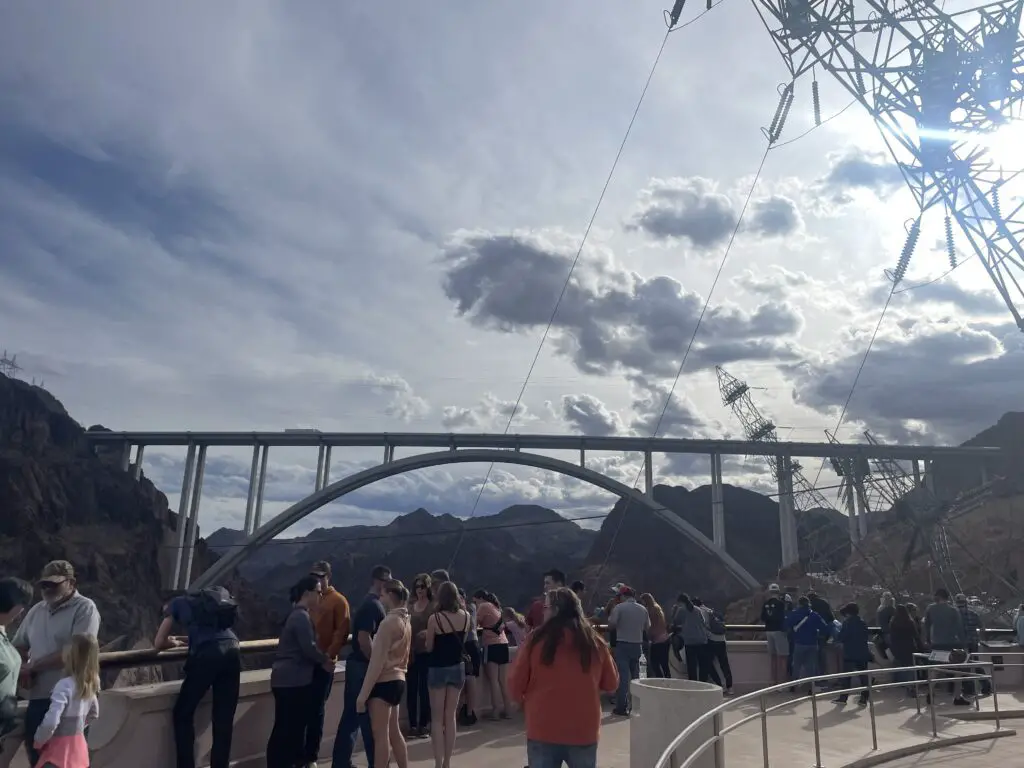
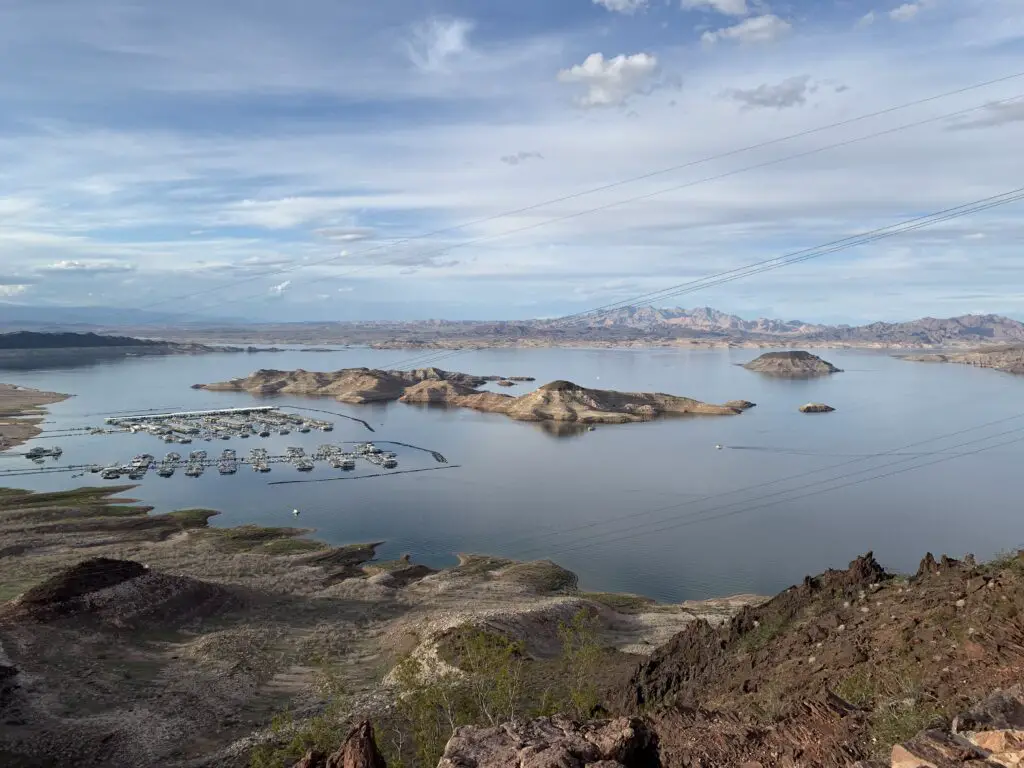
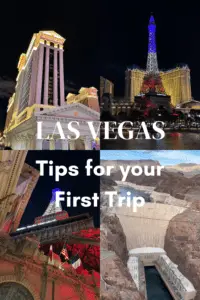
In this post, I detail our 40th birthday trip to Las Vegas and the Hoover Dam!
Mr. Trekker and I enjoyed an epic Spring Break trip to Las Vegas and the surrounding area to usher in both of us turning 40! We drove 3270 miles that week!
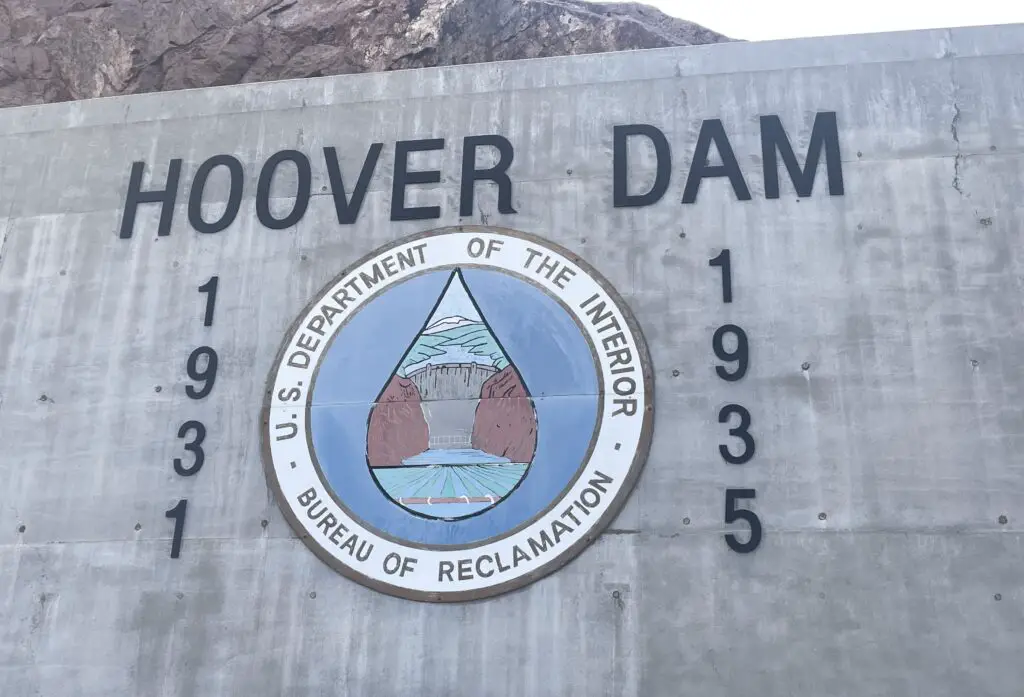
We had to take the LONG way to Vegas to avoid snowstorms on both I-80 through Wyoming and I-70 through Colorado. So, we drove south through Nebraska and the Colorado plains all the way to Trinidad, CO. Then we picked up I-25 to Albuquerque, New Mexico where we joined up with I-40, and took that to US 93, then the Hoover Dam, and Vegas!
This was not a typical vacation for us. The Trekkers are probably some of the worst people to visit Vegas. We barely drink or gamble (we only played–and lost–$5 on this trip! 🤑) and there weren’t any shows we were really interested in. 😂 When we go on trips we spend most of our time in the woods, not showering and using holes in the ground for toilets. 😯 Yet, we still had a pretty good time!
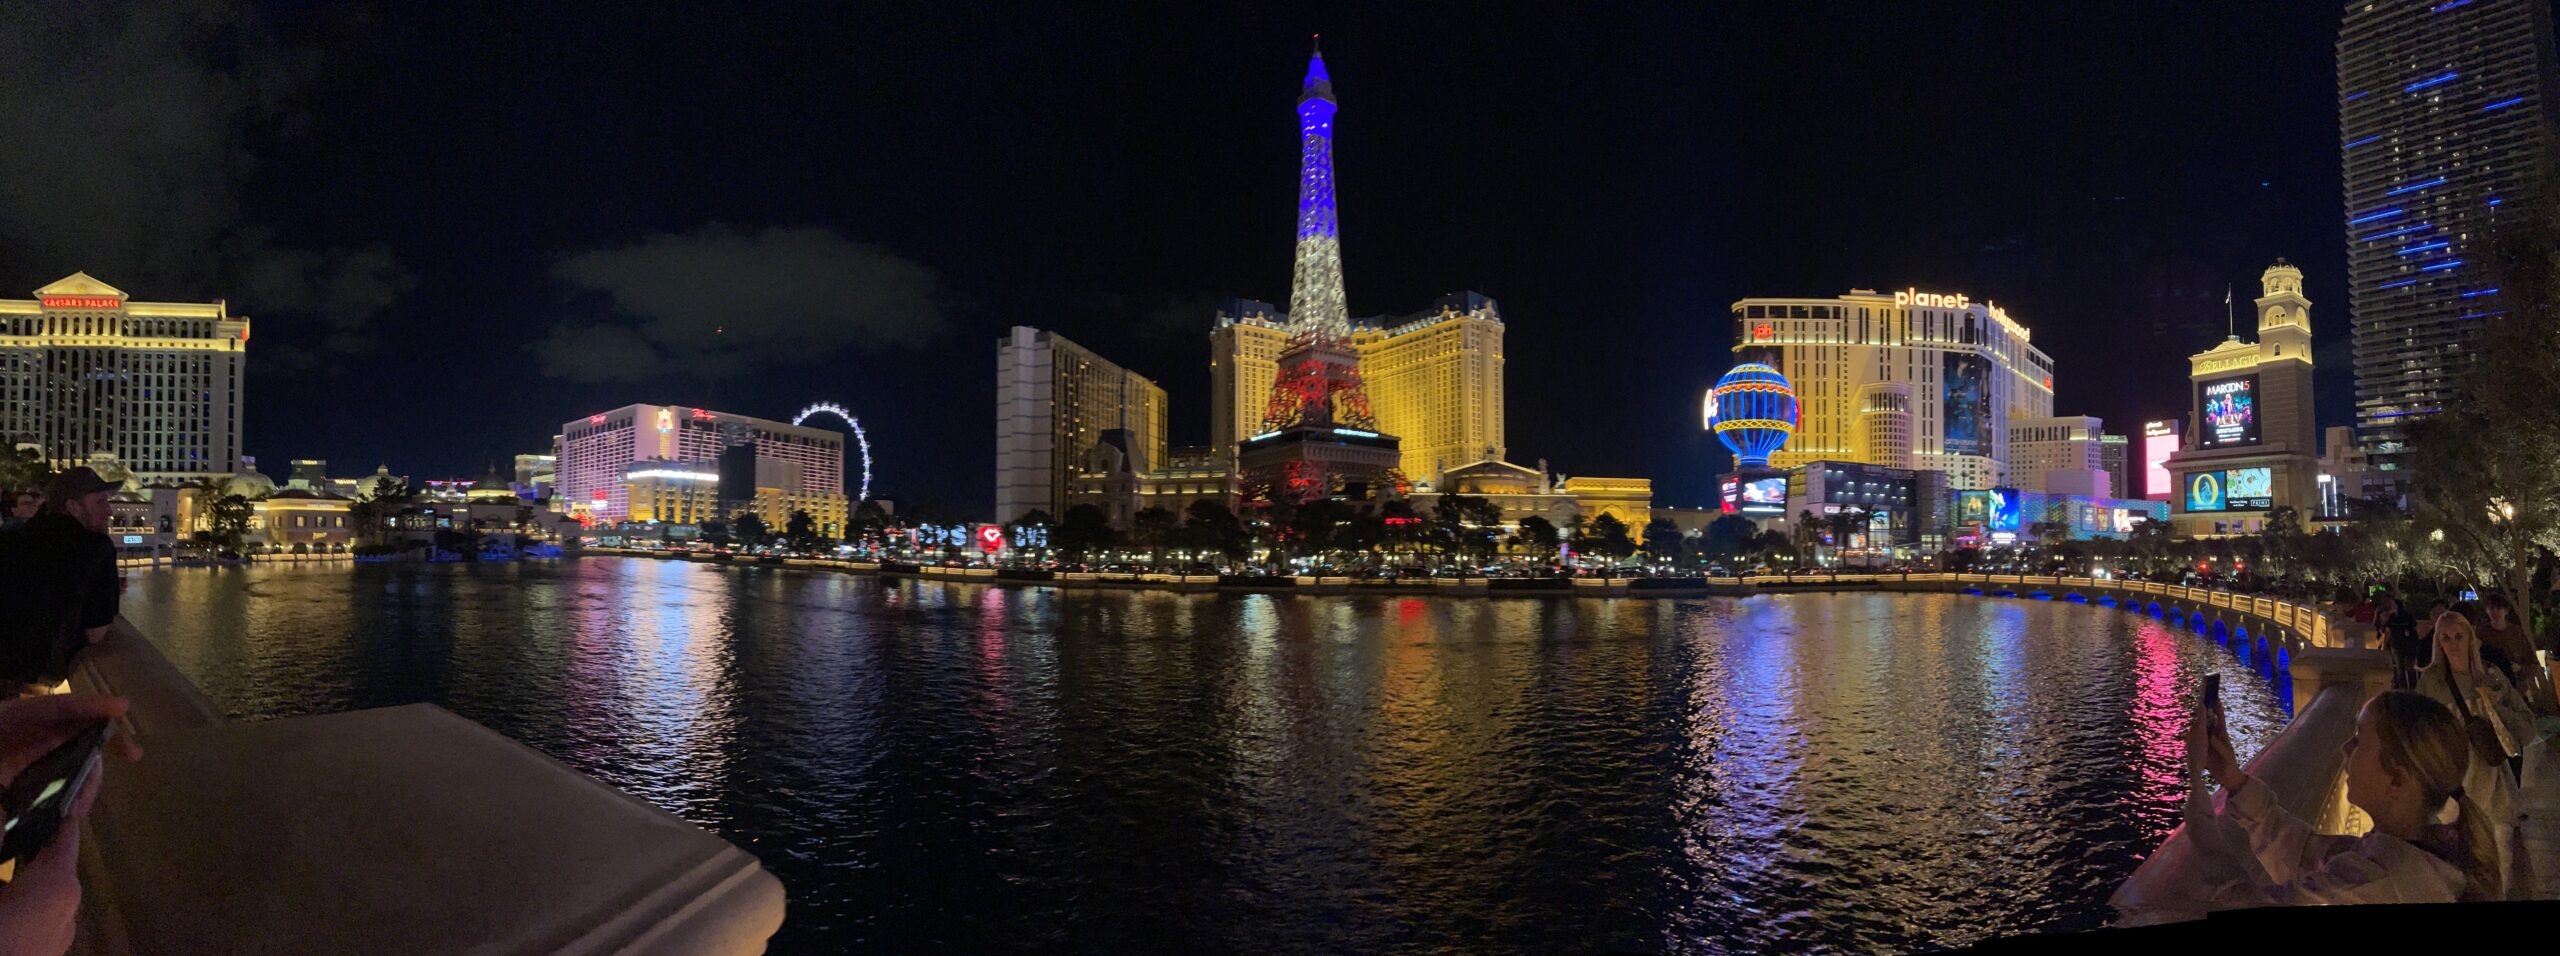
Las Vegas Casinos
We checked out most of the well-known casinos along the Vegas Strip. I was impressed that you can go into all the casinos/enjoy all the entertainment they offer regardless of where you are actually staying. You may have to pay an additional fee of course, but everything is accessible to everyone. Even places like the Bellagio Conservatory were free to everyone! It felt very egalitarian there…
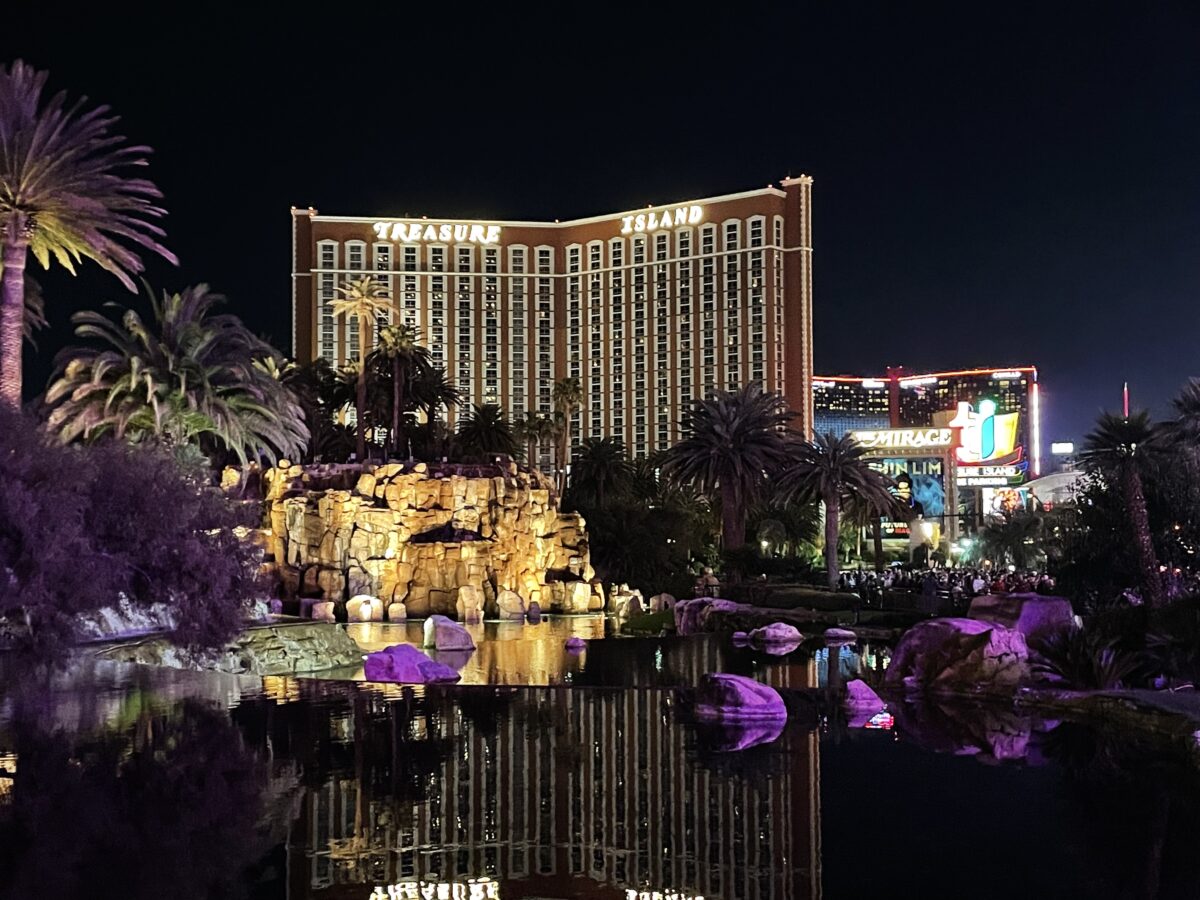
–We liked Treasure Island, it looked like a pirate ship inside. I also liked the pirate ship in the pool out front!
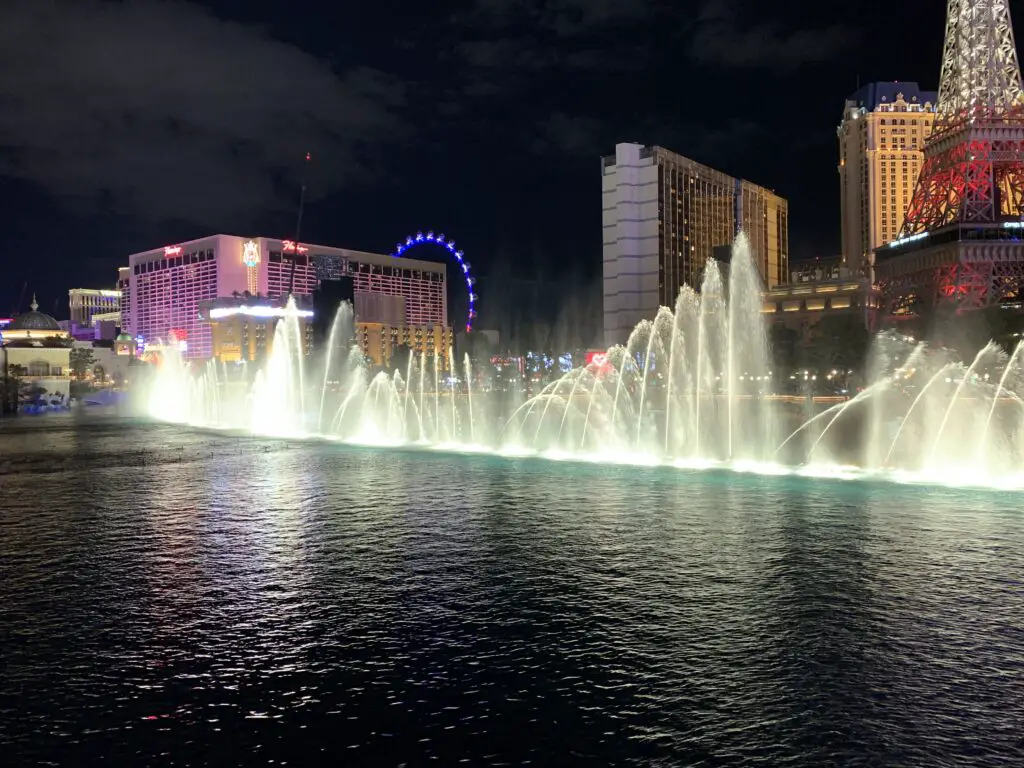
—The Mirage was cool. I especially enjoyed the Volcano show set to music! We LOVED the fountain show and the incredible conservatory at Bellagio!
The fountain show at the pool in front of the Bellagio!
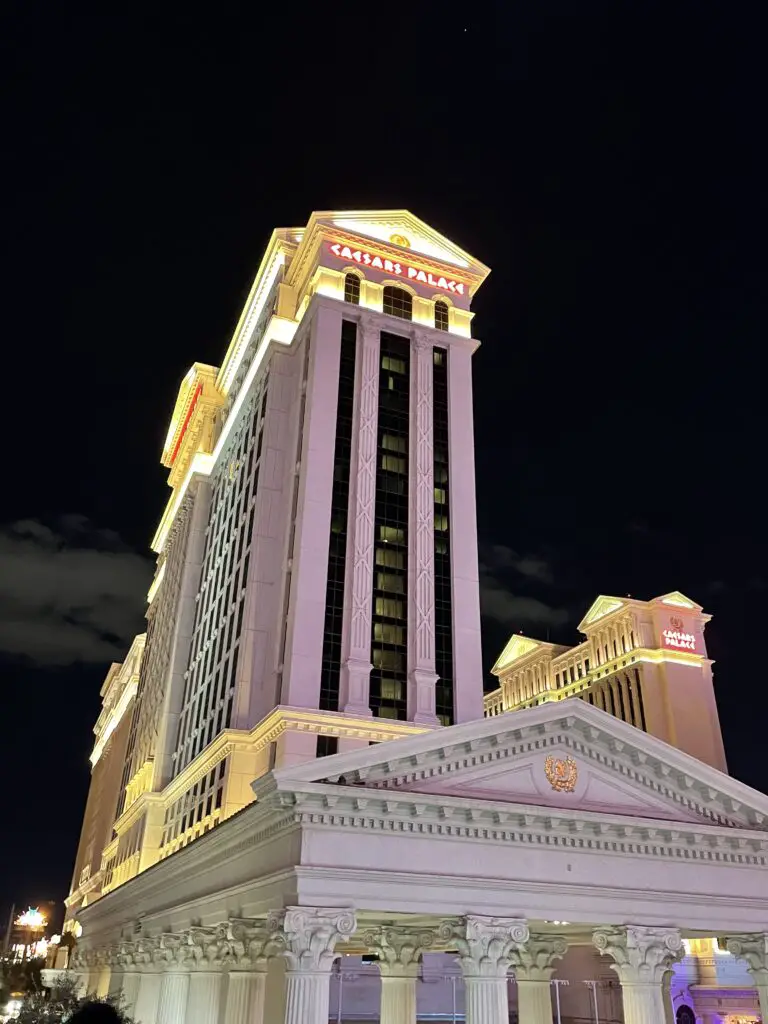
—Caesar’s Palace was very fancy but I found it felt somewhat confining with all the heavy wood and dark carpet/chair coverings.
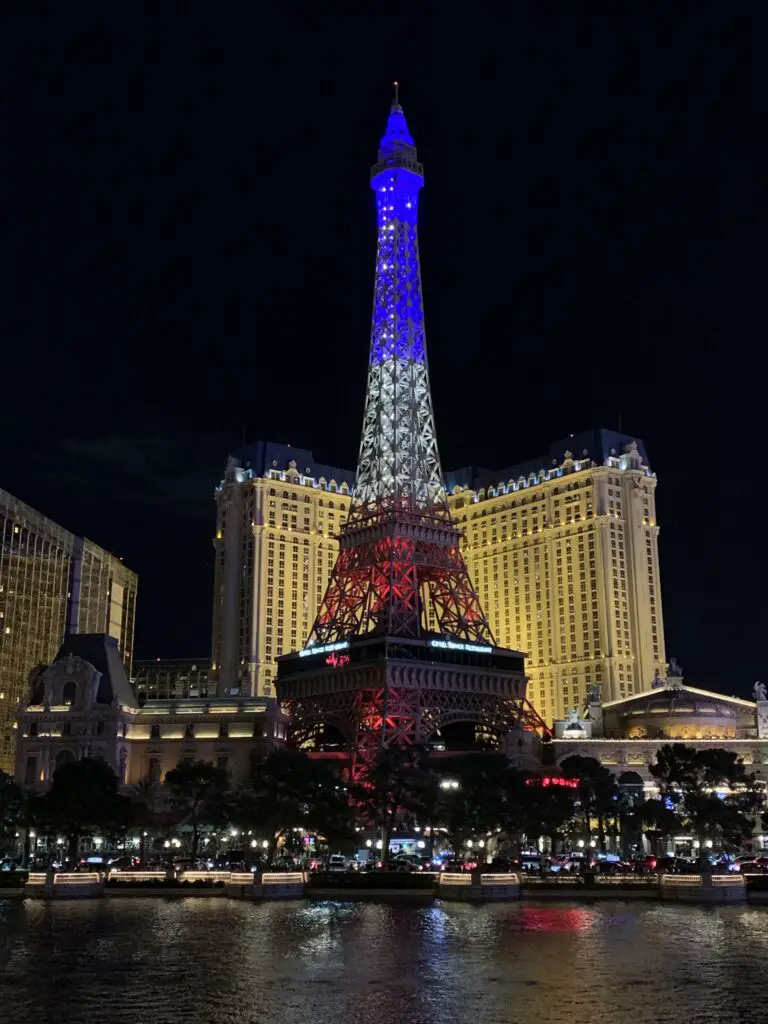
—The Pariswas our favorite, if we ever go back again we’d like to stay there. The actual atmosphere inside was almost calming. The ceiling looked like blue sky with white, fluffy clouds. It was set up like you’re walking through the streets of Paris along shops and restaurants. They even had a city-like walking bridge in the center of the main room!
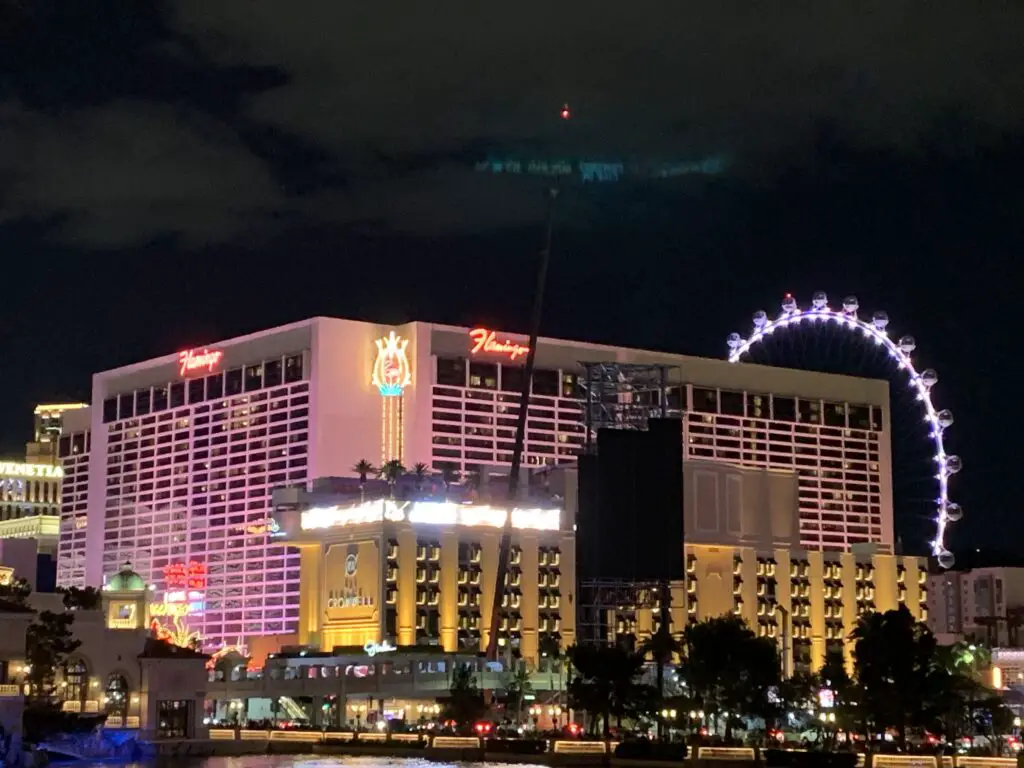
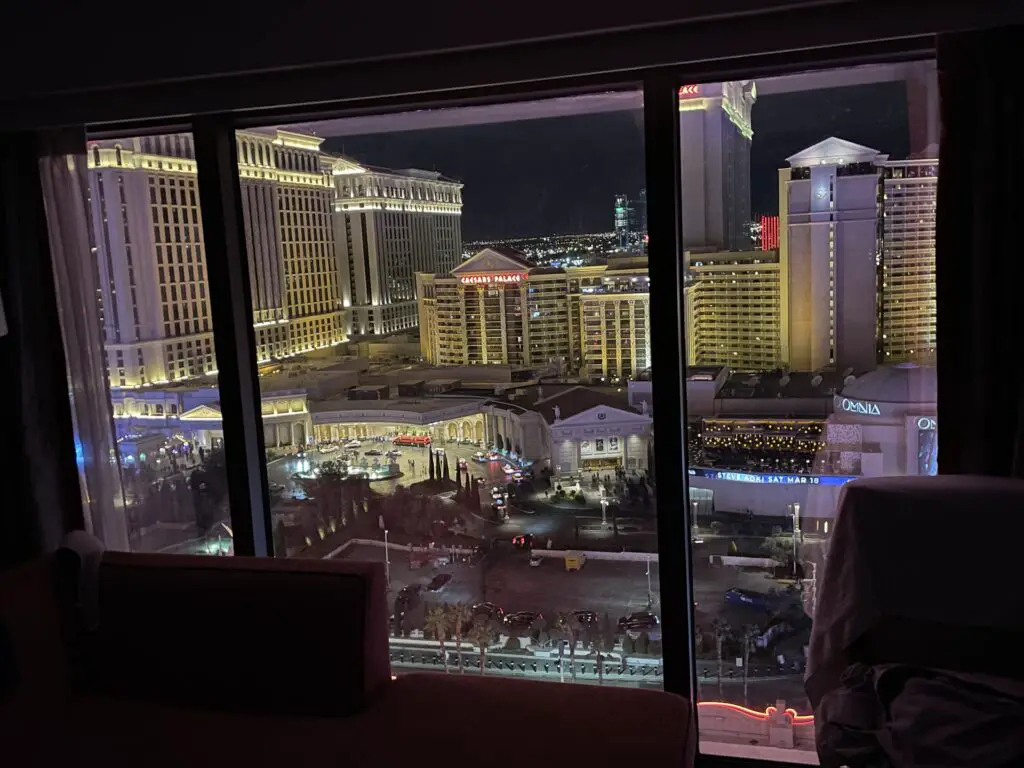
Flamingo Hotel
We actually stayed at the Flamingo. First, the bad news…
Customer Service was difficult to navigate…
The Ceasar’s online/phone customer service that I tried to use before we arrived was TERRIBLE! The woman on the phone could barely give me any helpful information regarding parking. I’d ask her things like where to park and she’d say, “talk to the front desk”. Then I asked her for that number or if she could transfer me and she said “Well, I really don’t know that.” Then she’d follow up with, “Is there anything else I can help you with today?” My literal response was, “Well you haven’t really helped me at all so far!” 😝
To be clear, I ALWAYS strive to treat customer service workers, housekeeping staff, waiters, etc. with the UTMOST respect and politeness. They work hard for little money and they put up with A LOT of crap! (I’ve done LOTS of customer service work.) But it was obvious this woman was just reading from a canned script and didn’t really care if I got the info I needed or not, she just wanted me off the phone as soon as possible. THAT does NOT sit well with me! 😤
Then I did some searching on Ceasar’s website and found a little more info. They even had a phone number for Ceasar’s Parking Customer Service! Of course, when you called that number, it rang a few times and then informed you it was a Ceasar’s nonworking number! 😝
Check-in was difficult to complete
Check-in also SUCKED! When we arrived on-site it took almost an hour to get through the line. We couldn’t get the online check-in to work using our phones. Then they had mostly kiosks available with very few actual humans working. Hardly anyone in line could get the kiosks to work so they had to resort to the humans anyway.
Though I will say, the Customer Service lady we dealt with was WONDERFUL. She was incredibly polite, helpful, and fast. I felt really bad for her. There were A LOT of irritated people and she was doing a great job of helping them. So KUDOS to her. And Ceasar’s, you should be paying her more! Whatever she is making, it isn’t enough!
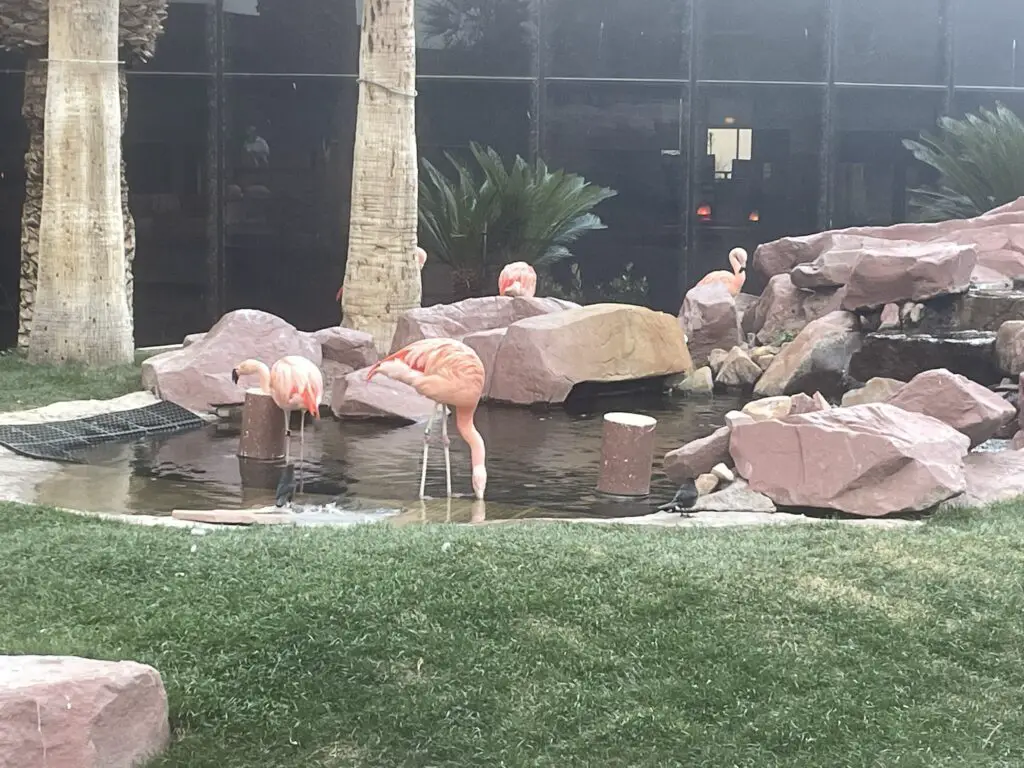
Real flamingoes at our hotel!
The Flamingo was a good, lower-cost hotel option in Vegas!
Now for the good news! Once we finally survived check-in, the remainder of our stay was wonderful! The hotel itself was clean, it provided perfect access to the rest of The Strip, our room was nice and it was relatively quiet (other than our neighbors who seemed to enjoy coming home arguing at 3 in the morning for several nights straight! 😝We considered yelling outside their door when we left at 8 am but thought better of it. 😇 ).
I was actually impressed with the room. The Flamingo is kind of a “budget hotel” on The Strip. I was worried it would feel more like a Super 8 or Motel 6. This felt more like a Hampton Inn. Also, “budget” is relative. We still spent more than $500 for our stay there (three nights, Sunday through Wednesday) but that’s comparable to one night at many of the other hotels.
We used this website to easily check hotel availability in Vegas!
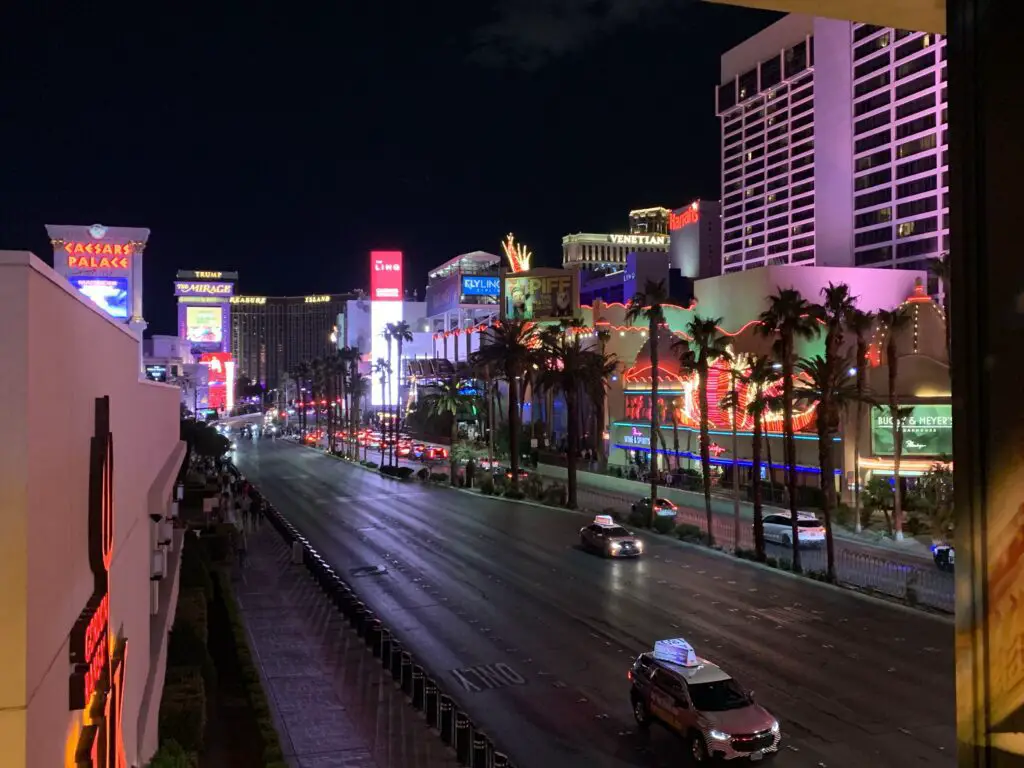
The accommodations at the other hotels are swankier but concerning location, Ceasar’s and Bellagio were literally right across the street from our room (also we paid extra for a room with a LARGE window and a Strip View.)
We spent more than an hour one night just staring out the window in awe, watching the well-oiled machine that is the Ceasar’s Palace limo system parade before us (we were getting Vegas-ed out by that point. 😂–it was impressive though!)
The view from our room!
The Flamingo offers EASY access to EVERYTHING not to mention GREAT views. You could literally park your car once and not have to move it again till you leave. You can walk most places but for things that are further away the Vegas Monorail stops right by the hotel.
My final verdict is that the Flamingo is a good place to stay, especially for first-timers or “normal” people who are trying to stick to a budget. Aside from check-in, I would even consider staying there again.
Tips for Visiting Las Vegas
Author’s Note: This was our first time in Vegas so these tips are intended for first-time visitors. Some of this info may seem rather “duh!” to people who frequent Vegas.
I was a little anxious about this trip. I’ve always wanted to visit Vegas but the Trekkers don’t usually do big cities so I worried we might be biting off more than we could chew. I was actually much more impressed by Vegas than I thought I would be. I could never live there (it’s still a big city). I would also hate the heat and I’d REALLY miss the color green.
On that front, I was very impressed that even in the very nice neighborhoods people didn’t really bother trying to keep grass growing. Obviously, it’s the desert, so they seemed to use desert-friendly plants, rock gardens, patios, turf, etc. I was very impressed that they weren’t wasting such a precious, natural resource (water) on such a futile fight (keeping grass alive where it usually doesn’t grow.)–So good on you Vegas!
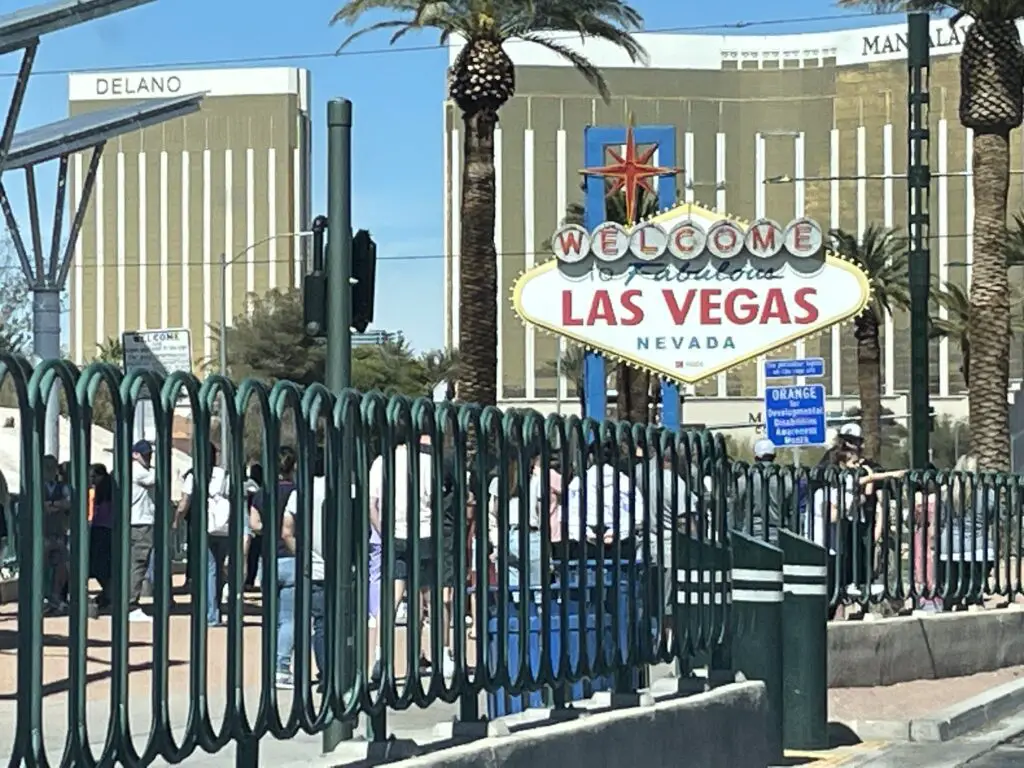
The iconic, Vegas sign!
–Everyone was VERY friendly. I think I was a little intimidated to go to Vegas with the whole idea of rich, High Rollers walking around. I know they’re around and I’m sure there are places you can go that cater to those types of people (note: the Trekkers ARE NOT those types of people! 🤣) but everyone we encountered from fellow tourists to Locals, hotel staff, and servers were all very friendly! It felt like a city in the Midwest–which, shouldn’t really be surprising as Westerners tend to be pretty friendly too.
–It was pretty casual. We didn’t feel out of place at all in our hiking pants when we arrived. 😊 I expected to see lots of dressed-up people so I was pleasantly surprised to see so many people dressed comfortably like we were. I was a little surprised to see the “Sturgis Wear”, as I called them. 😂
So the standing rule in the Black Hills, during the Sturgis Motorcycle Rally, is you have to wear at least “pasties or paint”–mind you, this is in reference to what women wear to cover up their “upper halves.” 🤭
–Depending on what you want to do (and how much you can afford 😇) 2-3 days is a good amount of time to plan to spend in Vegas.
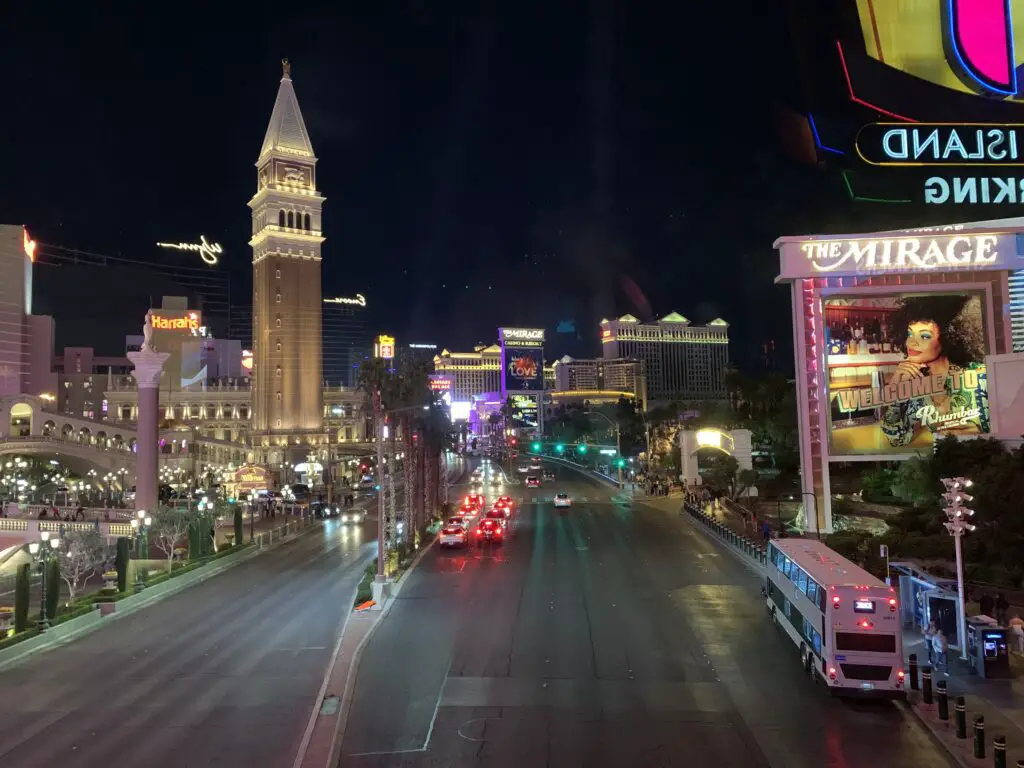
–I would definitely advise you to stay on The Strip if you can. It’s beautiful, you have the iconic, “Strip views” and it gives you easy access to everything available there (food, shows, casinos, people watching.)
Panoramic view of The Strip from the pool at the Bellagio
–Bring comfy shoes! We walked SO MUCH! We were EXHAUSTED every night! It felt like it took 20 minutes just to walk to the car, in the parking garage, that was attached to our hotel! We both lost weight on this trip and it DEFINITELY wasn’t from eating healthy. 😂
–Whoever invented the raised walkways was a GENIUS! People/cars hardly intersect except for the driveways leading into the casinos.
Strip view from one of the raised walkways
A few negatives to be aware of:
It stunk like Pot…EVERYWHERE! 🤥 (All of my 40 years may be showing with this comment but I was a DARE child of the 90s so, deal. 😉) It was kinda weird because we never saw anyone smoking. I lean Libertarian so I’m not looking to impede people doing what they want but holy smokes (no pun intended!) does that stuff STINK! After smelling that for three days, when we actually smelled skunk later in the trip it almost smelled good! 😝–that’s saying something! I will say though, it seems to bother my asthma much less than cigarette smoke, interestingly enough.
–It was PRICEY! I mean, I get that we were on “The Strip” but the thought used to be you could get things like food and hotels cheap in Vegas because they wanted you to spend your money on gambling…NOT SO ANYMORE! $75 for a couple of burgers, some fries, and two milkshakes?! We spent $60+ one morning for Dunkin’ Donuts! I mean COME ON! (To be fair, you go off The Strip just a couple of blocks and prices return to normal.)
“Affordable” Vegas Restaurants
We definitely didn’t need to gamble to lose all our money on The Strip! That being said, below are a few food suggestions that shouldn’t break the bank:
Blueberry Hill: this restaurant has multiple locations around town (all off The Strip.). It was your basic, DELICIOUS, home-cooked meal. I especially recommend them for breakfast. (If it helps, the parking lot was full of local cars–on a Monday morning–which is ALWAYS a good sign!)
Bobby V’s Ristorante: This place was VERY good. I had some of the best cheese ravioli I’ve ever had!
Apparently, this is owned by Chef Buddy Valastro from Cake Boss–and that’s literally the extent of my knowledge on that subject. 😂
Bobby V’s is right on The Strip and not “cheap” but definitely a more “budget-friendly”, option, at least by Vegas standards. (It also offered some great views out the windows!)
Hoover Dam!
The Hoover Dam is a fun, interesting side trip when you’re visiting Vegas!
The Hoover Dam was built in the 1930s to help control the unpredictable floods of the Colorado River. The dam is used for hydroelectric power. There are a variety of tours of the dam offered at various times and days (unfortunately none were being offered while we were there as the elevators were being worked on.)
You can check out the dam’s website for info on tour times, days, and prices (which range from $15 – $30. Typical cost to view the Visitor Center and see the short documentary on the building of the dam is $10).
The dam was cool! We did feel a bit like cattle being herded through a pen as they guided us into the movie theater for the short info movie; then guided us upstairs to the Visitor Muesum portion and viewing decks. 😂 The sites and info were pretty cool though!
The Hoover Dam!
Where is Hoover Dam?
Hoover Dam is located off of US 93, right on the Nevada/Arizona border, about 40 miles east of Las Vegas. It spans the Colorado River in this area.
Pat Tillman Memorial Bridge
Lake Meade
As the Hoover Dam slows the mighty Colorado River, it forms Lake Meade, the largest reservoir in the US. The lake has been incredibly low for the last several years due to drought (like 20 to 30 feet low).
A VERY low Lake Meade!
Watching Fighter Jets at Nellis Air Force Base
Nellis Air Force Base sits just outside of town and Mr. Trekker was very excited to find out some military exercises were being held while we were in Vegas (yep, I married a nerd! 😉) So we spent a sunny, 70-degree afternoon sunning ourselves next to the Vegas Speedway (which sits just across the road from the Nellis runway).
For some insider info on when you can catch planes flying at Nellis, click here!
WORD OF WARNING! You will be perfectly fine if you sit and watch planes on the roadside next to the Speedway. DO NOT sit across the road next to the Base fence! Technically both are portions of a public road, but the Base Police are known to get cranky if you sit on their side. (Just a tip to help your trip stay fun and uneventful. 😇)
So, take a trip to check out the Vegas Strip, the Hoover Dam, and maybe watch some fighter jets roar through the skies above you!
Have you been to Vegas or the Hoover Dam? Tell me what tips you would have for first-time visitors in the comments!
Did you enjoy this post? Pin it!
Like what you read here today? Please feel free to leave a comment, like or share this post! Add your email at the bottom of the page, or the sidebar to the right, to be notified when a new post is published. By signing up for the email list, you will also receive a free copy of the Tranquil Trekker’s Top 10 Tips of Trekking Do’s and Don’ts! You can also follow the blog on social media by clicking the links below!
In this post, I highlight our visit to Garden of the Gods, Pikes Peak and other locations around Colorado Springs!
The Trekkers’ enjoyed another lovely, anniversary trip to Colorado! This time we visited the Front Range, the one part of the state we haven’t spent much time in. We also knocked several long-held items off our bucket list: the National Museum of World War II Aviation, Garden of the Gods, and Pikes Peak!
I find I have a love-hate relationship with Colorado. I LOVE visiting there! If I had to pick one state in the entire nation to vacation the rest of my life it would be Colorado, hand’s down. It’s just SO beautiful and there are so many things to do!
That being said though, to actually live in Colorado, you have to either choose a crowded, big city or live isolated, in the middle of nowhere, with weather that can be incredibly harsh for much of the year. *sigh*
We’ve spent extensive time in the northern, western, southwestern, and southeastern portions of this awesome state. The only place we hadn’t really visited was the Front Range. So, as Mr. Trekker had a work meeting there on our anniversary weekend we thought we’d make use of the opportunity! (I’m very blessed that, as long as I have internet access, my flexible job allows me to work from hotel rooms in random states. 😉)
On the drive down to Colorado Springs we opted for the “Nebraska Route” from the Black Hills. This is a great drive to avoid traffic but it includes a unique trip through the nuclear missile fields of far southwest Nebraska and far northeast Colorado. The dichotomy between these weapons of death and destruction that sit just off the road and the relatively benign, green energy, wind turbines that watch over them from the nearby hills is enough to leave a chill down your spine. 😮
The Colorado Front Range
For those who don’t know, the Front Range is essentially a conglomeration of cities and towns that run for almost 200 miles, north-to-south, along I-25 and the “front range”–hence the name–or eastern border, of the Colorado Rockies. This region basically runs from Fort Collins to Pueblo and includes the other highly populated areas of Boulder, Colorado Springs, and, of course, Denver.
I get why people like to live on the Front Range. It’s got many cultural opportunities, easy access to shopping (basically anything you could want), and easy access to incredible sites and all the outdoor activities you can think of at any time of the year.
Now for the bad news…THERE ARE SO MANY DAMN PEOPLE!!! 😝 This region is one of the fastest-growing areas of the country (not to mention one of the most expensive places to live) and it keeps expanding! This equates to it being incredibly busy and hectic. 🤯 Sorry kids, there is nothing tranquil about the Front Range. 😂 The Trekkers have spent too much time living in small-town America to handle all that craziness. Plus, you’re talking to the girl who grew up in rural Indiana and liked it! FAR too many curses emit from my lips when trying to navigate Front Range traffic! 😂
So, Colorado, while I love you and will forever enjoy vacationing there, I don’t EVER see myself living there! 😇
Pikes Peak
The summit of Pikes Peak sits at over 14,000 feet of elevation. This is VERY high! The air is much thinner up here and the oxygen level is much lower. Do not be surprised if you feel short of breath, dizzy, and lightheaded with even the most minimal exertion. Also, if it is summertime know that you can get sunburned FAST at this altitude.
Altitude sickness can occur at this height (though it is rare if you are only visiting for a short time and is a larger concern if you are heavily exerting yourself.) Symptoms to watch for include nausea, dizziness, and shortness of breath. In most cases, these will subside once you return to a lower elevation.
How do I visit Pikes Peak?
There are multiple ways to visit Pikes Peak! You can drive your car, ride a shuttle bus, hike up or take a train! Details on each option are below:
Drive the Pikes Peak Toll Road
You will find the entrance to the Pikes Peak Toll Road off of US 24, about 10 miles west of Colorado Springs. There is a fee to reach Pikes Peak using this route. Please note: this mountain is VERY popular. So much so that during the summer season (Memorial Day through the end of September) you must have a reservation to drive all the way to the summit. (You can purchase tickets online here.) There are also guided tours during the summer months that allow you to let someone else drive.
This picture speaks for itself 😁
Click here for a video of our drive UP Pikes Peak and here for a video of our drive down the mountain (complete with police escort! 😮
Ride Bikes up Pikes Peak Highway
You can also ride a bike to the top of the mountain via the Pikes Peak Highway. Fees and reservations still apply.
This wouldn’t be my preferred method as you’re sharing this winding, narrow road with about a million of your closest friends (mostly tourists who are trying to navigate large machines that could easily kill you while they’re looking around at the amazing views)…but you do you. 😉
A panorama, 14,000 feet up from the top of Pikes Peak!
Hike Pikes Peak
If you’re the ambitious type, you can hike the Barr Trail up Pikes Peak. This would be an incredibly scenic way to see the mountain although I’ve heard the hike is not for the faint of heart. We didn’t do it but I know some people who have, successfully. For a first-hand account of the hike up Pikes Peak please see the blog of a friend of mine!
This hike is no joke! The trail is 13.5 miles long (one-way) and gains more than 7000 feet in elevation! It also reaches heights of over 14,000 feet and much of it is incredibly exposed both to sun and thunderstorms that can easily pop up.
Many people like to hike up the mountain and then take the Pikes Peak Cog Railway on the return trip (see below)!
Garden of the Gods as seen from Pikes Peak!
Pikes Peak Cog Railway
One of the more popular ways to reach the summit is via the cog railway. This way someone else gets to “drive” (while you enjoy the views!) and you don’t have to deal with the crowded roadway on the way up! Click here for information on getting tickets for the cog railway!
This hazy pic is of the east side of the Sangre de Cristos mountains as seen from Pikes Peak. We visited the west side for the Festival of the Cranes earlier in the year!
Police escort off Pikes Peak (not a joke!)
We had quite the adventure as we left the summit of Pikes Peak. The story starts when we initially arrived at the gated entrance to the attraction around 2 in the afternoon. (That gave us a good four hours to enjoy the views and get down before dark.) When we paid our entrance fee the “gatekeeper” told us THE MOST IMPORTANT THING to know is to keep the vehicle in low gear on the return trip to save the car’s breaks. Note: he stressed the importance of this tip and this is the ONLY THING he told us.
We reached the summit and went to check out the summit building when I realized this was the place that had the awesome donuts I had heard so much about! (They ran out WHILE we were standing in line! 😝) We also saw some signs that said the summit building closes at 4:00 pm.
That’s fine, we’re used to buildings in our local national parks closing around that time, it just means you need to find an outhouse if you need a bathroom after that time…or so we thought. Note again, this is the ONLY thing the signs or the brochure said–stay with me, this is important for later in the story…
A short while after leaving the summit we stopped at a pull-off where a number of people had stopped and were hiking around. We wandered down the trail and around the corner of some rocks for about 20 minutes. We were upwards of 14,000 feet in altitude so we weren’t moving very fast 😇 but it was a nice day and we were enjoying our walk.
As we were returning to the car we noted the pull-off was now completely devoid of other vehicles save the ranger truck with flashing lights sitting next to our car (and another police truck sitting on the road just before the pull-off.) We talked to a VERY friendly, older-gentlemen ranger who said they close the summit at 4 in hopes everyone will be off the mountain by 5-ish–ok, we were heading down anyway. Note: Again, this is ALL he said…
So we left the pull-off and got back onto the road with a friendly wave to the police truck who then…basically escorted us, with flashing lights, off the mountain. We thought, “wow, they aren’t kidding about closing the summit!” (That’s way more intense than we’re used to but whatever, we were on our way down anyway.)
I wasn’t kidding about the police! 😂
About halfway down the mountain, we came to another pull-off where several vehicles and people were still milling about. As we slowed down for the curve we were finally able to make out the muffled noise coming from the police truck behind us…”I told you all once before, if you’re not off the mountain by 5 pm it’s a $1000 fine!” (For the record, he was talking to the people still parked, not us.)
I should also note, it was currently about 4:55 and there was NO WAY we were going to make it off the mountain in the next five minutes! Fortunately, he was busy with those people and ignored us and we merrily continued our way down the mountain with no further problems.
Really…not kidding! 😂
With the rise in van life and “stealth camping,” not to mention the winding road, steep dropoffs, and large wildlife (and close proximity to a large, metro area) I can understand their desire to keep people off the mountain in the dark. However a few suggestions come to mind…
–Maybe…when a park gate employee tells you “THE MOST IMPORTANT THING TO REMEMBER…” three hours from park closing time, he should actually mention that there is a closing time? (Especially if there is a monetary fine involved?…)
–Maybe…on the brochures for the park (not to mention the signs on actual park buildings) they note this closing time as well?…
…these are just suggestions, of course. 😝
***I should also note we visited the park in mid-October, during the summer I believe it closes at 8…JUST MAKE SURE YOU’RE OFF THE ROAD BY THEN! 😝***
Colorado is one of my favorite places to visit. Click here for more posts on this awesome state!
Garden of the Gods
Garden of the Gods has to be one of the more famous “city parks” in the country! The main entrance is off 30th street on the west side of Colorado Springs (though there is another entrance on the south side from US 24.) Also of note, this park is open till around 9 each night, and there were signs ALL OVER clearly stating this…*ahem* 😝
Garden of the Gods with Pikes Peak looming overhead (to the right)
This is a great attraction! It’s found right in town so it’s easy to access for Out-of-Towners or Locals wanting a nice place to exercise or walk the dog. Rock climbing is also available at certain places within the park. Another cool thing about Garden of the Gods…admission is completely FREE!
Sign at the front of the park
This locale is characterized by a number of red rock formations rising from the dry, green scrubland that is common in this part of Colorado.
This formation is called the “kissing camels” (though from this distance it looks more like a sea turtle. 😝)Up-close view of the “kissing camels”. We thought they looked more like a calf laying down, kissing a vulture with its wings folded…but whatever. 😝
The Twins!
View from “the window” between the Twins!
National Museum of World War II Aviation
While in Colorado Springs we also checked out the National Museum of World War II Aviation which is located just north of the Colorado Springs Airport, just off Aviation Way (which you can reach from US 24). This was a nice museum! As Mr. Trekker is a history nerd with a special fondness for WWII airplanes, he especially enjoyed it. 😉We had enjoyed the Pikes Peak Regional Air Show earlier that fall and many of the warbirds from the museum were featured there.
Places to Eat near Colorado Springs
As usual, we found MANY good places to eat on our trip:
Paninos Restaurant–this is a cute, casual, family-owned, Italian restaurant. We enjoyed a lovely anniversary dinner there!
Louies Pizza –a tasty, casual place for pizza in a convenient, downtown location
Sandy’s restaurant –Sandy’s has one of the best breakfasts in Colorado Springs! This place has HUGE portions! (I’m not kidding. However much you think you should order…halve that!) You usually need reservations on weekends but the hostess liked us when she found out we were from South Dakota (a certain blogger may have noticed her Mt. Rushmore shirt and casually mentioned we live near there. 😇) She convinced some friendly locals to let us sit with them at their long table.
This is one thing I LOVE about traveling, road trips, and taking the scenic route. It often means you get the privilege of visiting local places. You never know when an opportunity will arise to get to know a complete stranger in a comfortable environment. I LOVE interacting with Locals like this! You never know what you’ll learn from their experiences!
Josh & Johns –this was a yummy place for a sweet, ice cream treat
Uncle Sam’s Pancake House, Manitou Springs —nothing fancy here but the staff were friendly and attentive and the breakfast was DELICIOUS!
Hoosier Pass, Colorado
After our weekend in Colorado Springs, we needed to get to Boulder as Mr. Trekker had some work meetings there. Normal people would have driven straight up I-25 from “the Springs” to Boulder…but who wants to be normal?!
Instead, the Trekkers opted for the VERY scenic route! We took US 24 west to Hartsel, then took Route 9 across one of our favorite parts of Colorado, South Park (click here for a video of another drive through South Park!) We even got to check out the ghost town of Alma and the skiing area of Breckenridge on this jaunt!
Leave it to the Trekkers to willfully and eagerly turn what could have been a simple, 90-minute drive into an incredibly beautiful, 8-HOUR tour of central Colorado on a GORGEOUS fall day…ALWAYS take the scenic route!
As part of our scenic drive, we randomly stumbled upon a place I’ve had on my list to visit…that’s right, the Hoosier finally found Hoosier Pass! 😁 😁 😁 (Not sure why the two signs differ by three feet in their claim of how high it is? 😮)
This is a great little park situated in north-central Colorado, around 15 miles west of Golden and about 17 miles north of I-70. It’s got a number of trailheads that can be accessed from various areas, but the main entrance/ Visitor Center can be found on Route 46 about five miles east of the t-intersection with Route 119.
Golden Gate Canyon State Park offers around 35 miles of trails in addition to other activities (like camping) and it’s dog friendly! If you want to know how the park gets its name, visit in late September/early October, it was beautiful!
Can you see why they call it “Golden Gate”?
There are places in the park that also offer incredible views of the surrounding Rockies, including some of Rocky Mountain National Park’s most notable peaks (the national park sits only about 60 miles to the north).
The tall peak to the right is the infamous Longs Peak in Rocky Mountain National Park!
Places to Eat in Boulder
We were only in Boulder a few days but we enjoyed a few yummy places to eat there, as well!
Sweet Cow –another yummy place for a sweet, ice cream treat!
Chez Thuy–this is a great, Vietnamese restaurant. I highly recommend their Pad Thai!
So if you’re visiting the Colorado Front Range, be sure to check out Garden of the Gods, Pikes Peak, Golden Gate Canyon State Park, and the National Museum for World War II Aviation! You’ll be glad you did!
Have you visited any of these locales? What did you enjoy most? Tell me about it in the comments.
Did you enjoy this post? Pin it!
Like what you read here today? Please feel free to leave a comment, like or share this post! You can also follow the blog on social media by clicking the links below!
This website uses cookies to improve your experience. We'll assume you're ok with this, but you can opt-out if you wish. Cookie settingsACCEPT
Privacy & Cookies Policy
Privacy Overview
This website uses cookies to improve your experience while you navigate through the website. Out of these cookies, the cookies that are categorized as necessary are stored on your browser as they are as essential for the working of basic functionalities of the website. We also use third-party cookies that help us analyze and understand how you use this website. These cookies will be stored in your browser only with your consent. You also have the option to opt-out of these cookies. But opting out of some of these cookies may have an effect on your browsing experience.
Necessary cookies are absolutely essential for the website to function properly. This category only includes cookies that ensures basic functionalities and security features of the website. These cookies do not store any personal information.
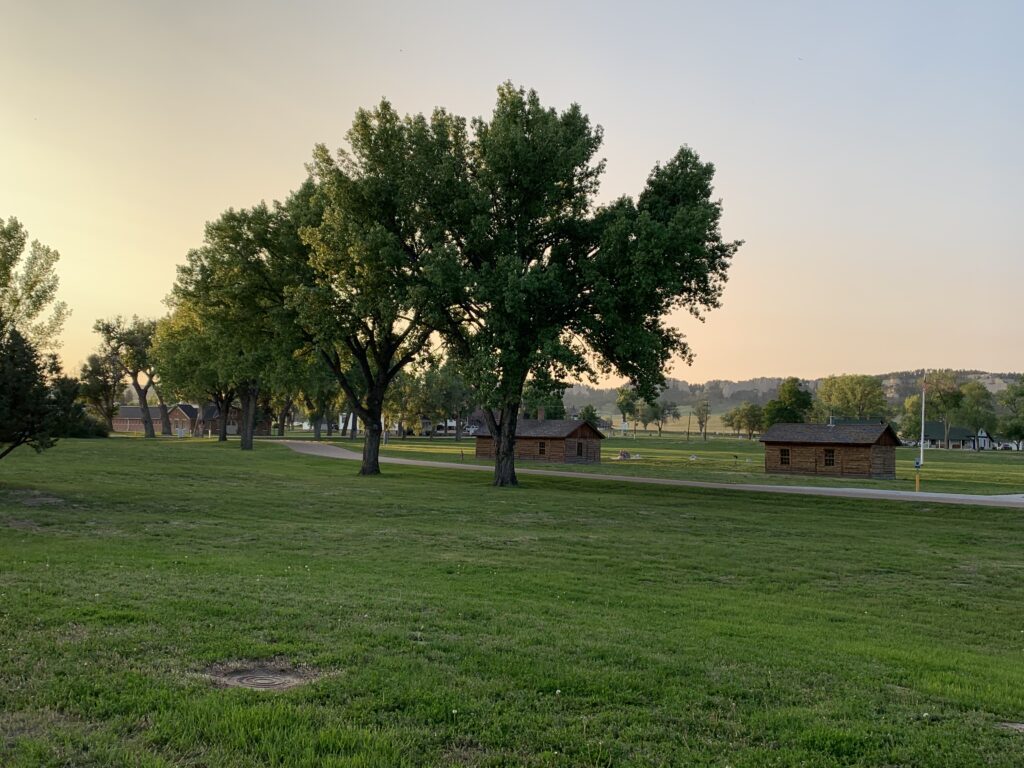
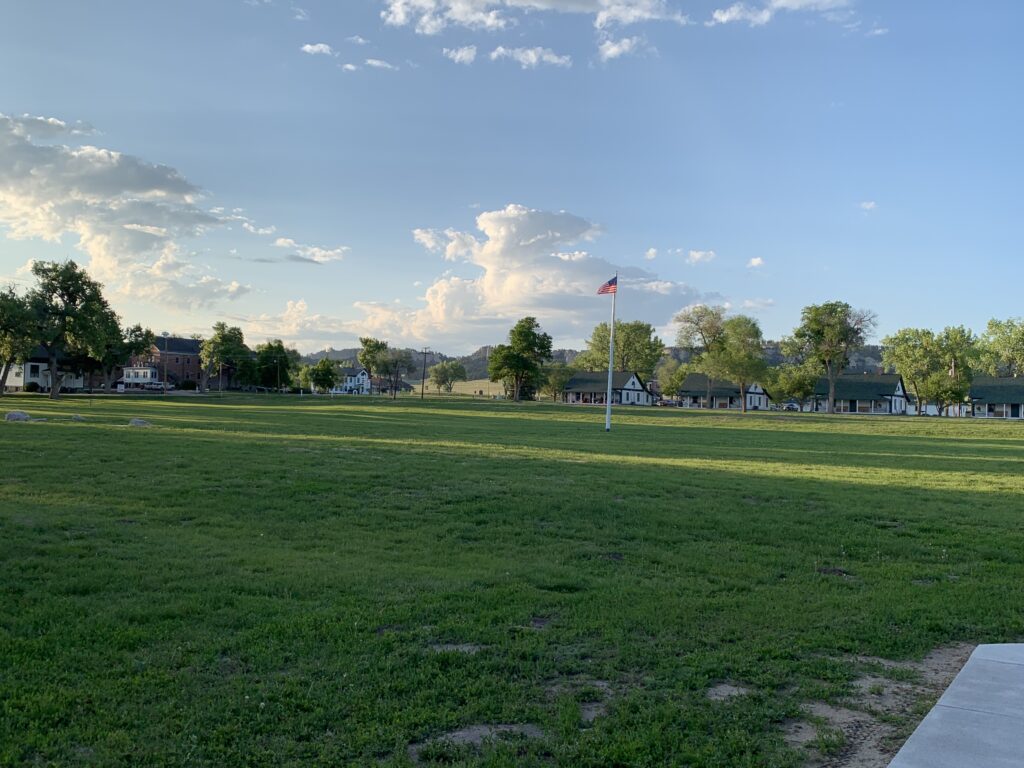
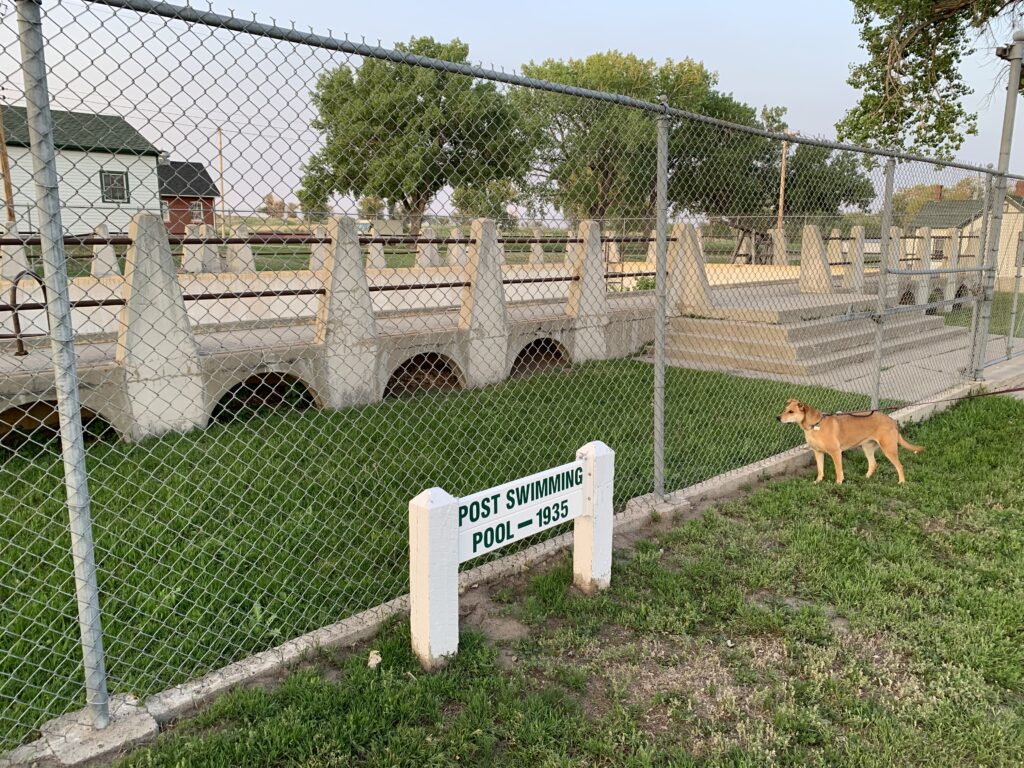
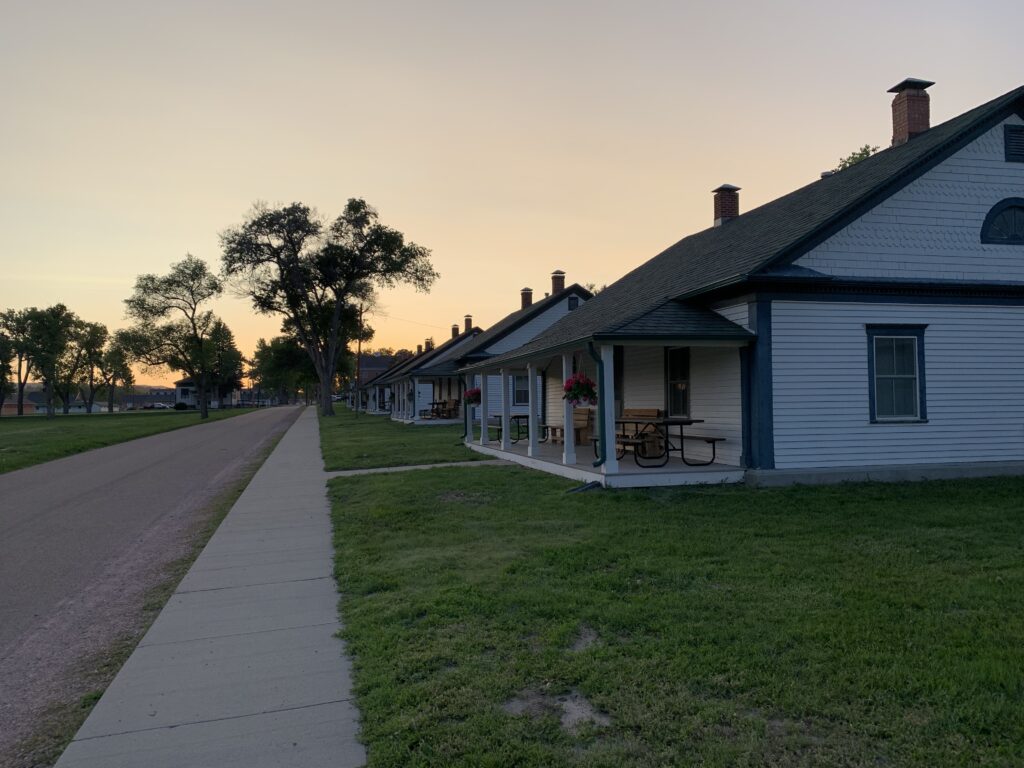
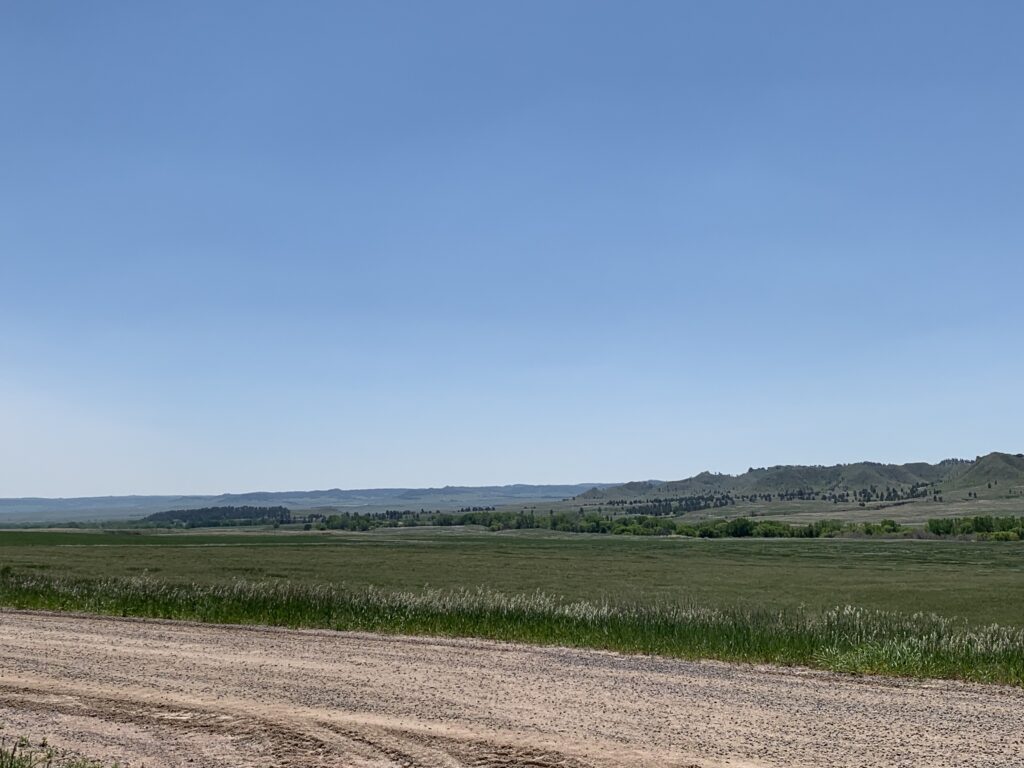
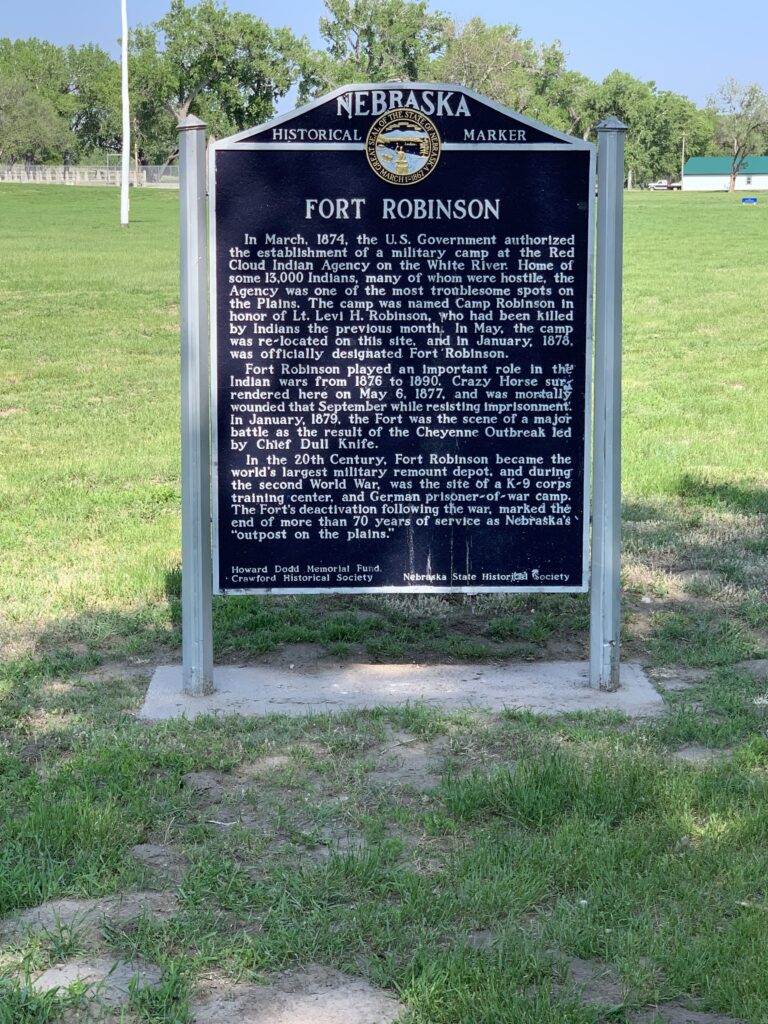
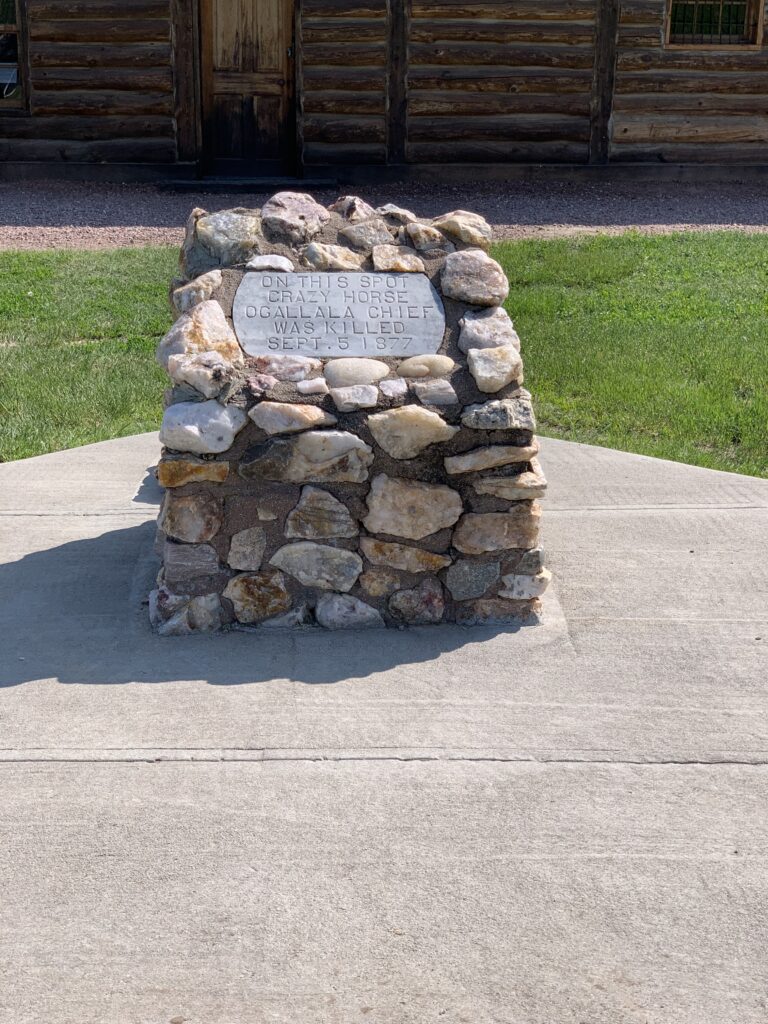
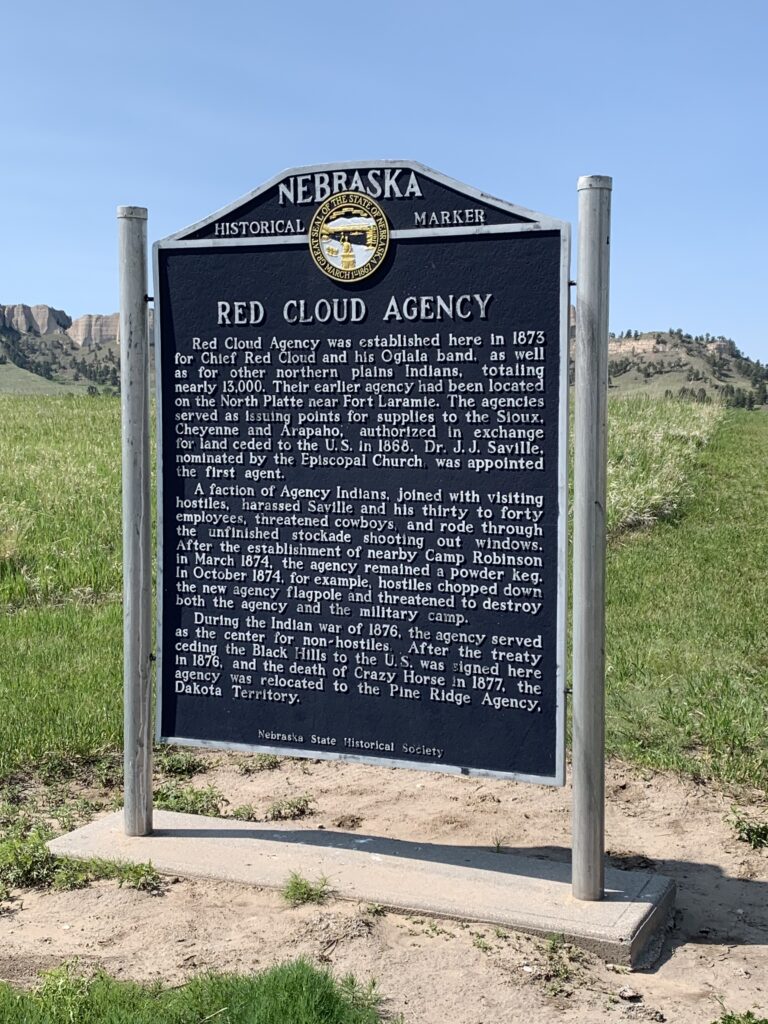
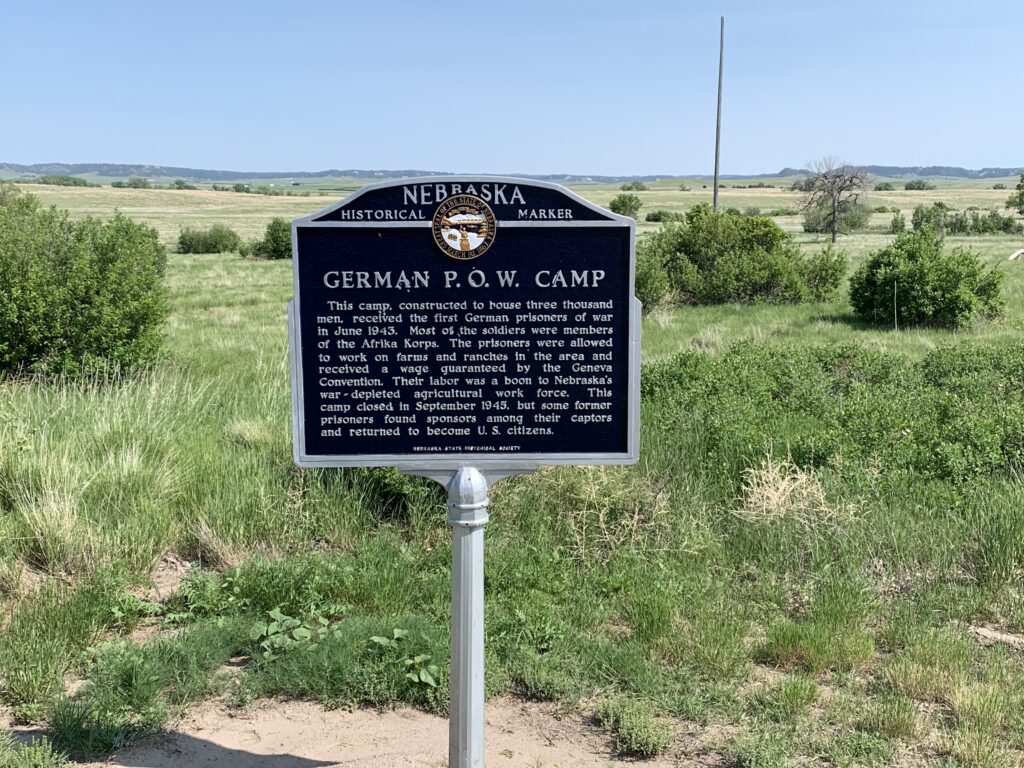
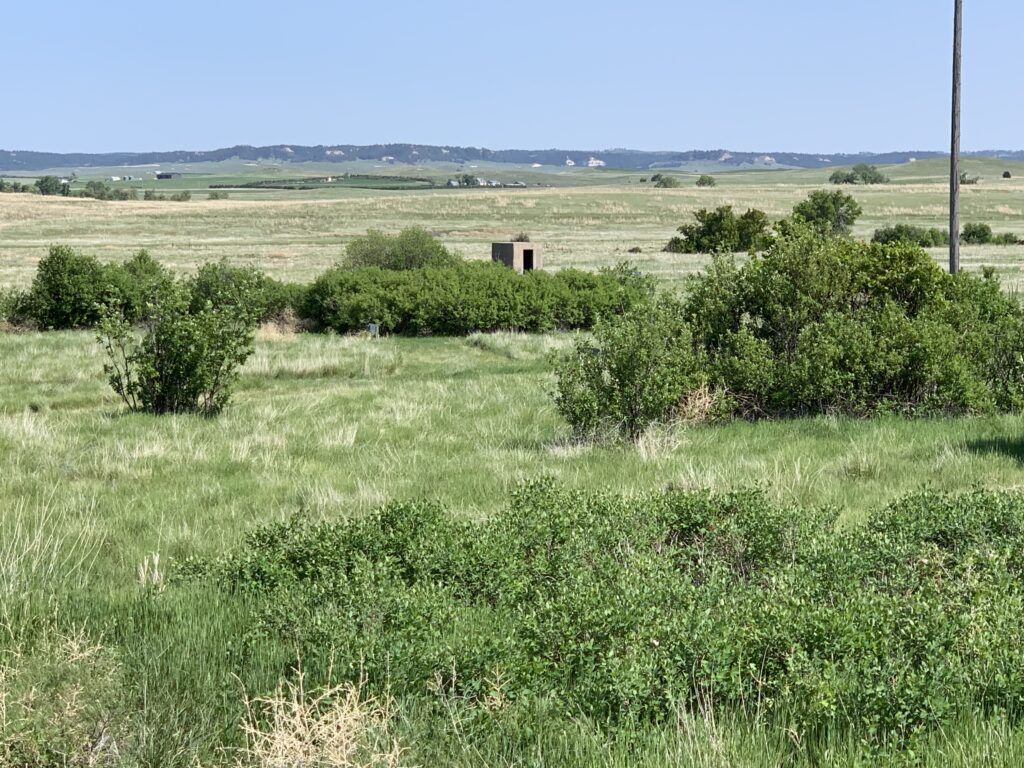
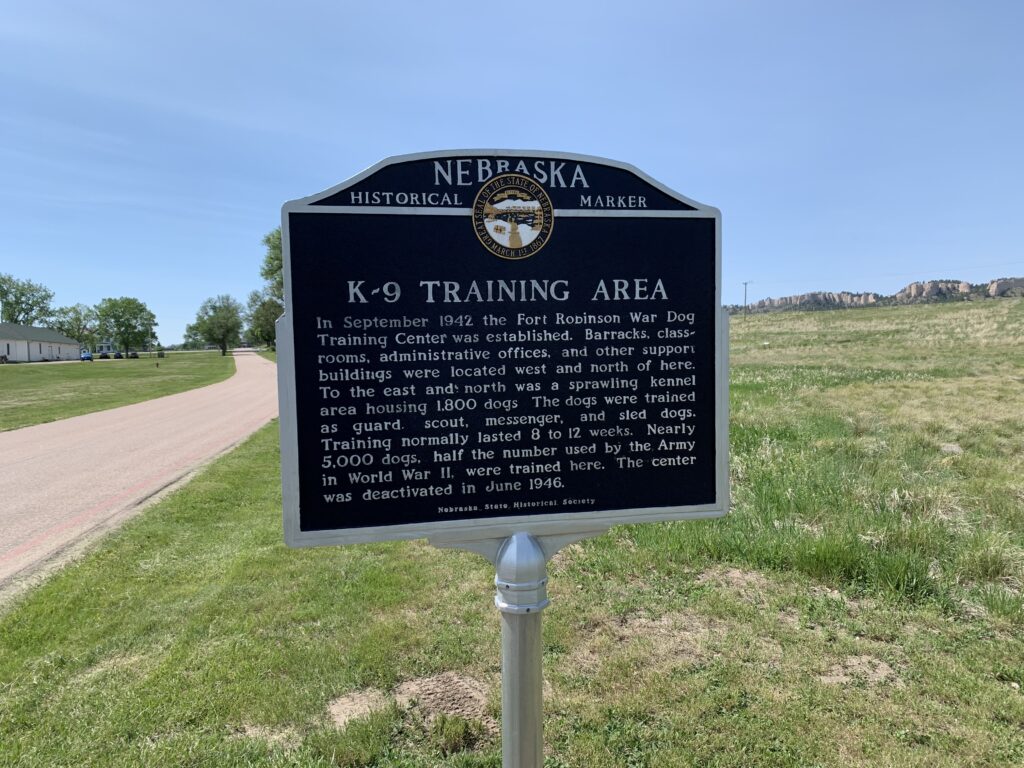
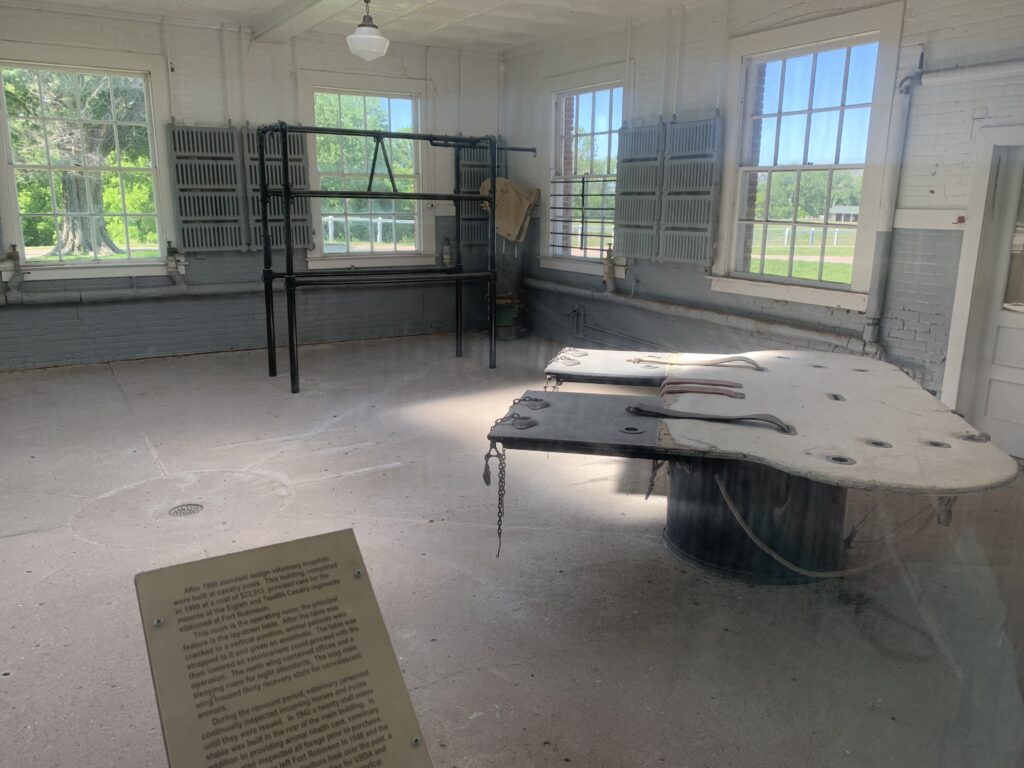
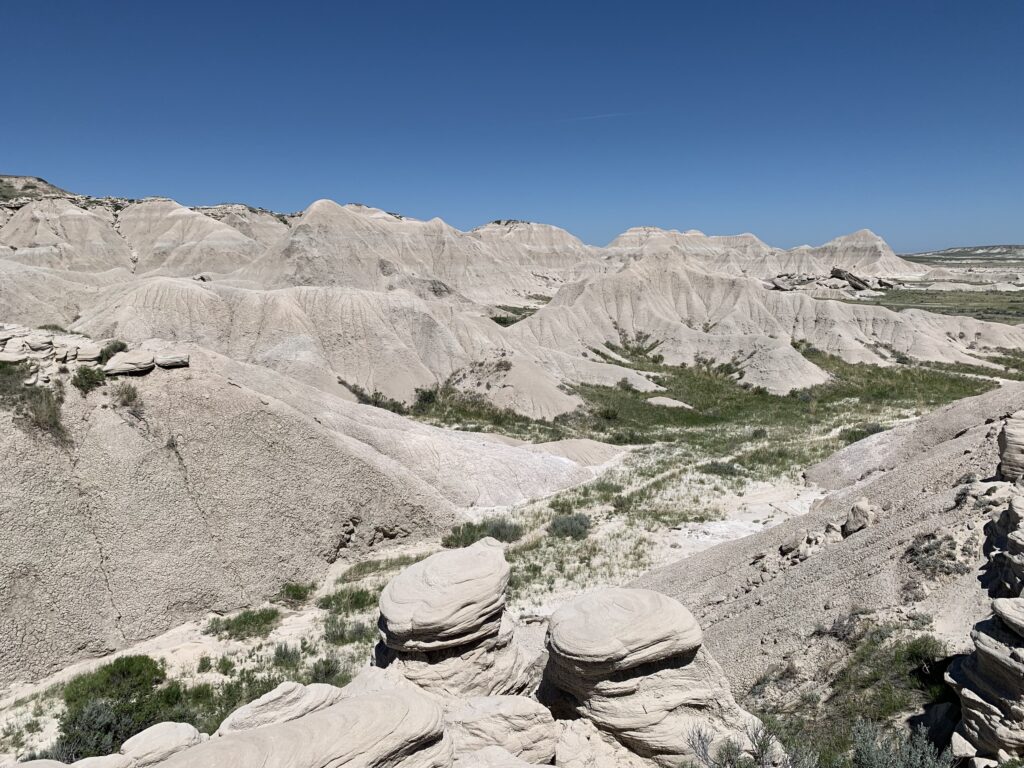
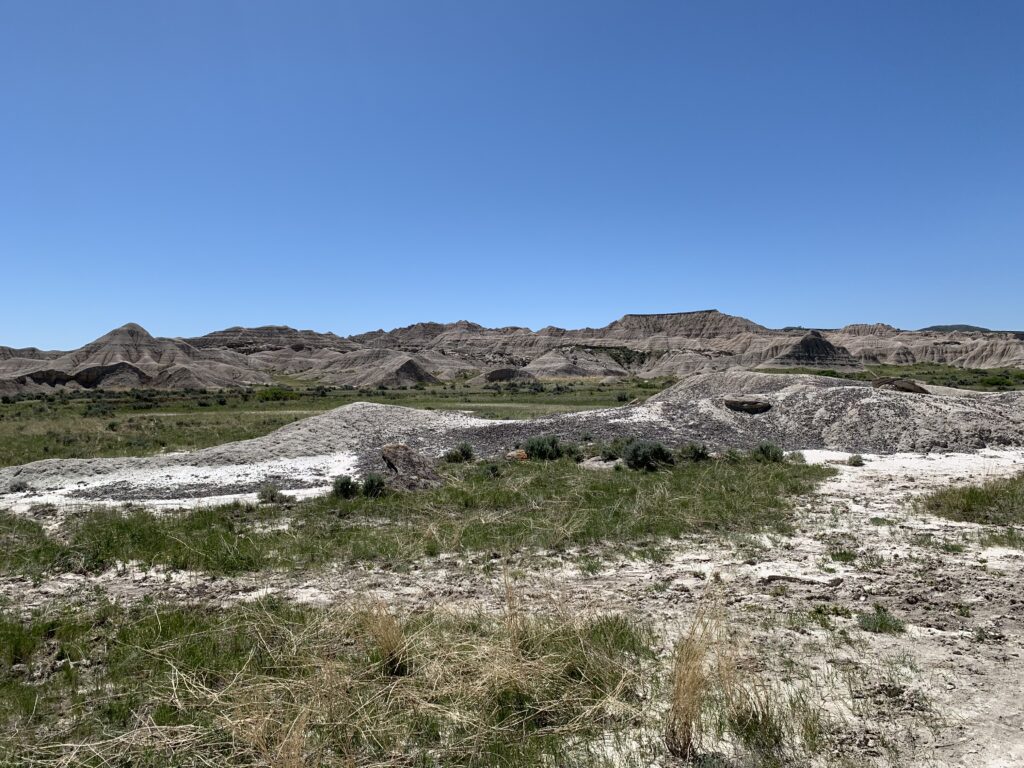
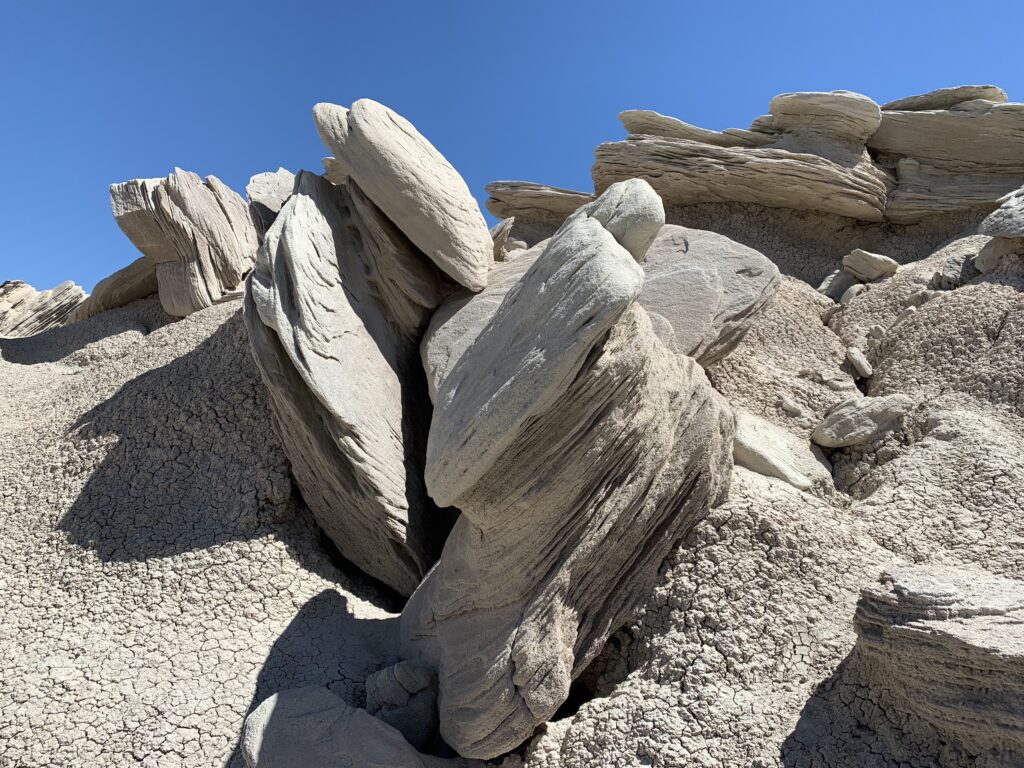
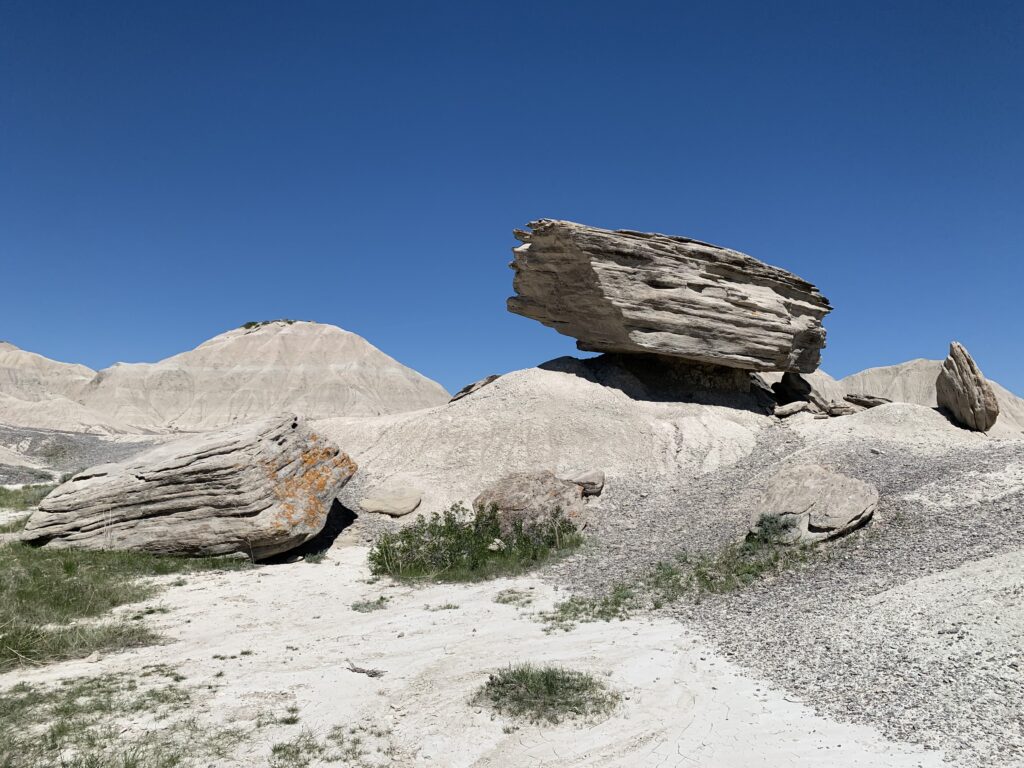
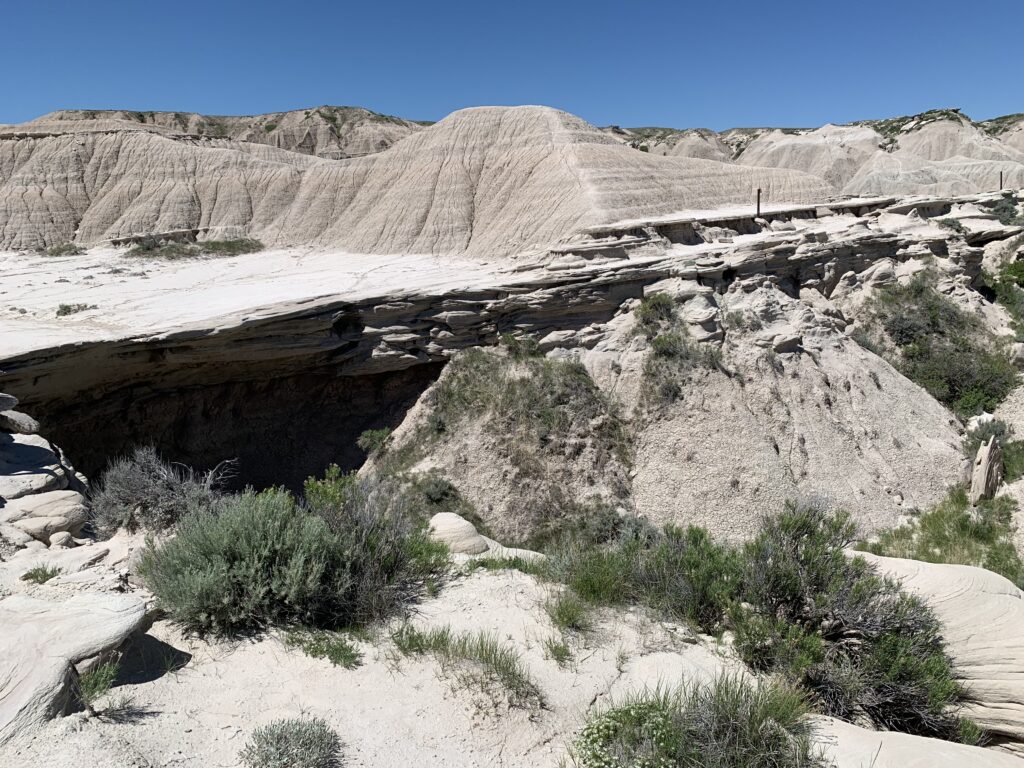
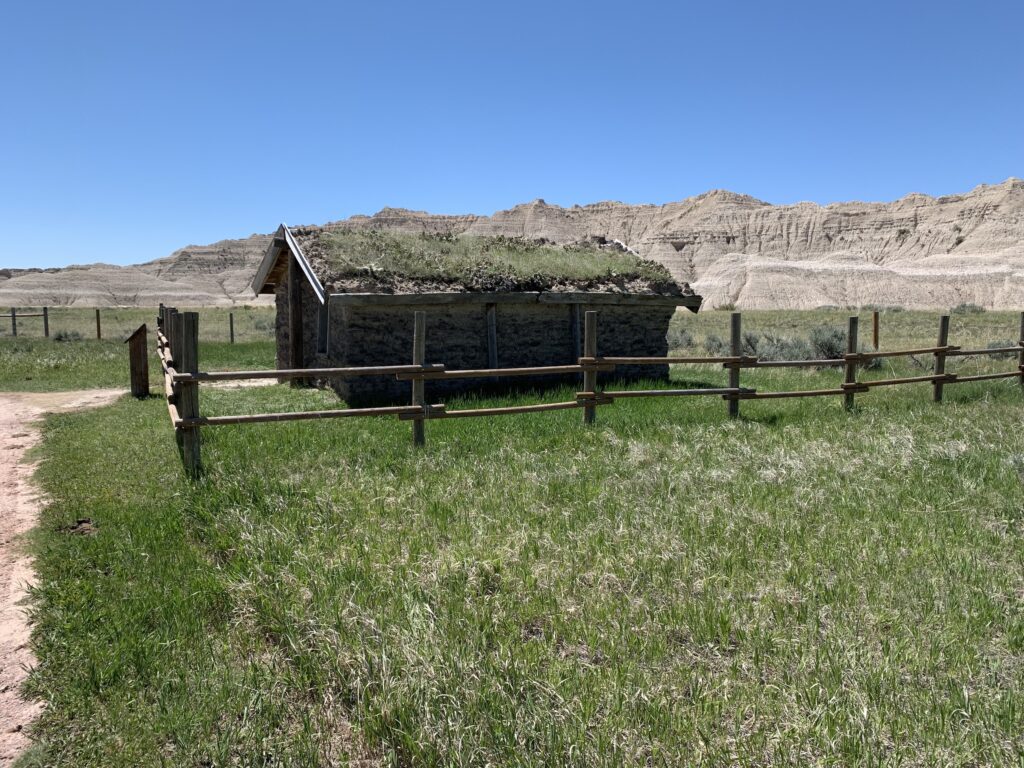
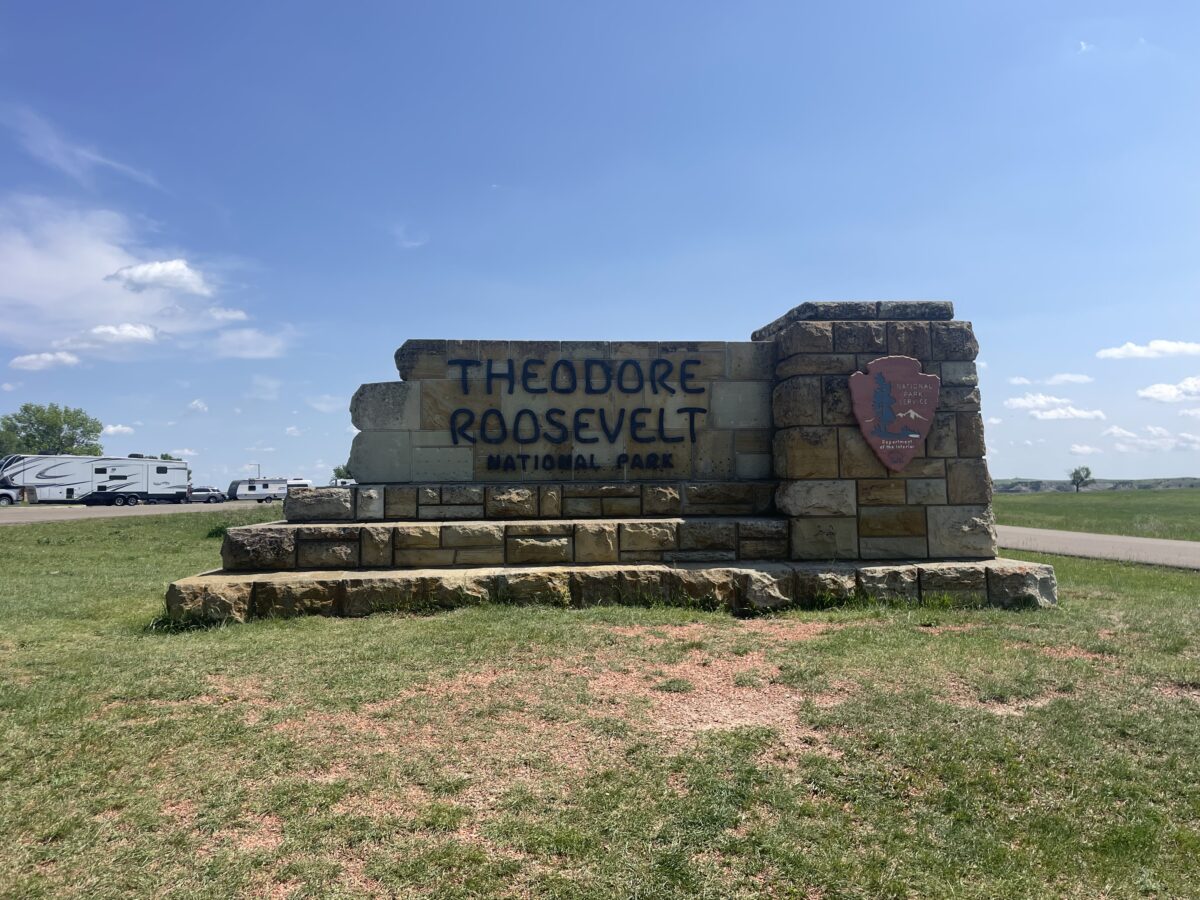
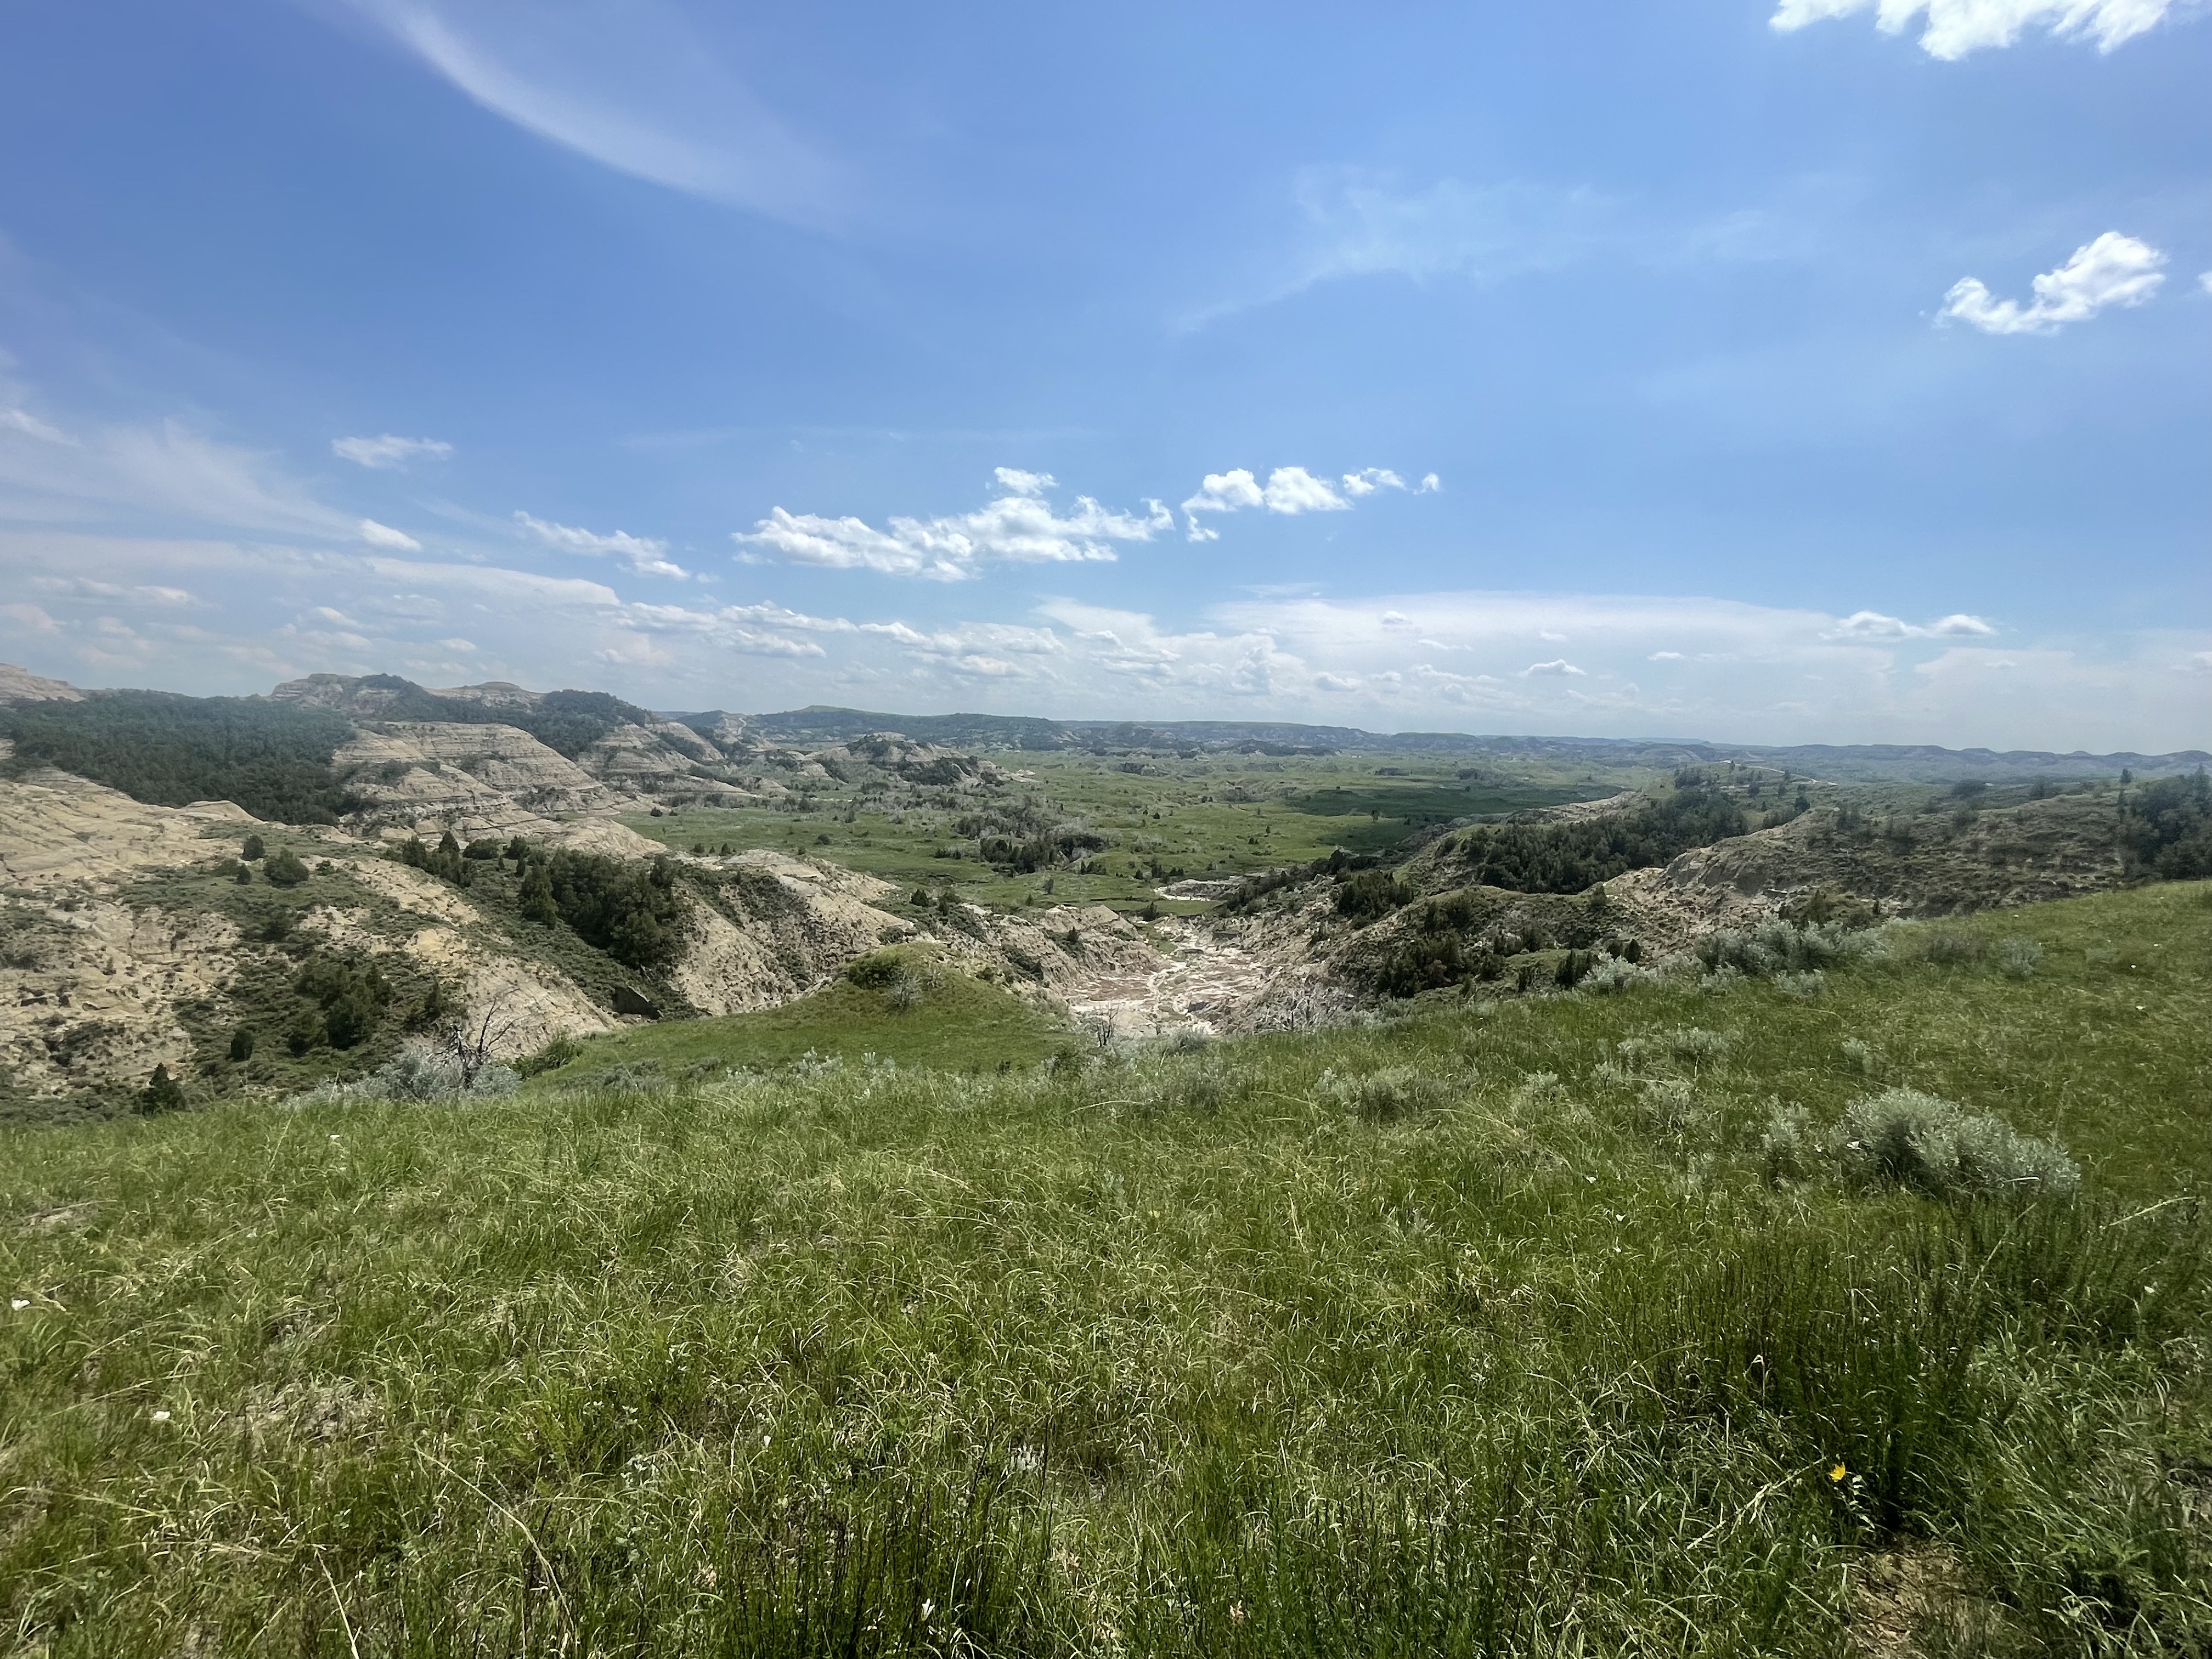
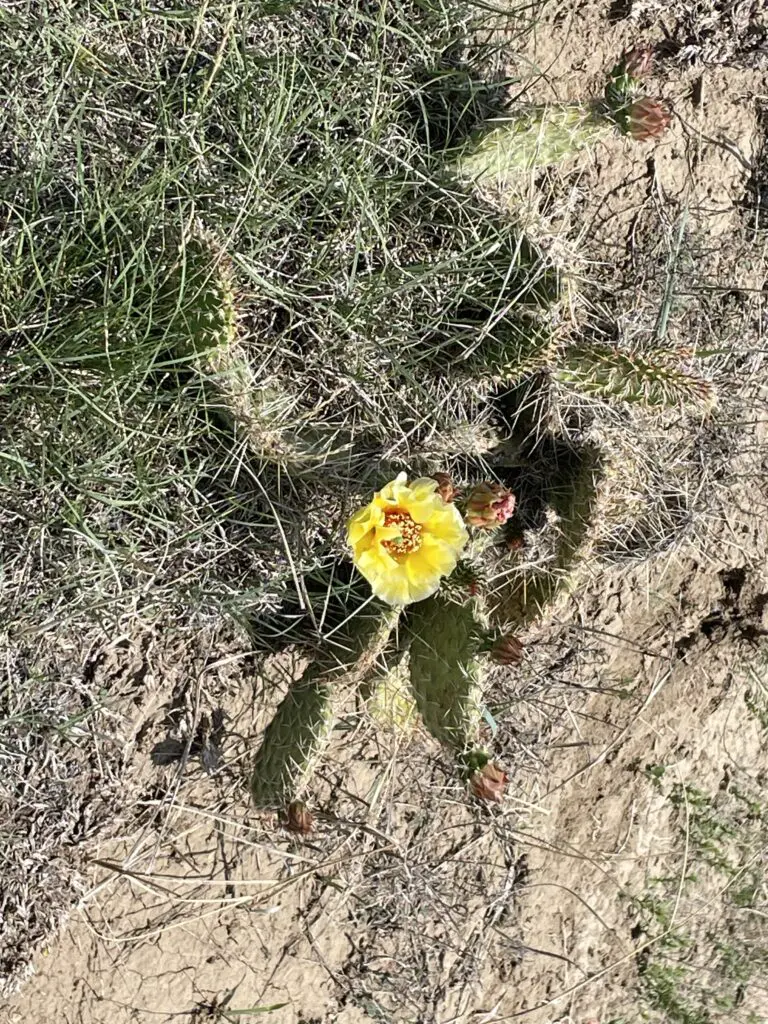
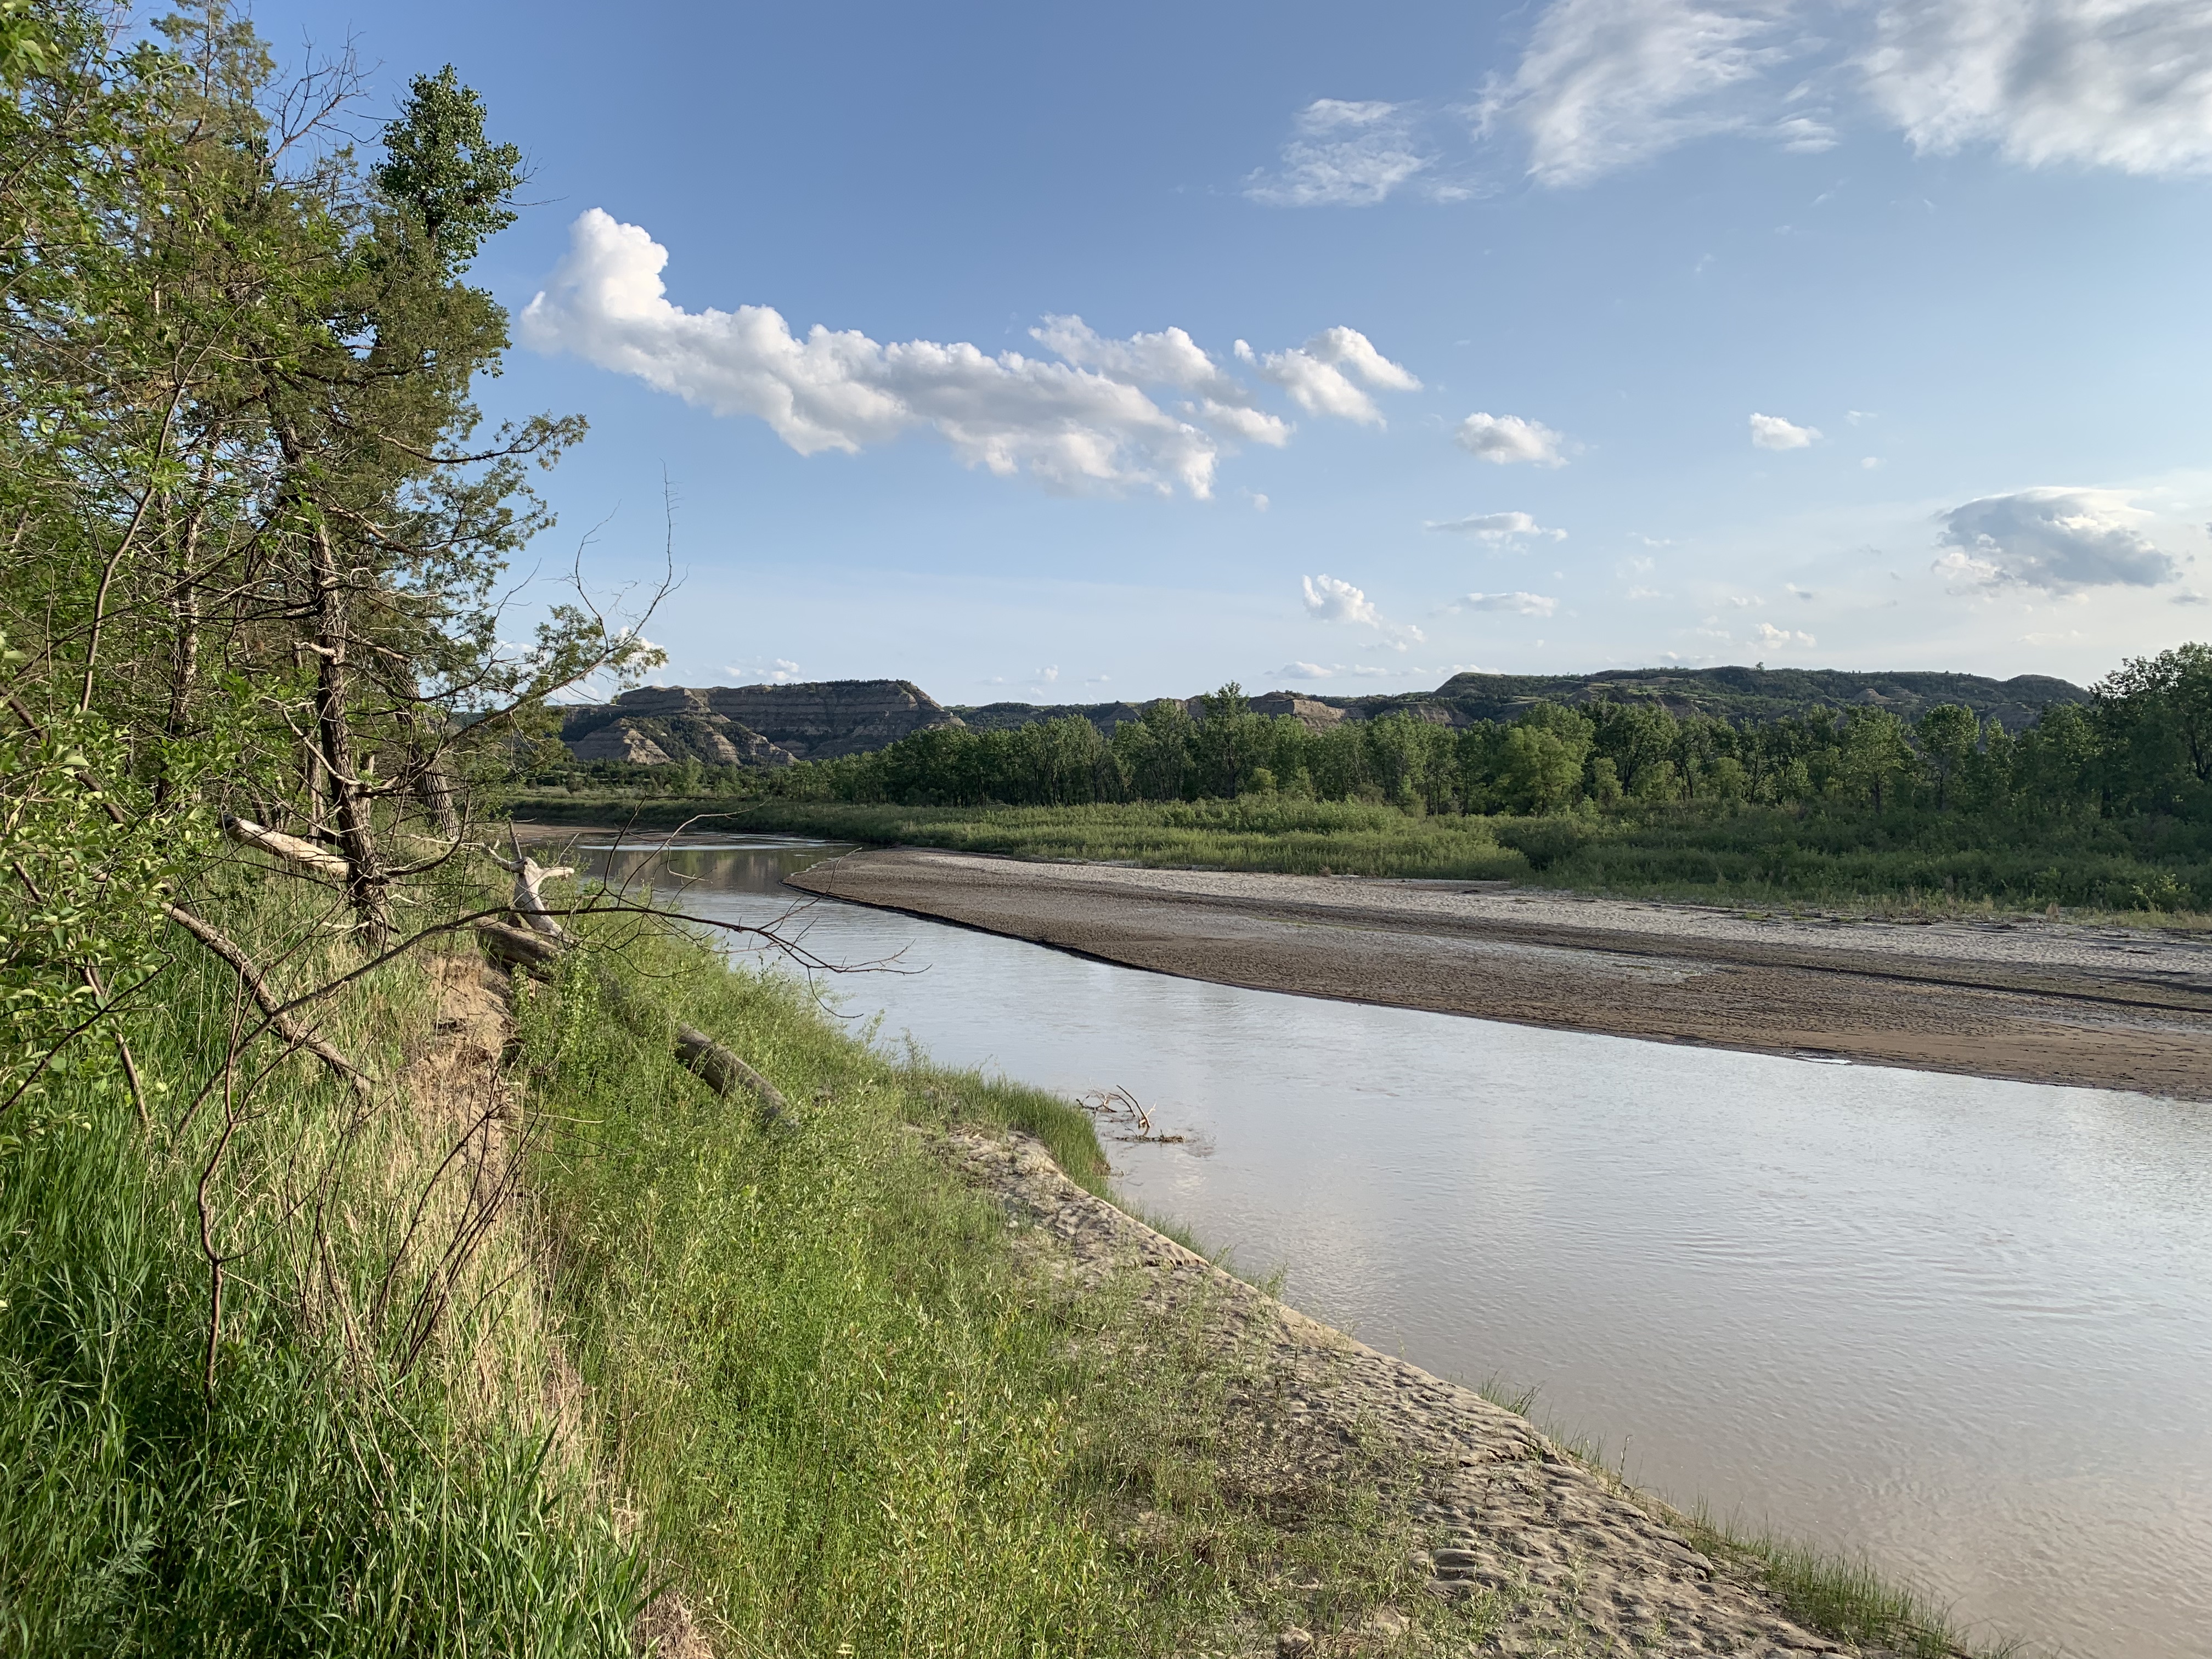
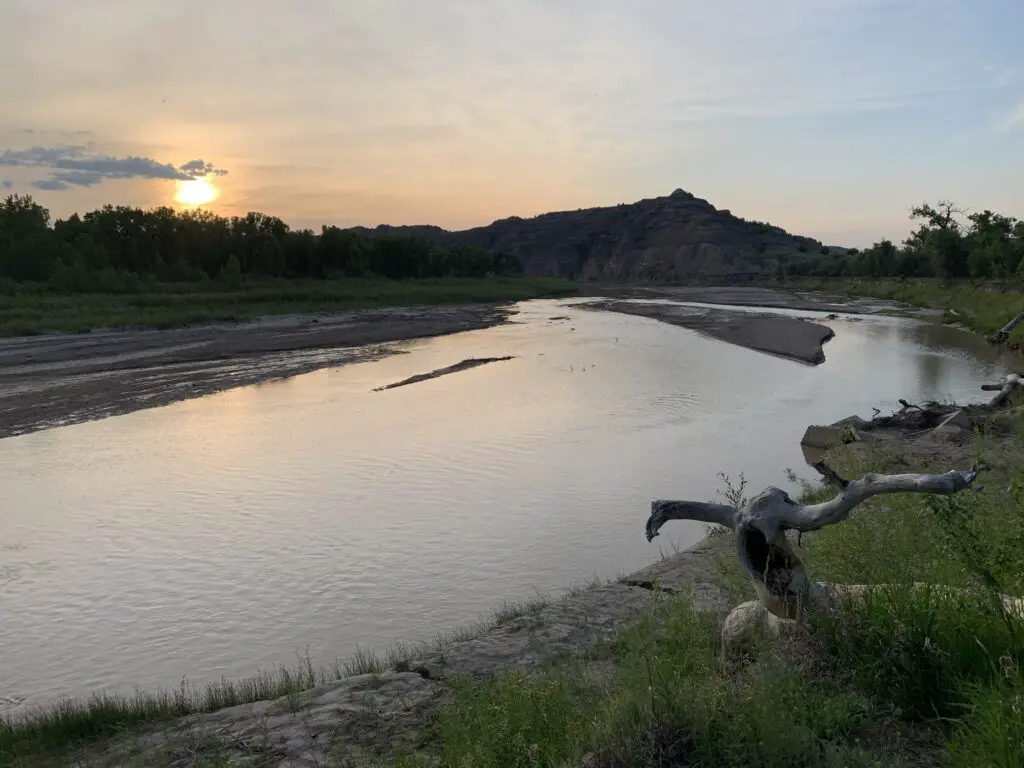
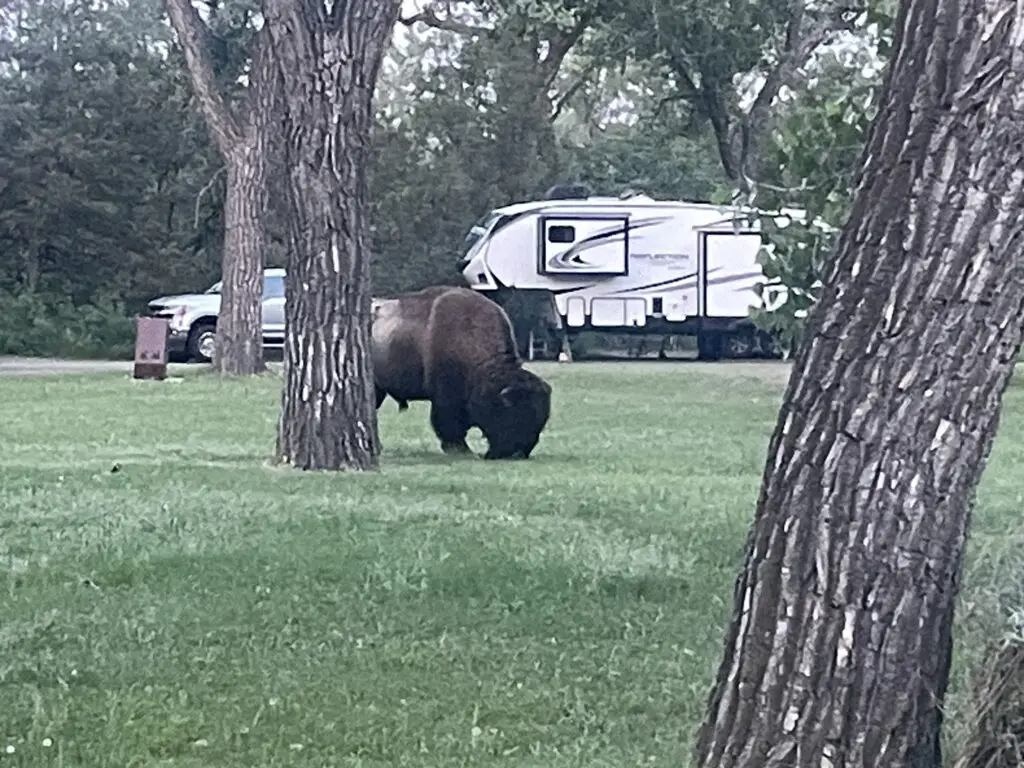
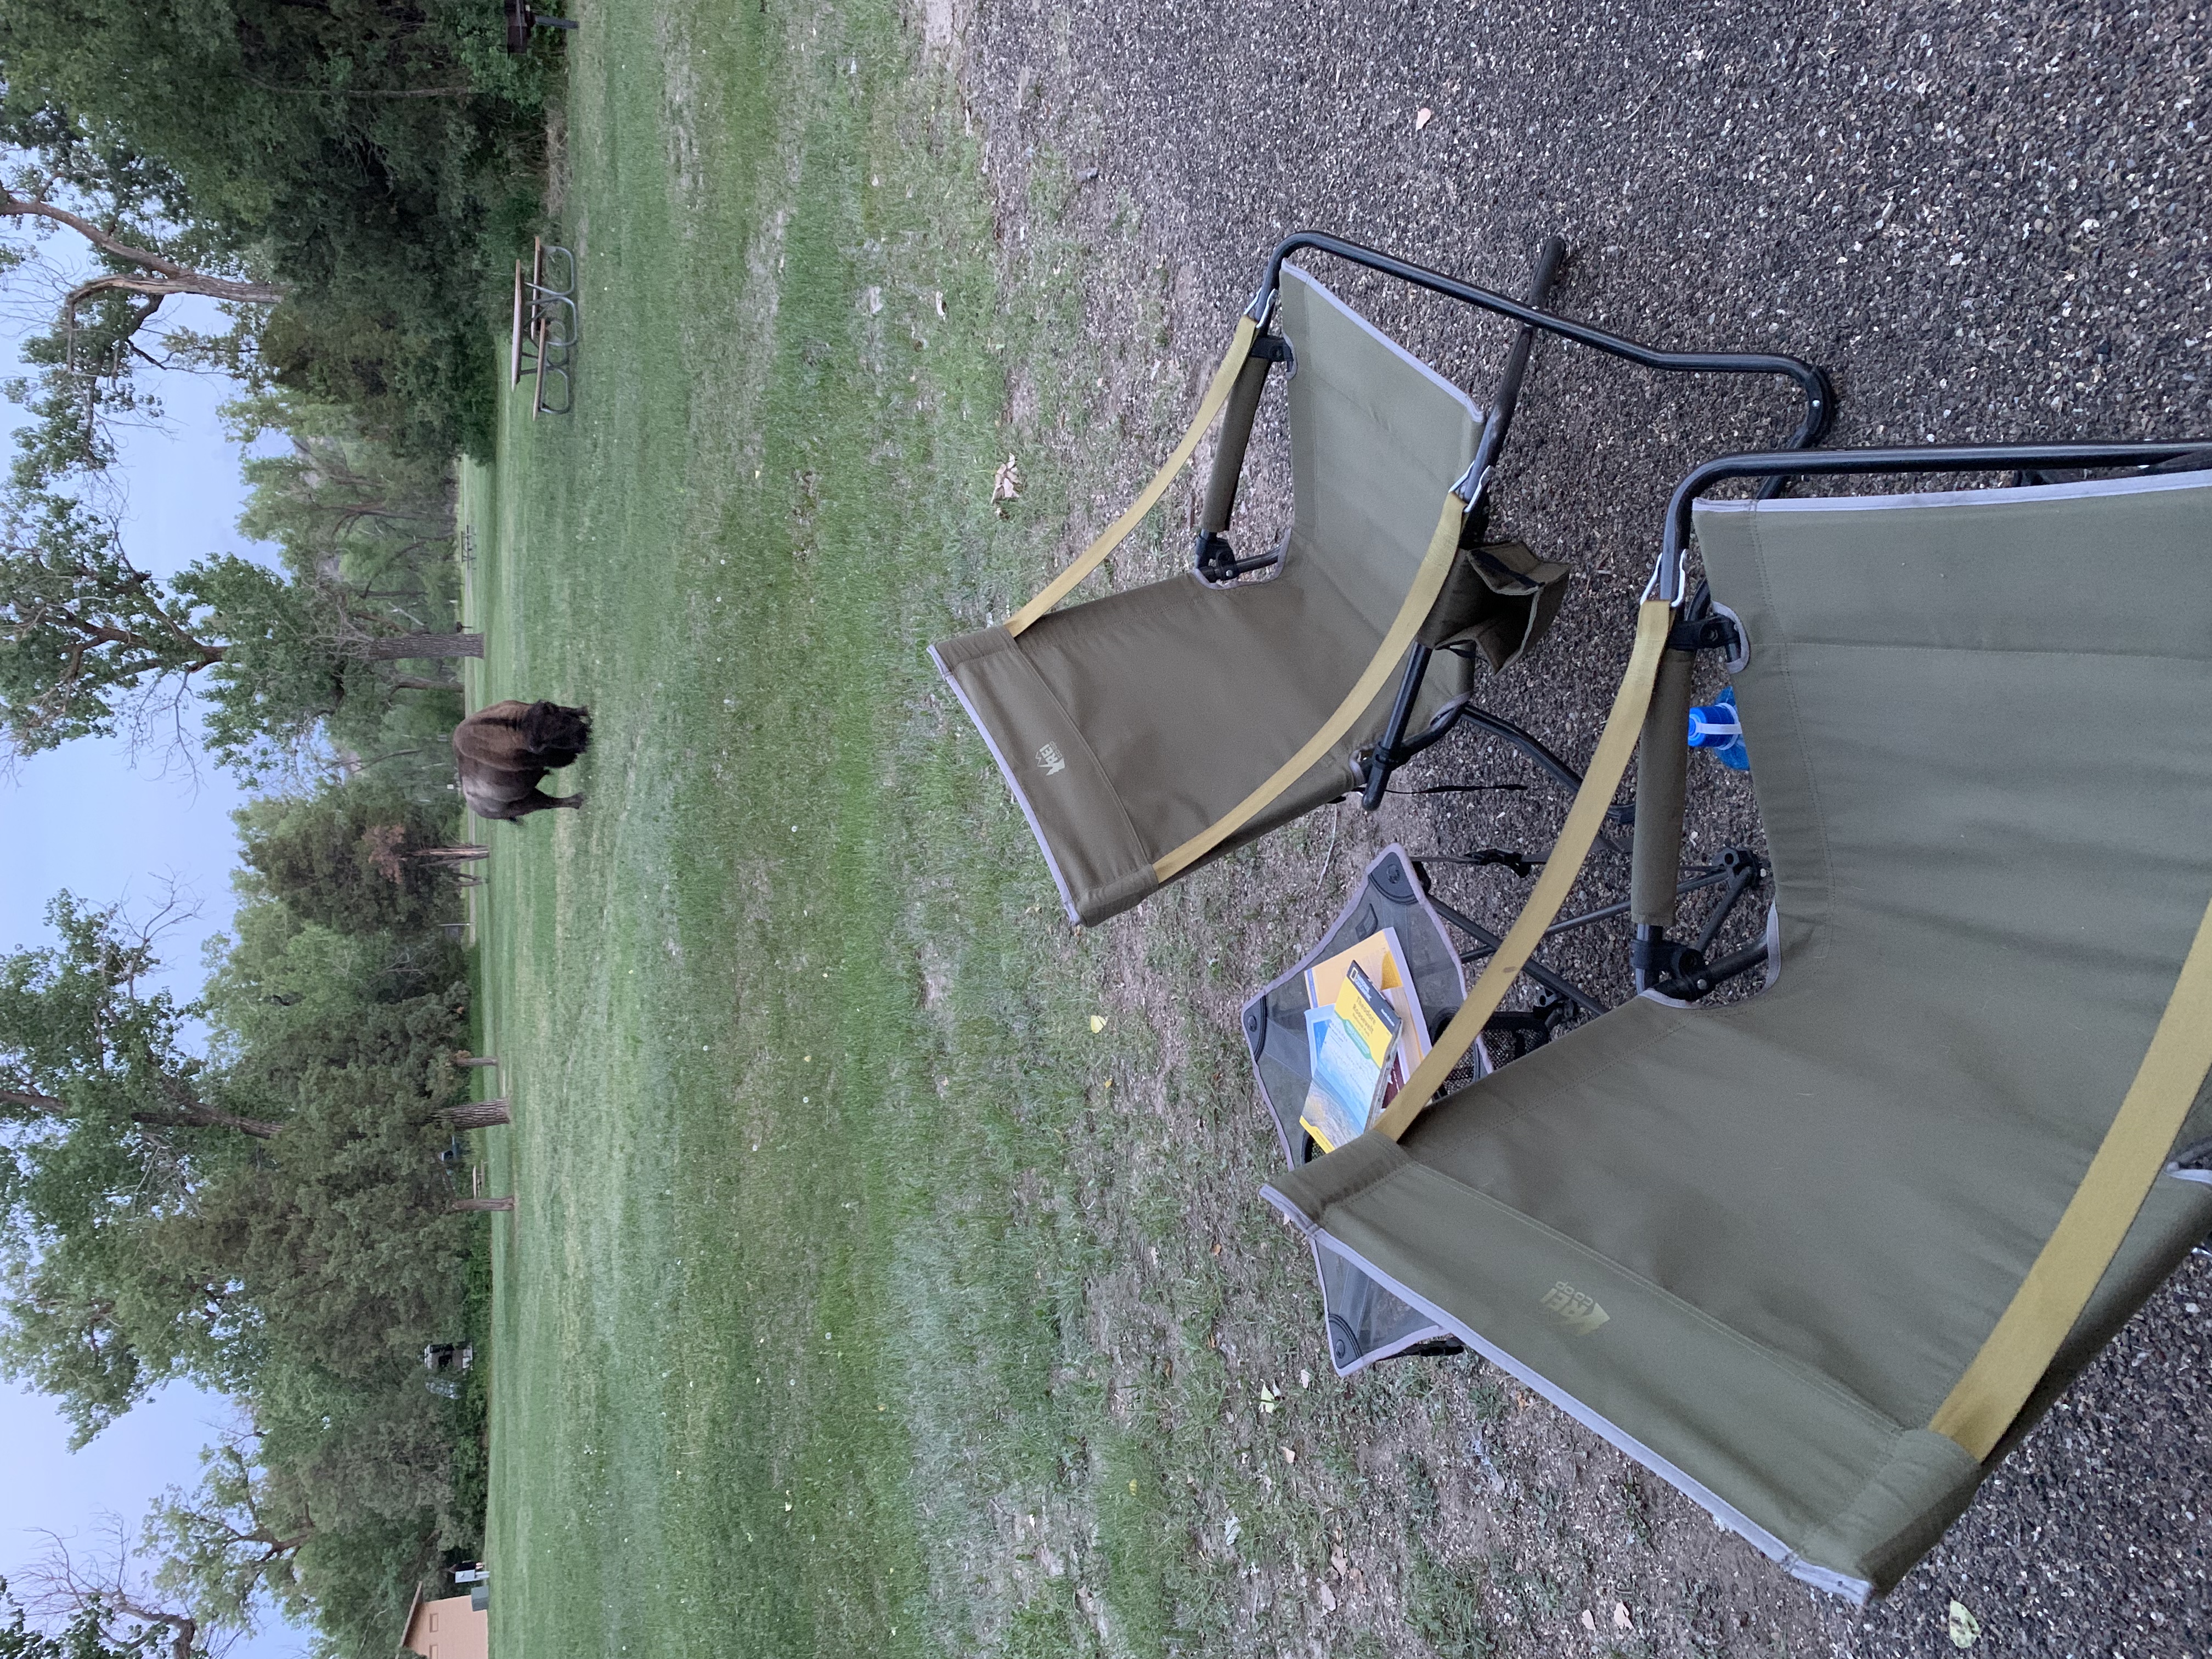
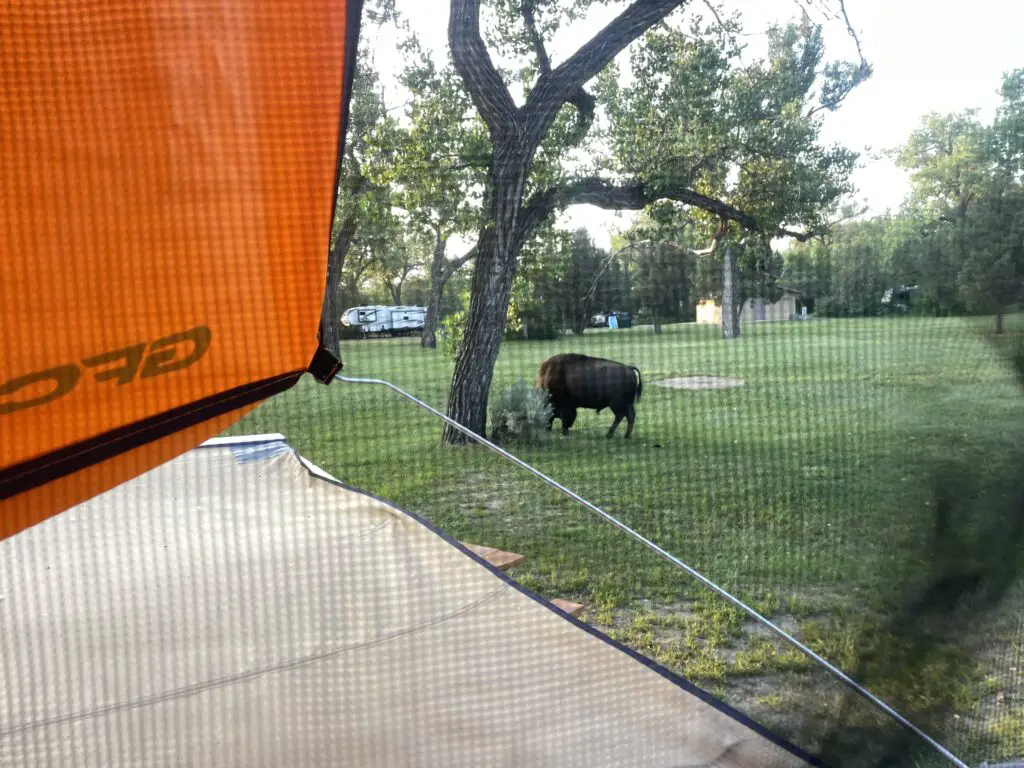
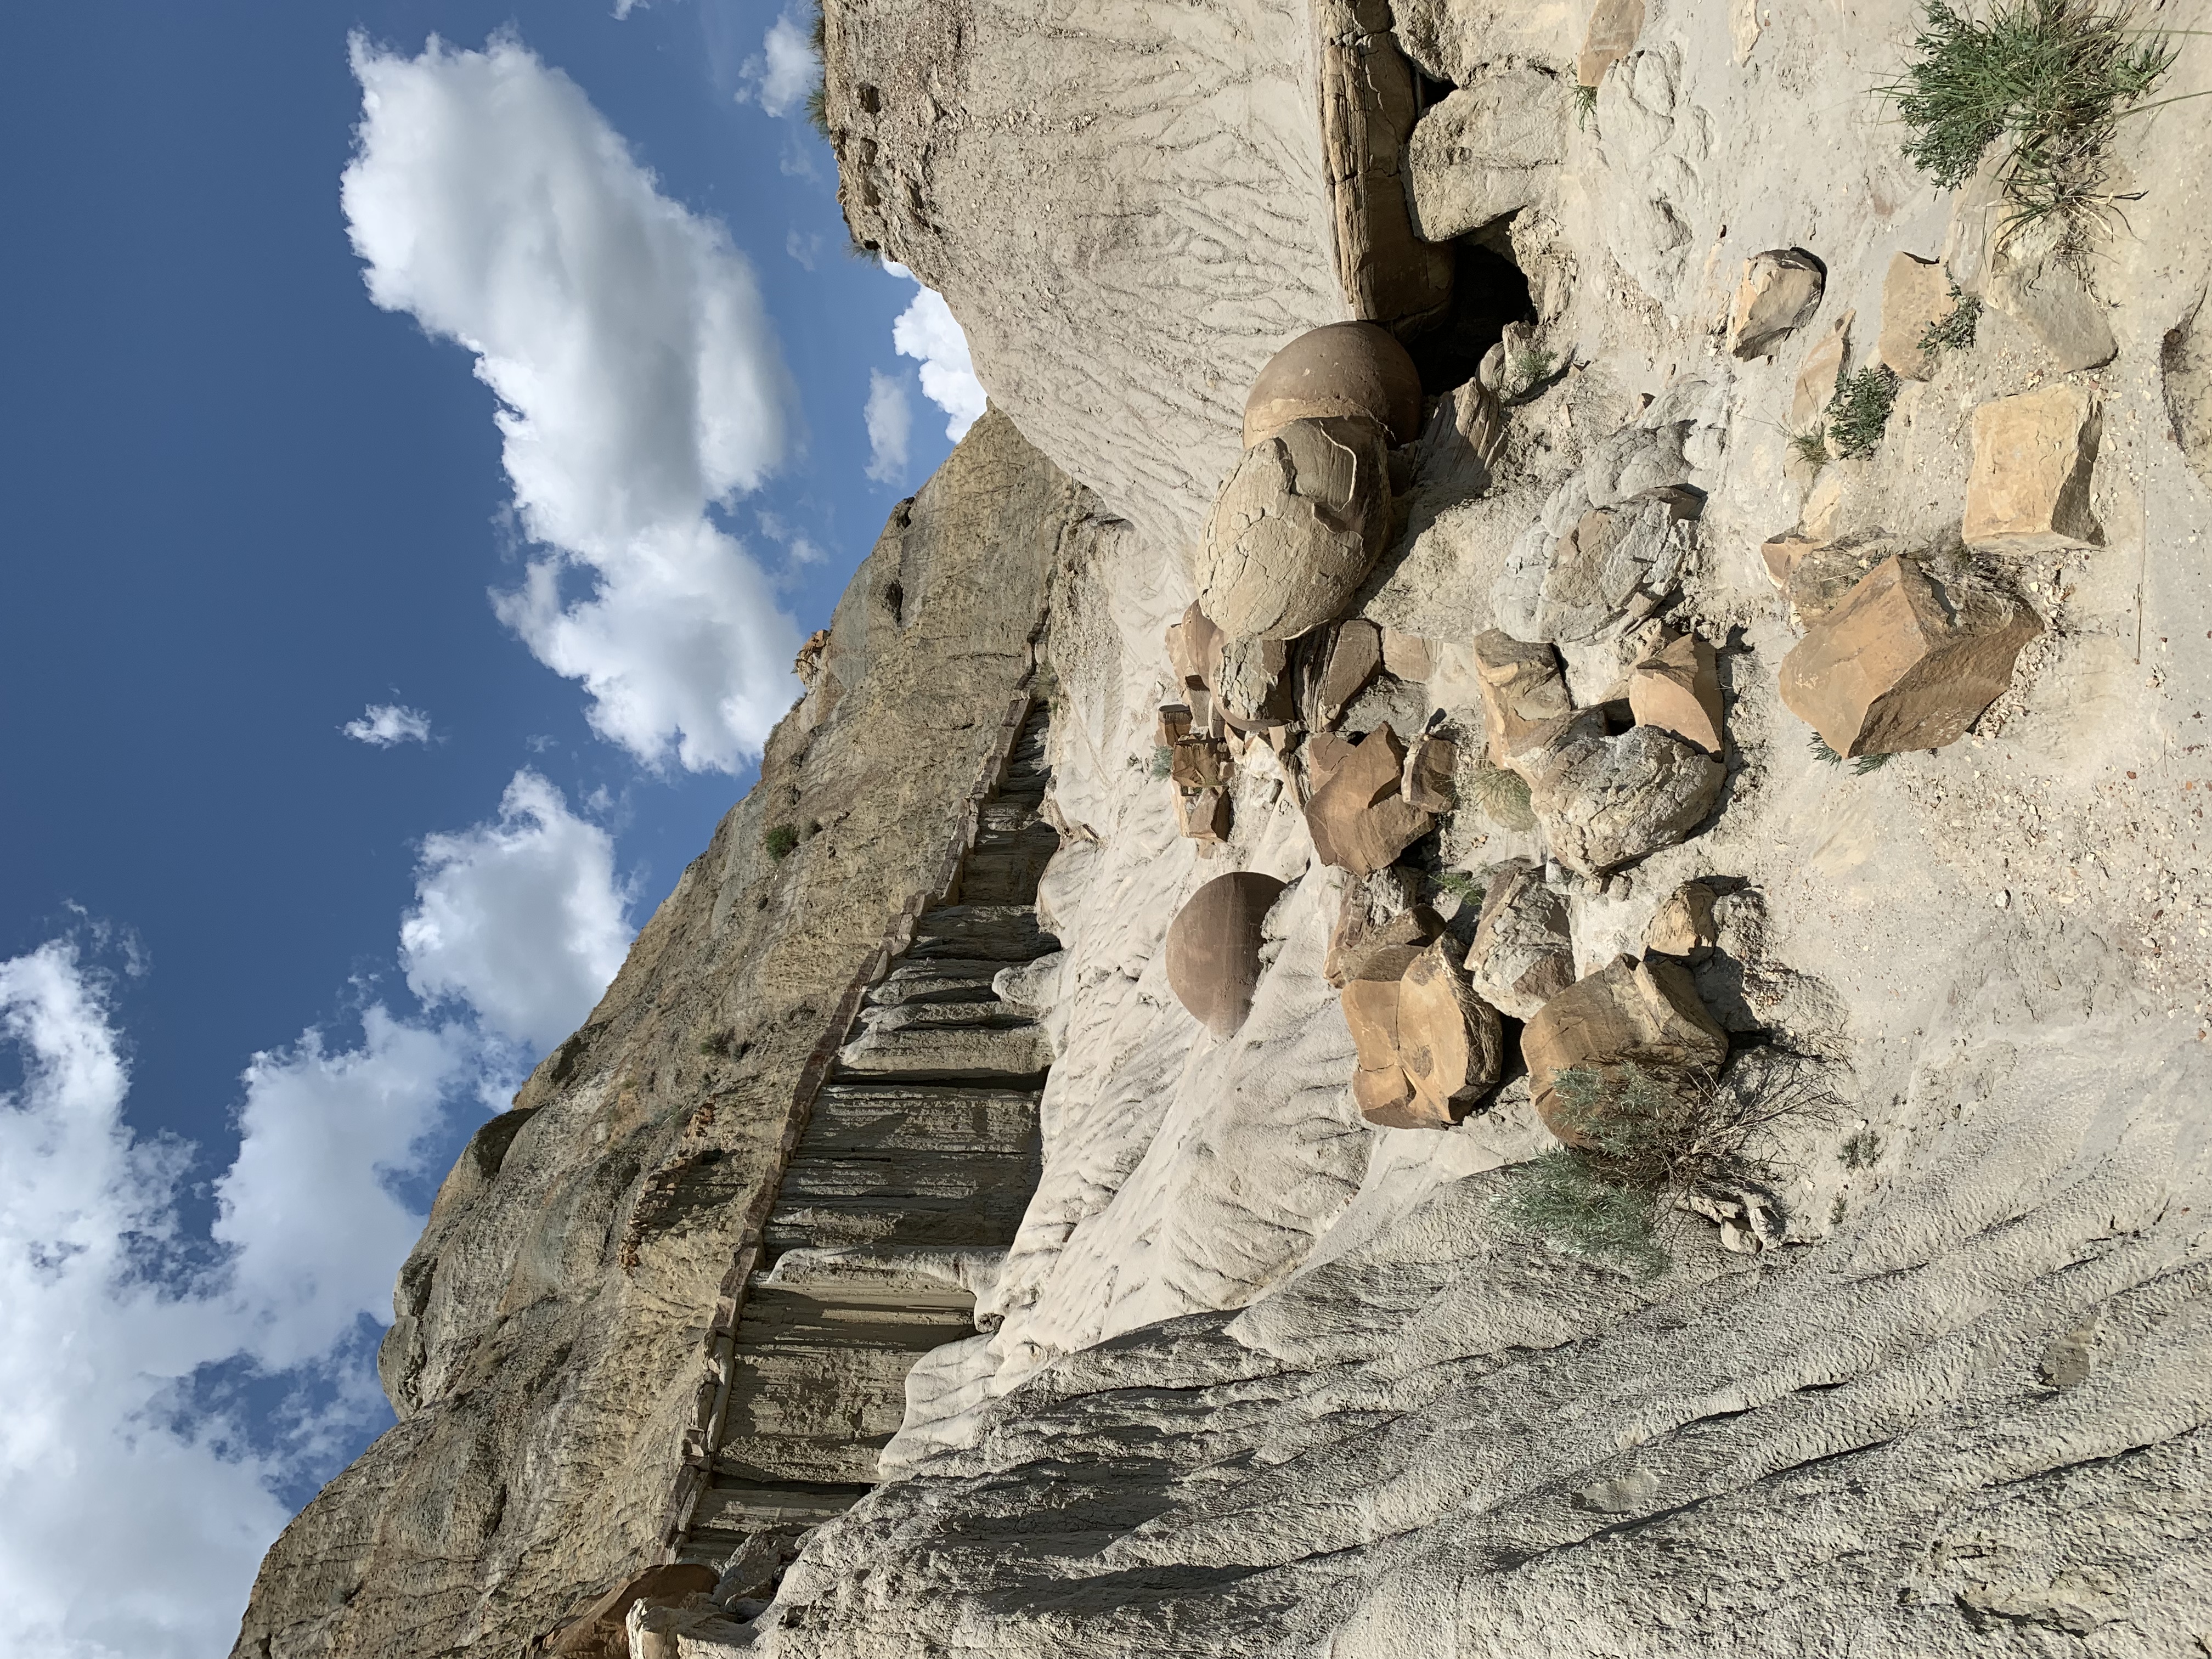
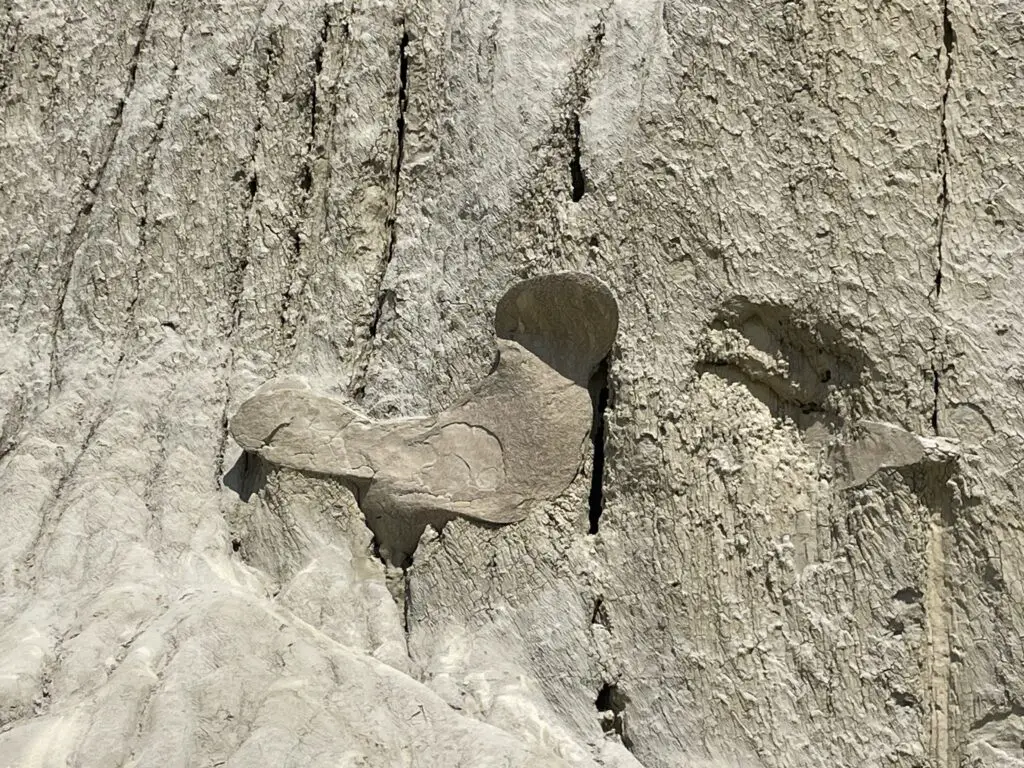
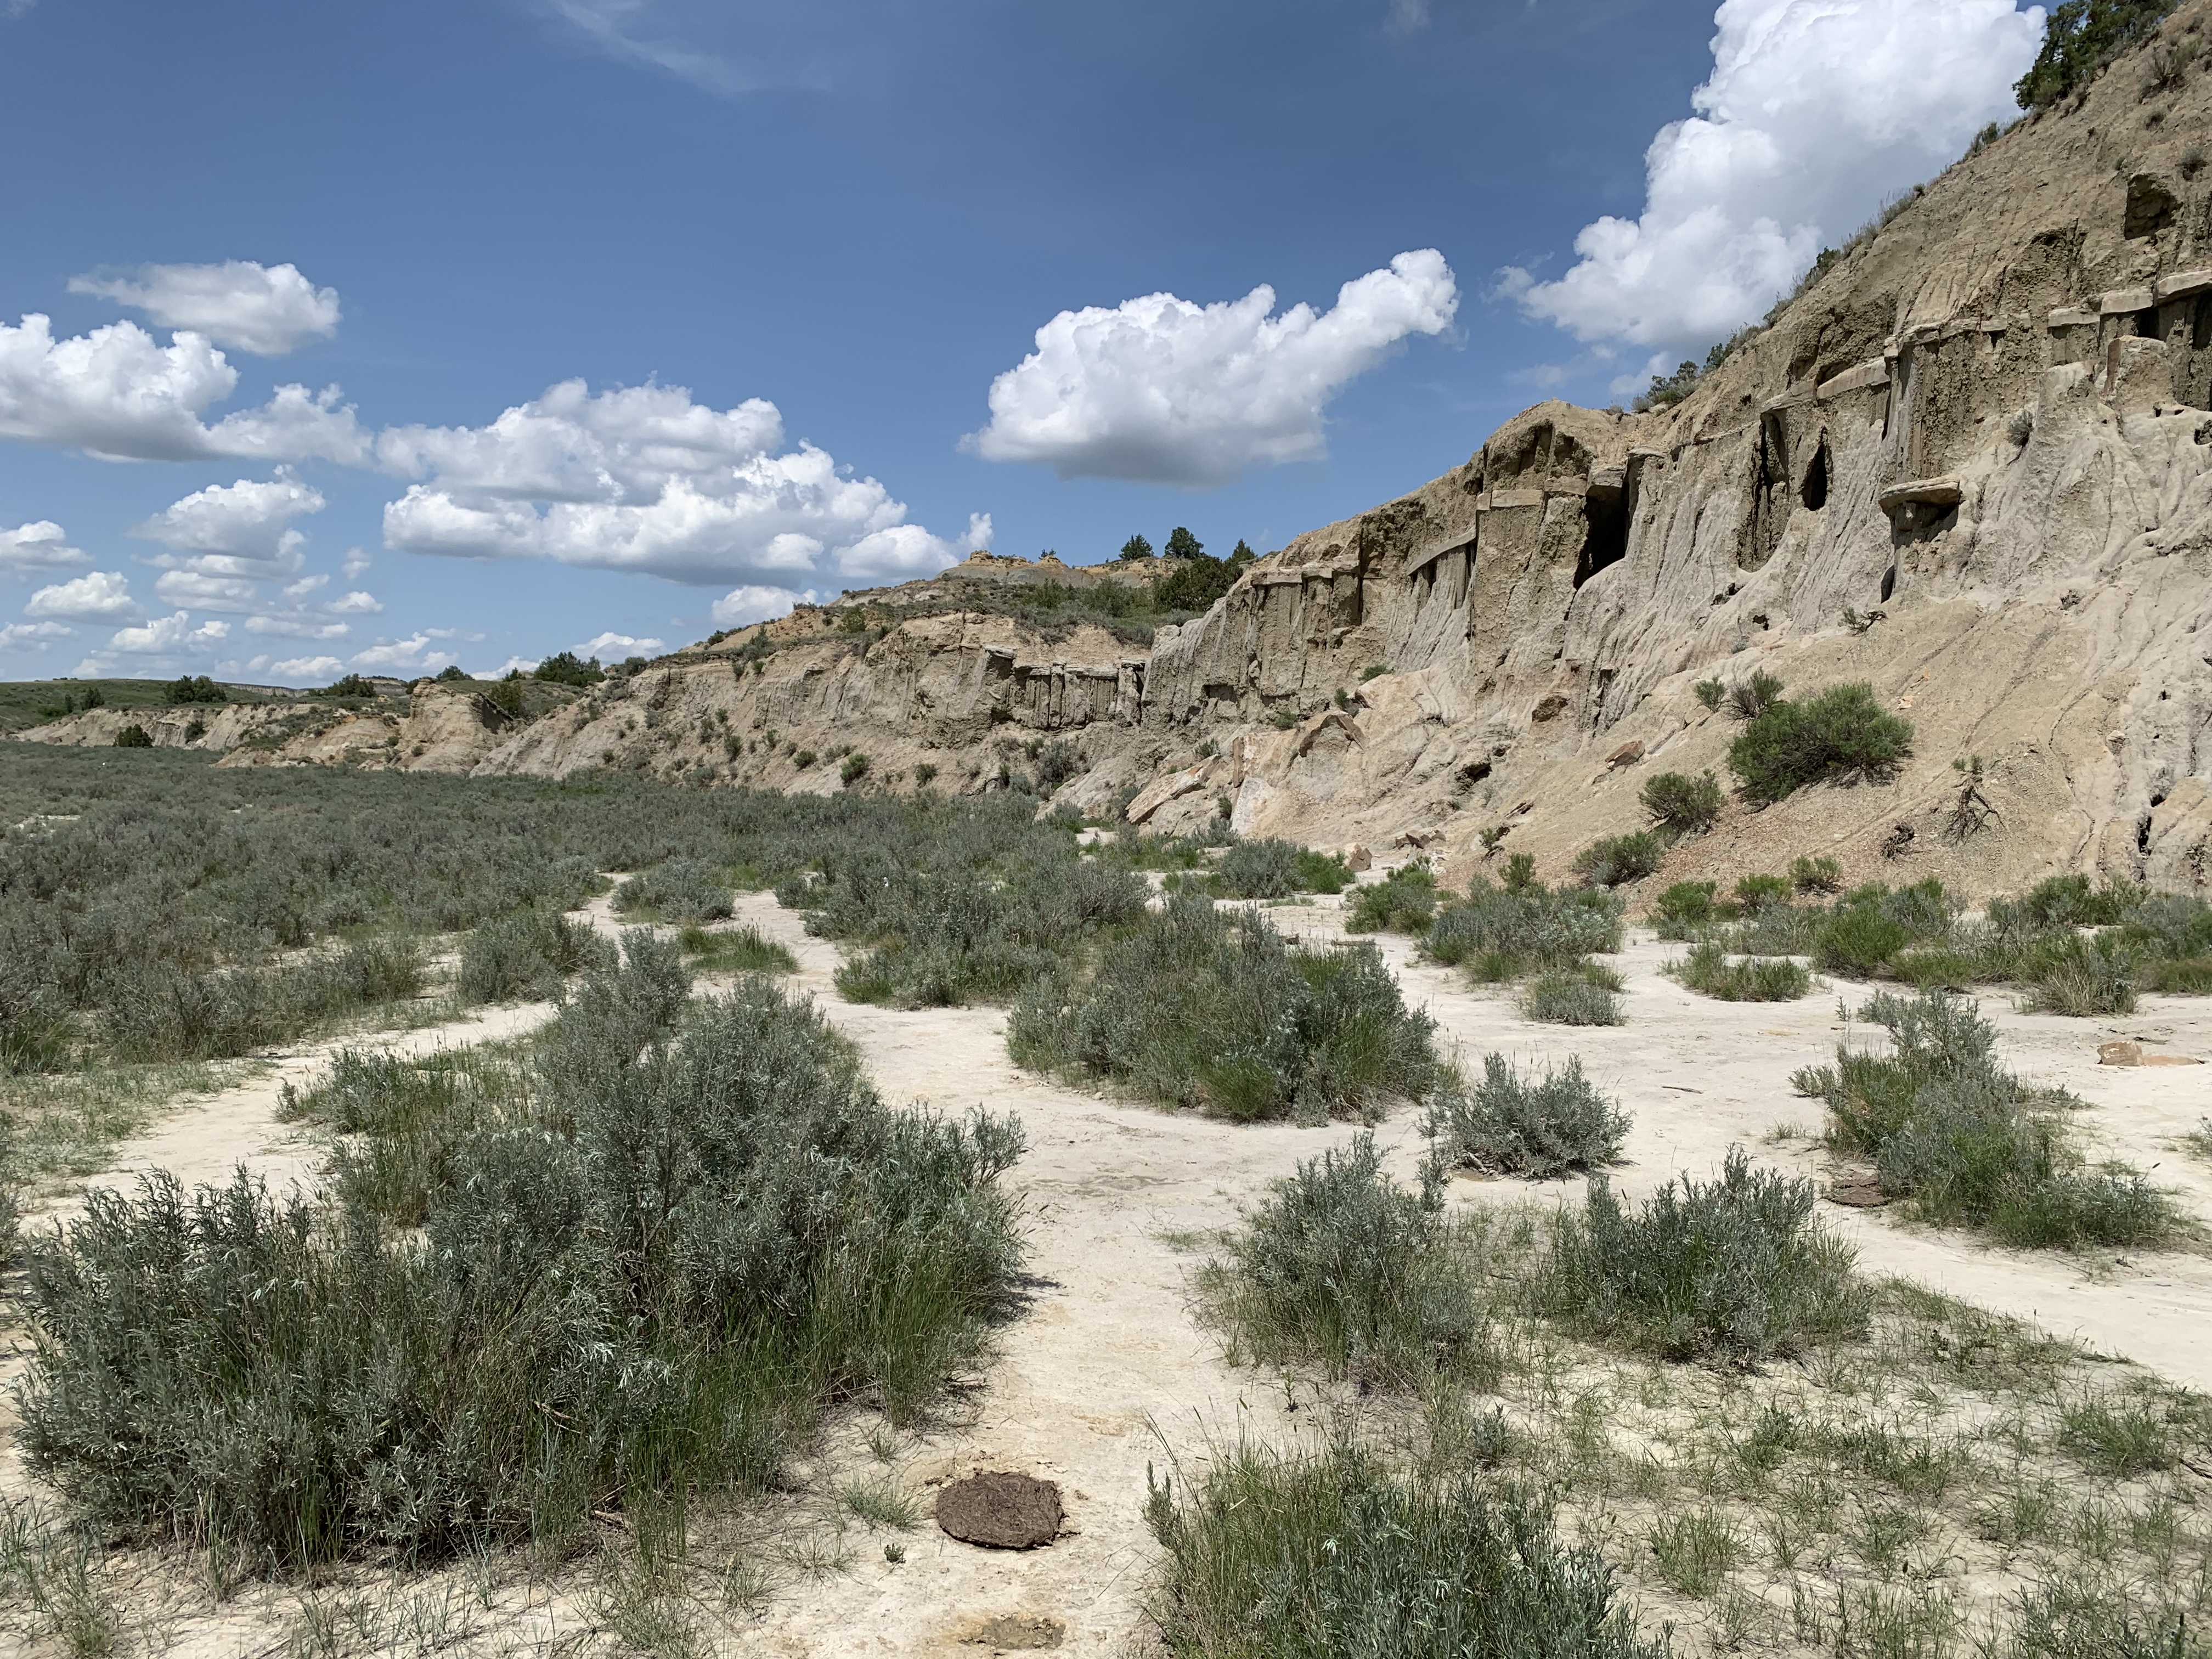
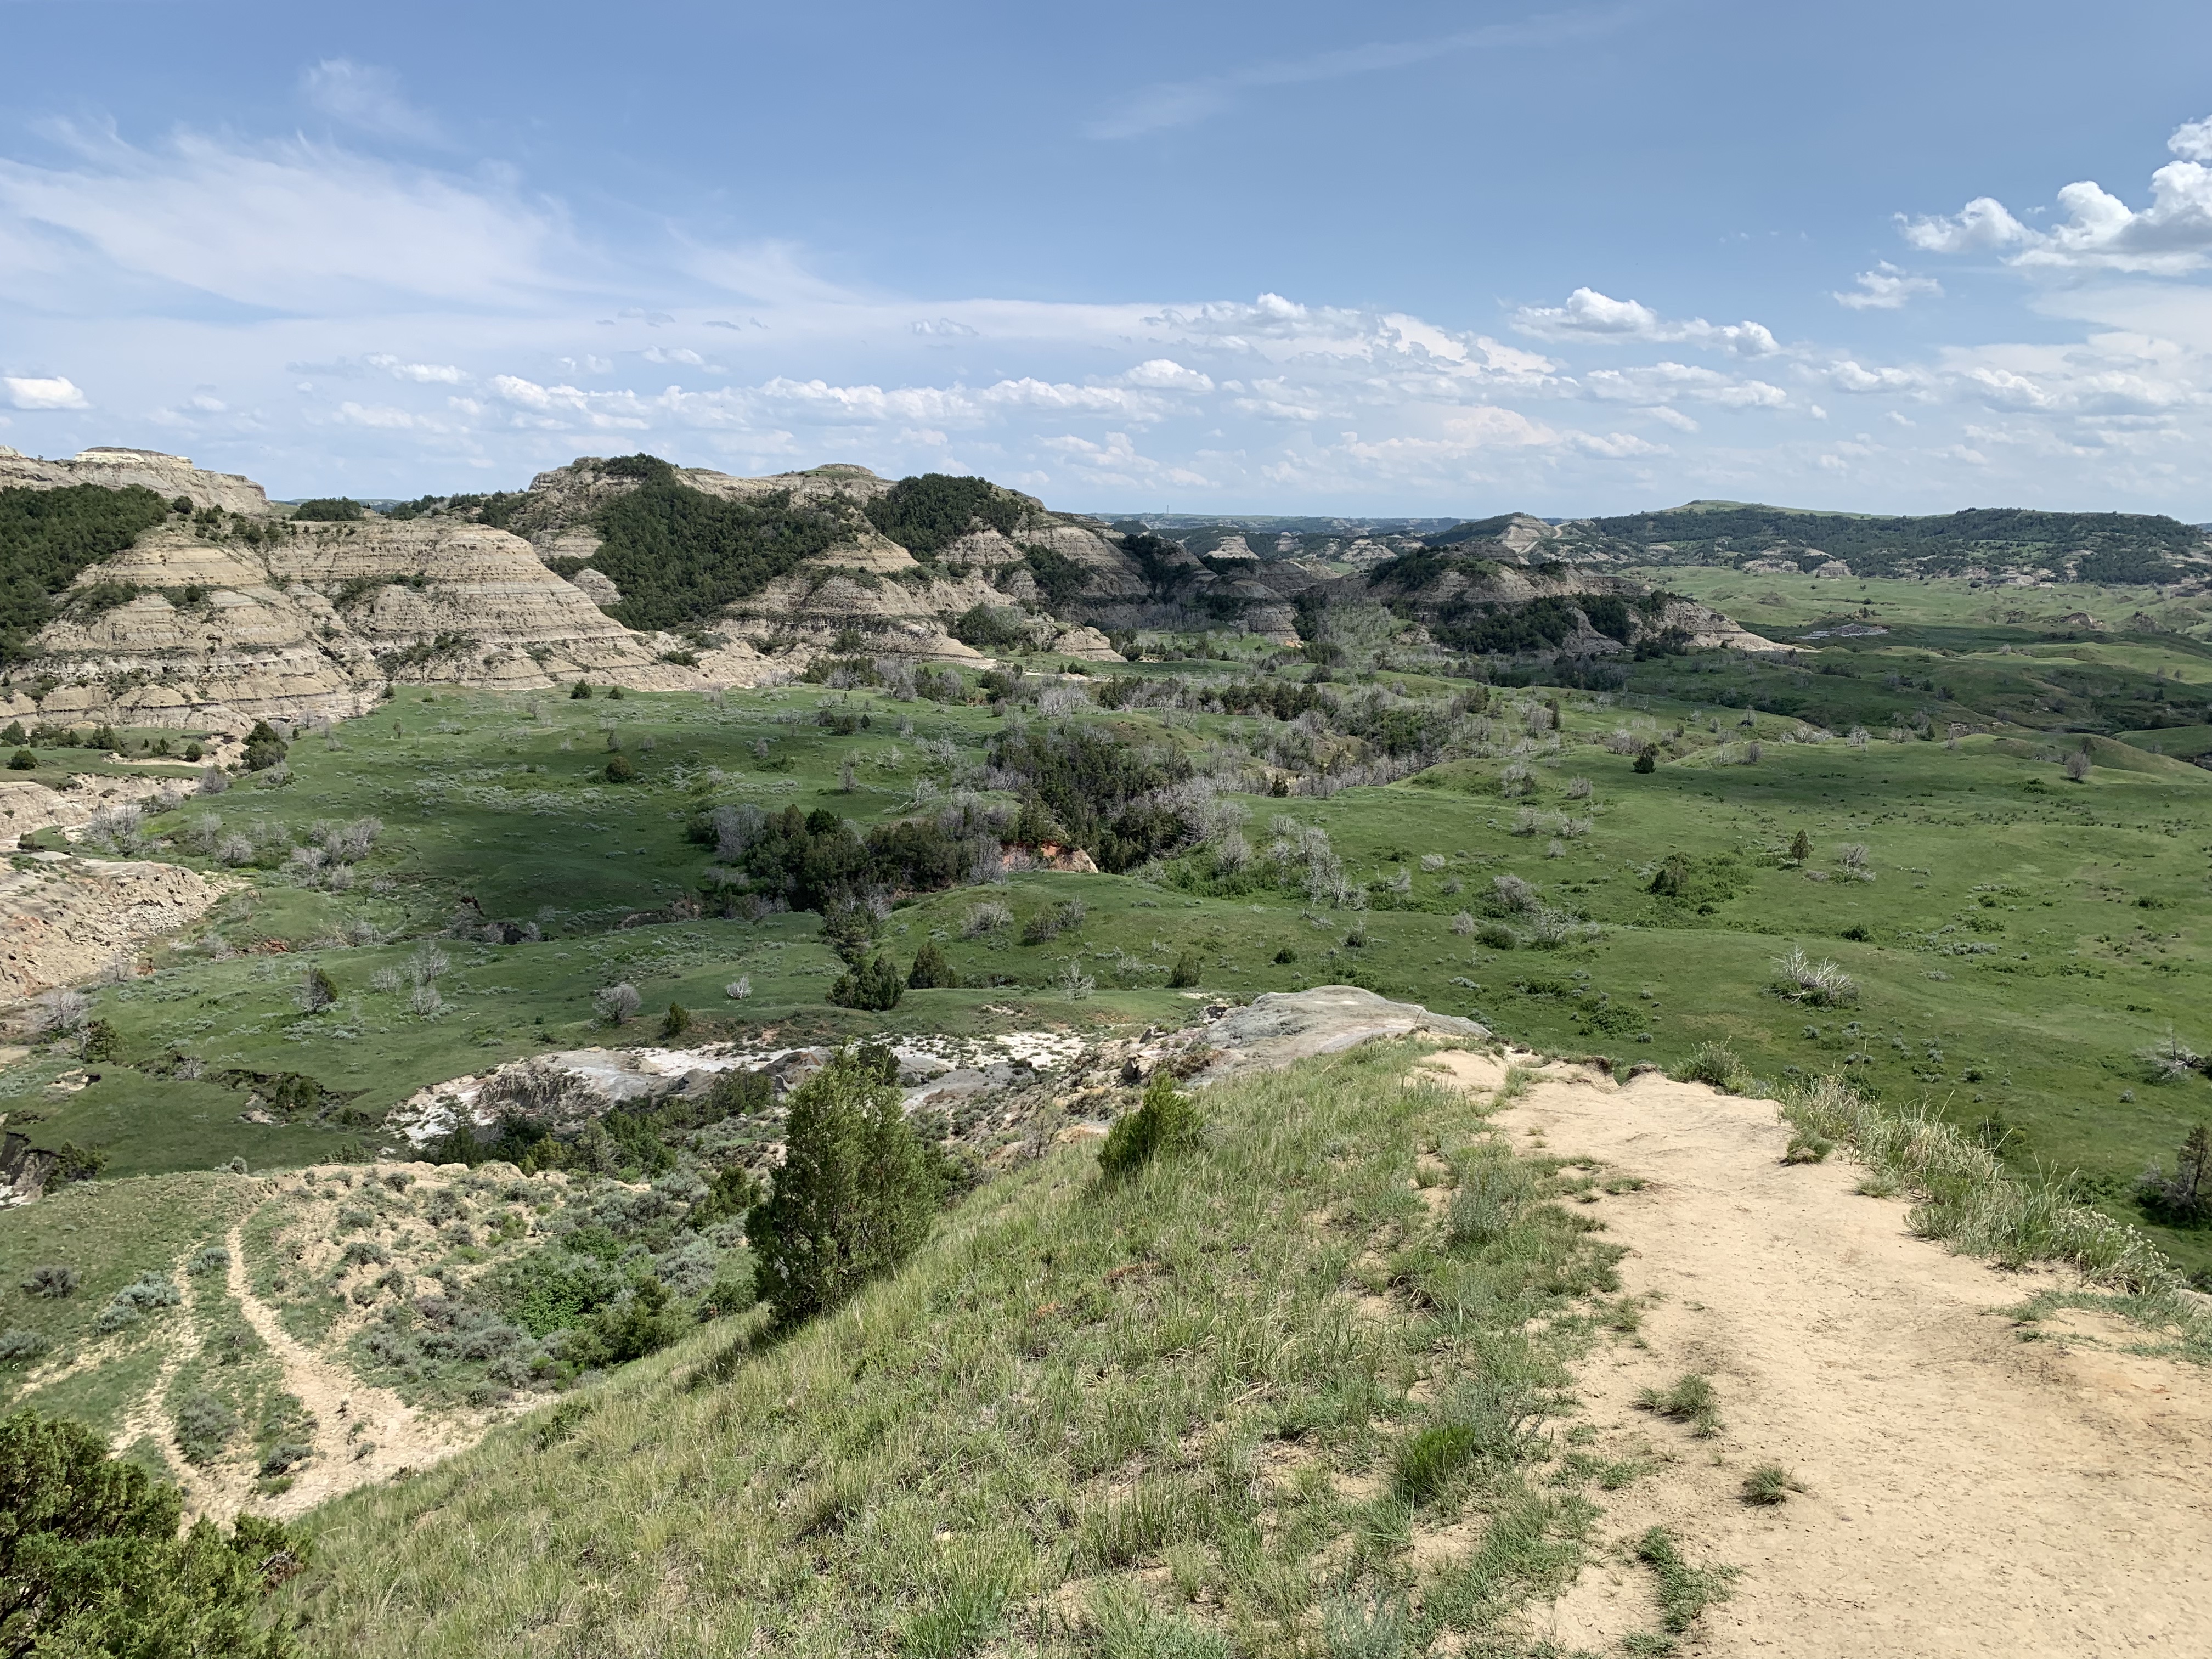
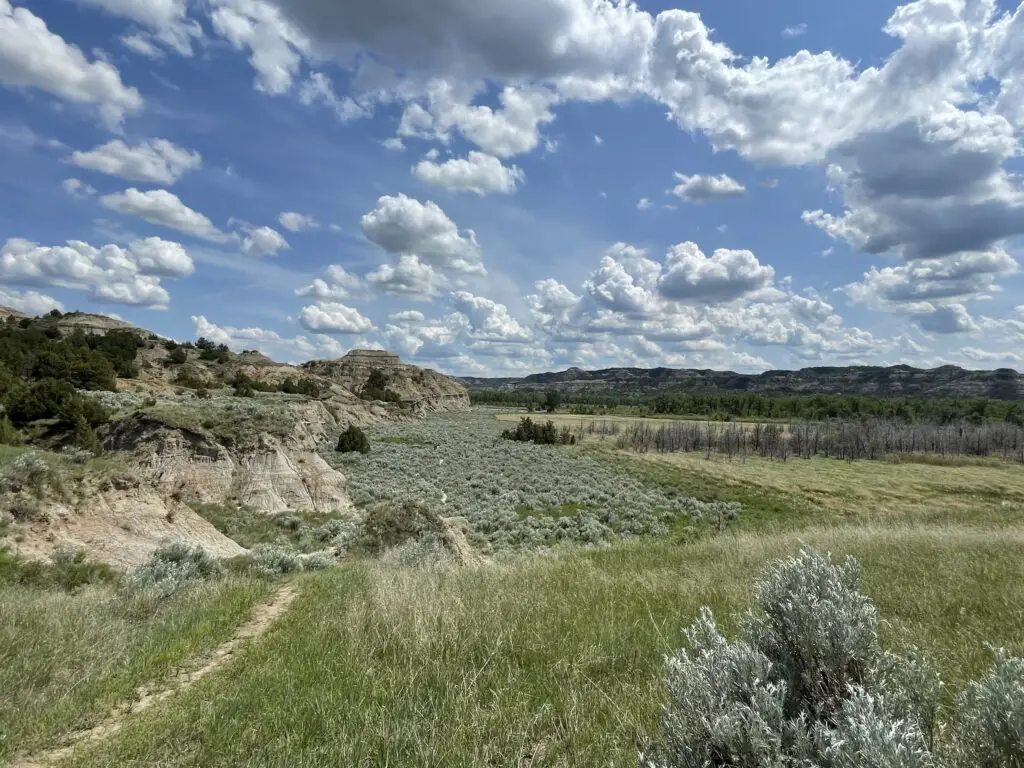
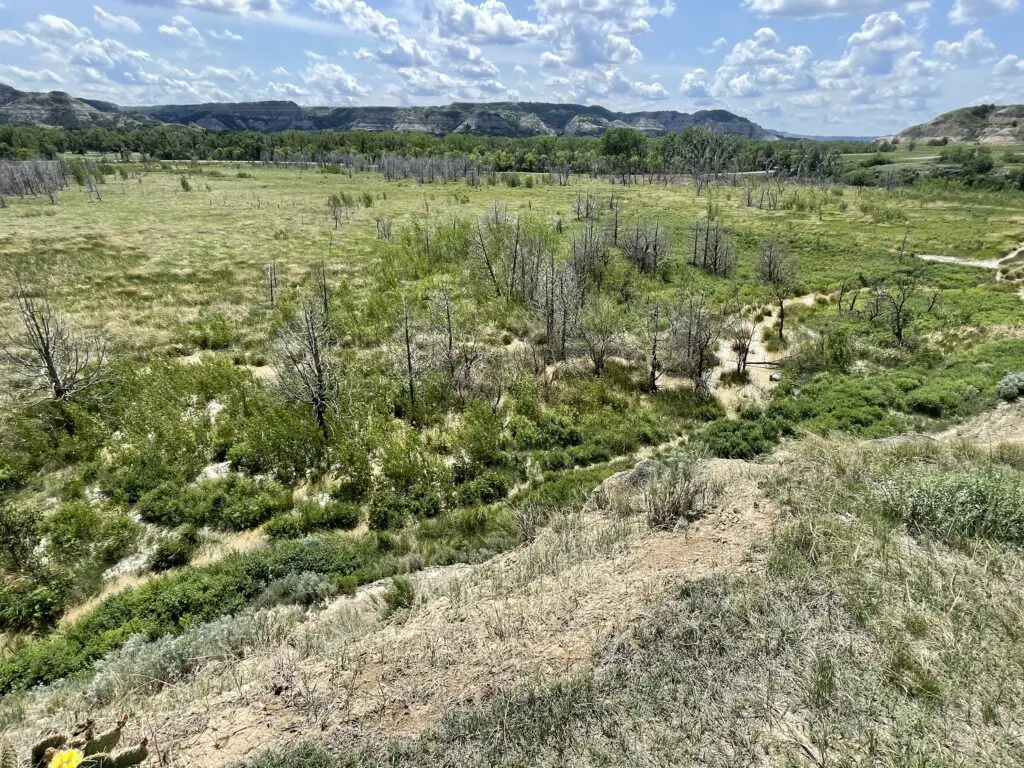
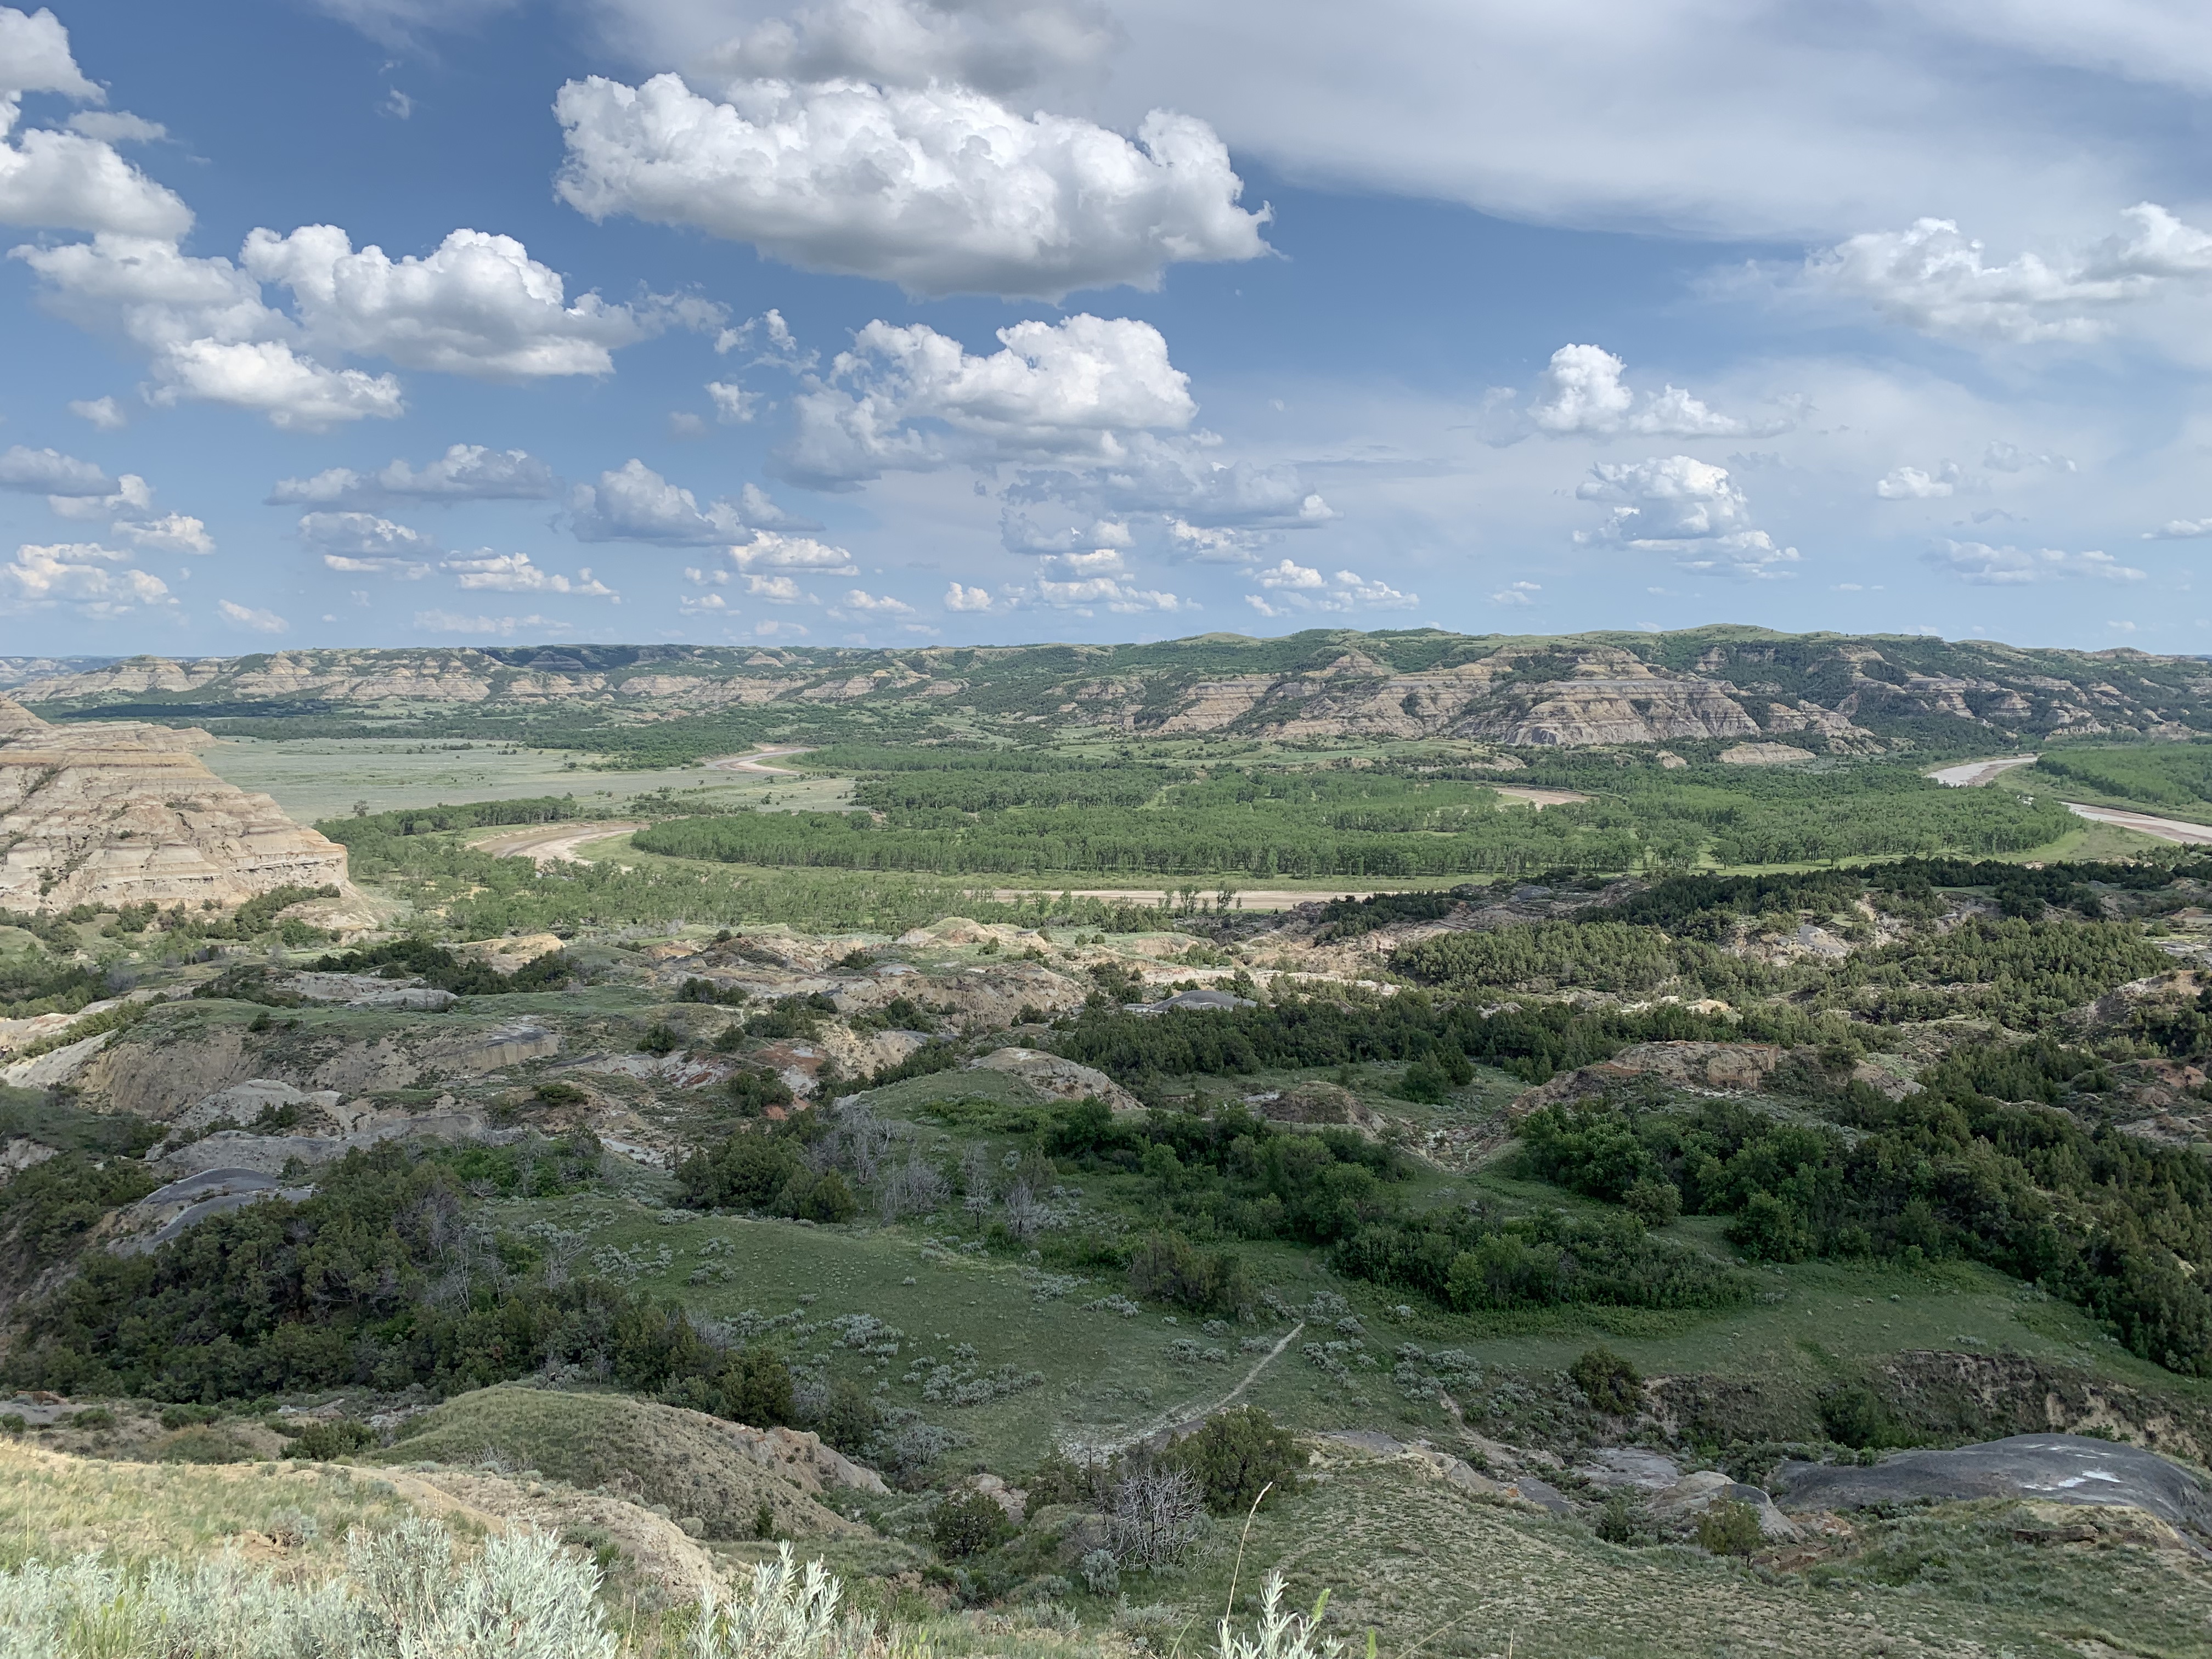
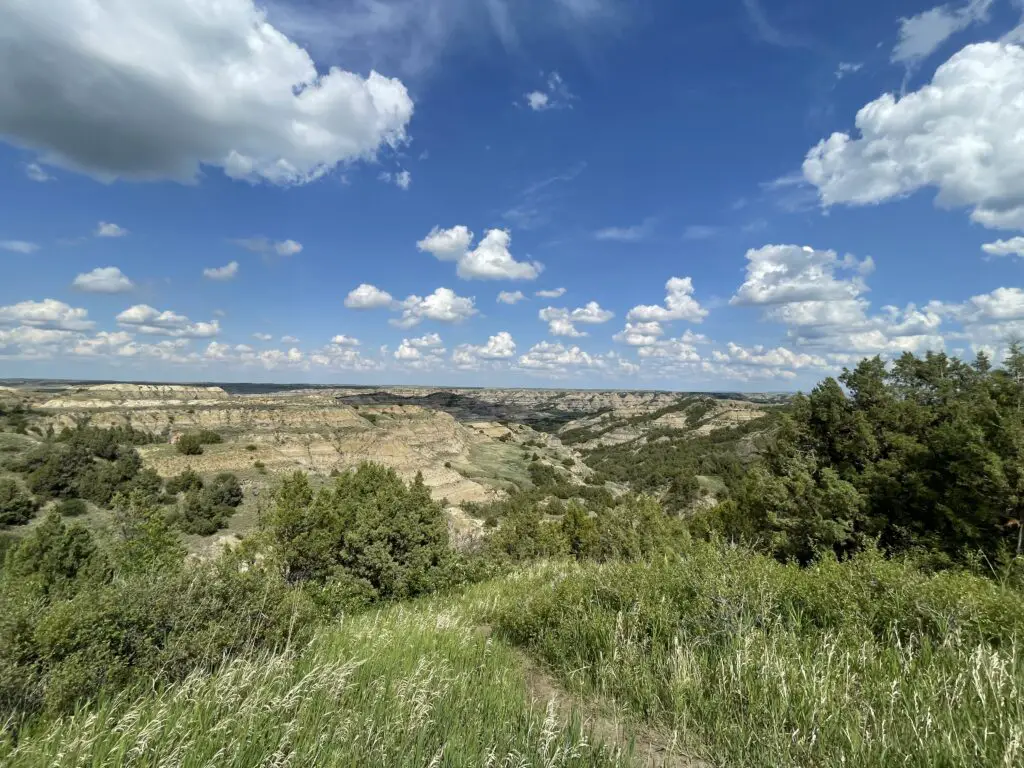
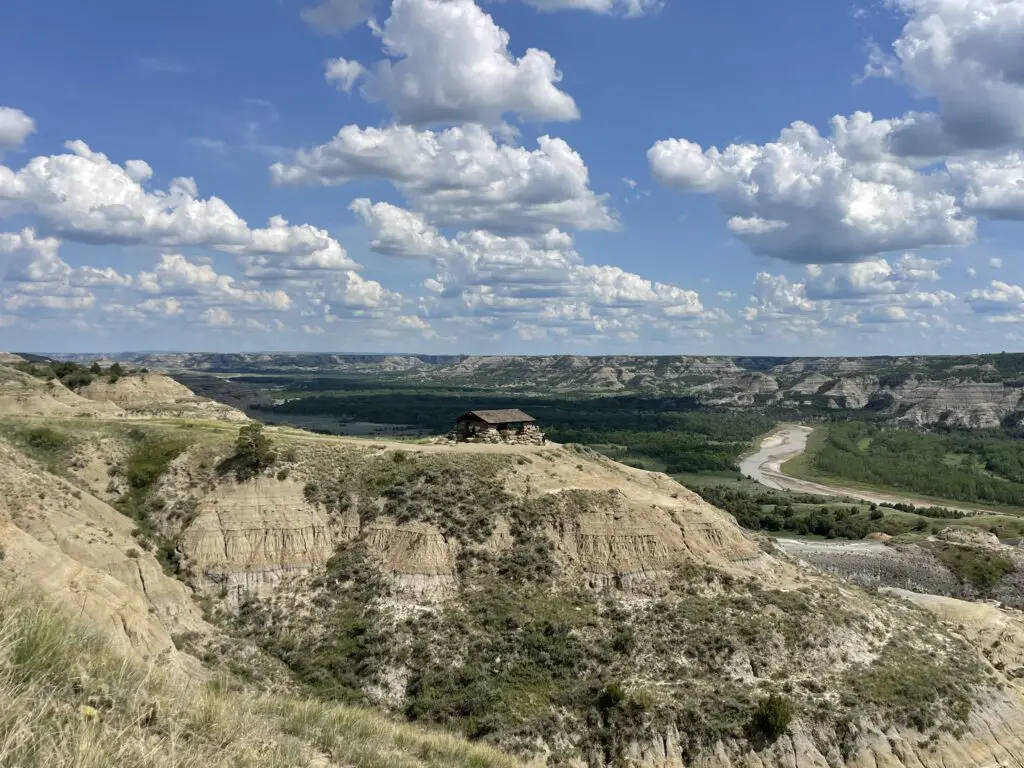
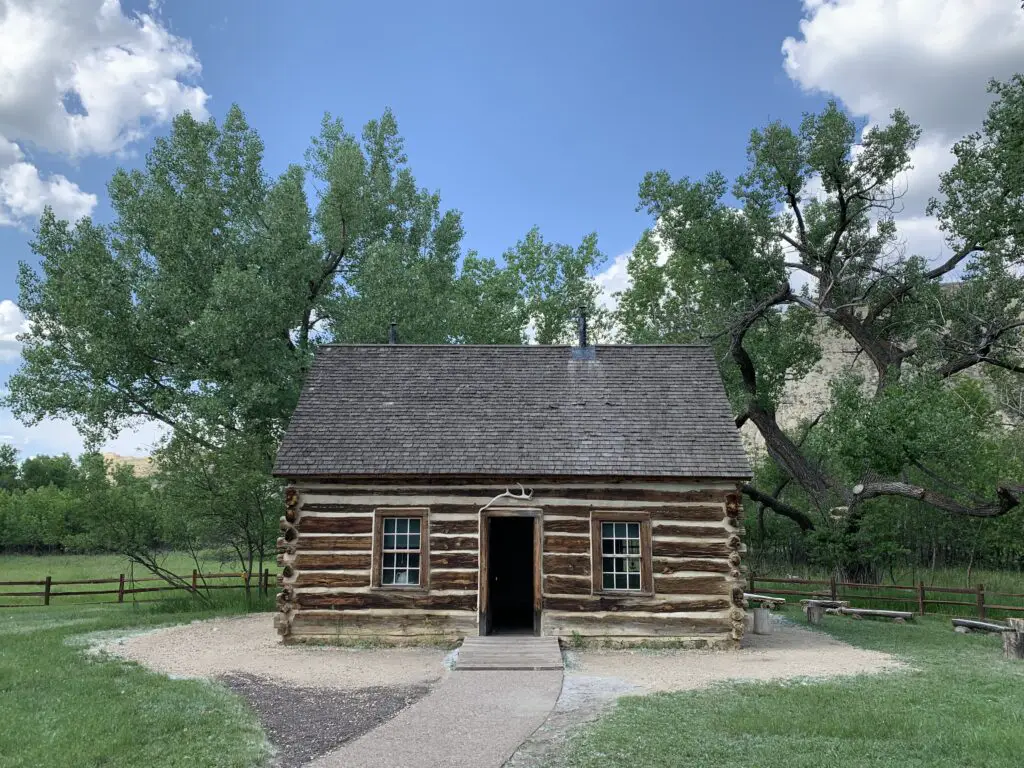
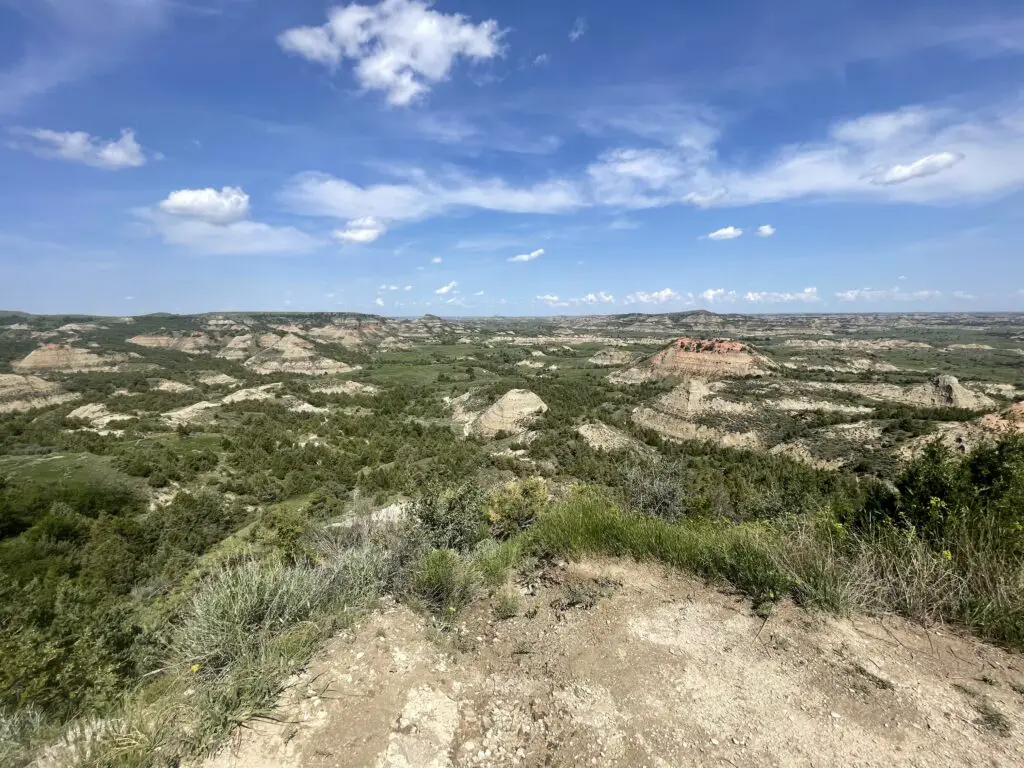
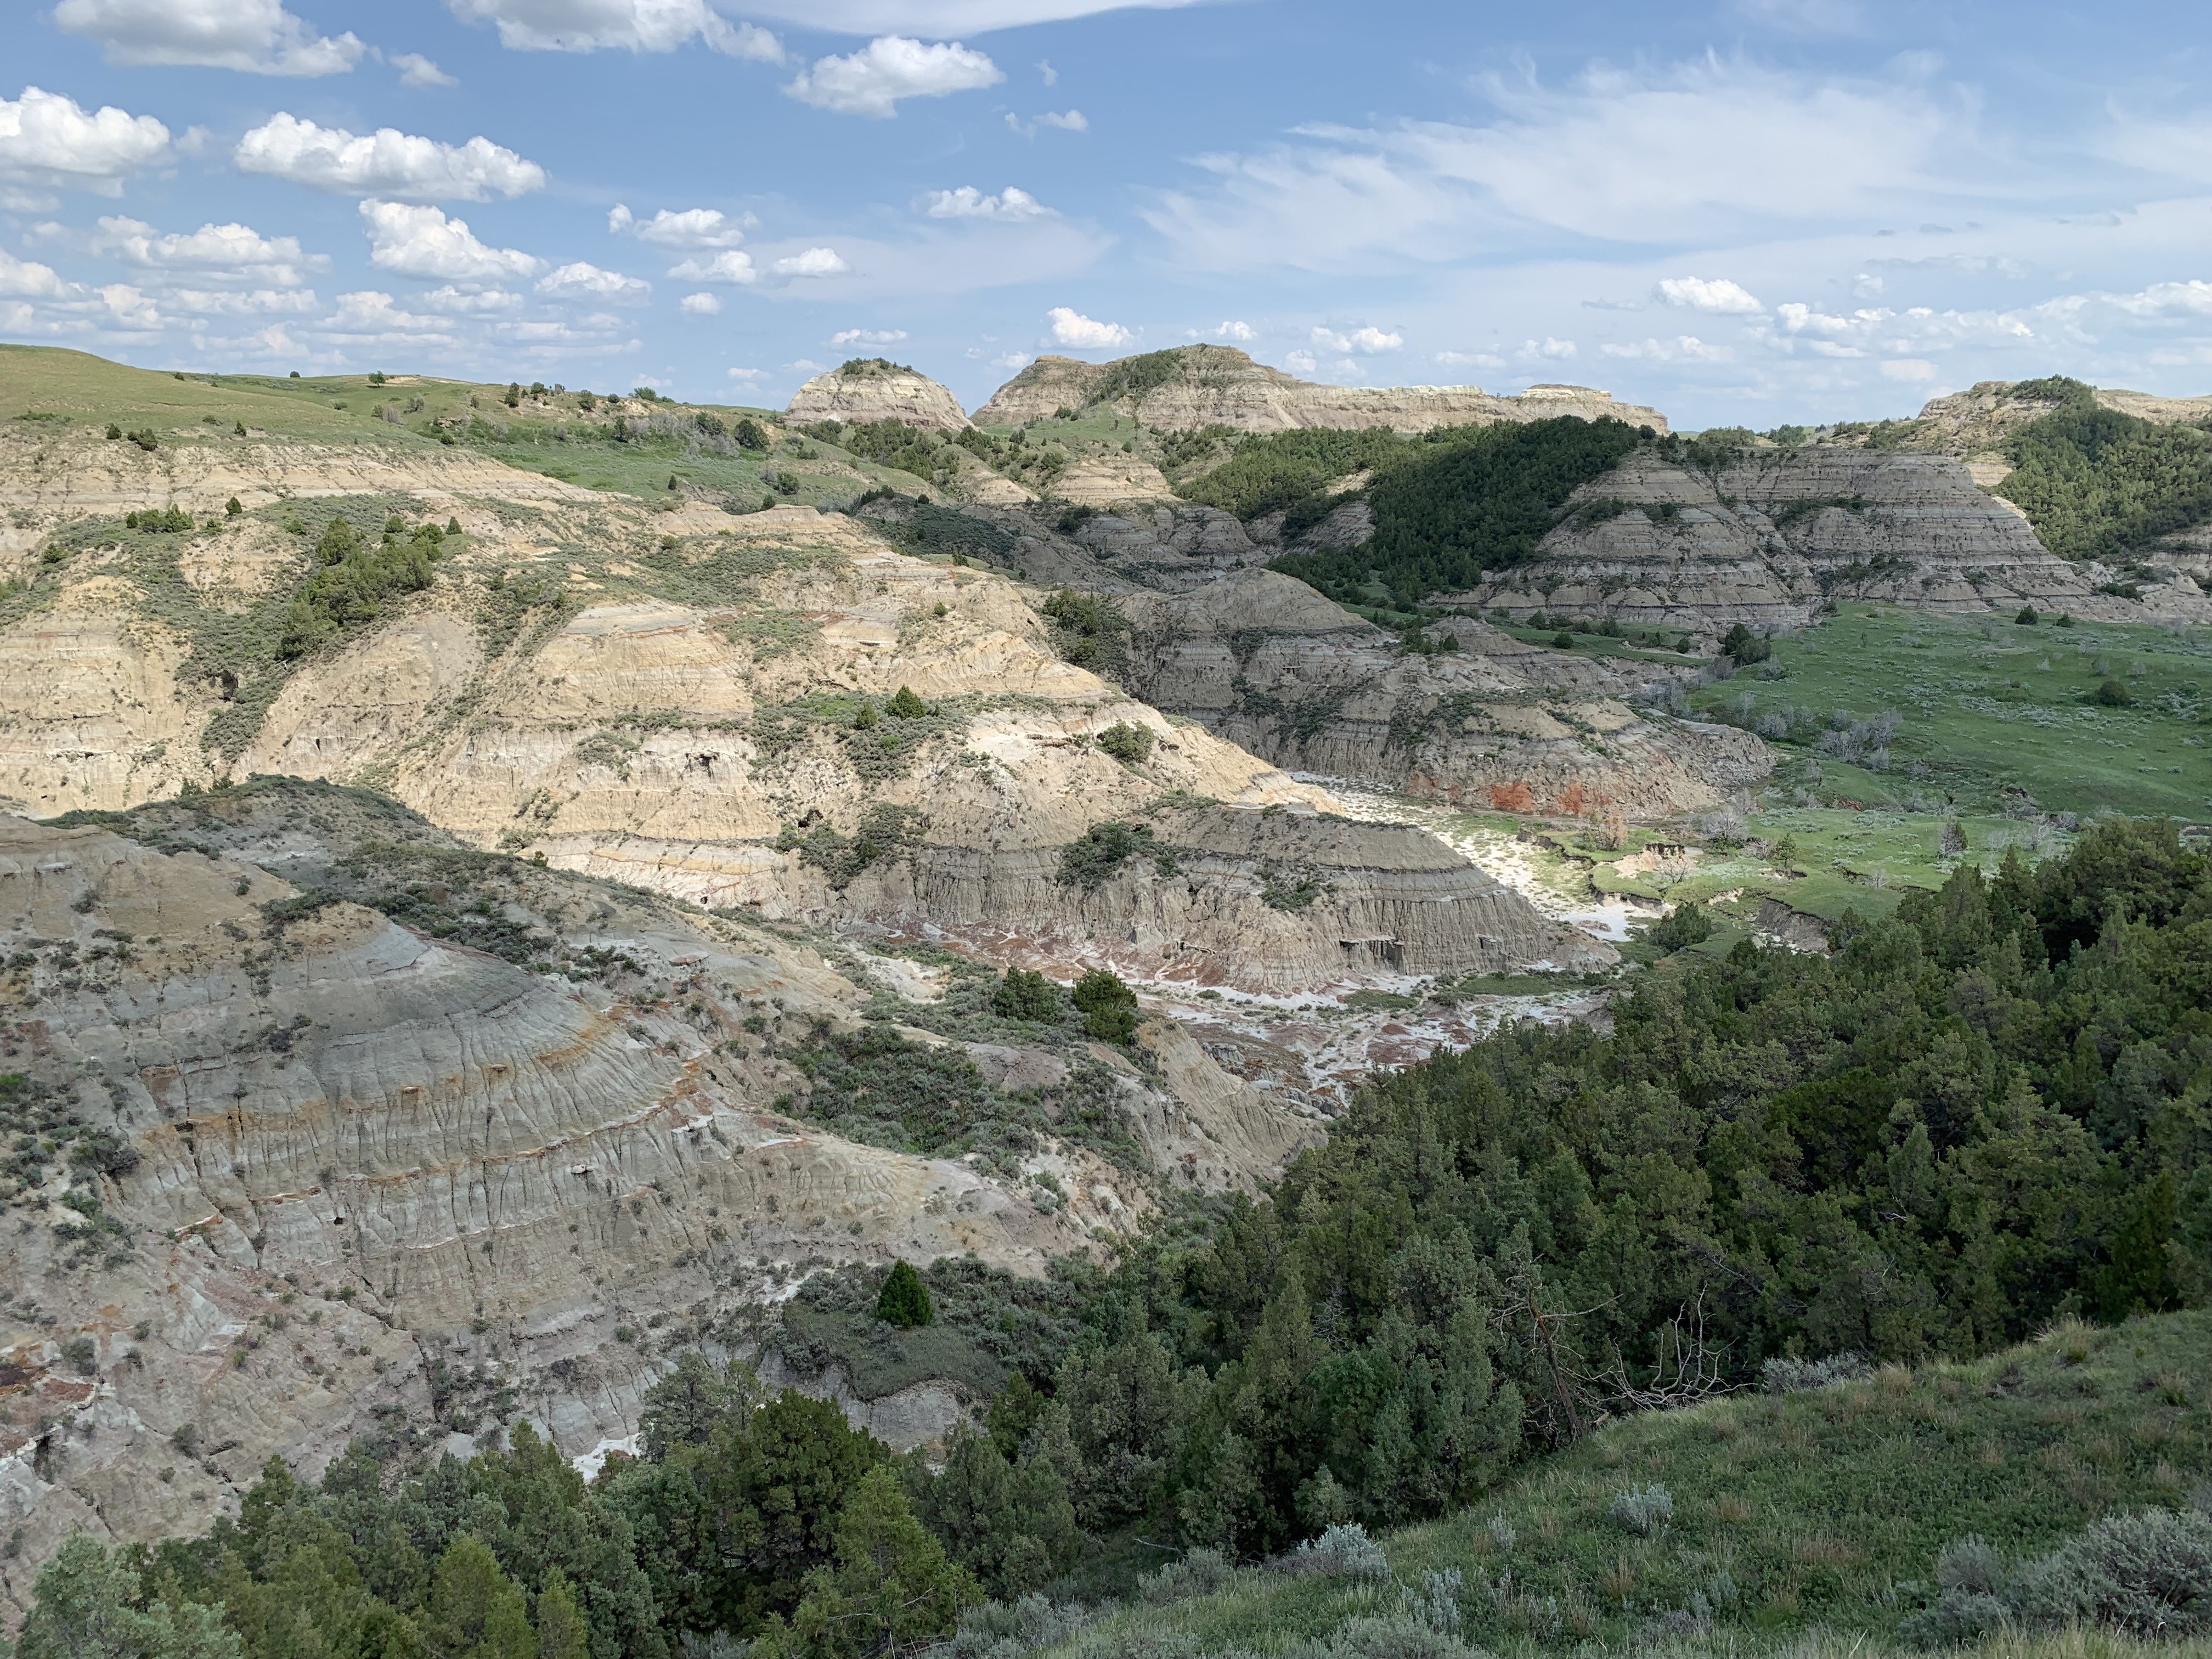
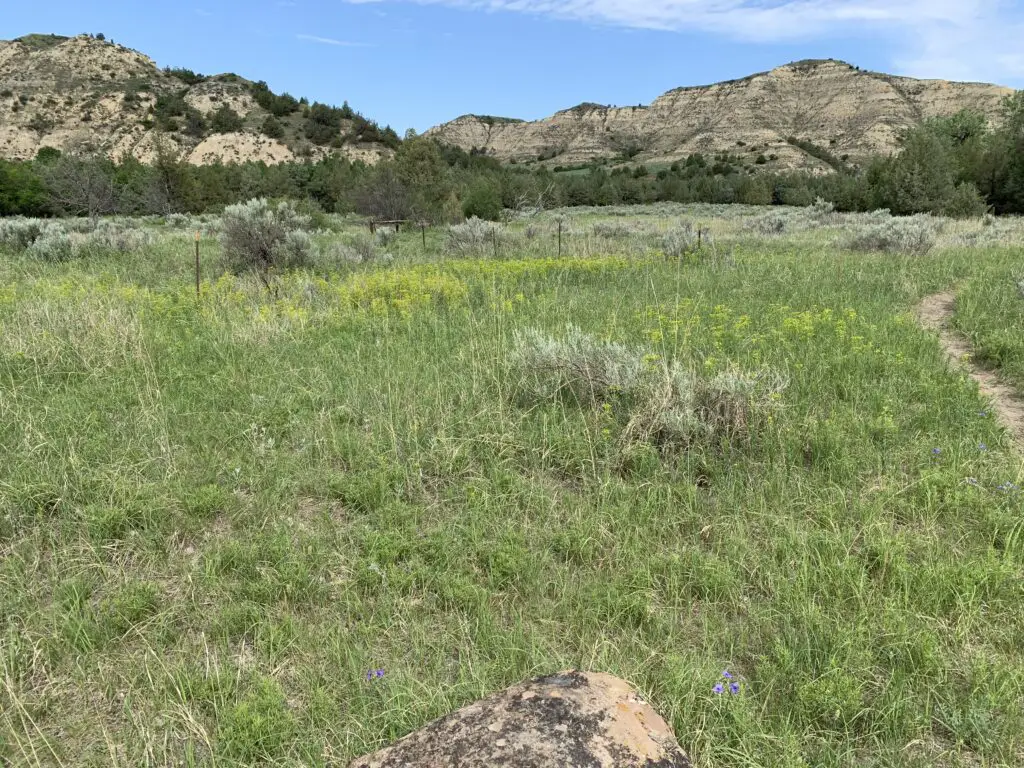

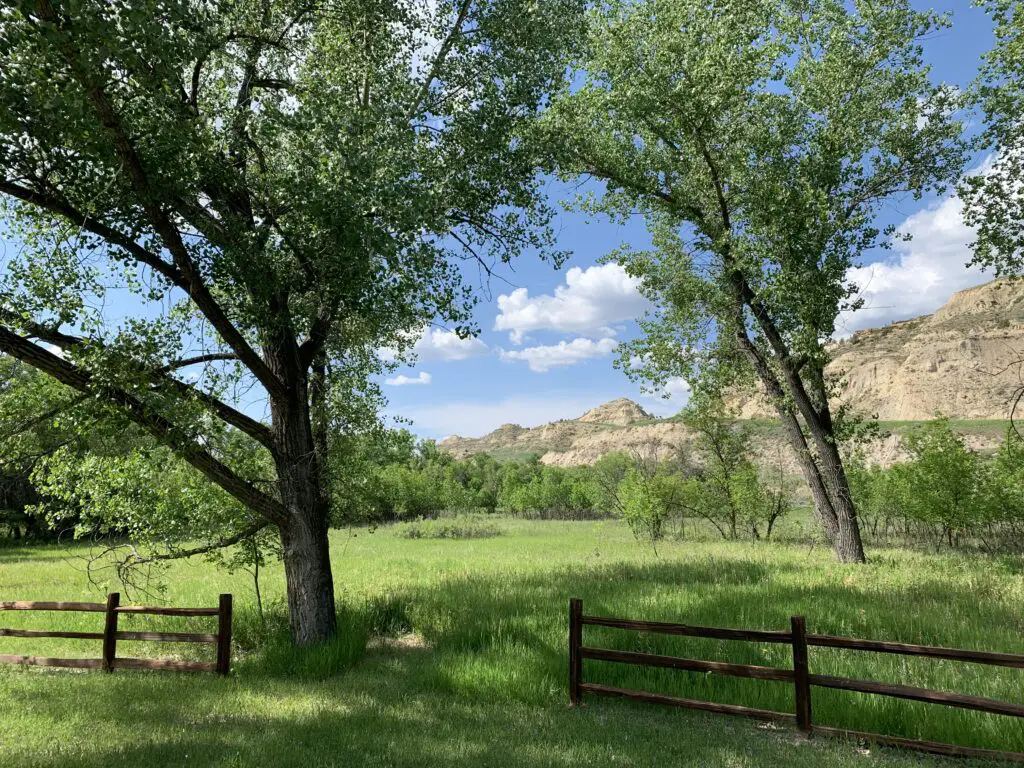
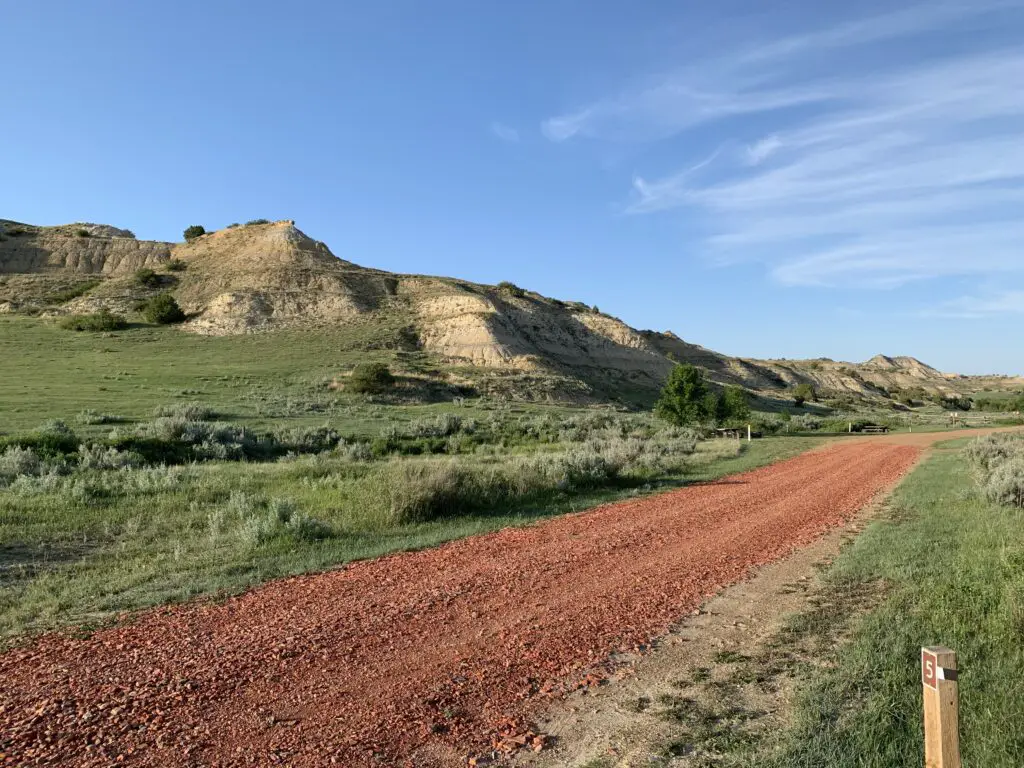

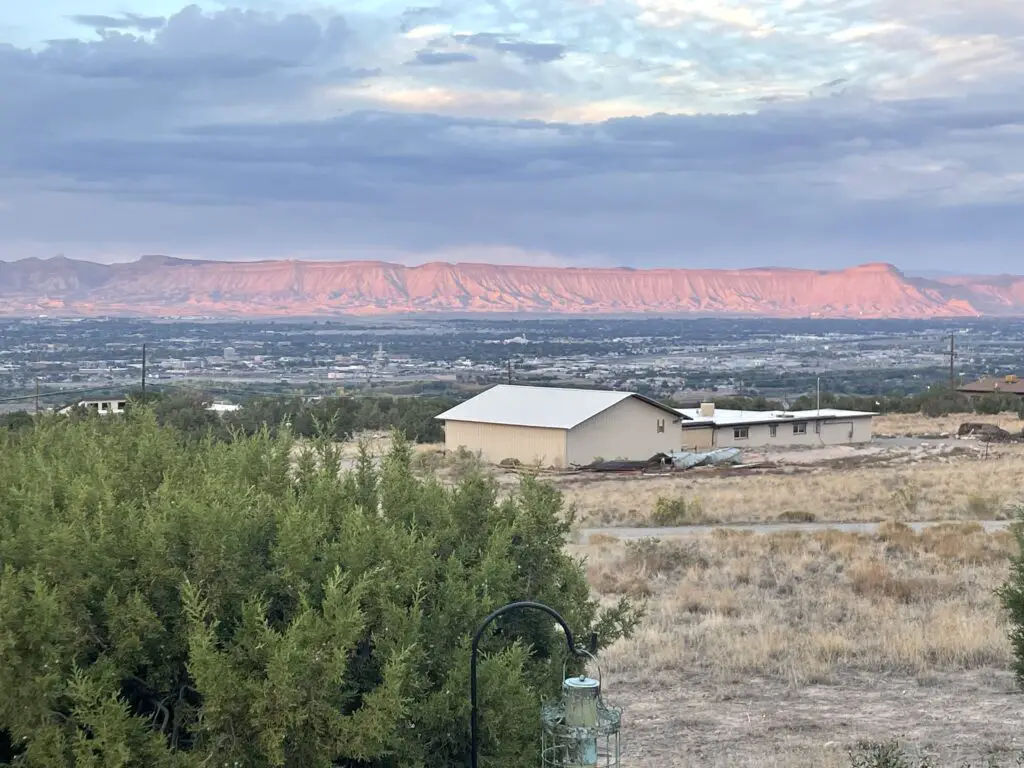
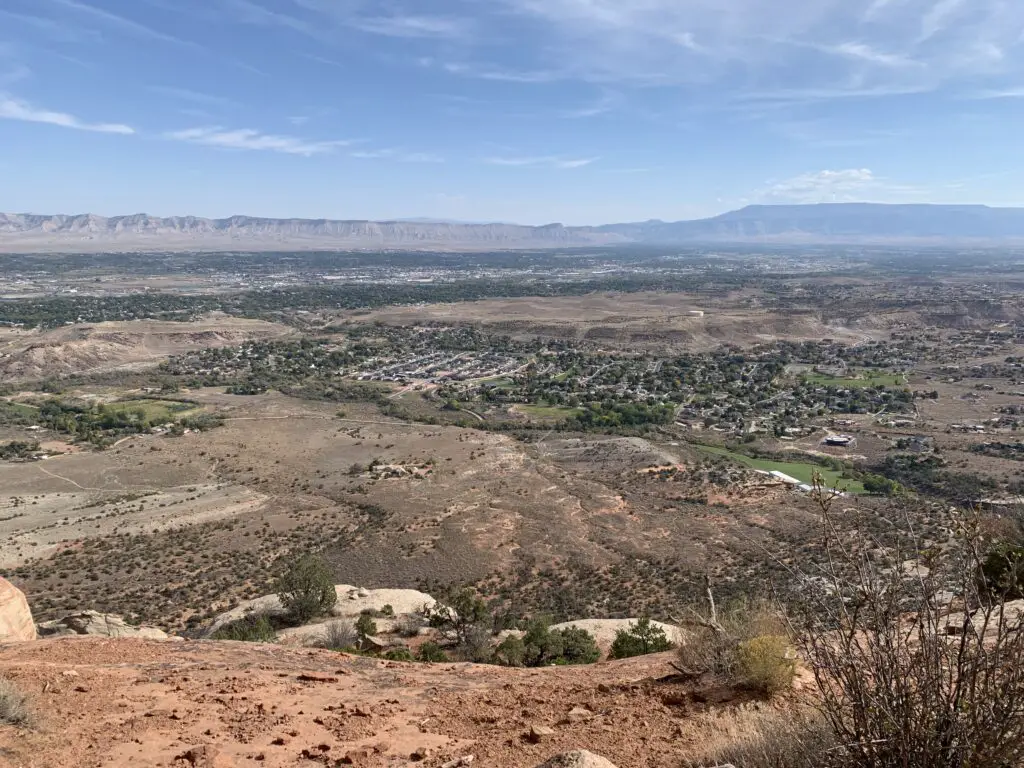
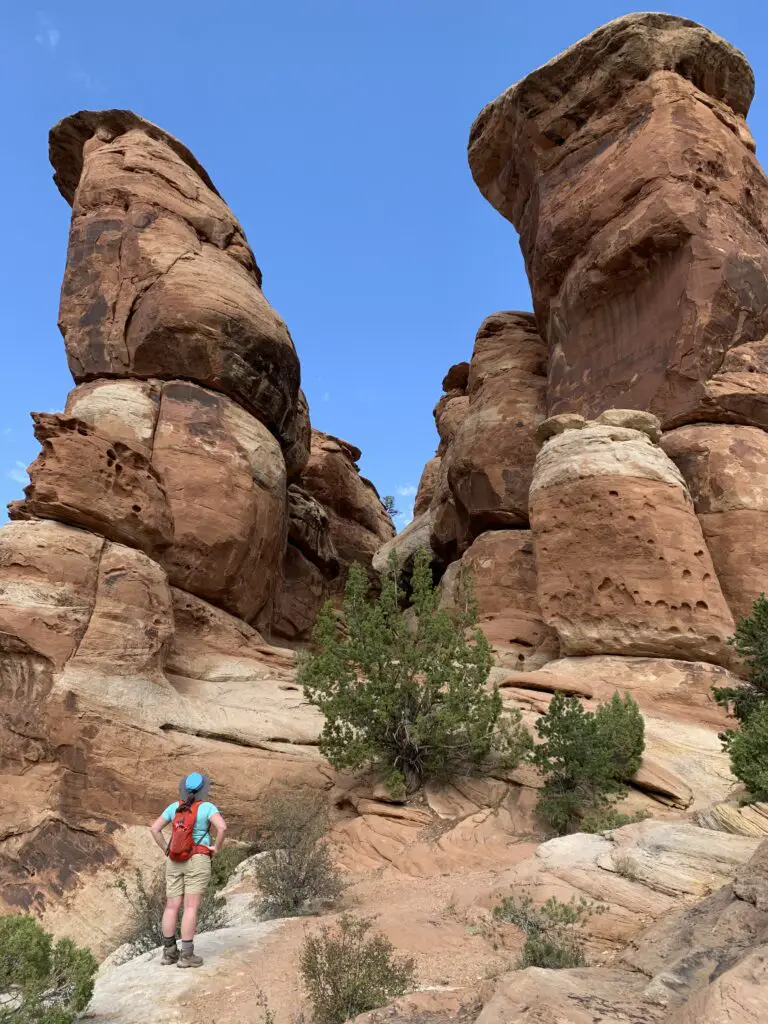

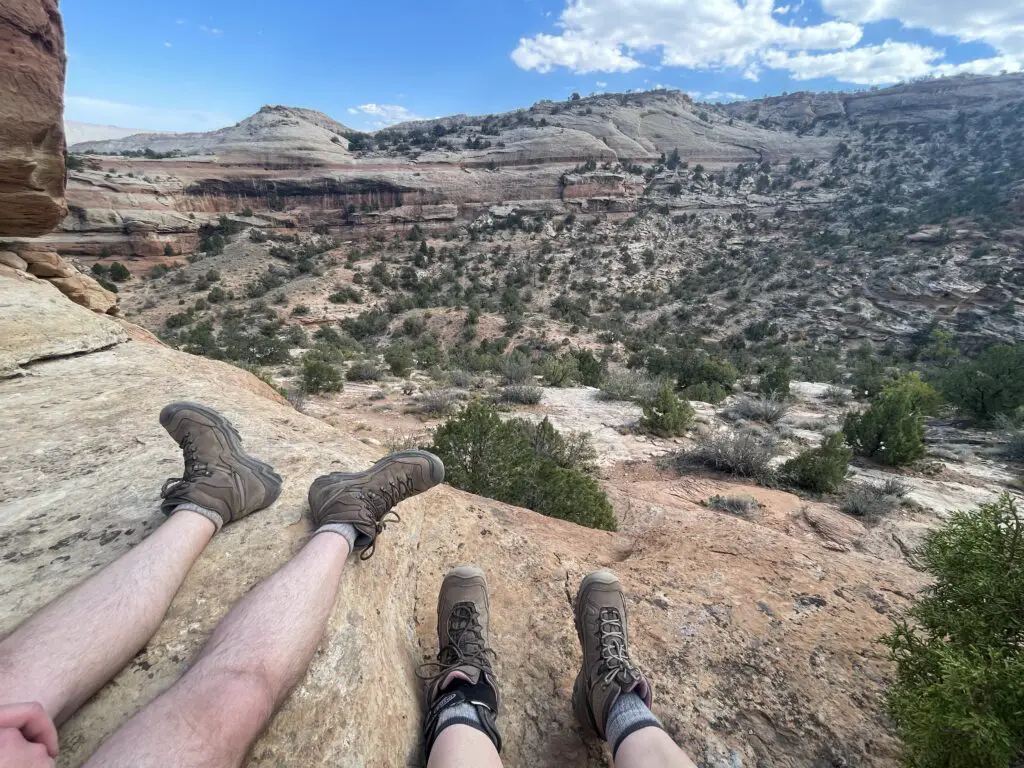
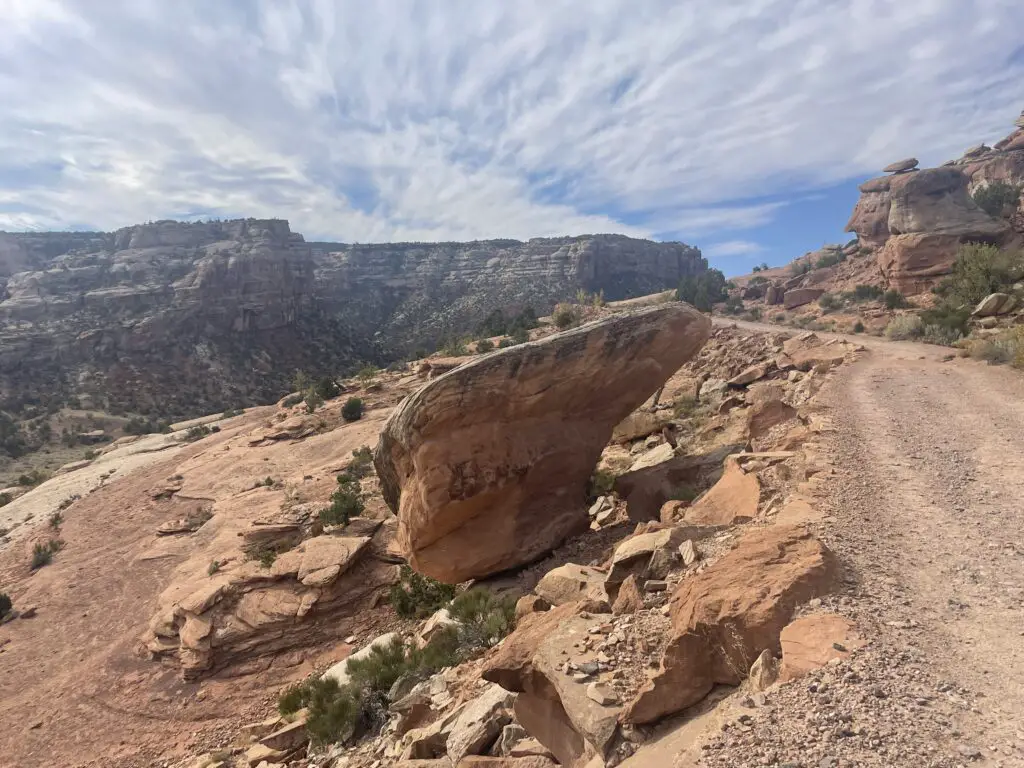
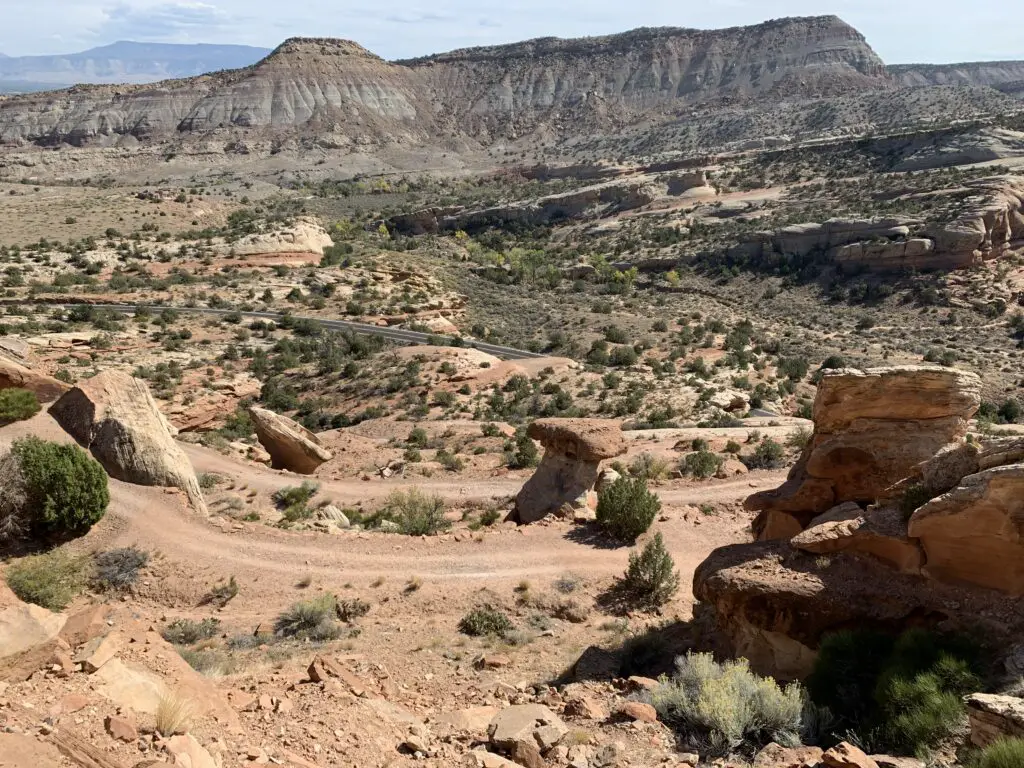
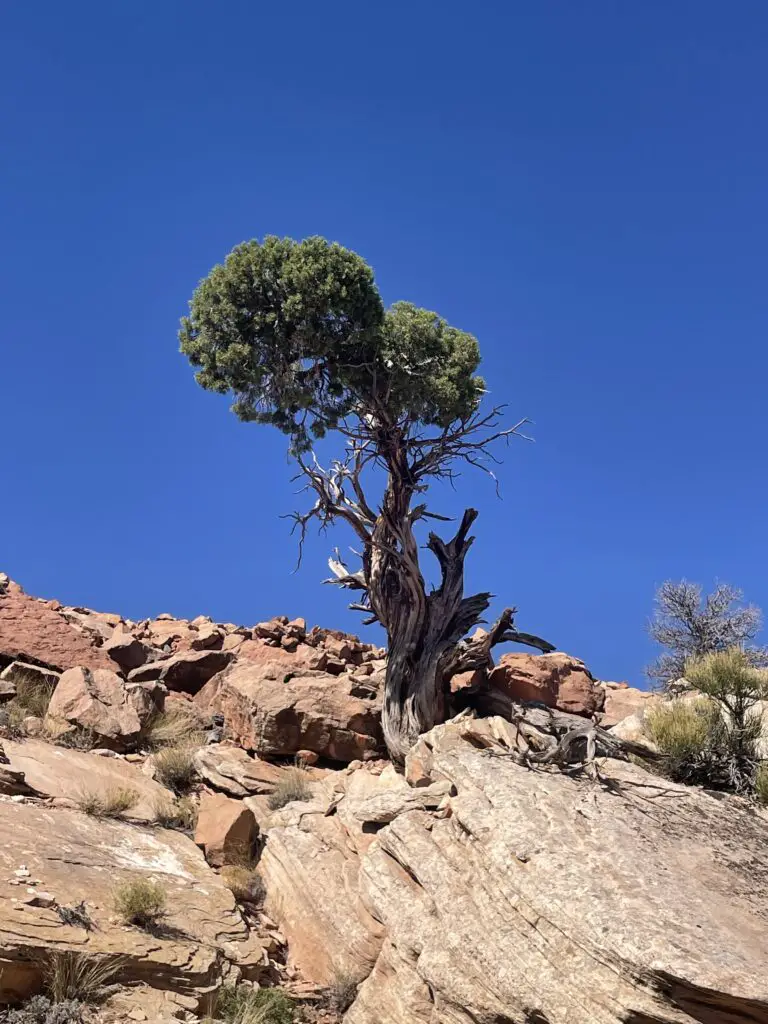
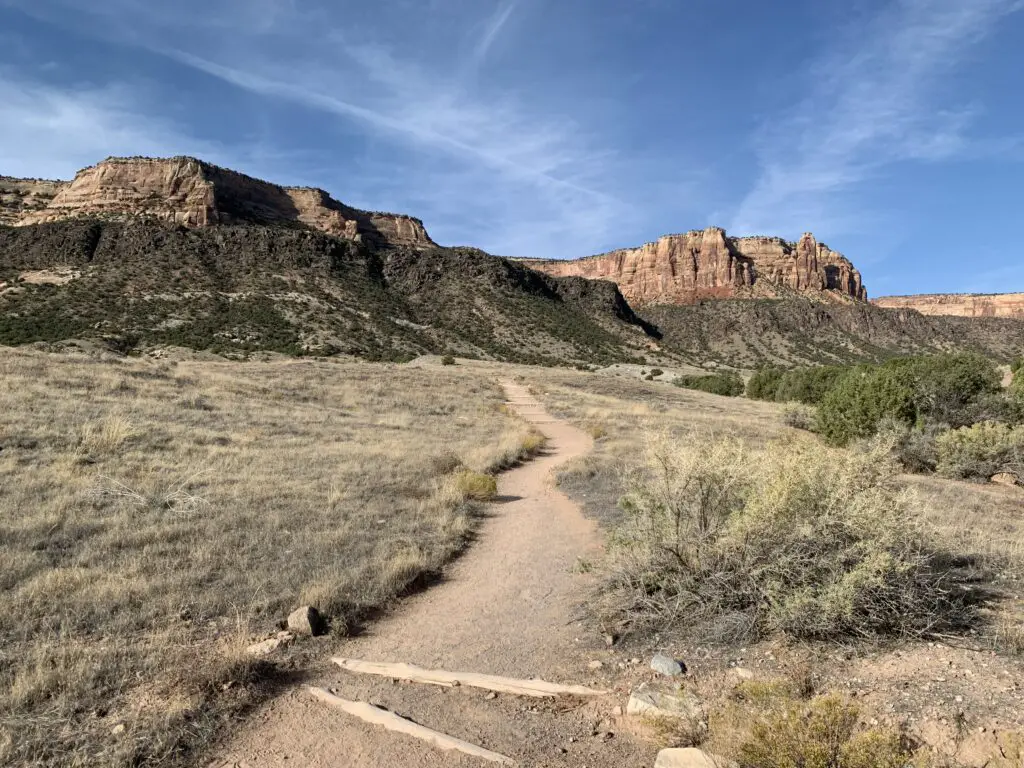
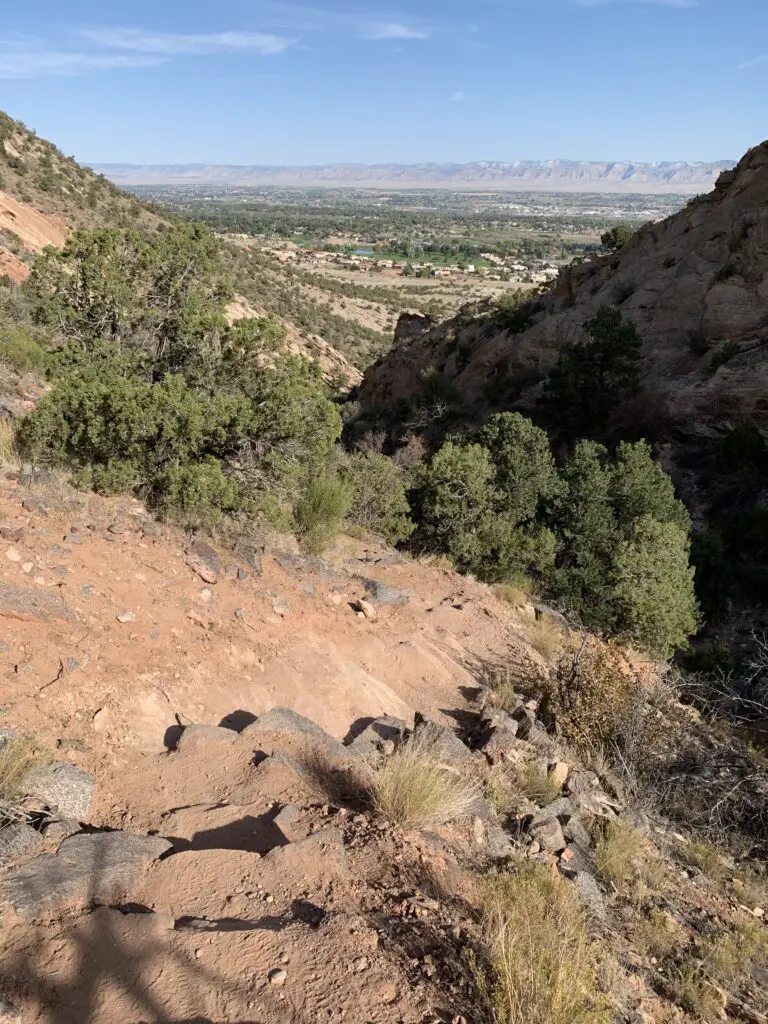
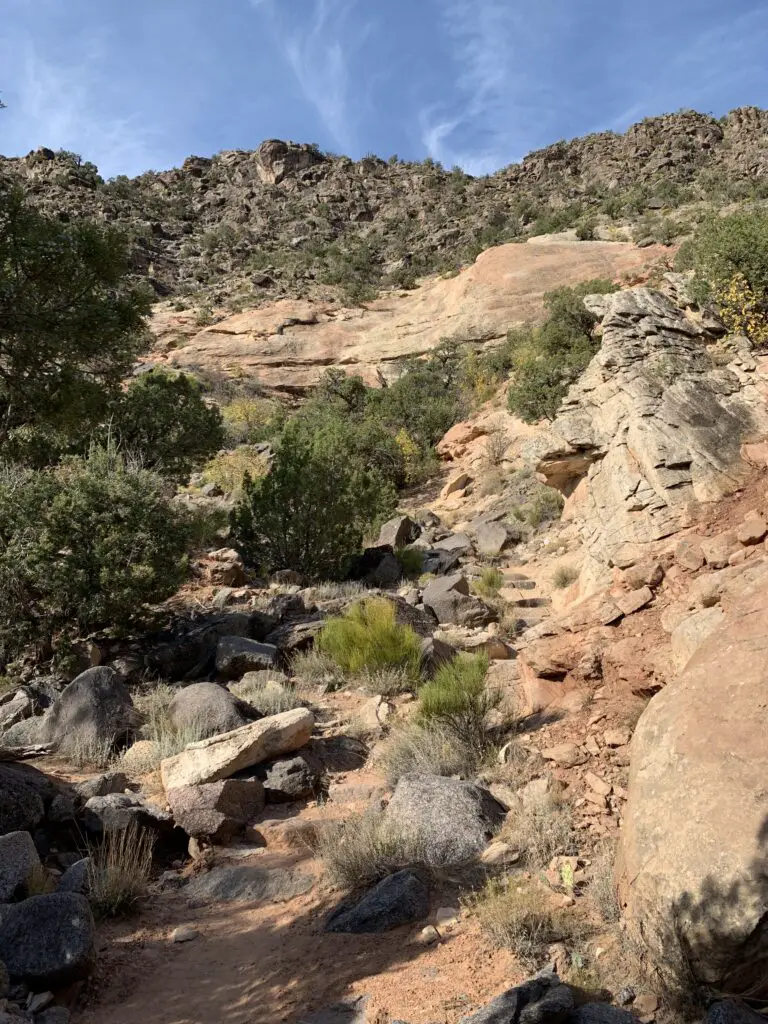
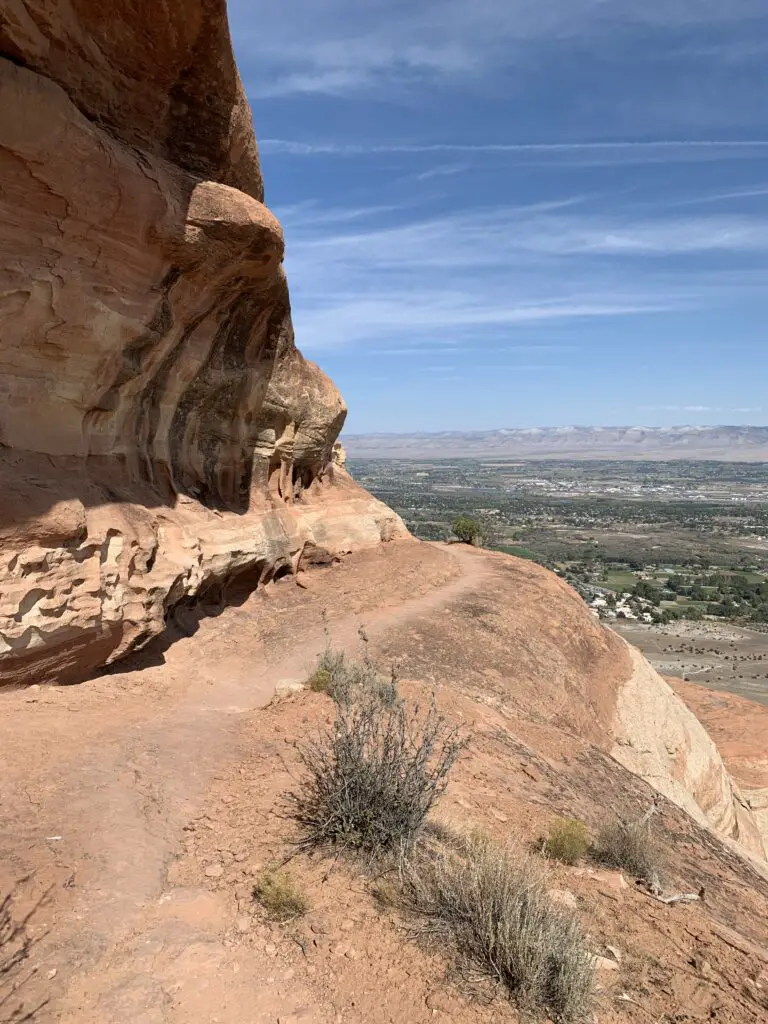
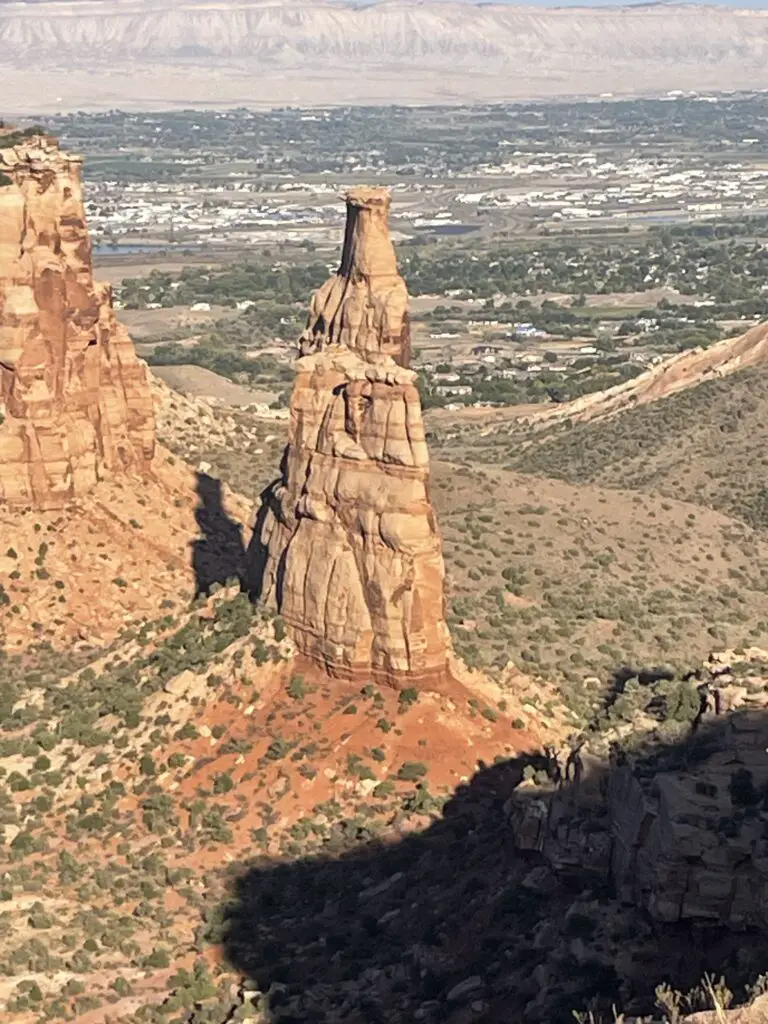
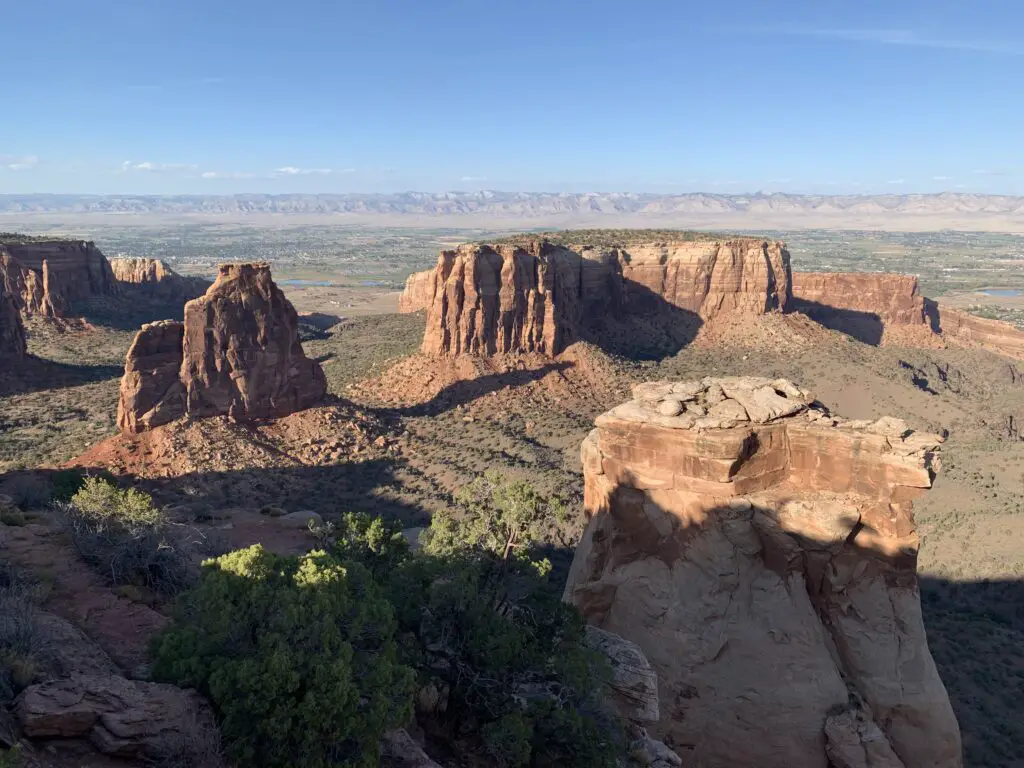

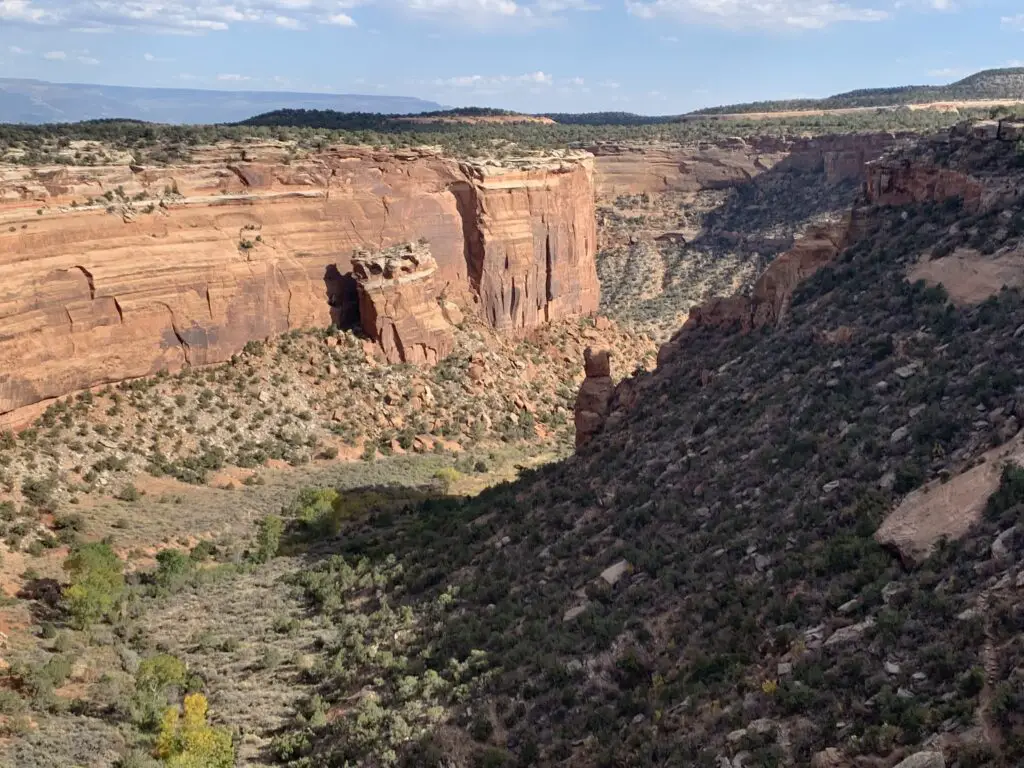

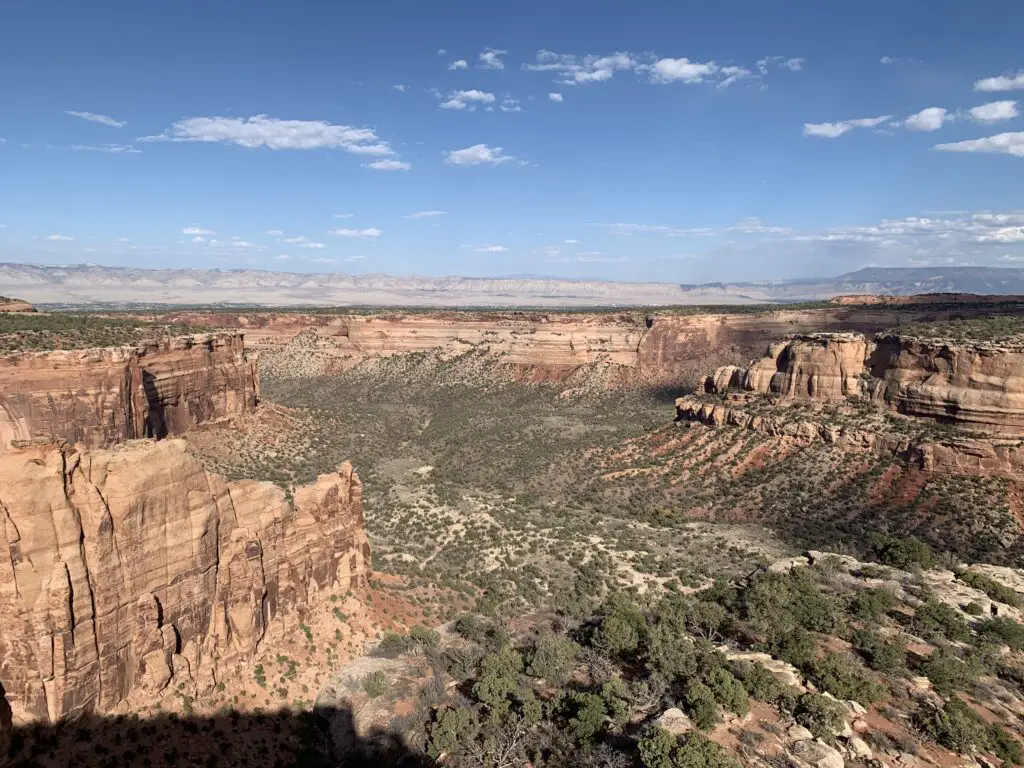 The road Broadway runs through several of the towns in Grand Valley and connects the two ends of Rimrock Drive between Fruita and Grand Junction. This road, along with the Rimrock route, make for a great loop drive!