In this post, I discuss a summer adventure to this great, state park in western Nebraska
Nebraska isn’t all flat cornfields! Looking for some hidden gems for recreation? Check out Fort Robinson State Park and Toadstool Geologic Park, both located in the far, northwestern corner of the state!
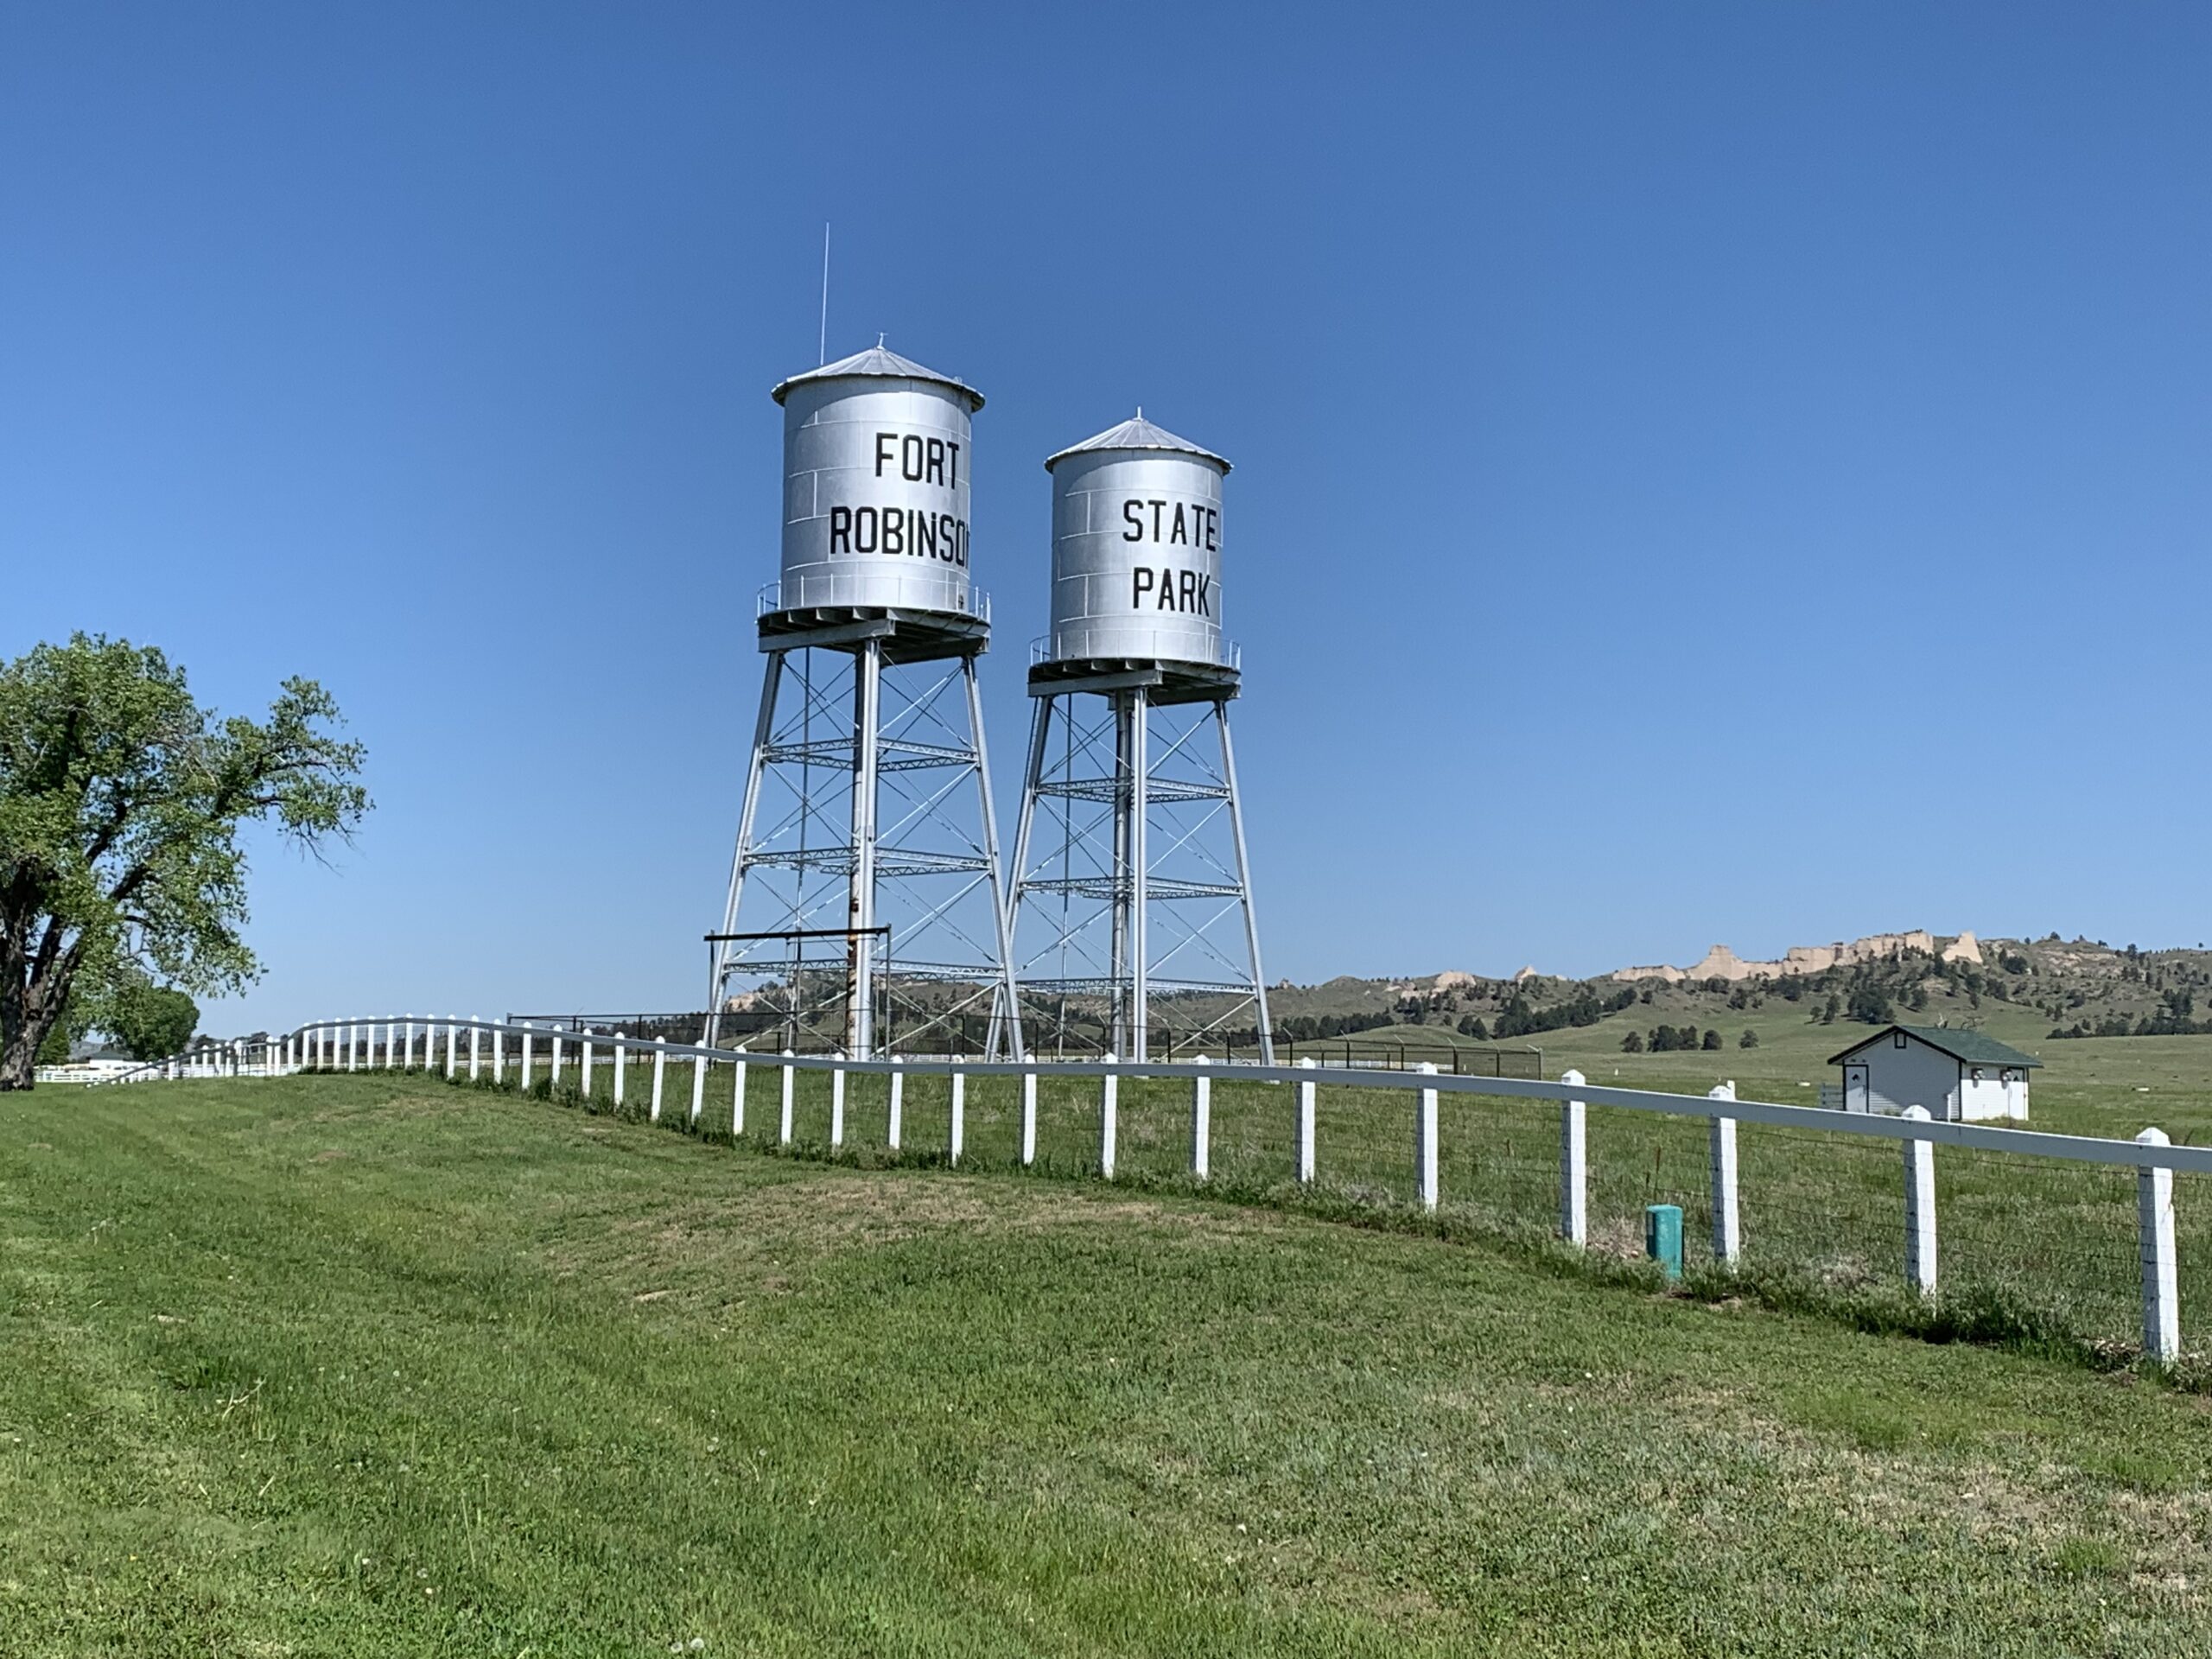
Fort Robinson State Park
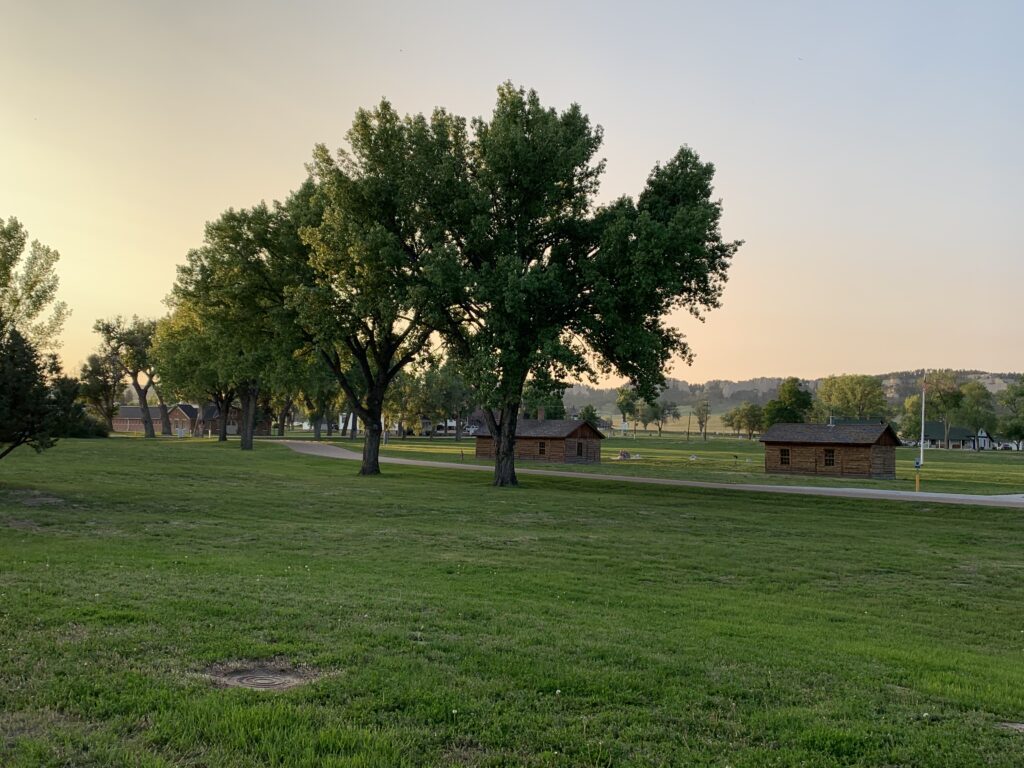
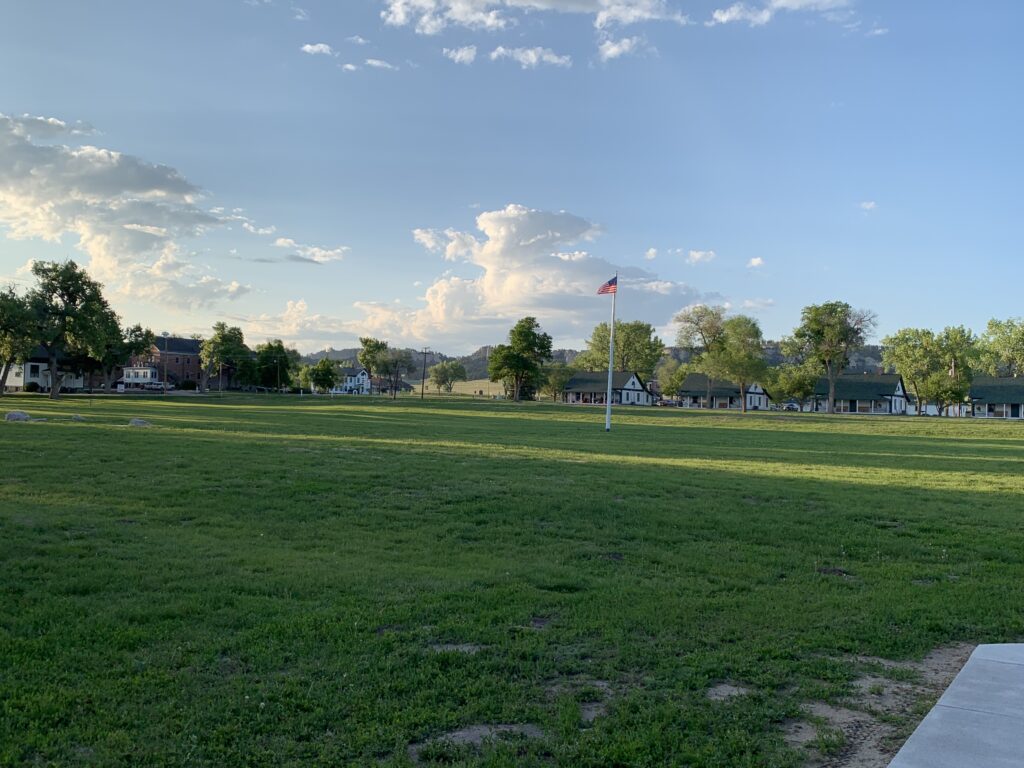
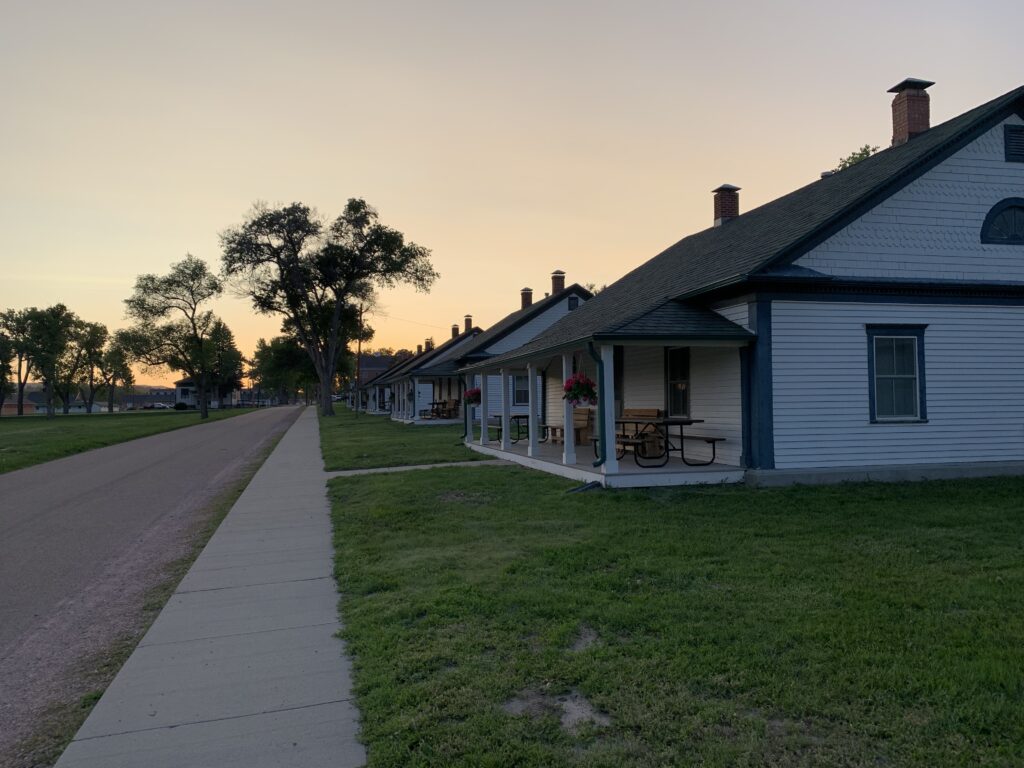
Fort Robinson State Park is a great place to visit! It is a former fort (hence the name 🙃) that has been transformed into a family-friendly rec area! It offers hiking paths, history, and many of the old soldiers’ Quarters were refurbished and are now available for vacation rentals. This is unique and allows Fort Robinson to actually be known as a great, family reunion destination.
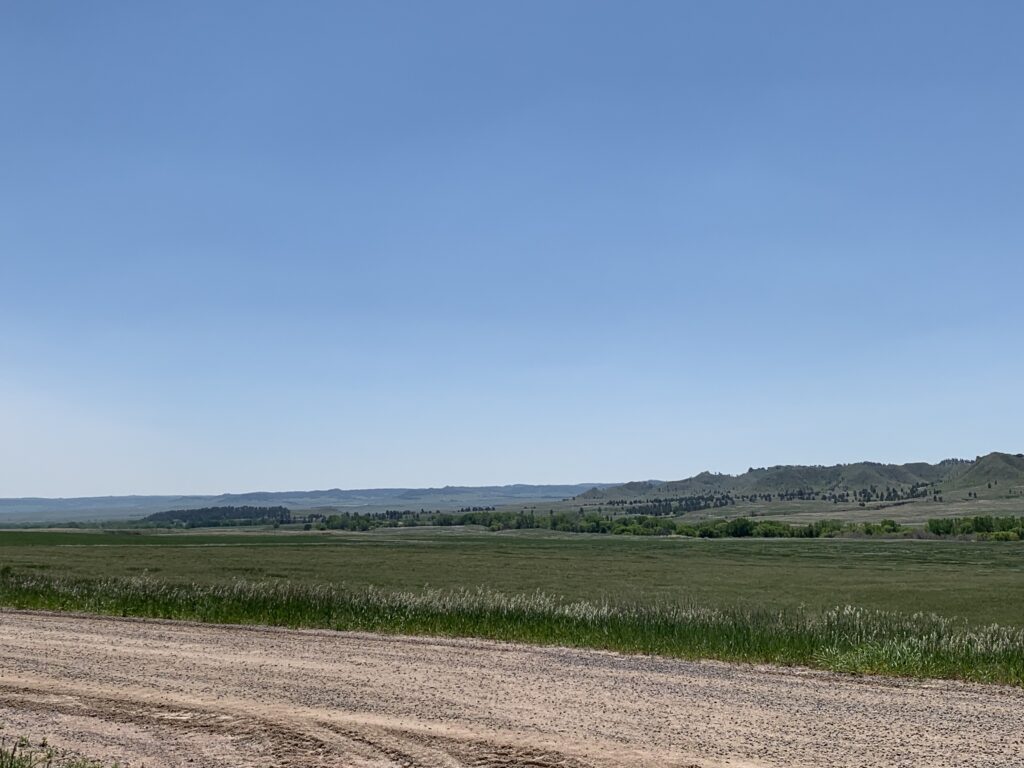
Sometimes called a “gem of Nebraska State Parks”, Fort Robinson was quite nice! (It’s a little-known fact that western Nebraska is actually very pretty! I recommend it over the rest of the state!) The park features LOTS of shade trees!
We did struggle with some ticks and bugs though at least it was quite green when we were there in late May. The mosquitoes weren’t bad though I’m sure they could be at times (and the tent-camping section was all grass, under trees, near the creek. It seemed fairly dark and damp–it looked like a great place to snag a few-hundred mosquito bites! 😝)
To be fair, we’ve only been to two of them, but this has been our experience with Nebraska state parks. We’ve never been impressed with their tent-camping areas (we had another disappointing, tent-camping experience at another Nebraska state park, on a Great Plains road trip, several years ago–though it did result in some Northern Lights viewing!)
For this trip, we actually chose to stay in the RV camping area. Though the sites were pretty tightly packed we were quite happy with this option.
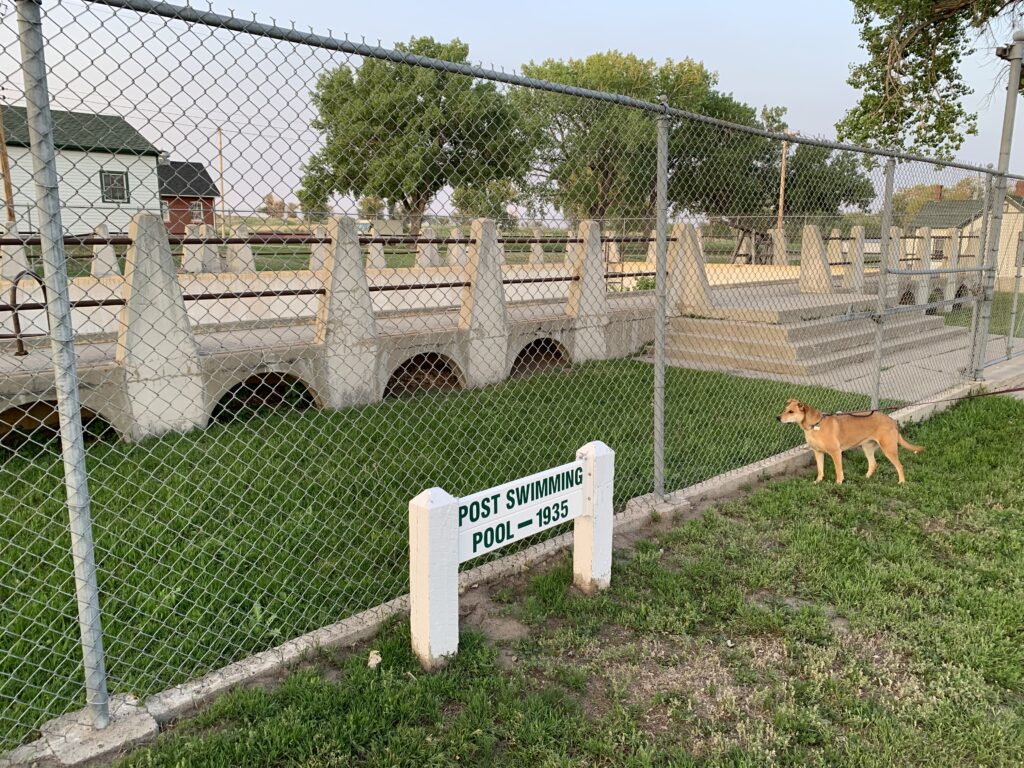
Puppers checking out the old, fort poolThese were Officers’ Quarters that are now available for rent!Western Nebraska is quite beautiful!
Where is Fort Robinson Located?
Fort Robinson sits right on US Hwy 20 in far, northwest Nebraska, less than five miles southwest of the small town of Crawford.
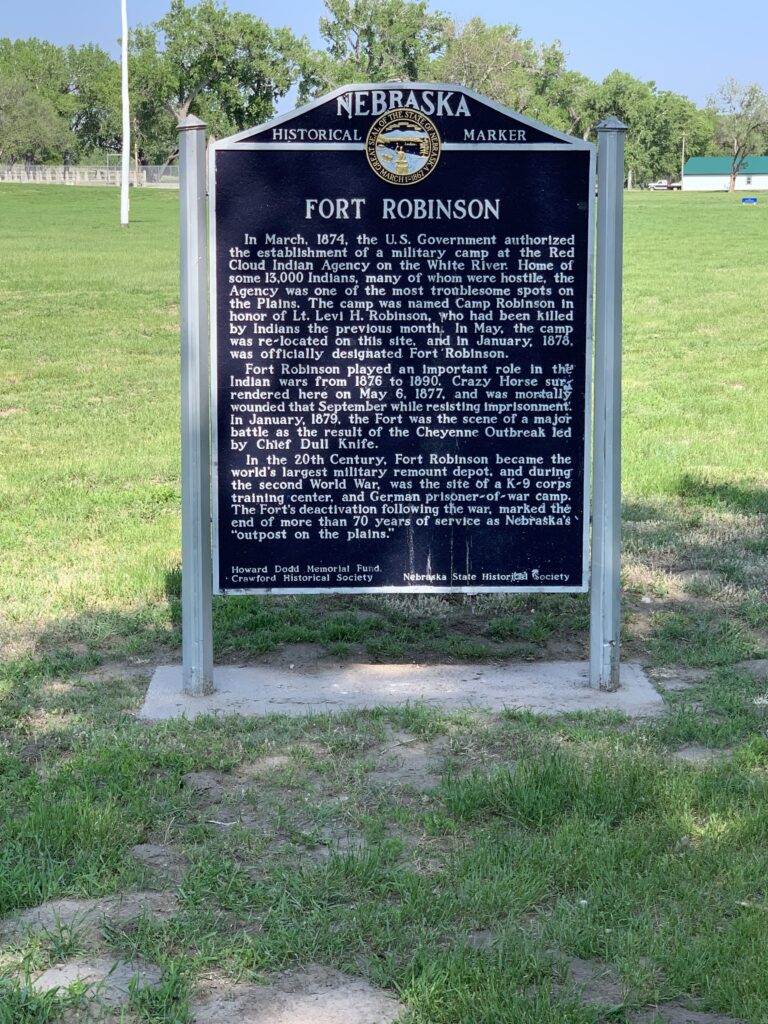
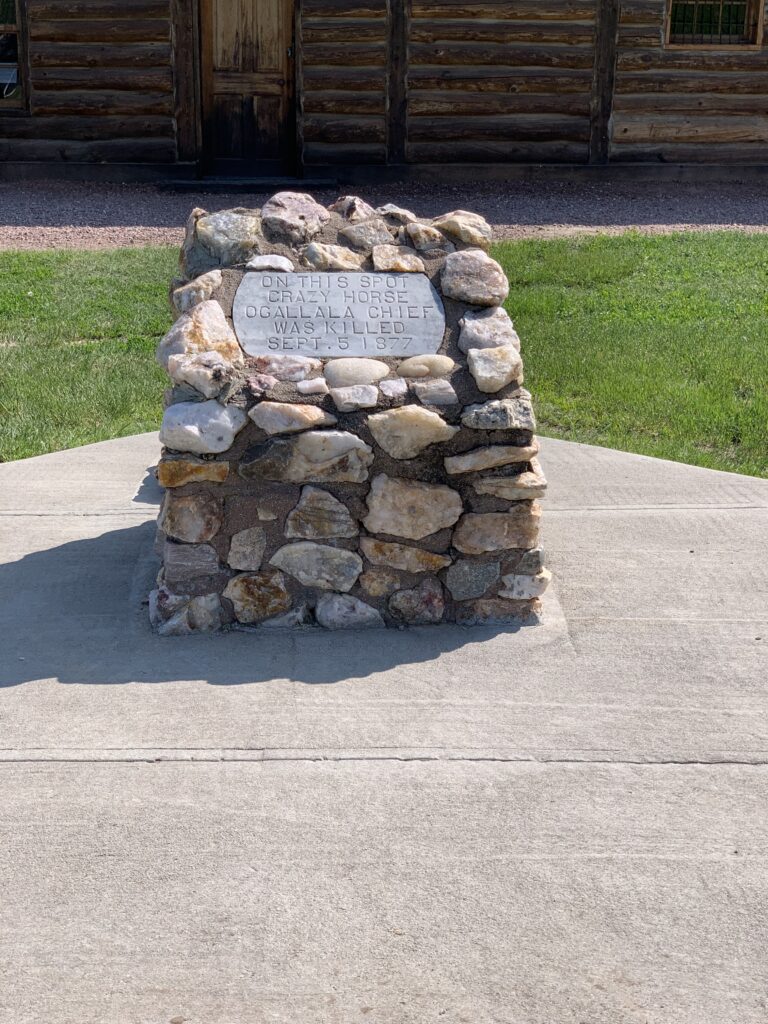
The park has quite a storied past. It started as a fort during the Indian Wars in the 1880s–this was actually the sad location of the death of Crazyhorse, the great Lakota warrior.
The actual site where Crazyhorse died
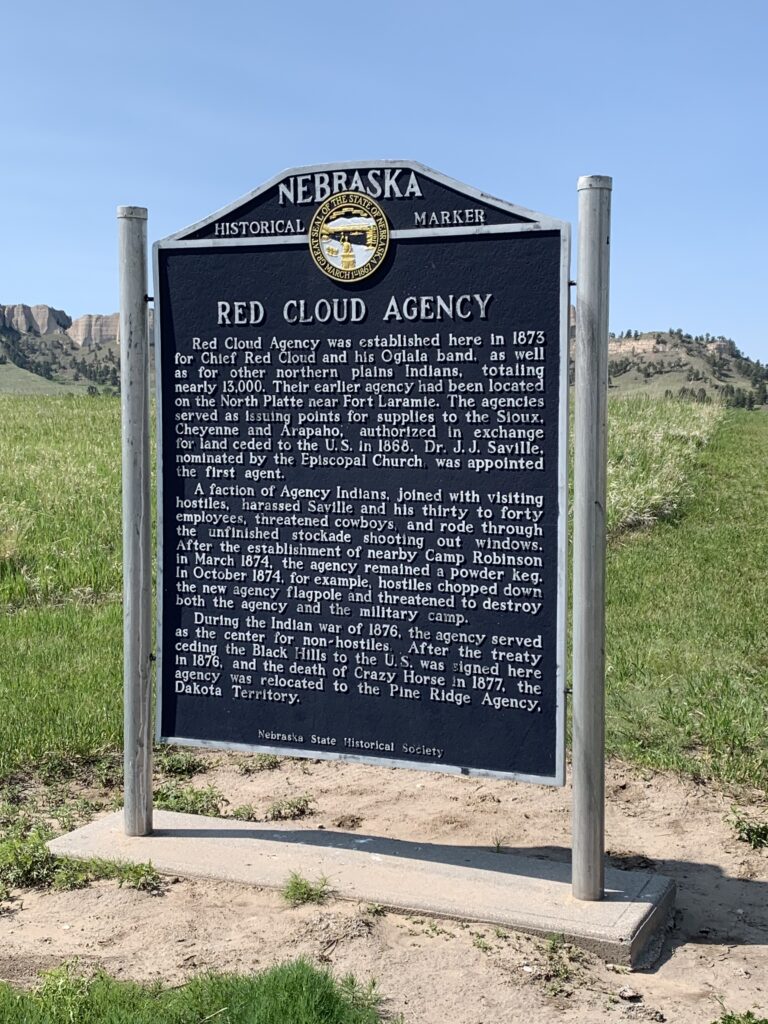
Fort Robinson also served as a large reservation for many American Indians including Red Cloud and his people.
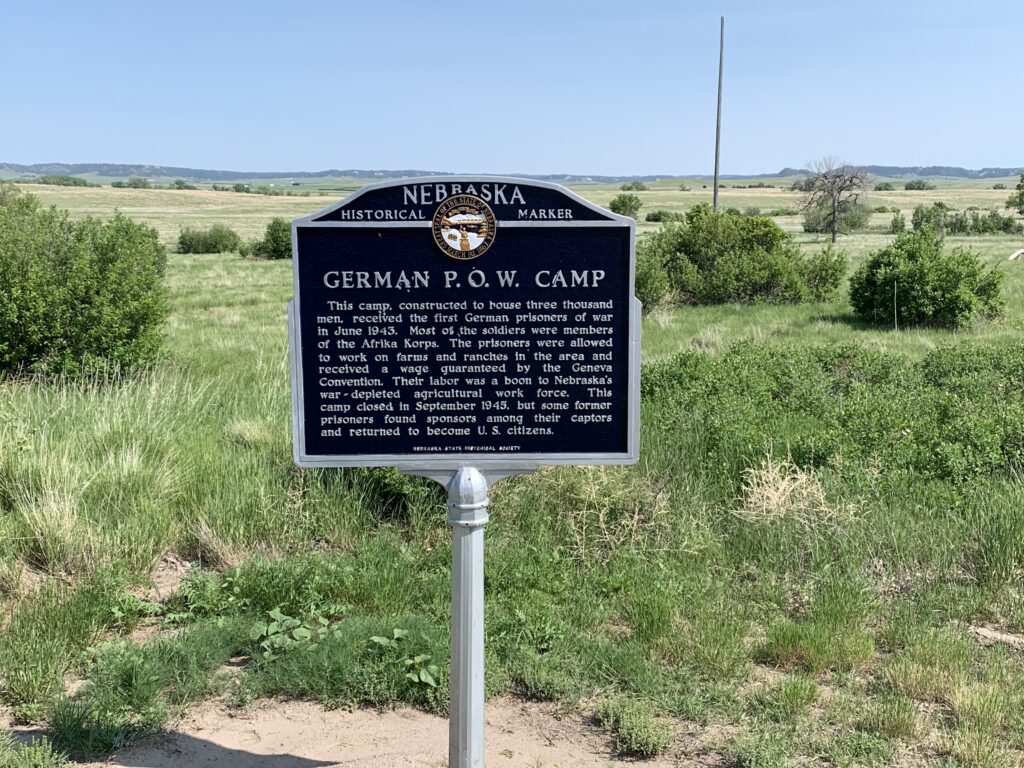
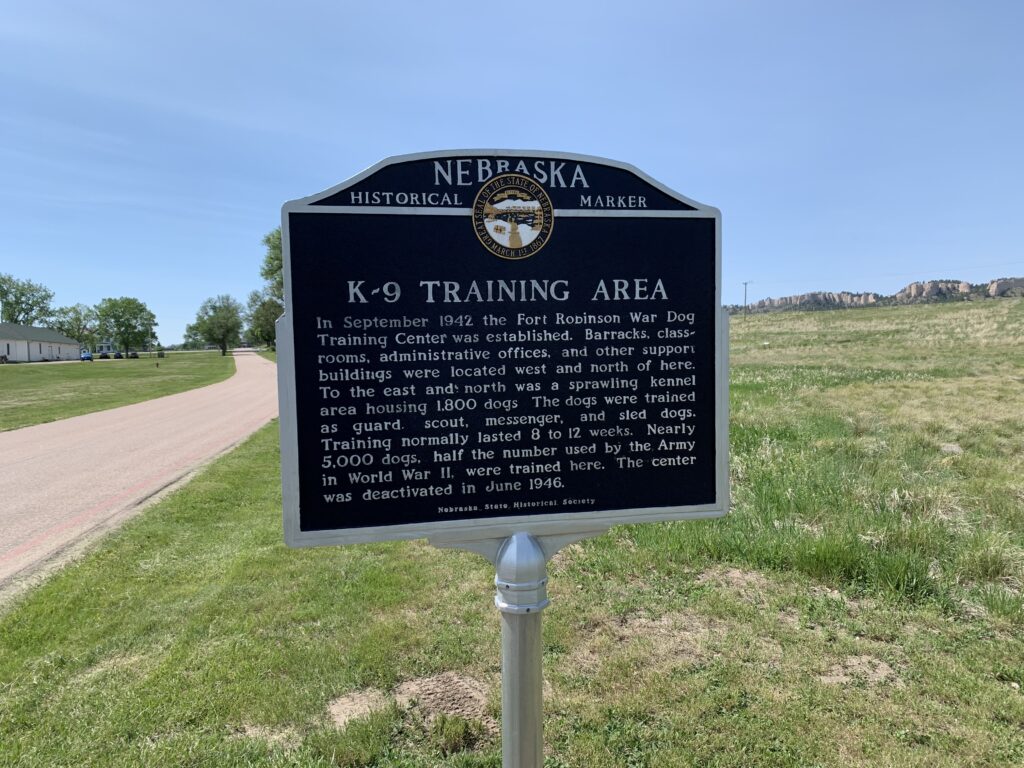
The fort was also a “remount” location for Calvary horses (meaning the battle horses and their wounds were treated here and new mounts were provided). Fort Robinson was also a war-dog training camp and a German, Prisoner of War camp during World War II.
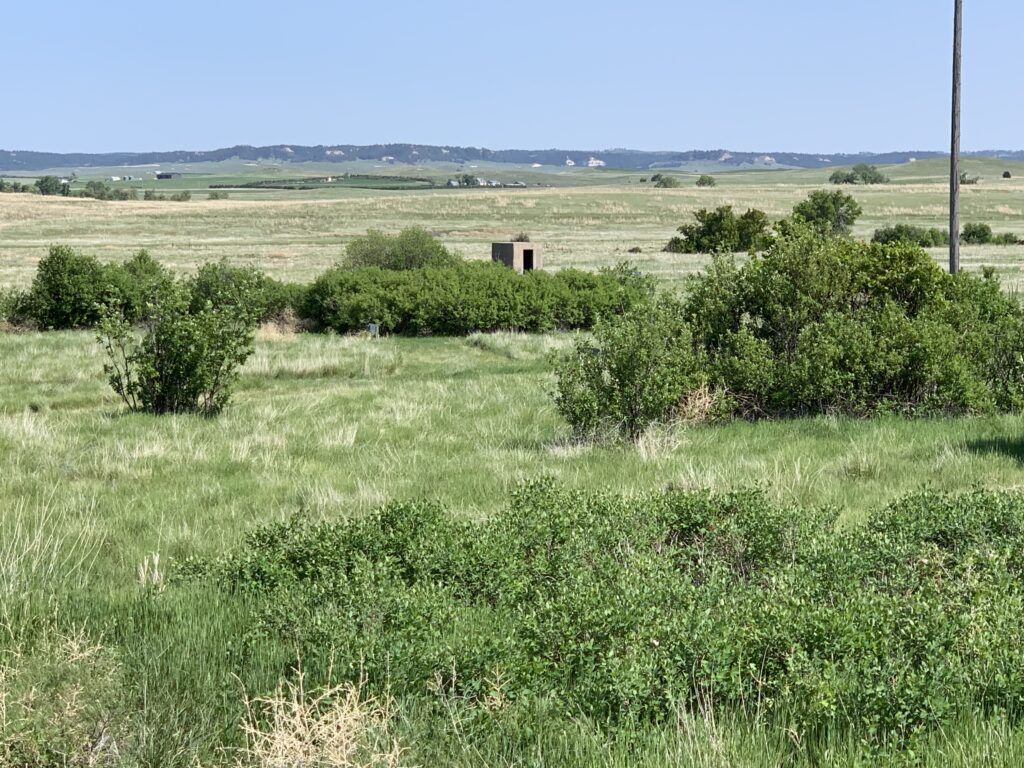
This is about all that remains of the former, German, POW camp
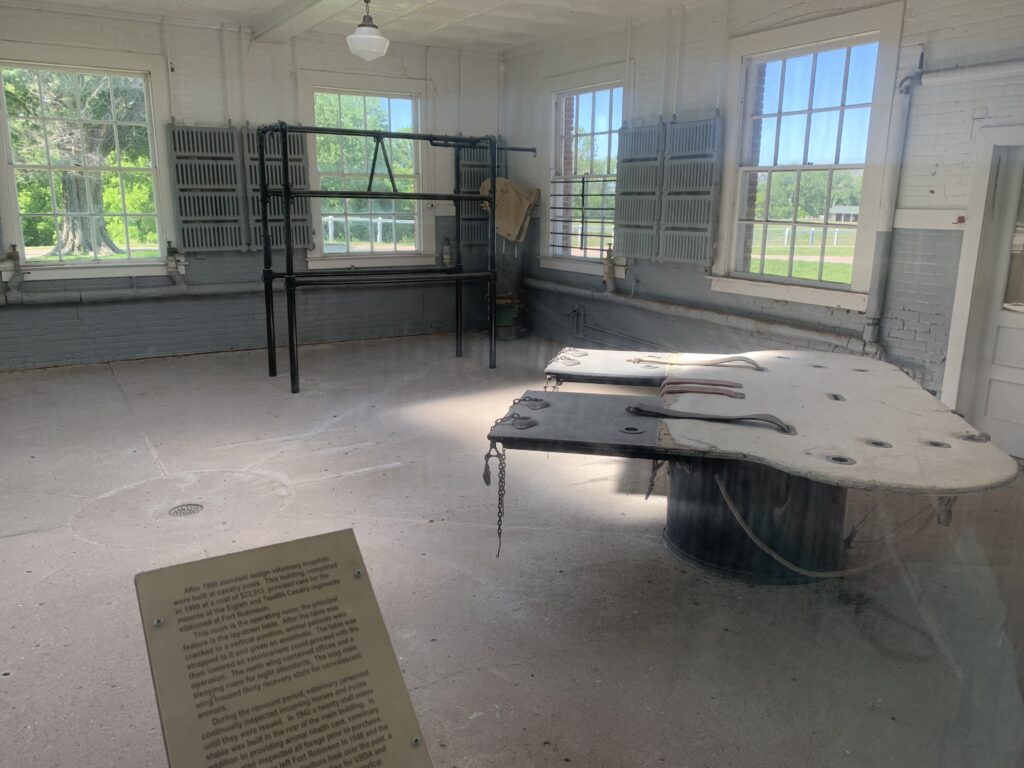
Horse vet center! That table moves to the vertical. They would strap a standing horse to it, sedate the animal and then move the table–with the horse strapped to it–back to the horizontal to perform procedures–not bad for 1940s technology!
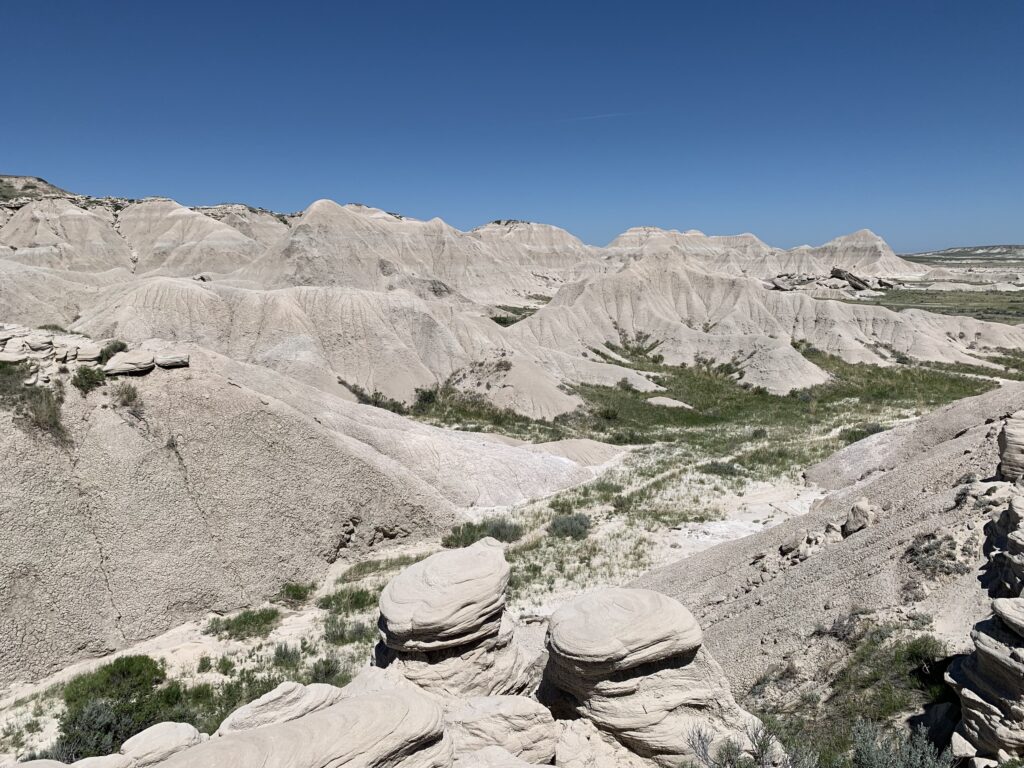
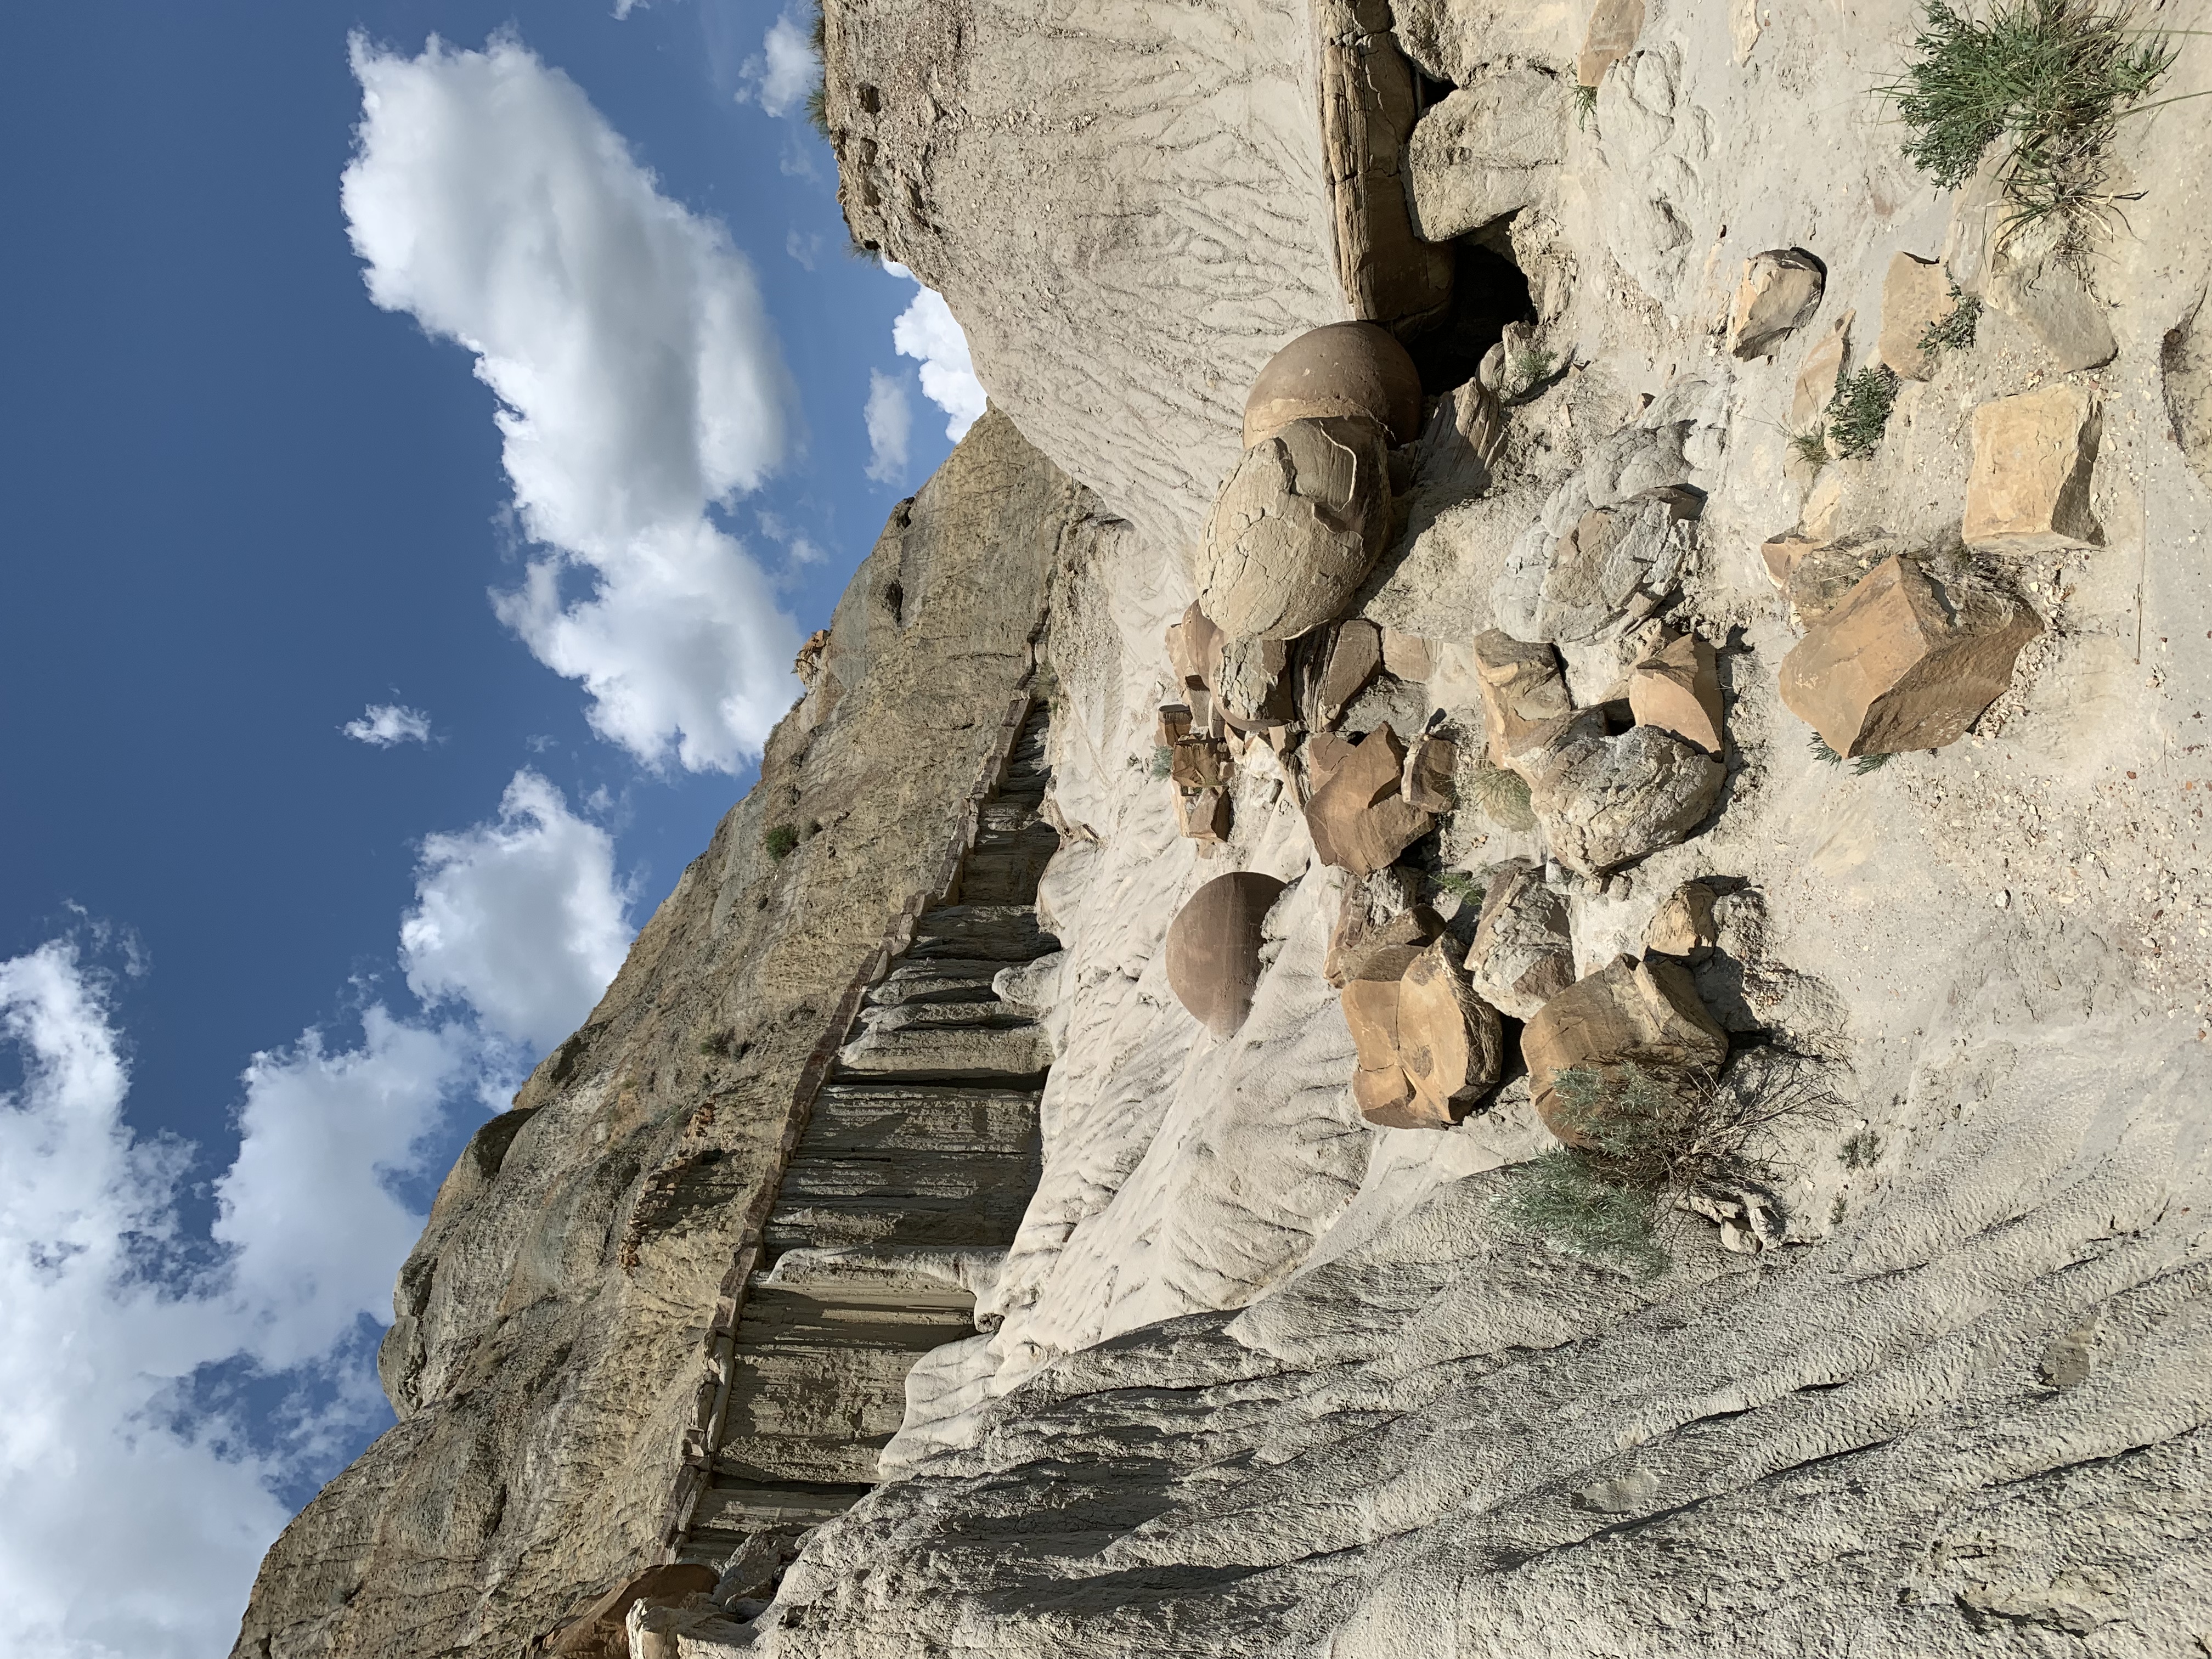
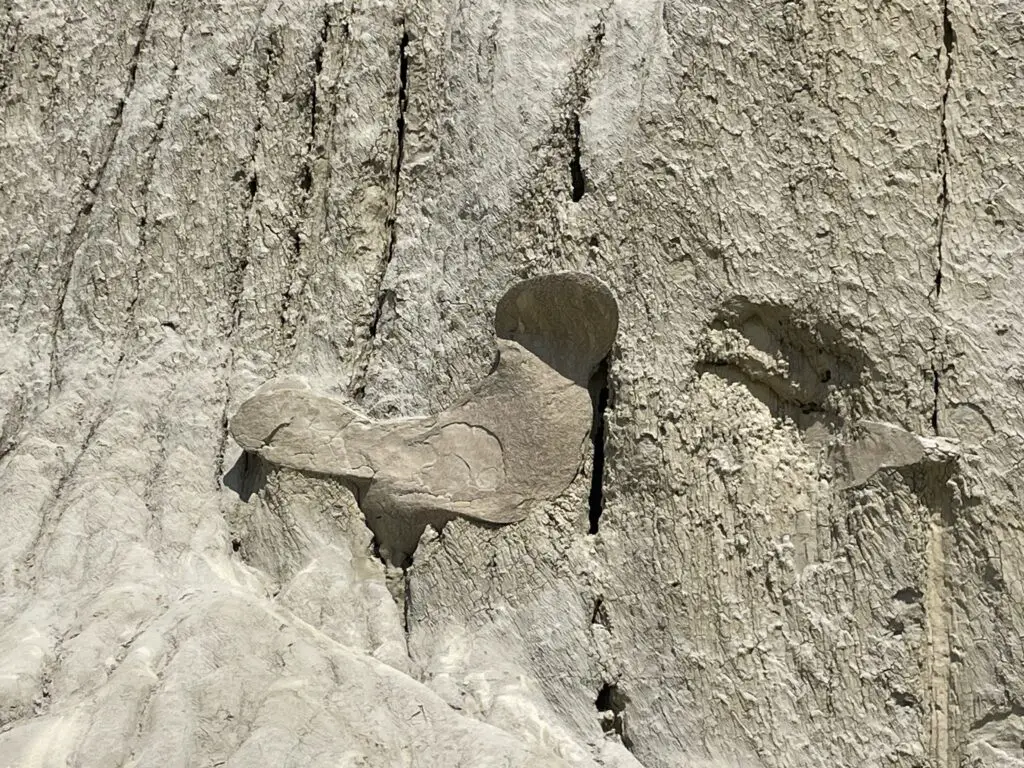
Toadstool Geologic Park
Toadstool Geologic Park is literally in the middle of nowhere! It is situated in the far, northwest corner of Nebraska, about 30 miles north of Fort Robinson, 20 miles northwest of the small town of Crawford and 40 miles west of Chadron, Nebraska.
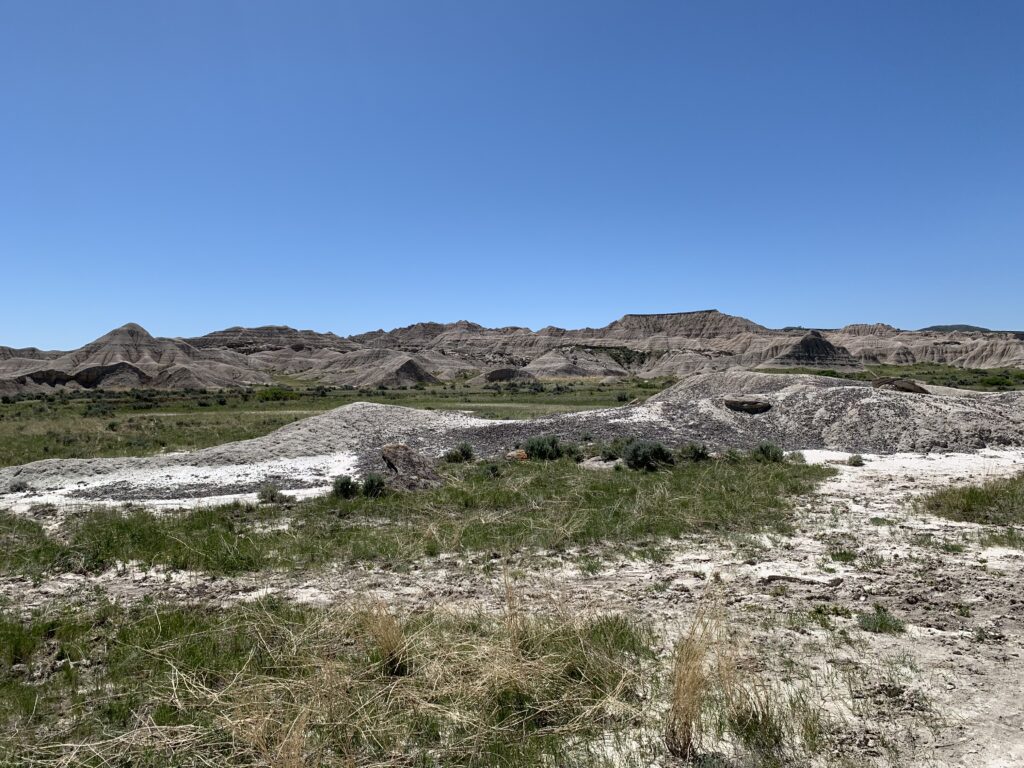
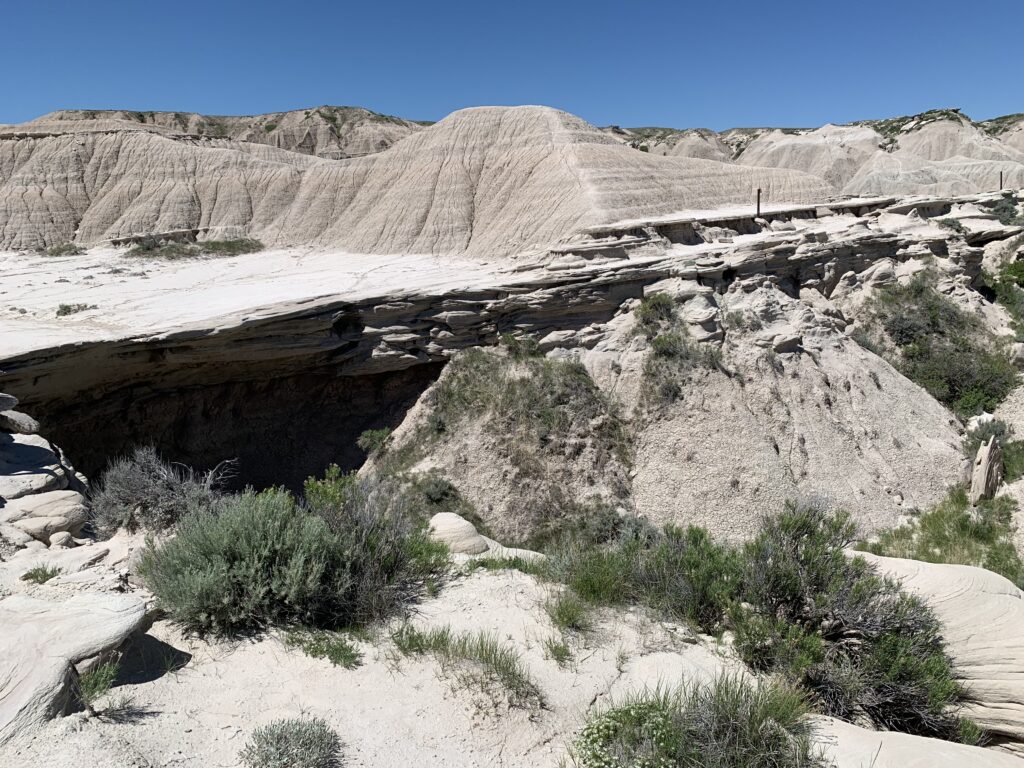
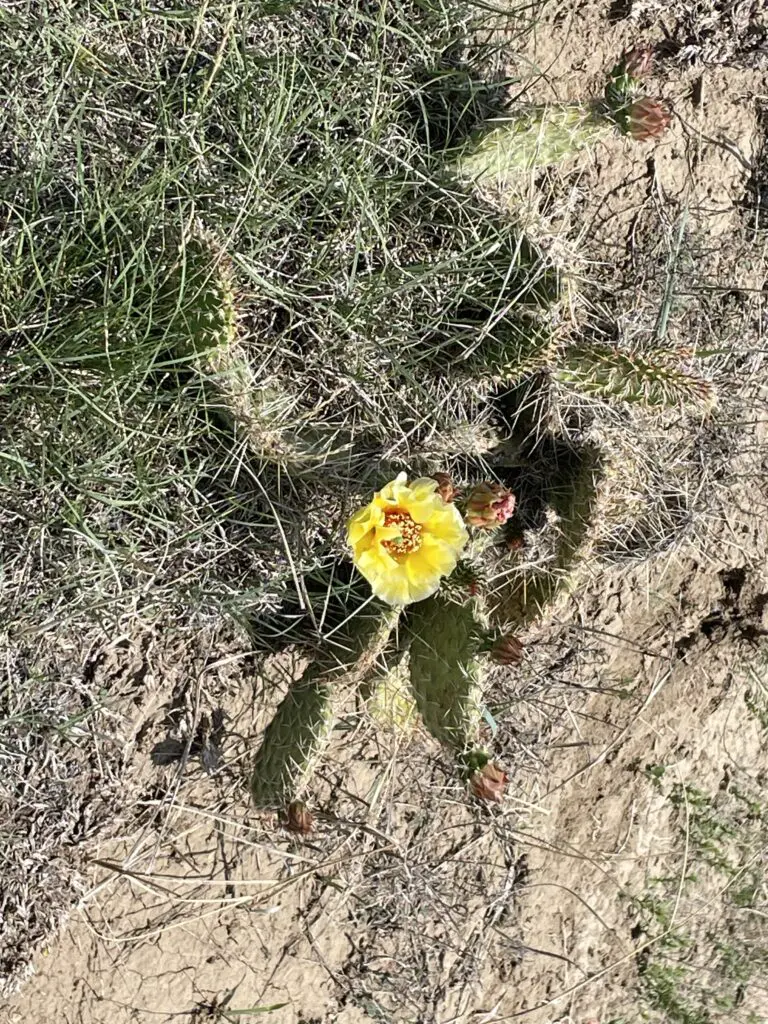
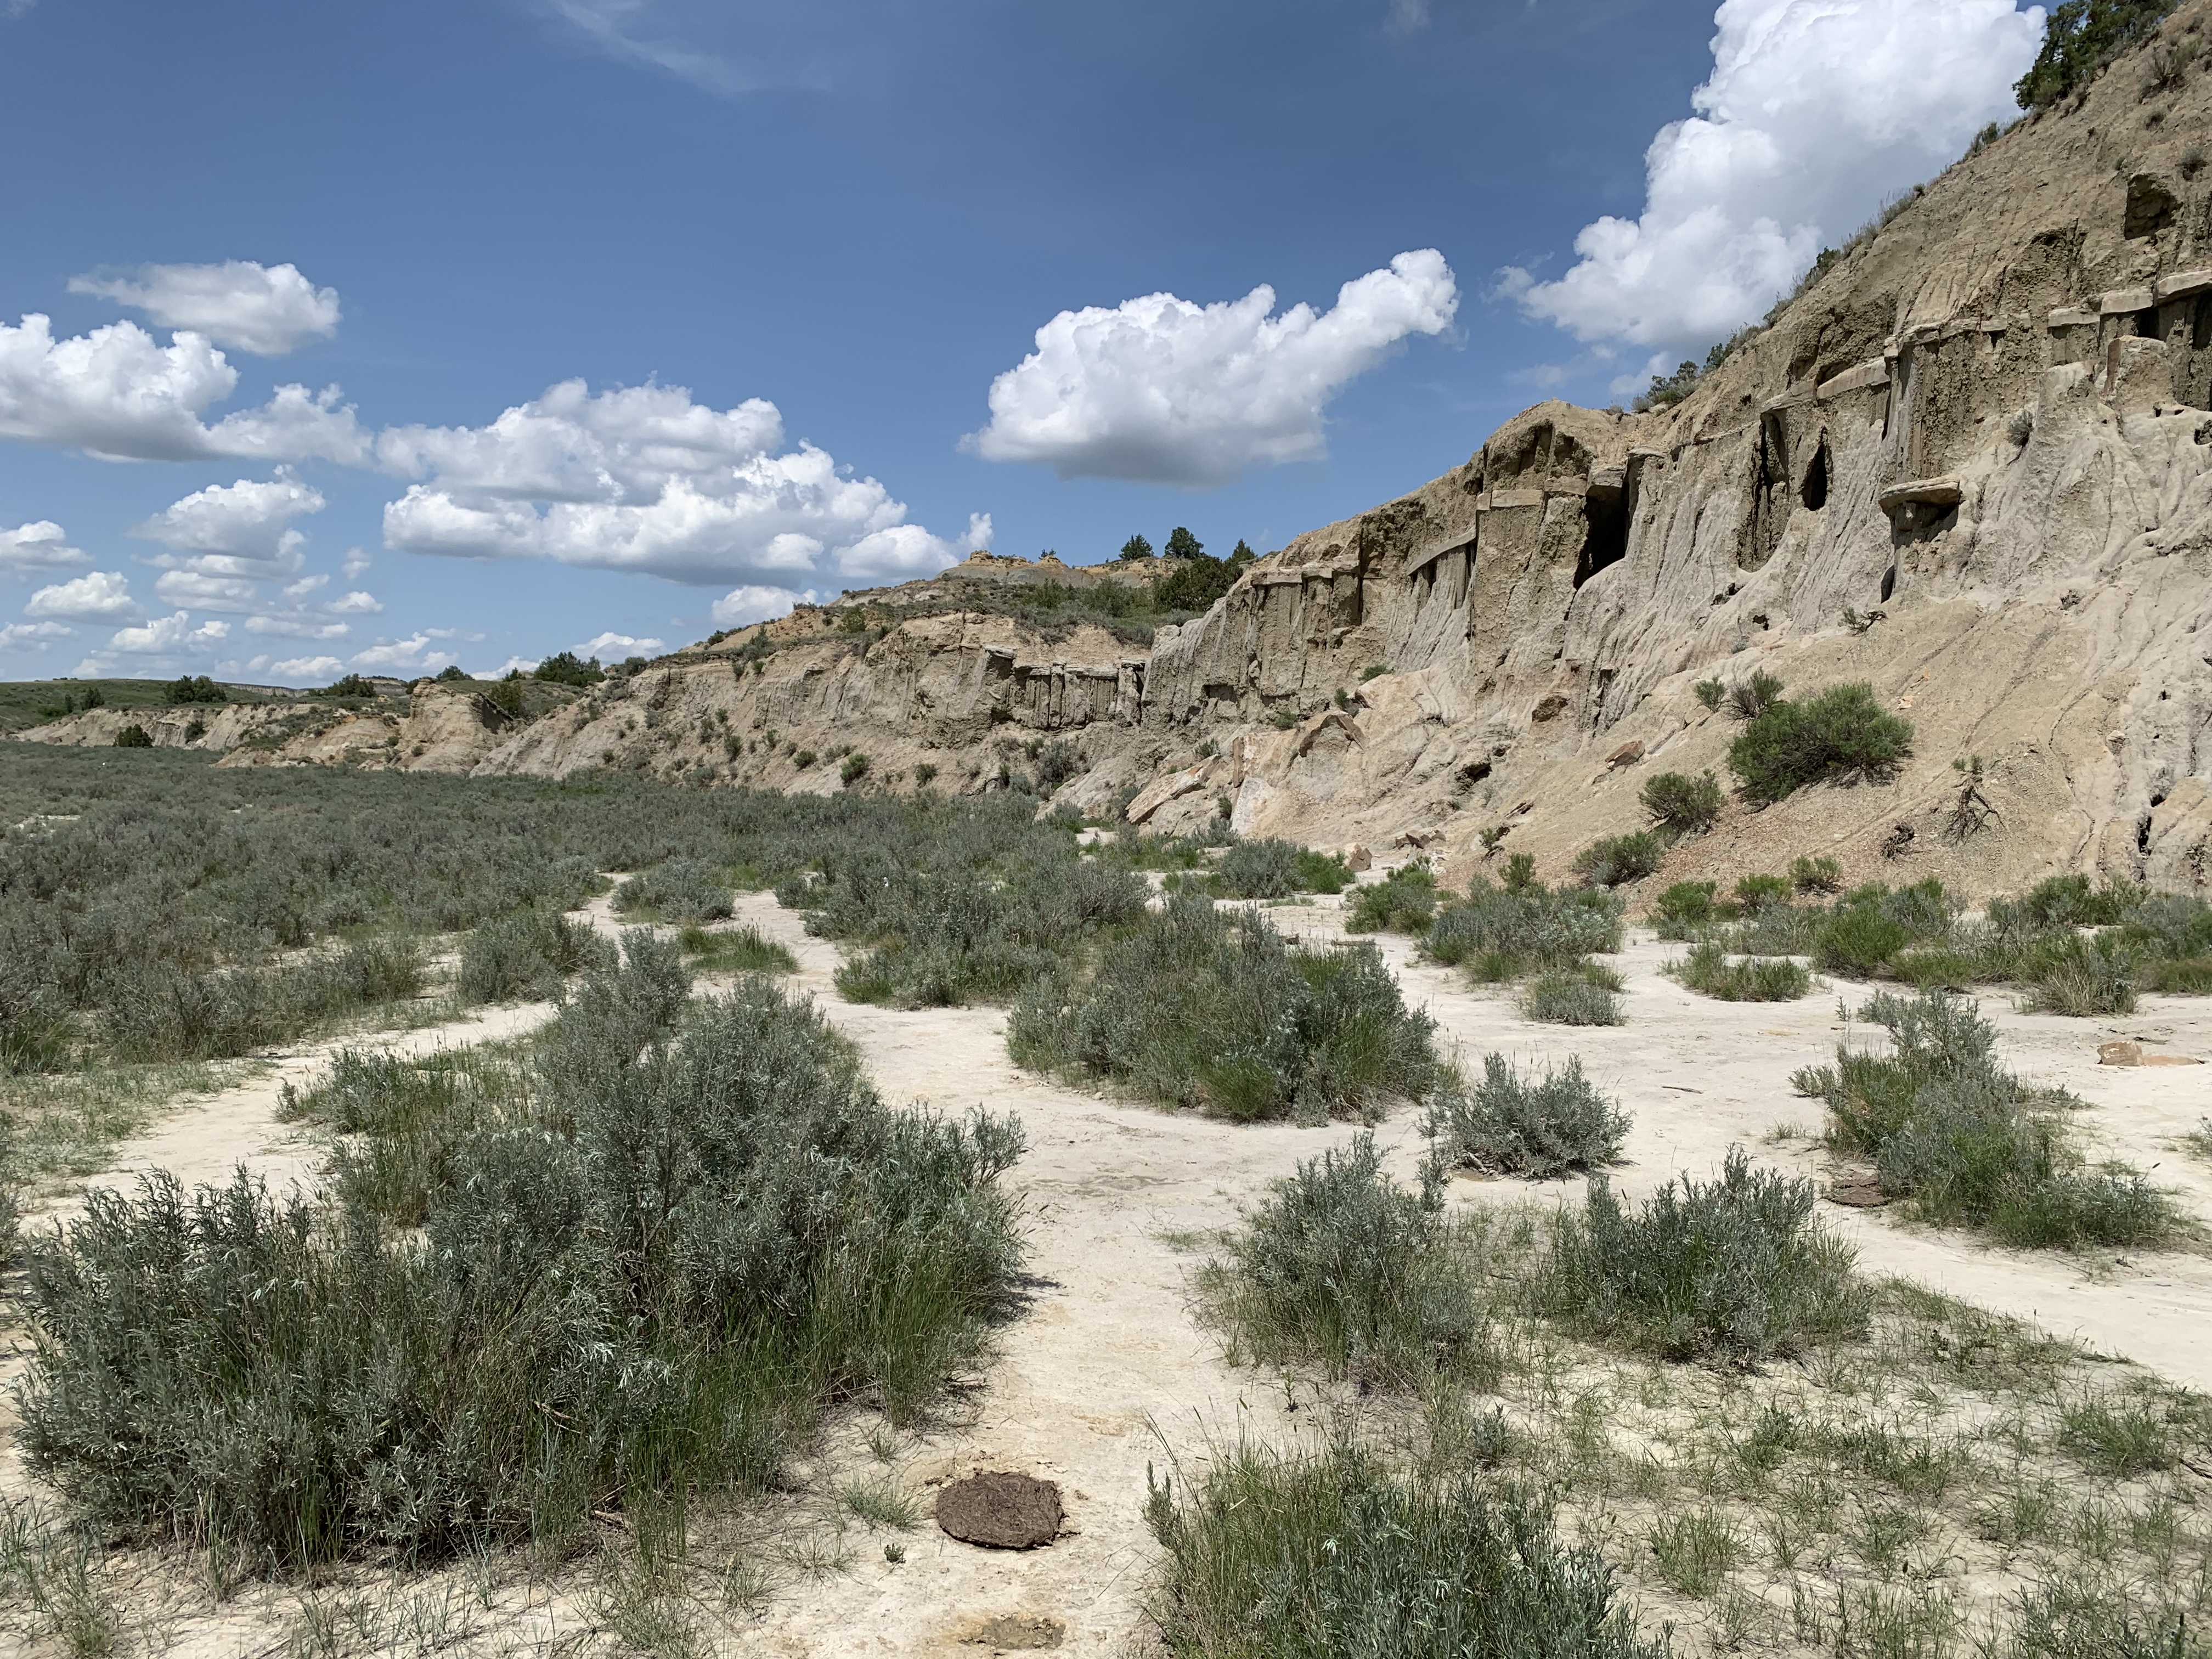
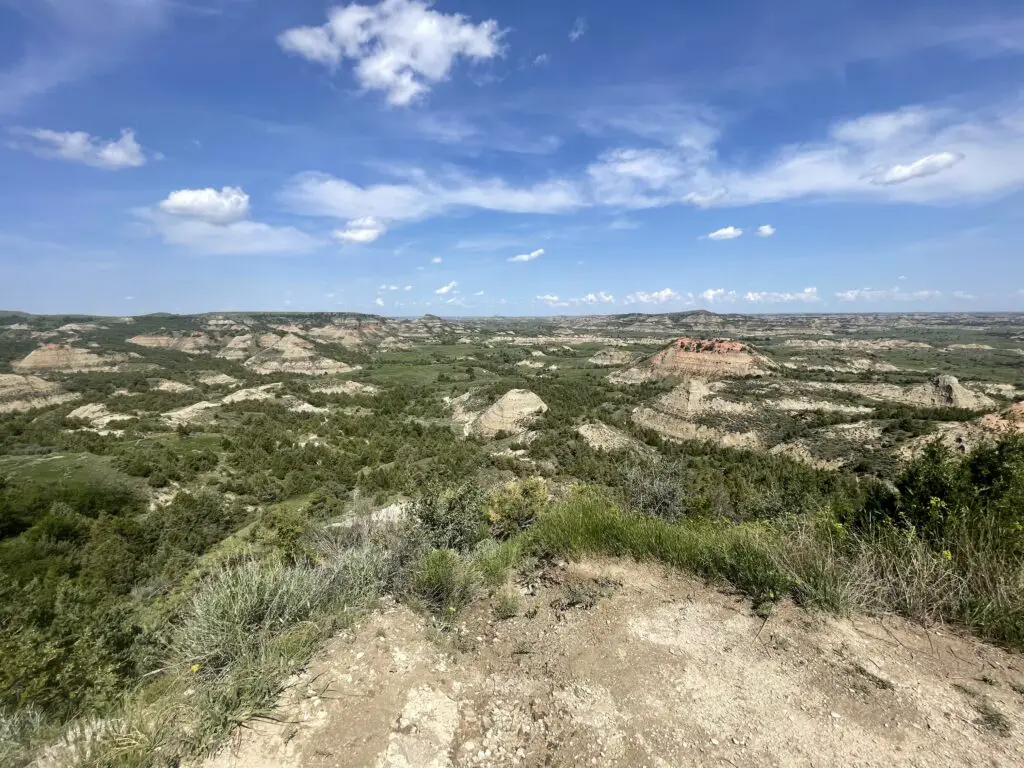
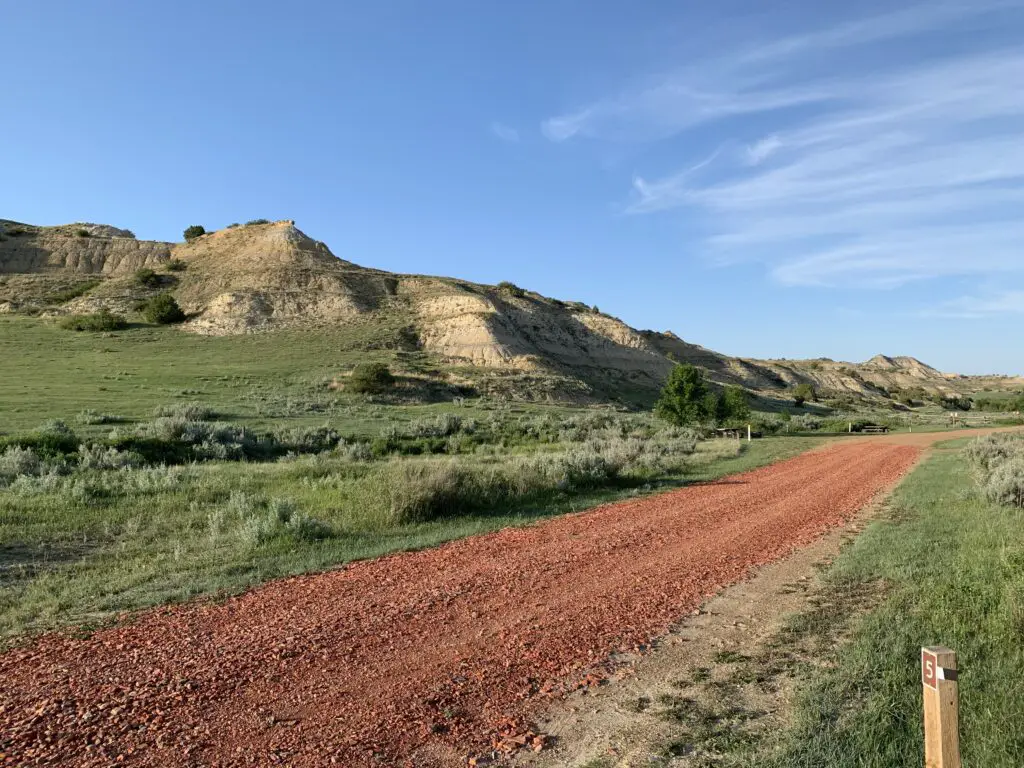
The park looks a lot like Badlands National Park in South Dakota or the North Dakota Badlands at Teddy Roosevelt National Park–you can read more on that hidden gem here!
Toadstool Geological Park is mostly a place for hiking though it does offer some camping options…
This was my first big hike after severely breaking my ankle a few months prior. It was a little tougher than we were first expecting for a “nature trail” but I finished the route thanks to my awesome trekking poles and help from Mr. Trekker!
The trail said it was a one-mile “nature trail” which are usually fairly easy. This hike wasn’t “difficult” but there was plenty of uneven ground and some scrambling on loose gravel as well as a few steeper ups and downs…
We learned later that I “may” have gotten a little too aggressive with twisting my ankle around on the uneven ground on this hike. A few weeks later, at my next ankle-surgeon checkup, we found out I broke one of my titanium pins! 😅 The doctor was like, “How did you manage that?!”–she had planned to take it out anyway 😇
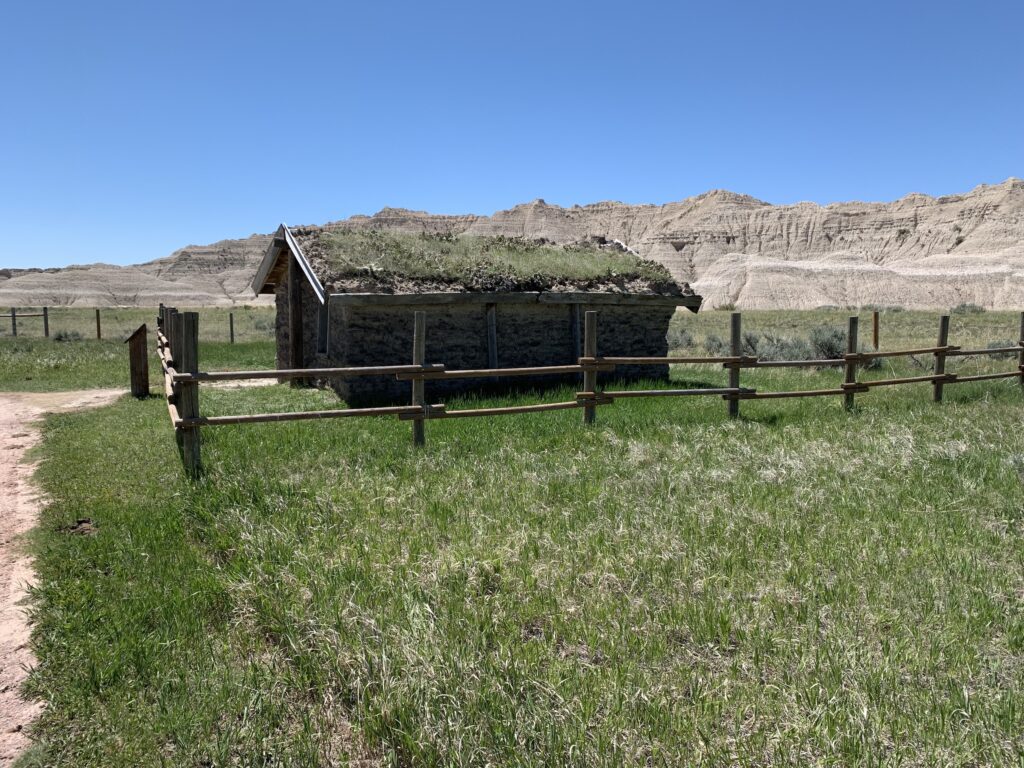
This is a mockup of a sod house–these were common in this part of the country in the past
If you’re looking for some great, family-friendly outdoor and camping options in western Nebraska, check out Fort Robinson State Park and Toadstool Geologic Park!
Like what you read here today? Please feel free to leave a comment, like, or share this post! Add your email at the bottom of the page, or the sidebar to the right, to be notified when a new post is published.
In this post, I discuss what you’re missing from this national park you may not know exists!
**Author’s note: Just a word of warning, as this is a National Park, no dogs are allowed on any trails (exceptions for Service Animals). They are only permitted in the campgrounds and parking lots.**
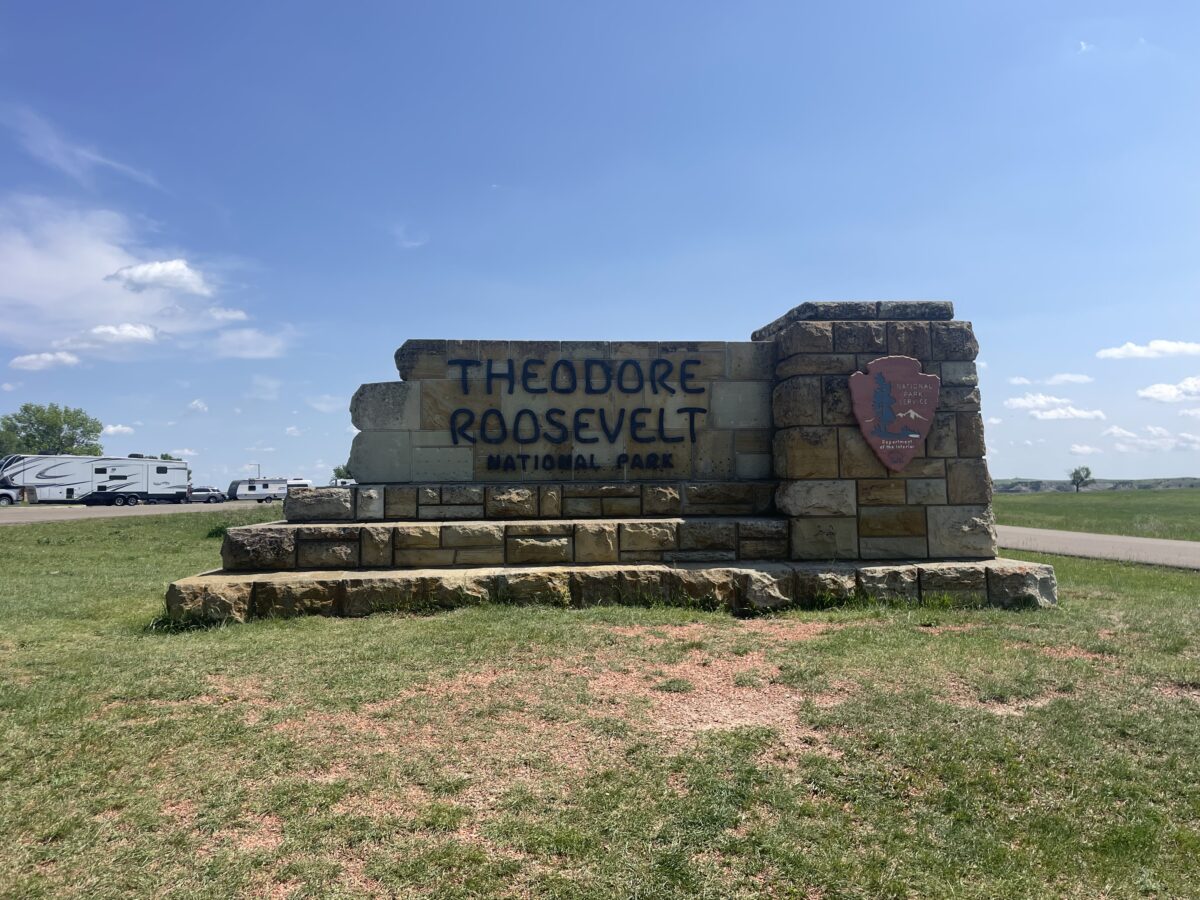
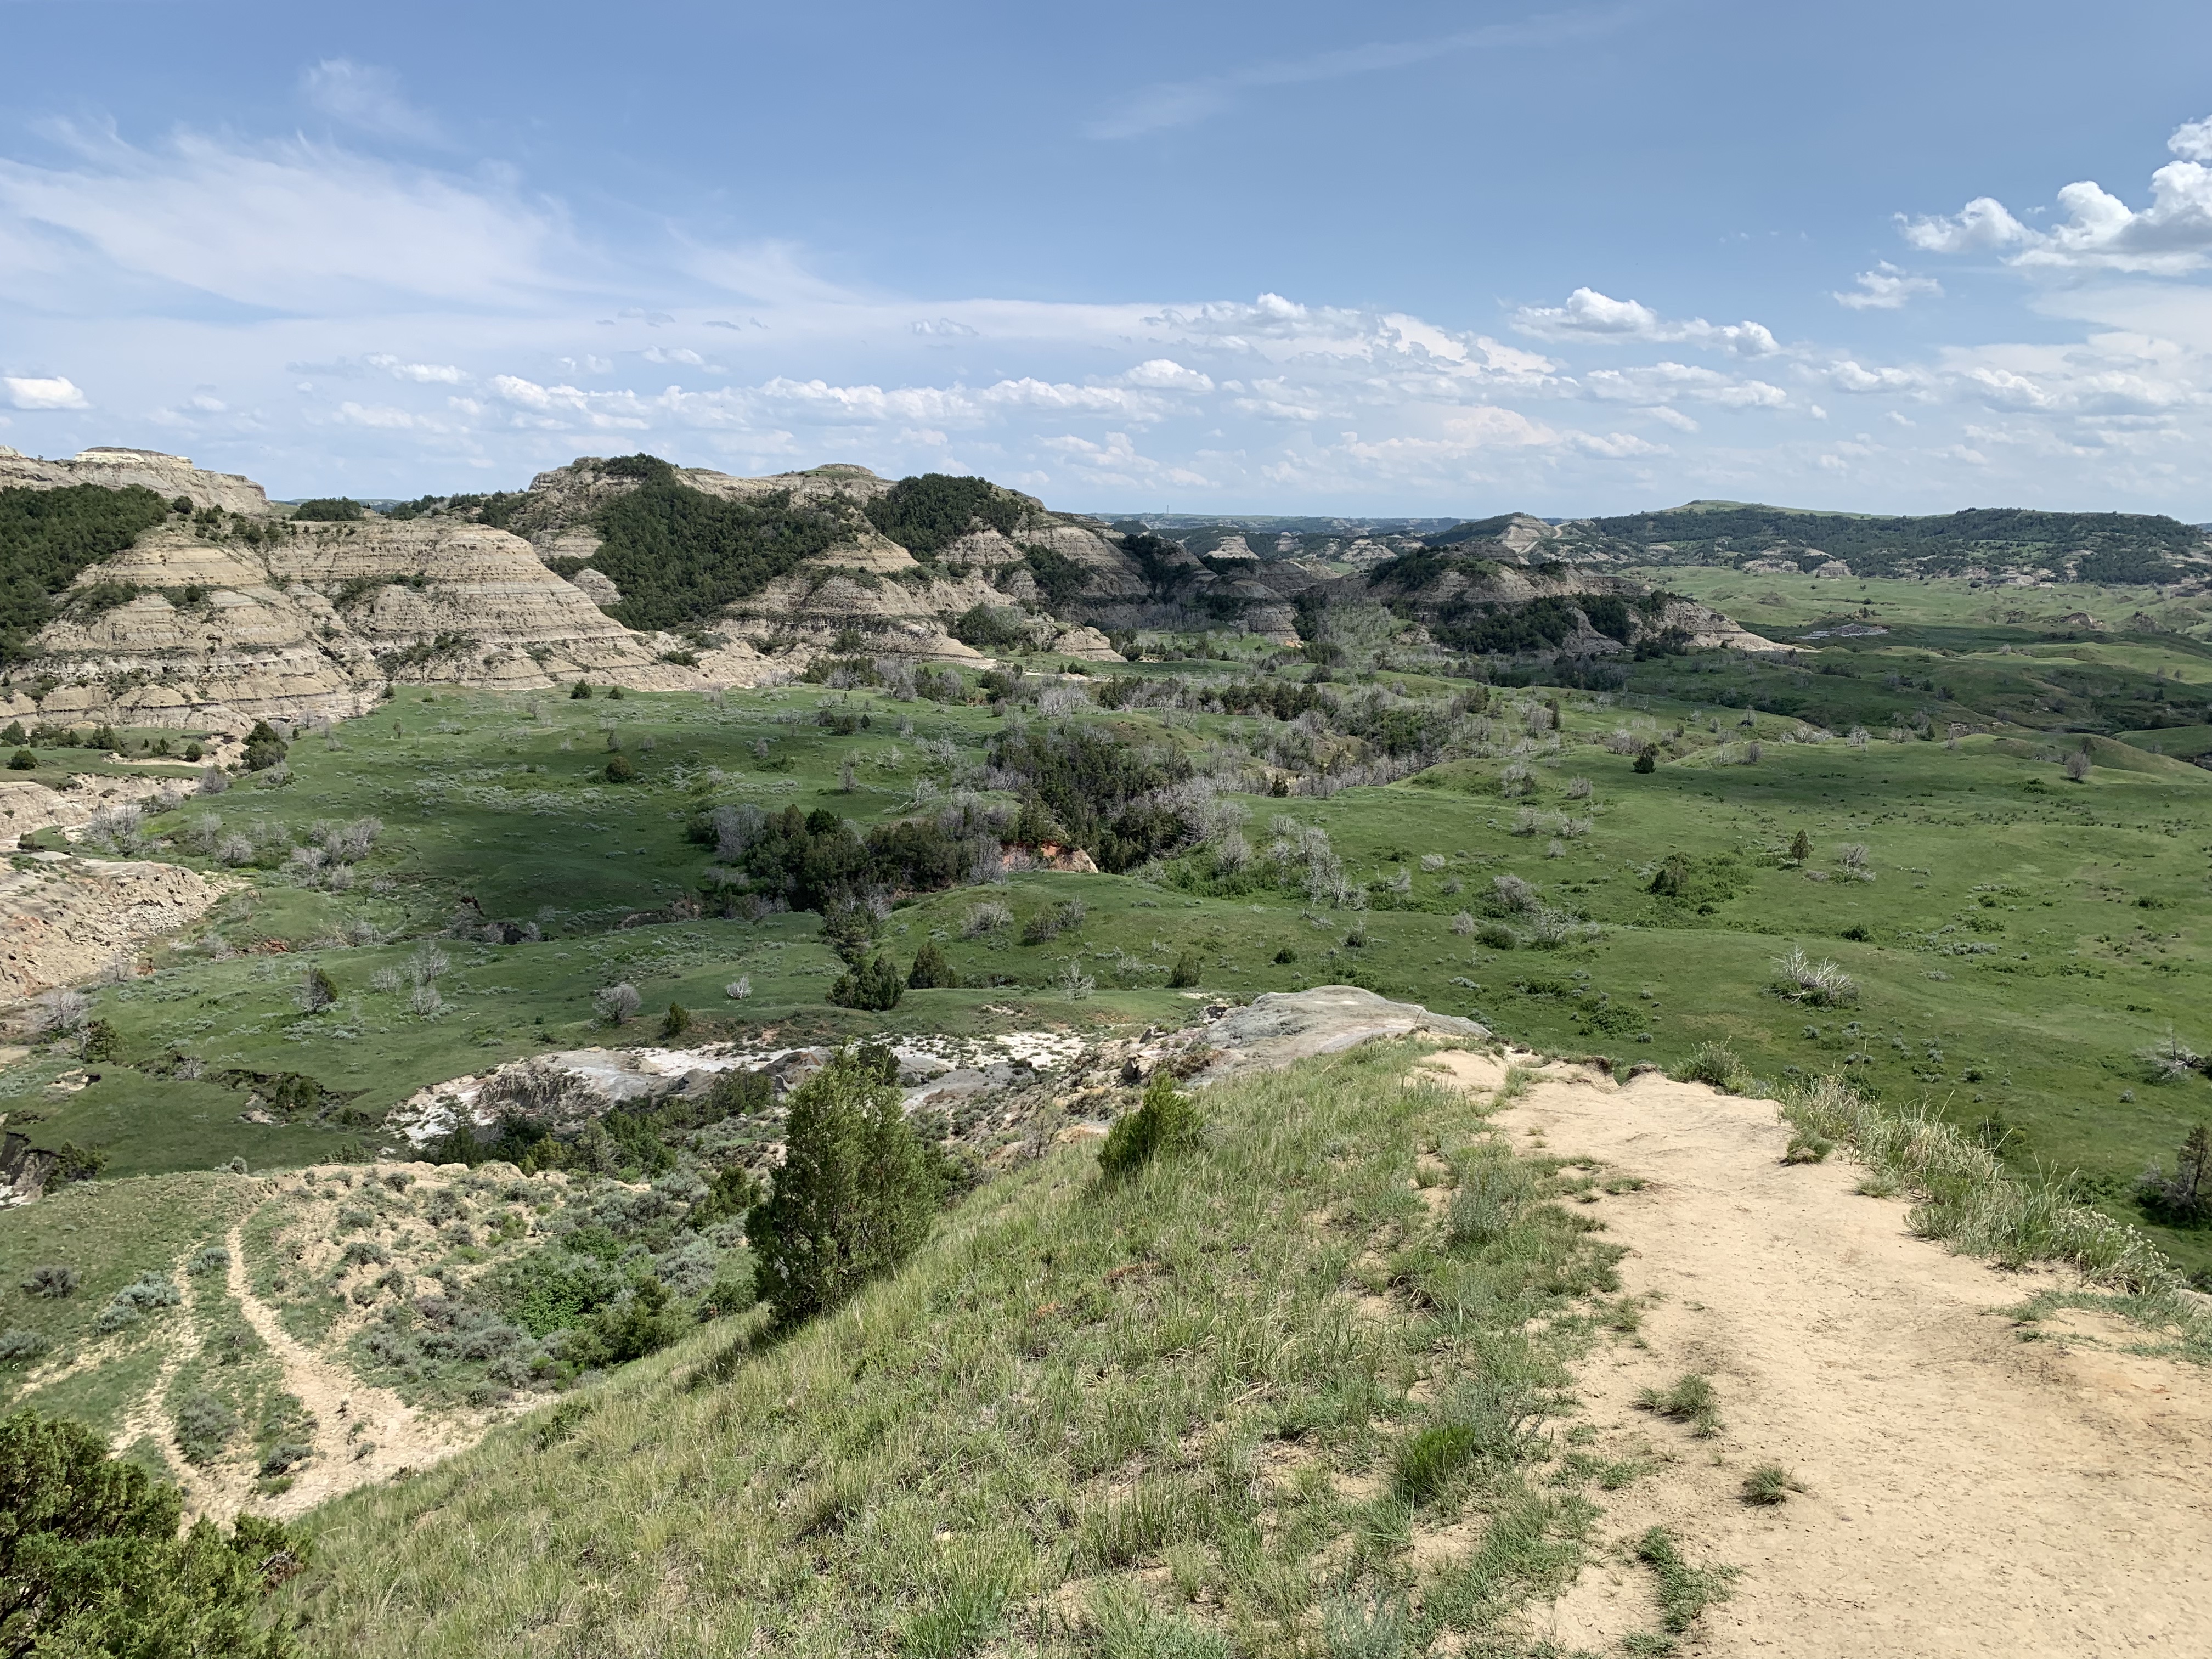
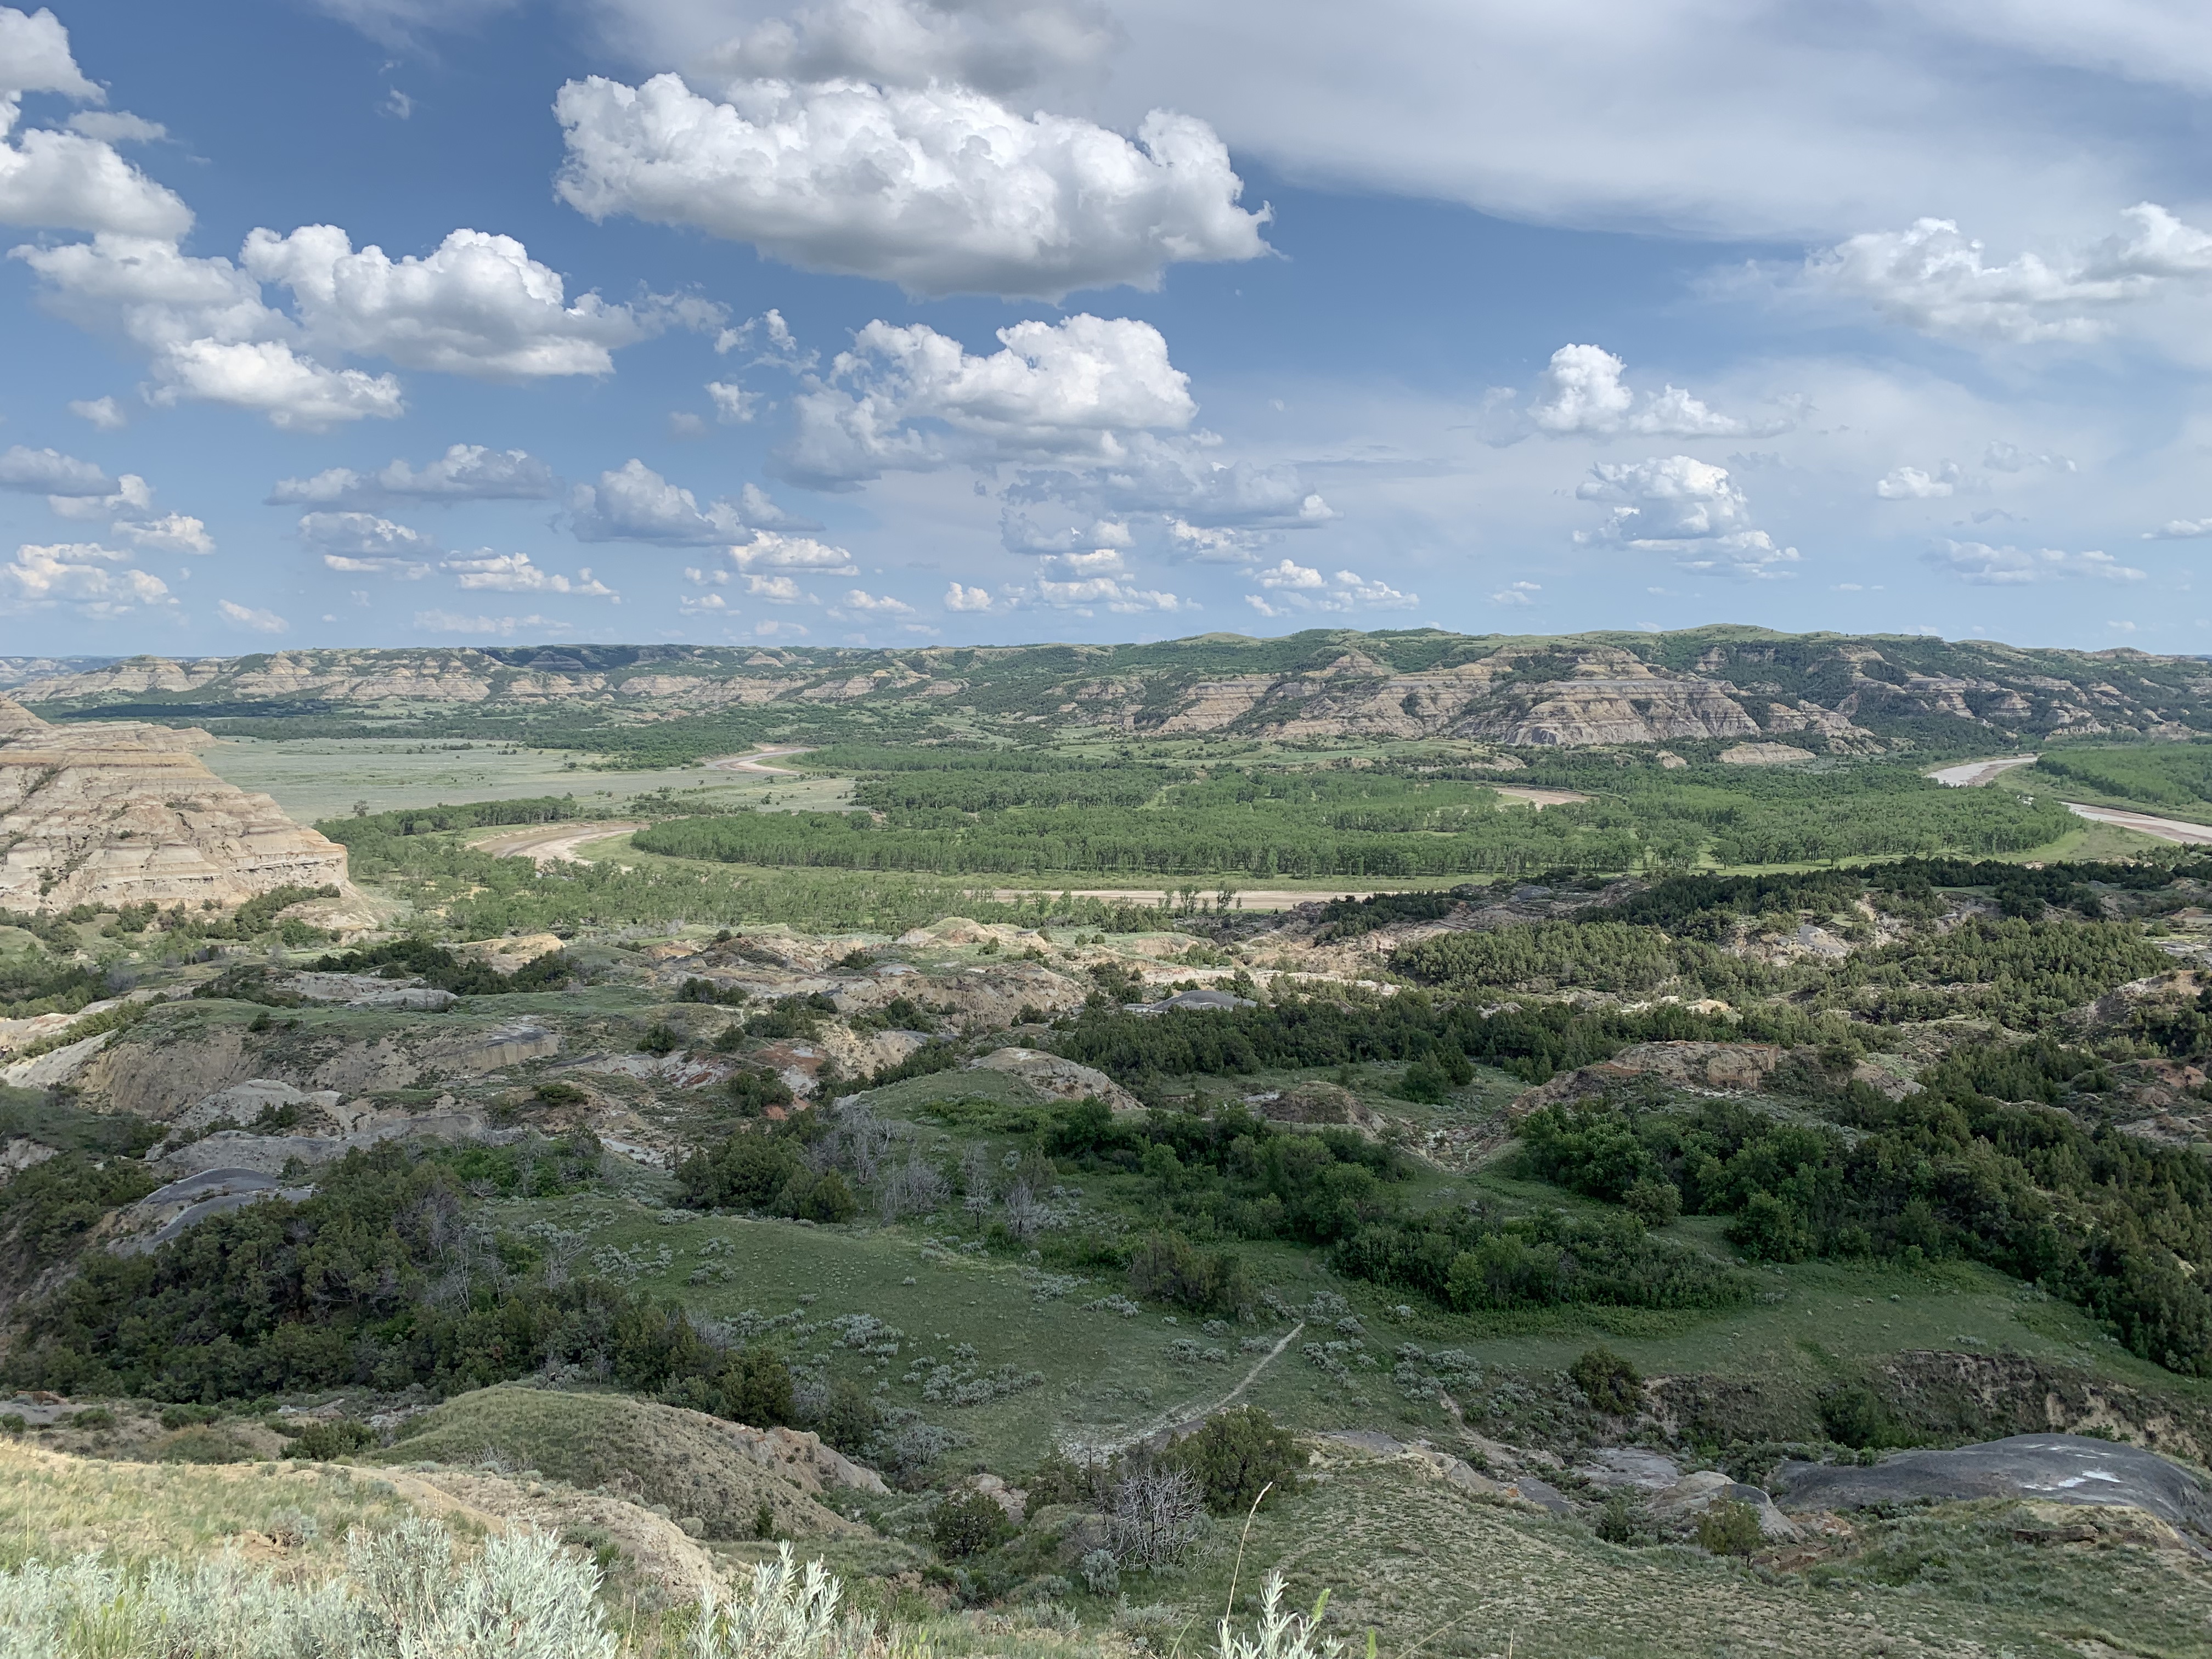
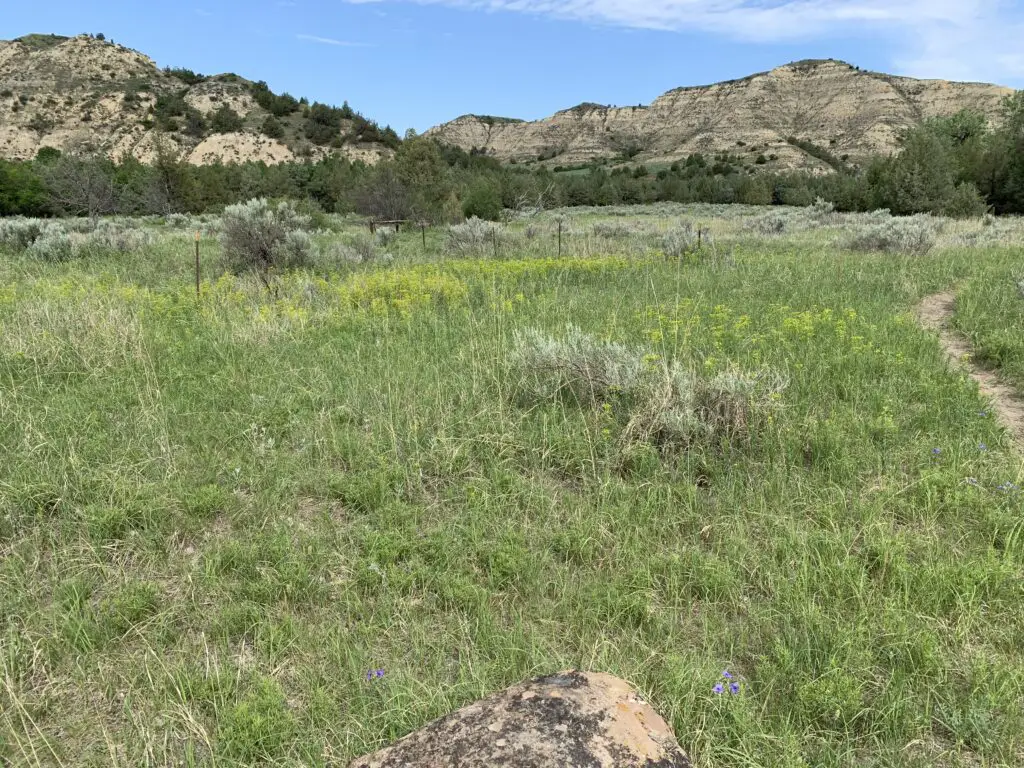
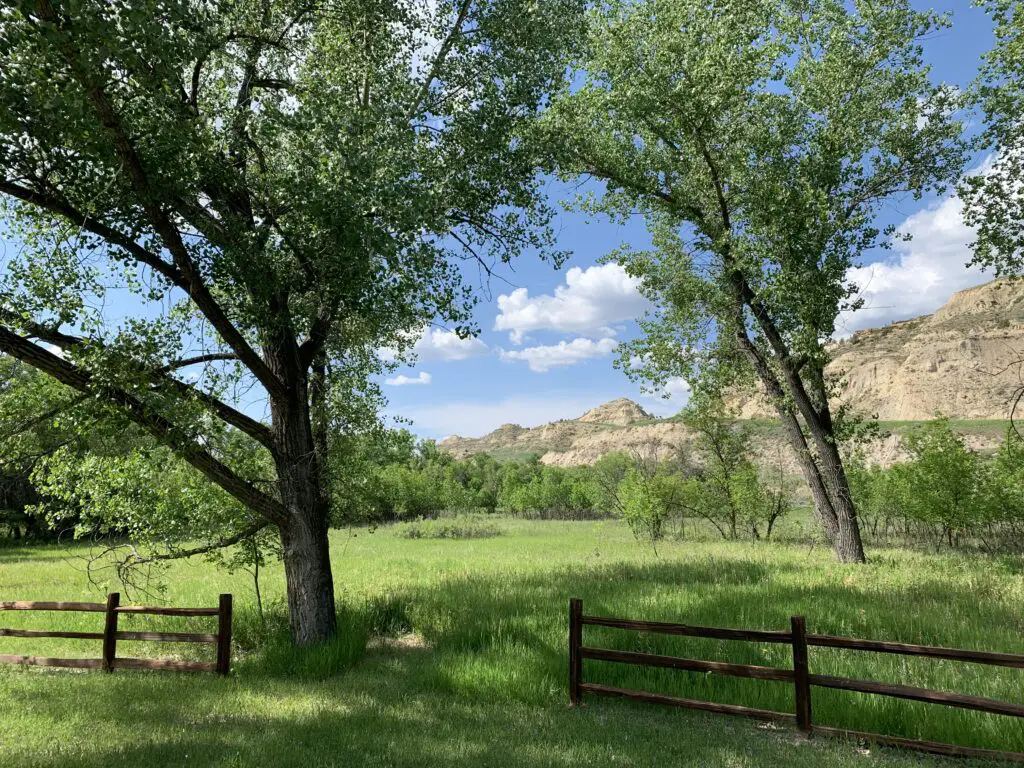
The Trekkers have had Theodore Roosevelt National Park, in southwestern North Dakota, on our bucket list for quiet a while. We wanted to go fairly early in the season, so it would still be green, and in mid-June it was BEAU-tiful!
This was one of the first trips we took once I could start hiking again after I had been laid up for MONTHS thanks to surgery for an ankle that was broken in two places (along with being dislocated and a torn tendon) after a NASTY fall on the ice. 😝 I was finally able to start getting back out there!
Teddy Roosevelt National Park is named after the 26th President of the United States as he lived in this area for a while (before becoming President). He credits his time there as inspiring him to the Presidency.
I’ve come to decide “Teddy” may be my favorite President. They did call him the “Conservation President” after all! He originally came west to help him escape the pain of several serious, personal losses (one of the “loves of his life”, his first wife, died from complications after childbirth THE SAME DAY his mother died of typhoid fever! 😪)
Teddy helped create the US Forest Service and was a champion of protecting countless acres of land in the western US, as well as creating a number of national parks and monuments (many of which the Trekkers’ enjoy regularly.) He was also friends with John Muir (another of my favorites!) He was the OG #natureaddict/#natureboy!
A note on this park: the irony is the National Park named after the “Conservation President” sits on the edge of the Baaken Oil Fields!–For those who don’t know these are some of the largest oil fields in the US.
This really won’t affect your experience at Teddy Roosevelt National Park too much. You can see the flames burning off waste-natural gas from some of the overlooks and hiking trails in the North Unit. This is especially troublesome at night when they can affect the Dark Sky status of the park.
I don’t think Teddy would have liked to see his beautiful land in this state but who can stand in the way of progress? 🙃 “Black Gold, Texas Tea baby!” 😡
Where is Teddy Roosevelt National Park?
The park is situated in far, southwestern North Dakota about 130-ish miles west of Bismarck!
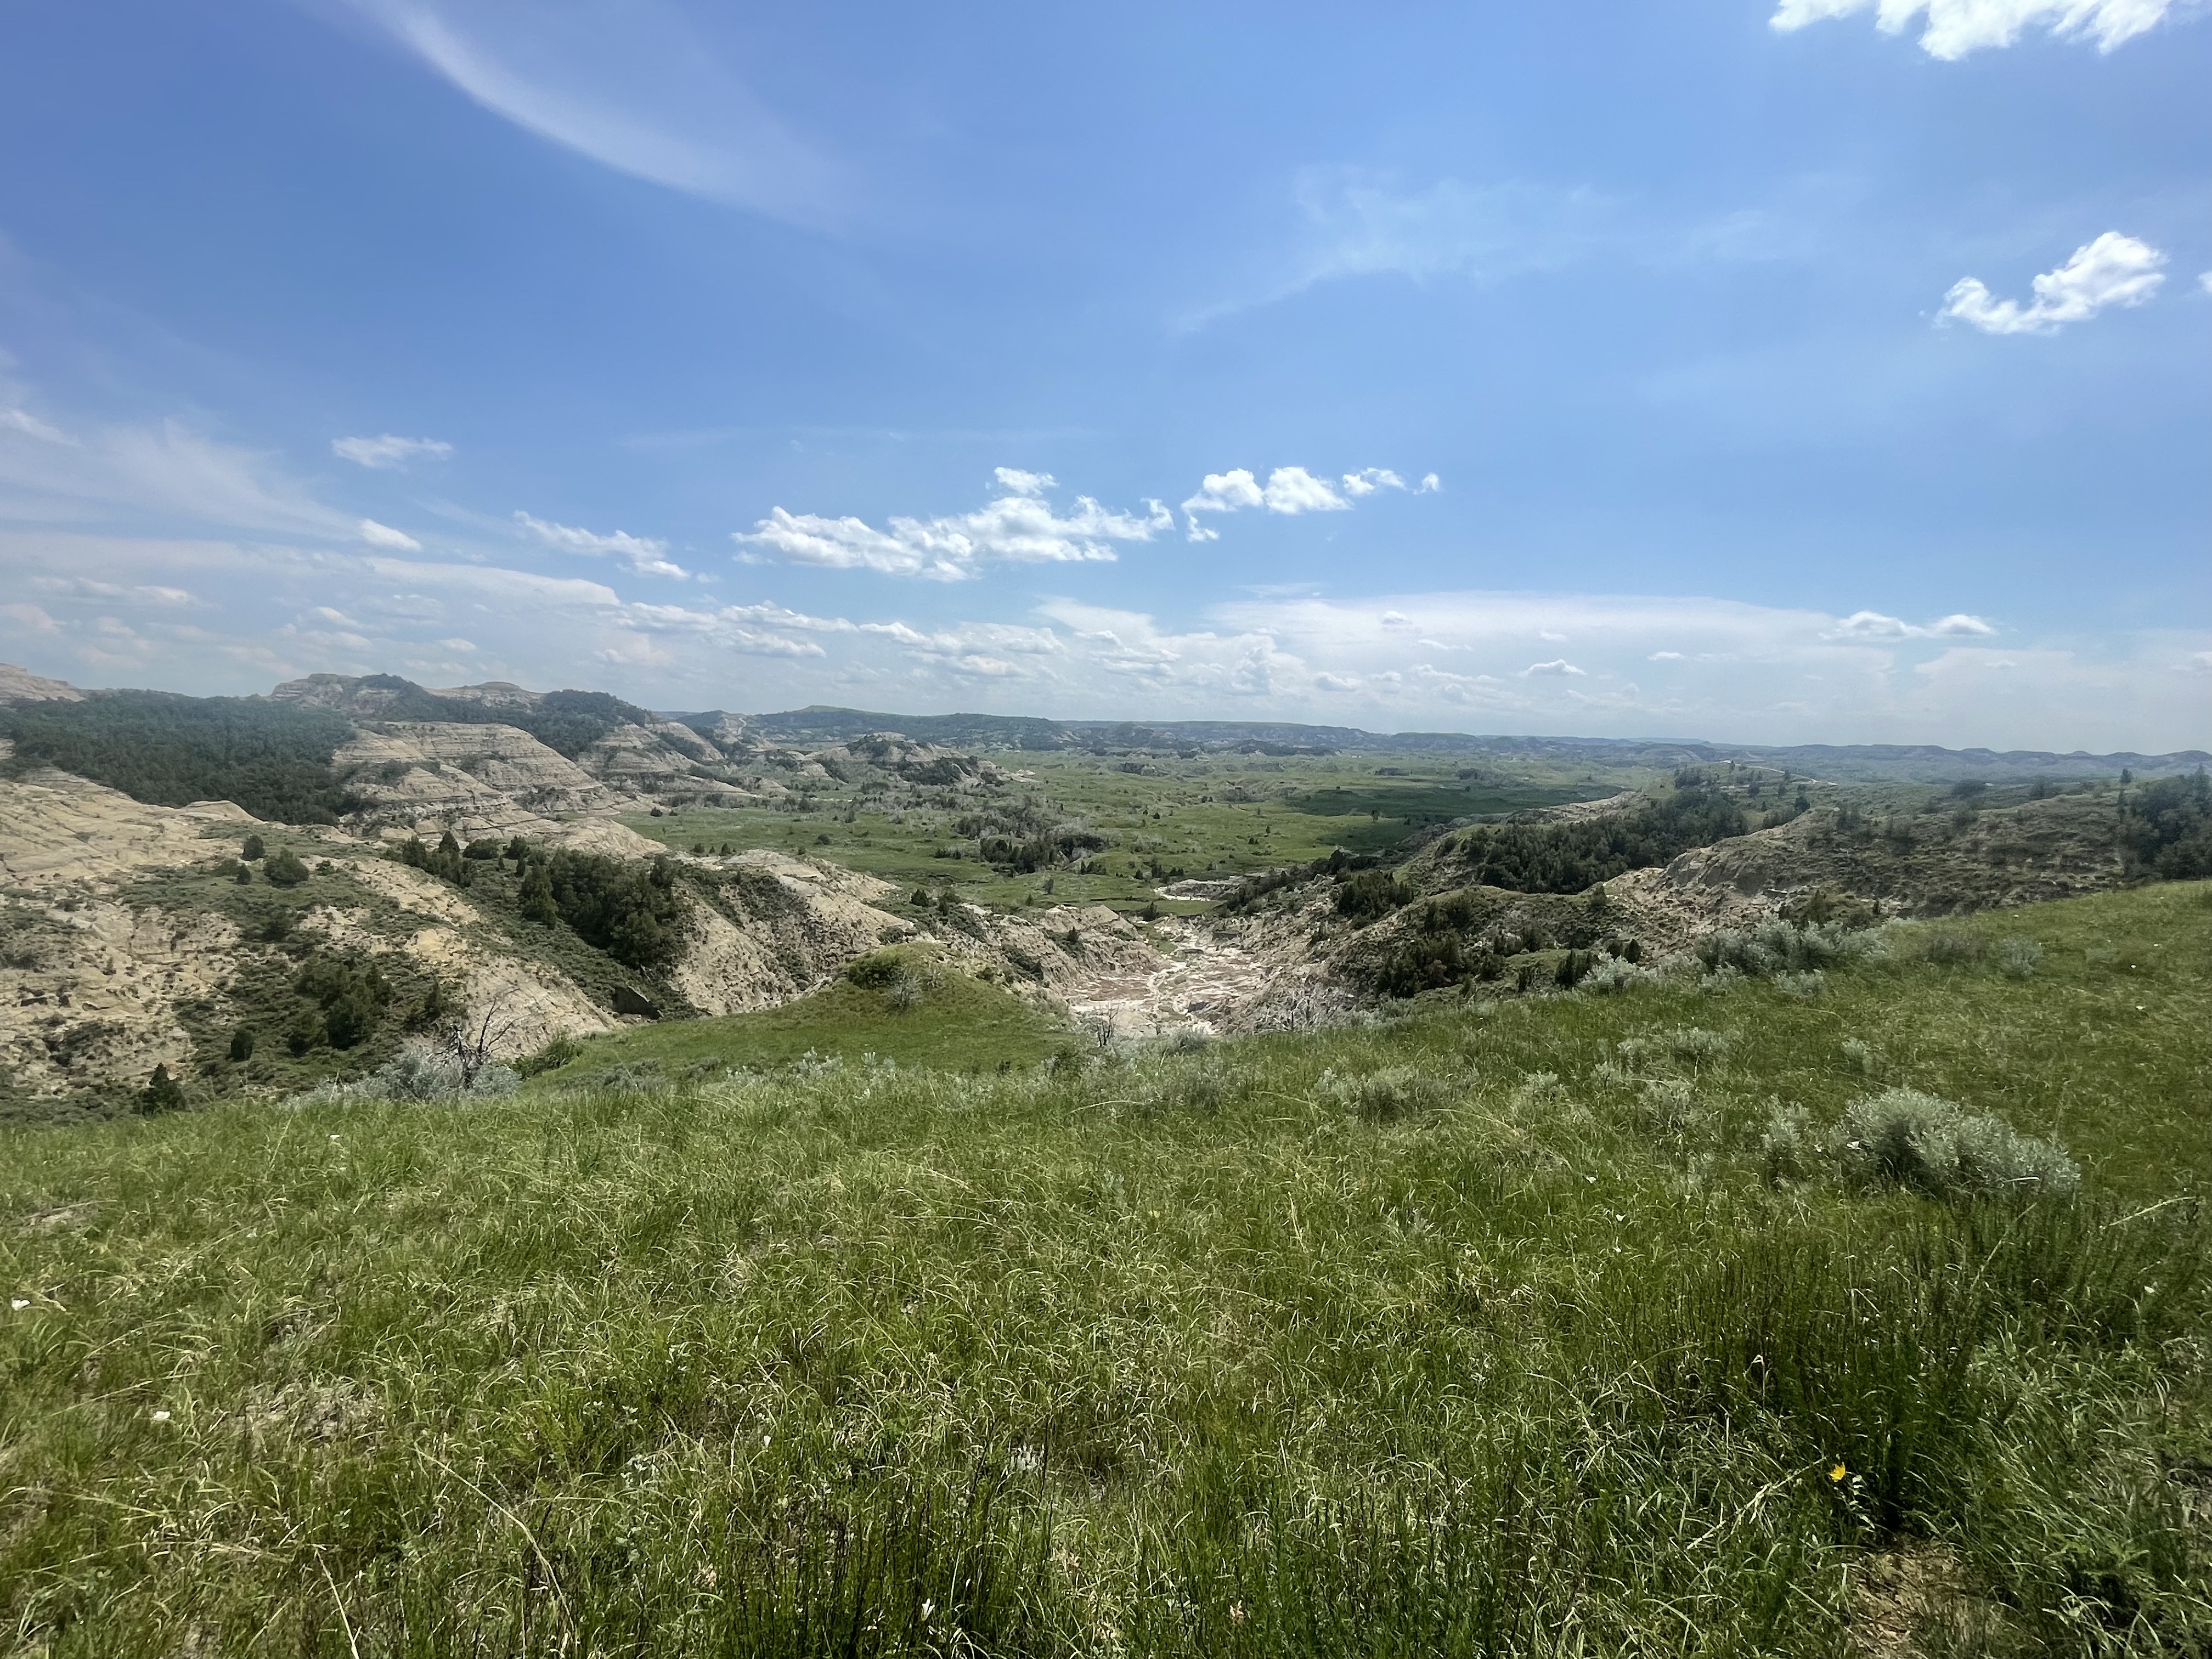
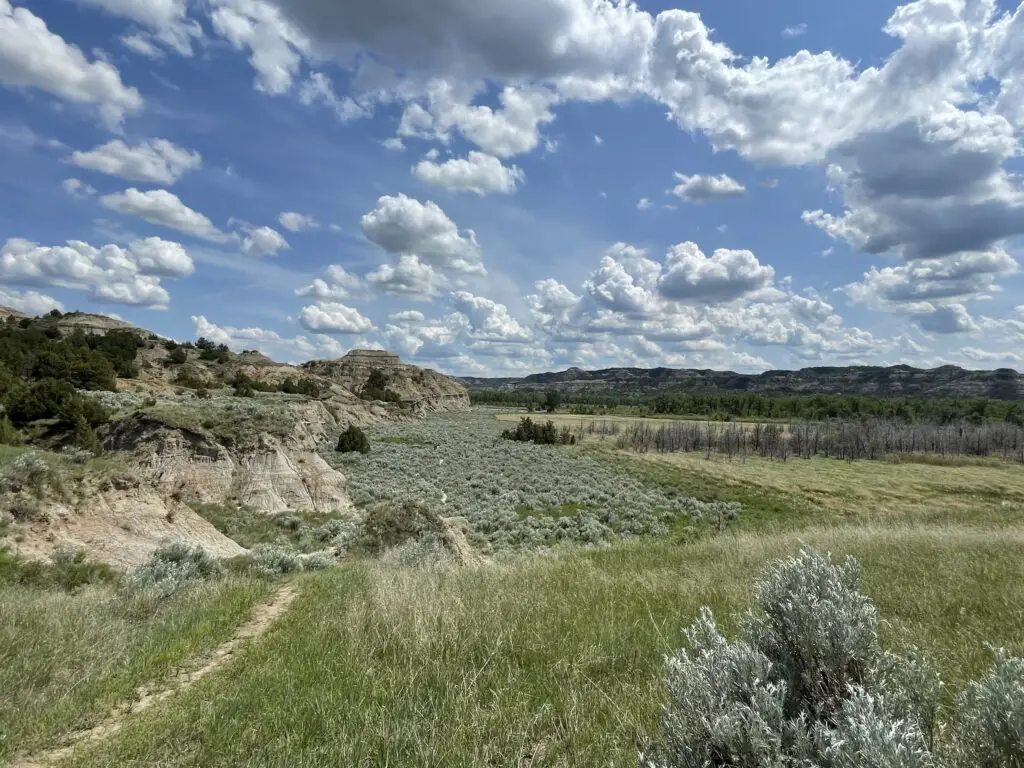
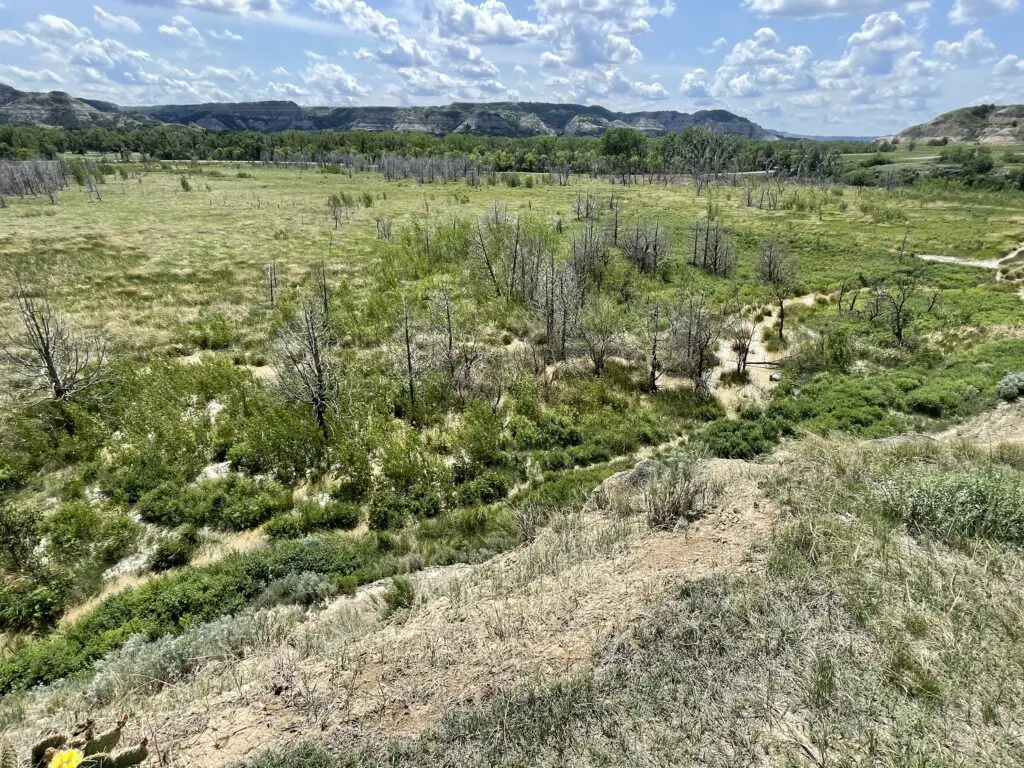
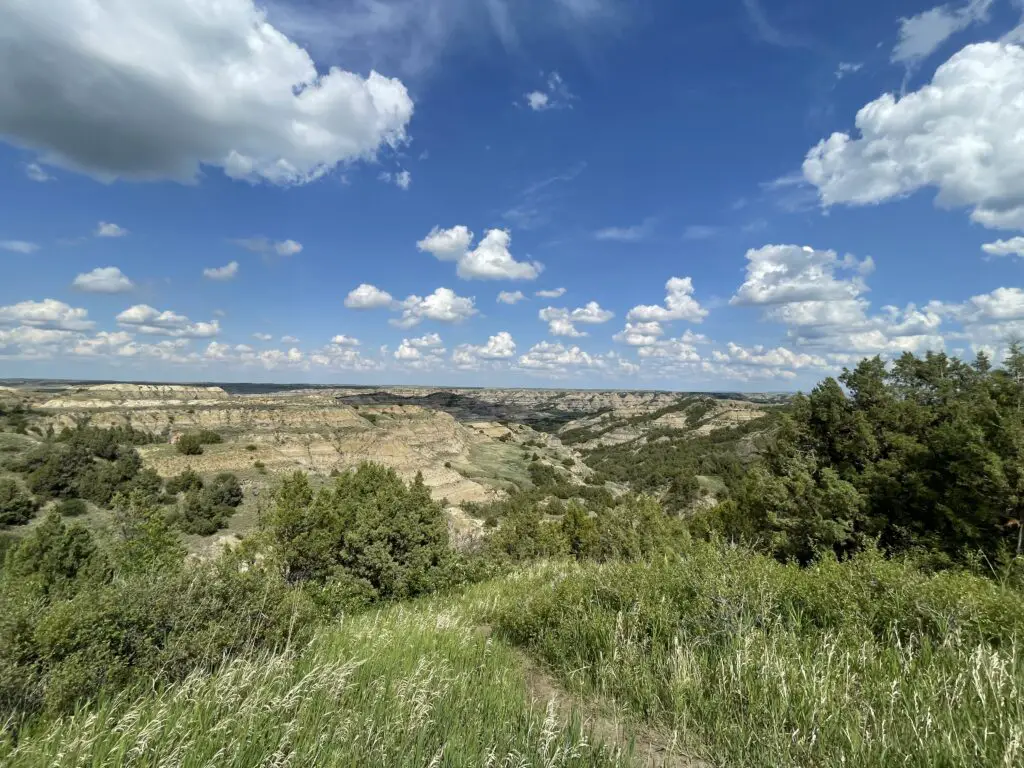
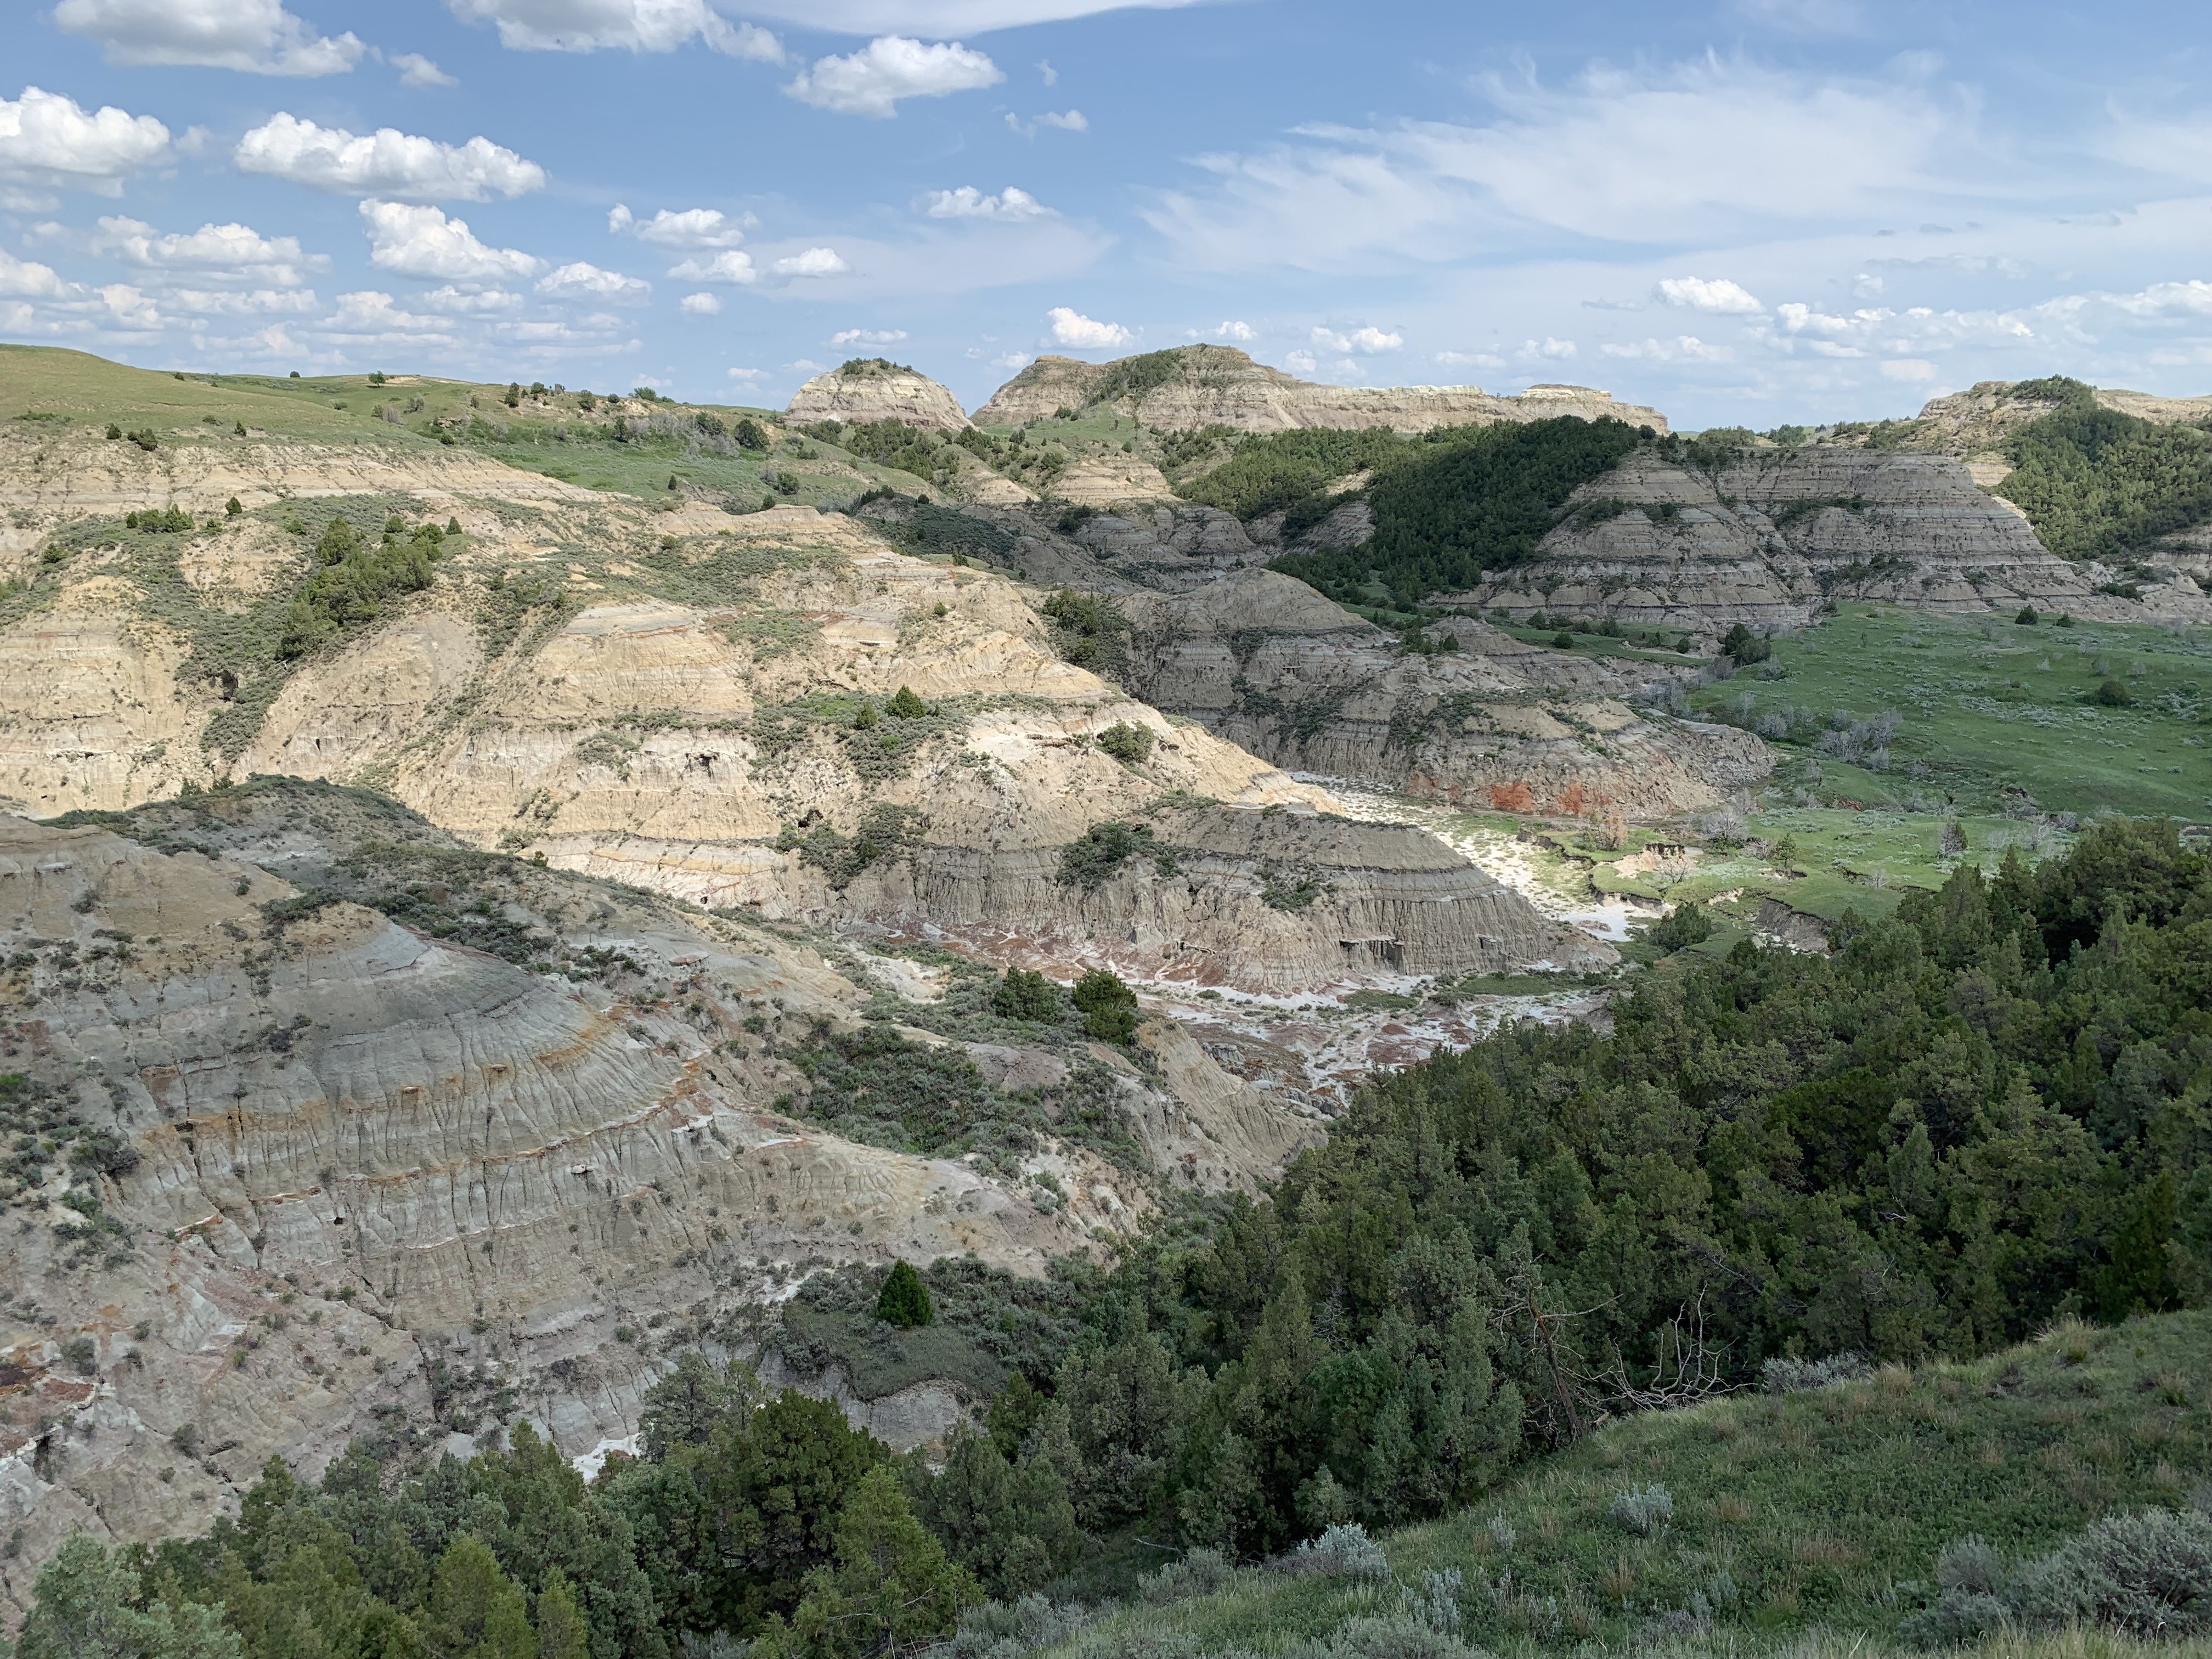
This park is also called the “North Dakota Badlands”. While somewhat similar to Badlands National Park in South Dakota, this area is wetter and greener…
Teddy Roosevelt National Park is divided into three separate units. The North Unit was our favorite. It is known for being less developed but also prettier, offers more wildlife and is less busy. The South Unit is more developed and busier but offers more hiking options. (The two units are about a one-hour drive apart–around 70 miles).
There is also a bit of a “satellite” unit centrally-located to the west of the other two, main units. It is called Elkhorn Ranch. This is where Teddy literally lived when he was in North Dakota and it is LITERALLY in the Middle of Nowhere! This one is pretty far out there–about a one-hour drive (around 54 miles) northwest of Medora…
The park basically isn’t near anything except the tiny town of Medora. The town is cute but small. It wasn’t too busy when we were there in mid-June but it can get MUCH busier later in the season.
Driving around North Dakota was kind of weird. 😅 All of their traffic light poles are bright yellow. Not sure if this is to highlight them against the snow they get all winter? Also, they don’t hardly have any good gas stations/Convenience-stores. All throughout Wyoming, rural South Dakota and Montana you have plenty of good, big, gas station stores (some are literally in the middle of nowhere with no other buildings in sight and double as catch-all grocery stores)–in western North Dakota these are HARD to find!
They have plenty of gas stations but they all look like they’re from about 1995–several we stopped at, while small, did at least have clean bathrooms! This was surprising to me because there aren’t a lot of gas stations up there, you’d think the ones they do have would be fairly good-sized and decent–even near major highways, like I-94, the stations were largely disappointing…
Teddy Roosevelt National Park North Unit
We enjoyed camping and hiking around the North Unit more. It was definitely quieter, and it offers a 14-mile scenic drive (each way). Just realize this is NOT a loop, you have to drive out and back!
Camping at Juniper Campground
Juniper Campground, on the North Unit of Teddy Roosevelt National Park, is MUCH easier to get sites at than the Cottonwood Campground on the South Unit. We got into a First-Come-First-Serve site at Juniper, in the middle of the week, in mid-June, with no problem!
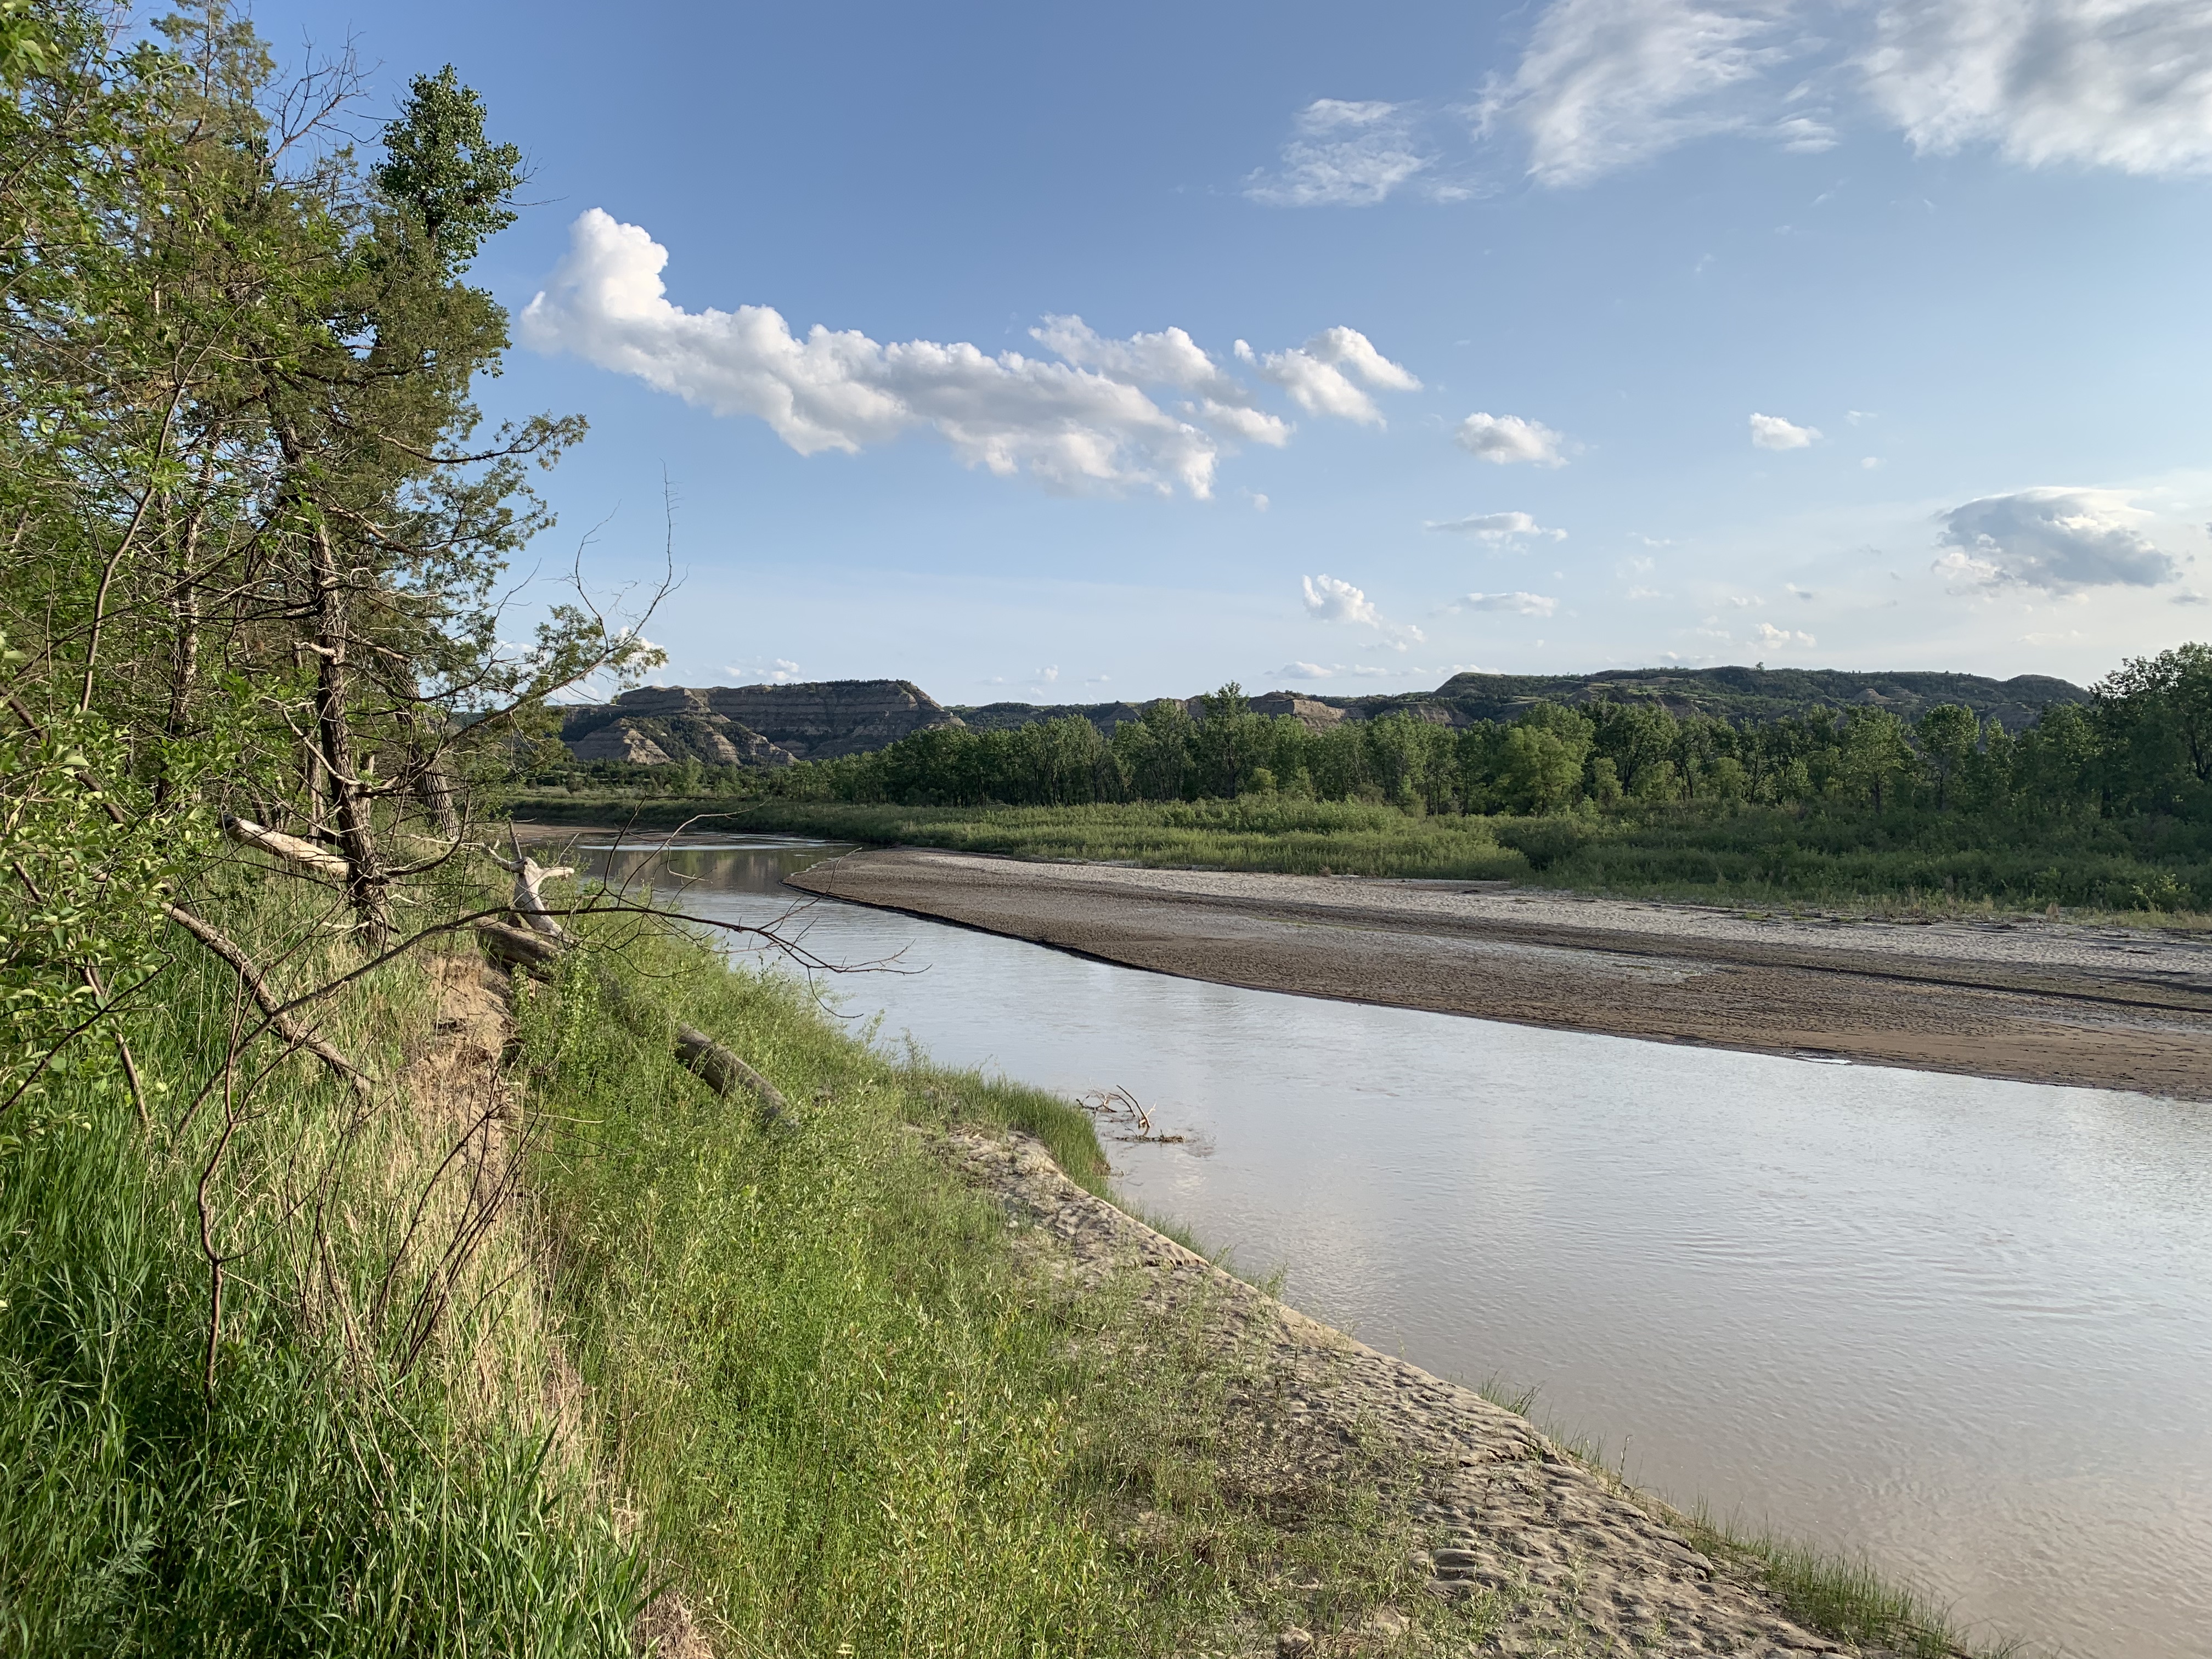
The Little Missouri River ran JUST on the north side of Juniper Campground–basically barely across the road from our campsite!
I would not want to be standing there in a flash flood!
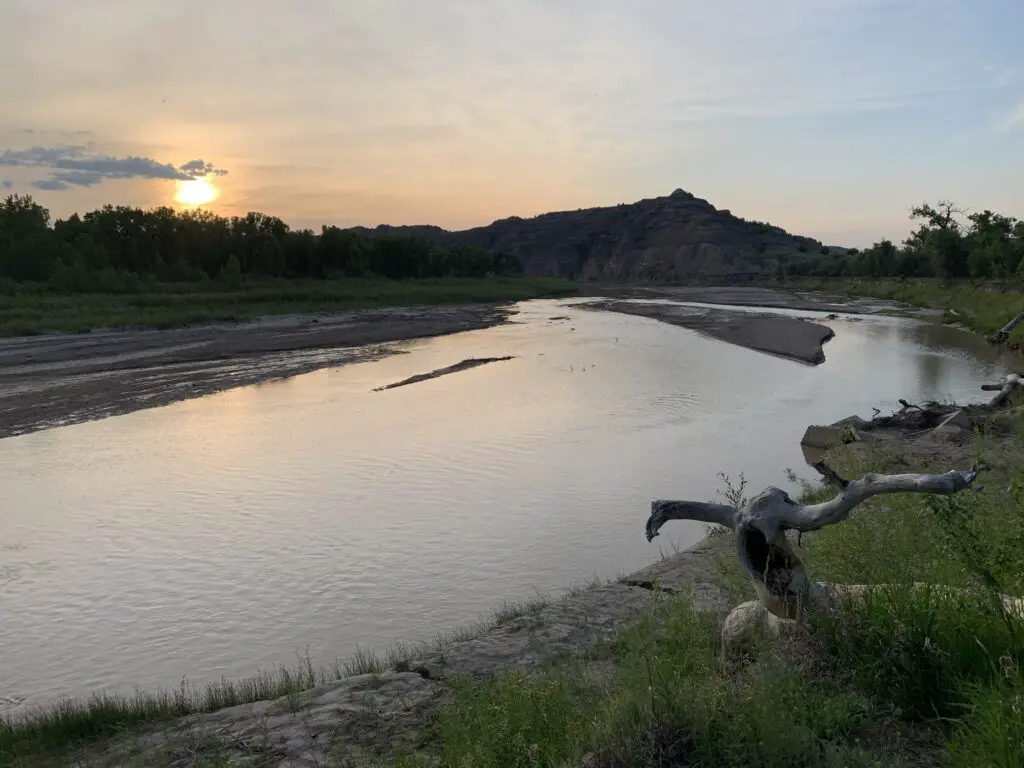
I LOVE this pic Mr. Trekker took, it’s SO moody!
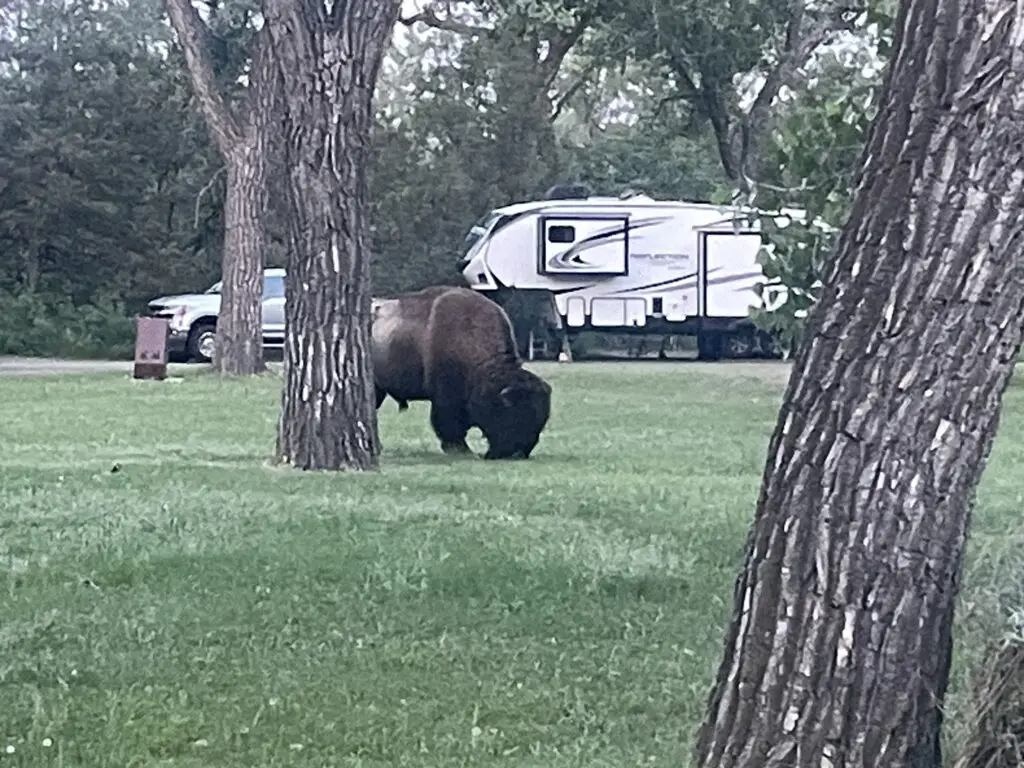
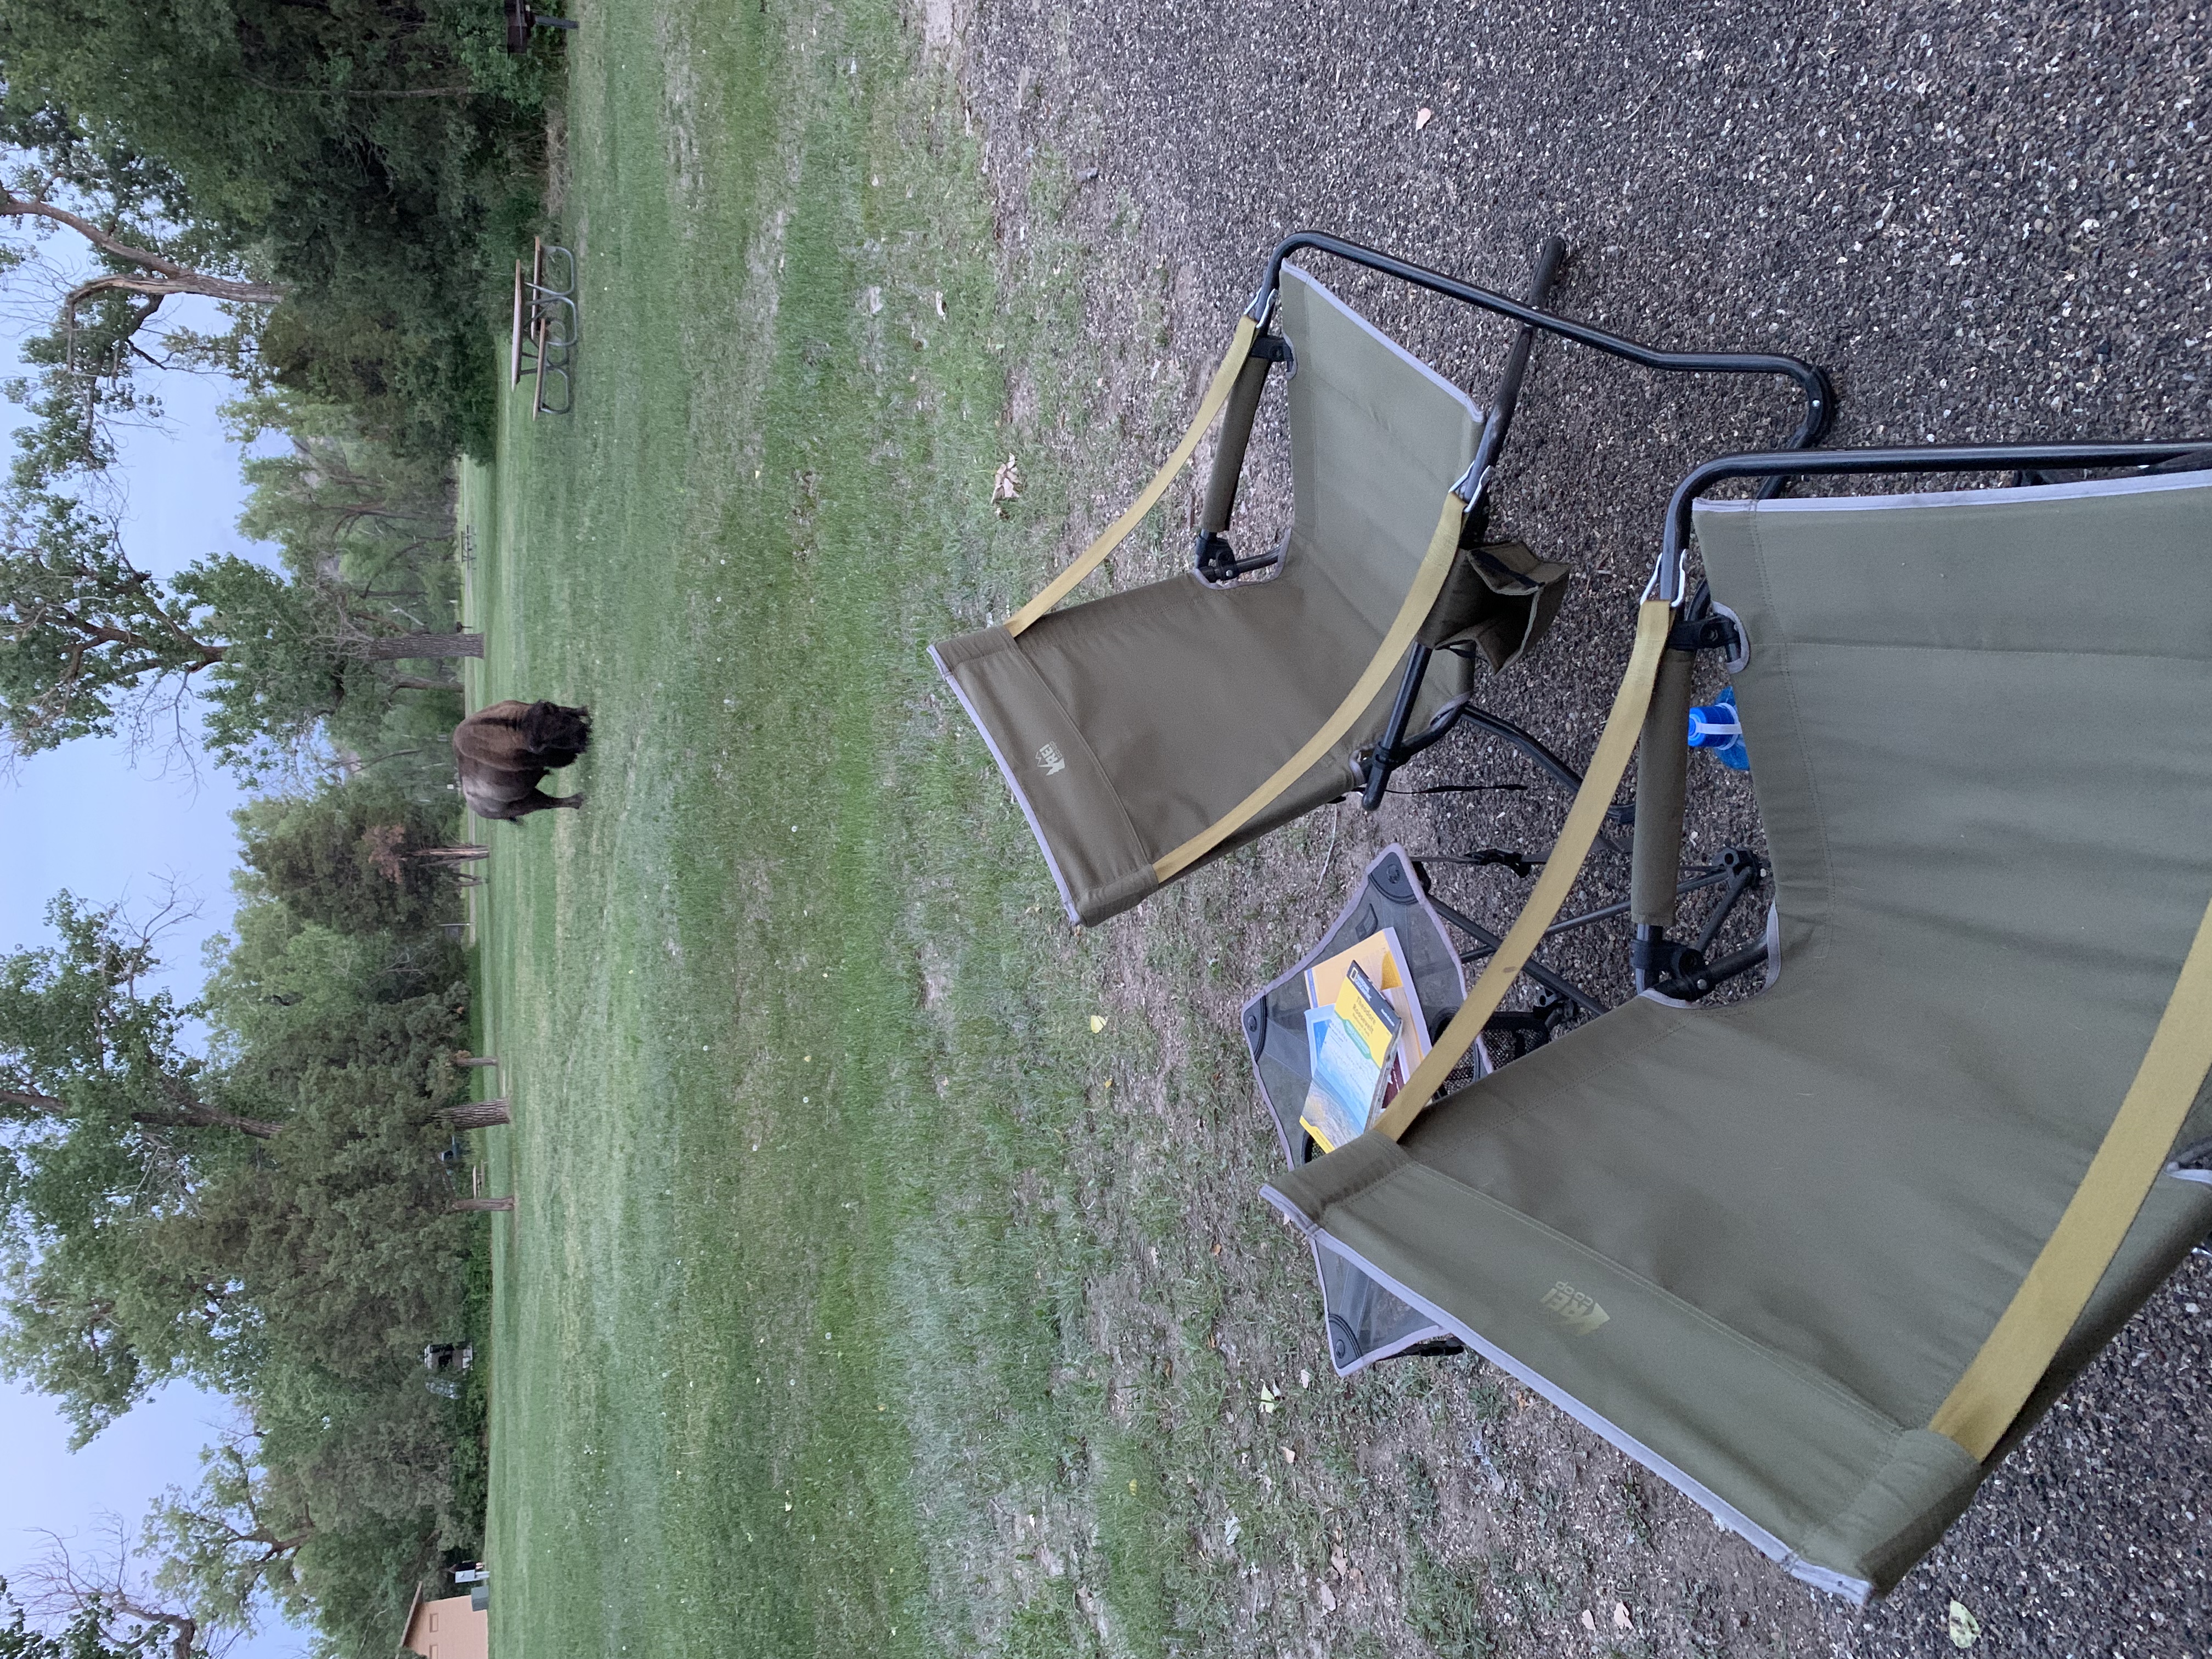
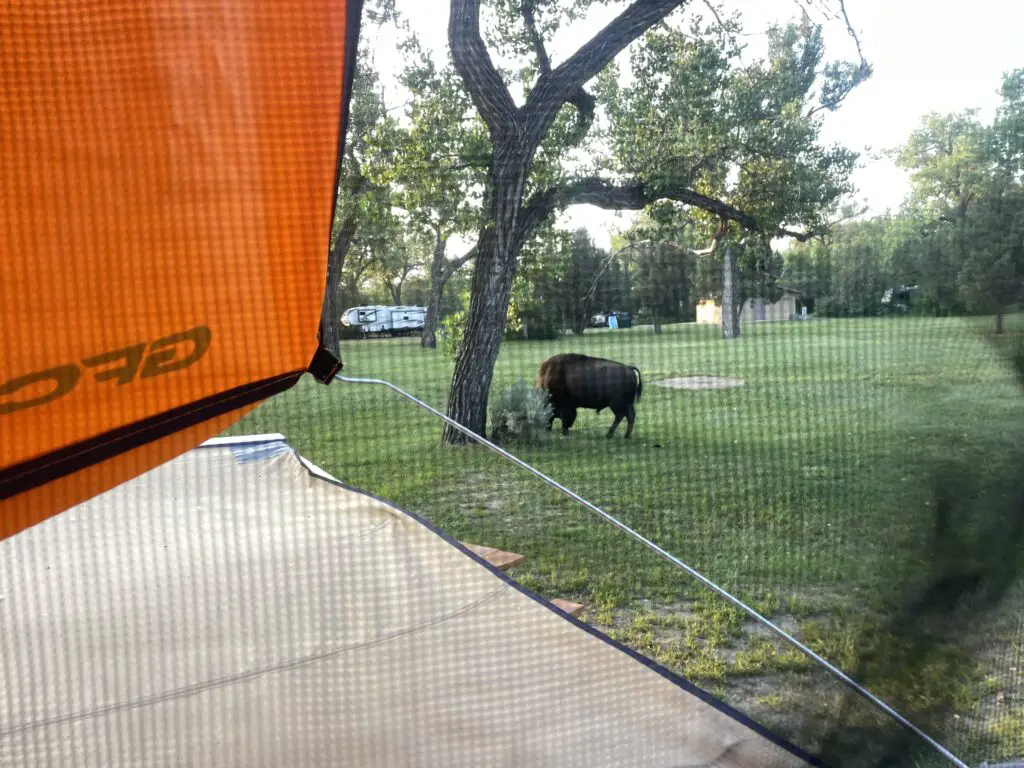
There was even a buffalo that hung out with us IN THE CAMPGROUND–watch out for these! #dontpetthefluffycows!
Big boy! Imagine running into him walking to the bathroom in the middle of the night!
A note about buffalo: it is NOT ADVISABLE to get as close to a buffalo as we were in the picture above. However, in this case, we were literally sitting on the truck bed and he came up to us so this was a bit of an exception. He seemed calm and other campers said he’d been there before. As he was showing no signs of agitation we stayed still till he wandered off to a safer distance.
To be clear though, buffalo are known to be completely unpredictable and they can be DANGEROUS if they get irritated. So even in situations like this, DO NOT approach them, give them space, be calm and quiet and try to back off slowly but calmly if possible. DO NOT let dogs get near them (dogs can agitate them and they can easily kill a dog). ESPECIALLY, DO NOT APPROACHif they have babies!!! They may look oafish but these brutes can run at 30 mph–you CANNOT outrun them–and they’re equipped with sharp horns and a VERY hard head!
View from our GoFast Camper the next morning!
For more info on camping at Teddy Roosevelt National Park, click here!
Since the North Unit was so quiet we noted there was SO MUCH birdsong! Teddy actually mentions this in his book about being at his ranch, Ranch Life and the Hunting Trail. He describes the birdsong as:
“…the rider on the plains will hear bird songs unknown in the East…many are characteristic of this region. Throughout June the thickets and groves around the ranch house are loud with bird music from before dawn till well after sunrise.”
Your Moment of Zen: enjoy some birdsong from Teddy Roosevelt National Park (it was breezy too!)–turn UP the volume!:
Some hiking trails and good stops at the North Unit of Teddy Roosevelt Park:
We enjoyed several fun pull-offs and short hiking trails in the North Unit:
The Cannonball Concretions Pullout was the first one we came to and is just across the road from the entrance to Juniper Campground:
The Cannonball Concretions!Whaddya think…a bird or Mickey Mouse?
Buckhorn Trail starts from the Cannonball Concretions pullout. We only did a small portion of this trail, basically just up the hill from the pullout. It’s full length is more than 10 miles long and wanders throughout the North Unit of the park!
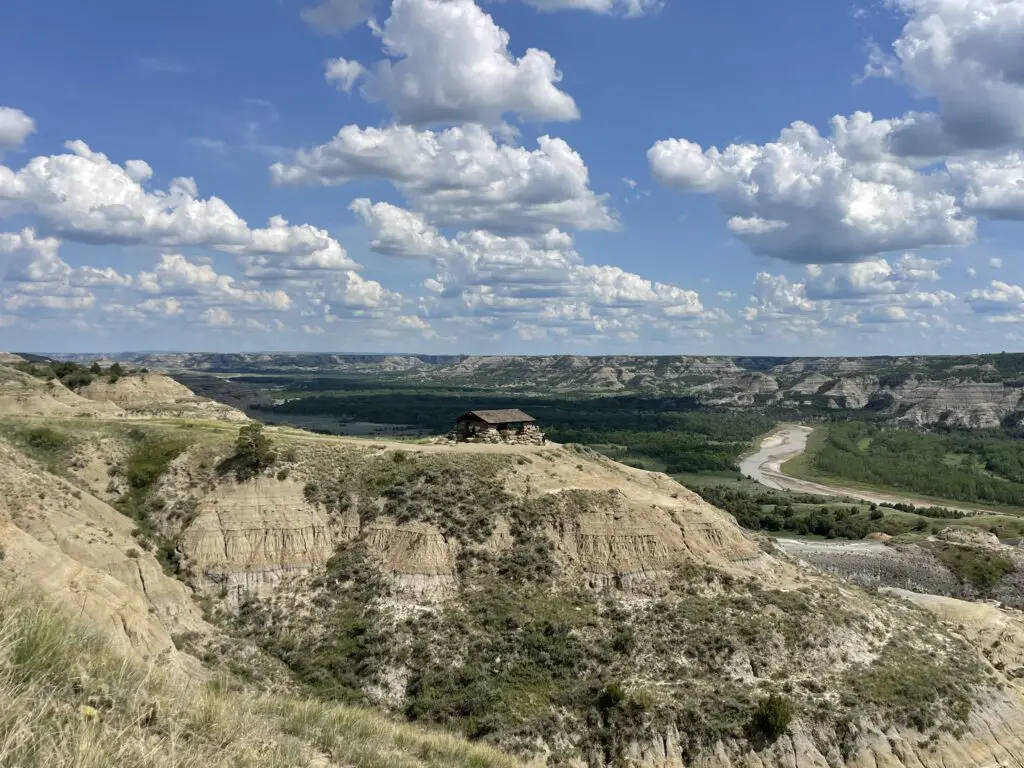
Riverbend Overlook was just a quick (but pretty!) jump out of the car:
Oxbow Overlook was an easy, pretty and short hike to and around the overlook–the shelter also makes a great place for a picnic or snack:
Teddy Roosevelt National Park South Unit
The Scenic Loop Drive circumvents the majority of the South Unit of the park. It is about 36 miles round trip though we couldn’t do the whole loop as the southern half was closed for construction…
Note: The time zone change between Central and Mountain time runs along the Little Missouri River. This results in the main, two units of the park being in separate time zones (the North Unit is on Central Time while the South Unit is on Mountain Time.) So the North Unit is one hour ahead of the South Unit–life is weird out West! 😀
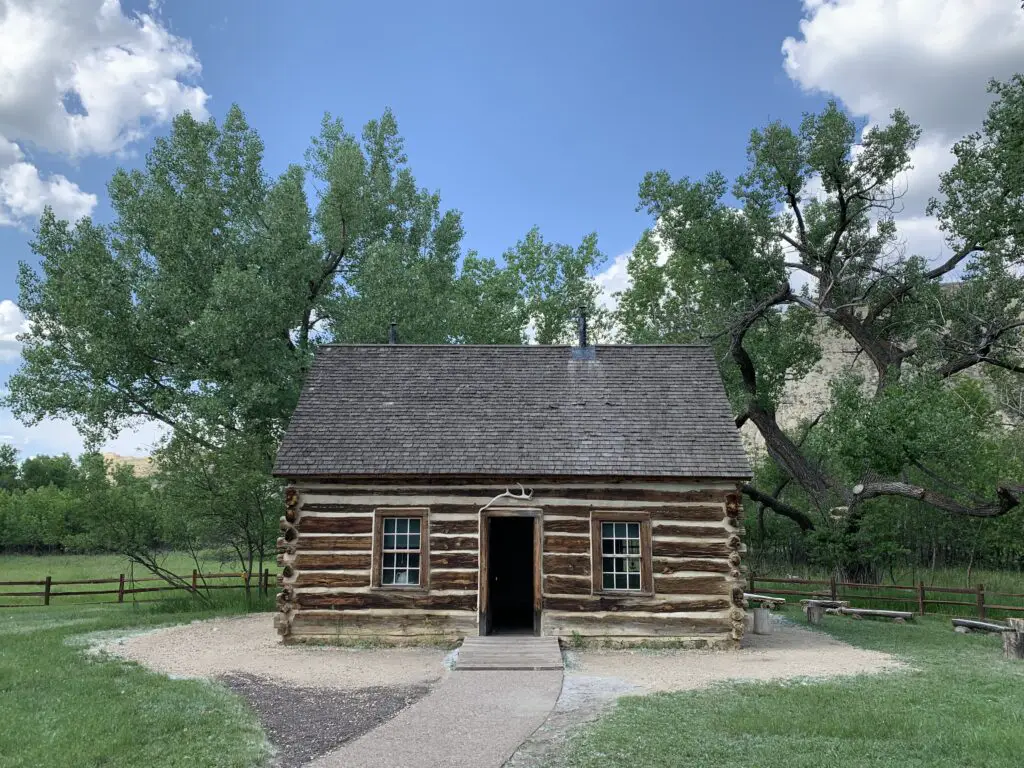
This was one of the actual cabins Teddy lived in when he was in North Dakota!
You literally drive through the South Unit on I-94 which is kinda cool. One of the rest stops is literally part of the park and you can hike a bit from here!
This pic was taken from the rest stop on I-94. This is a portion of the Painted Canyon Trail. You can hike around down there and access it from the rest stop!
Painted Canyon trails: These trailheads are locate at the I-94 rest stop that sits in Teddy Roosevelt National Park.
The Painted Canyon Nature Trail is an easy trail, only about 1/2 mile long and it runs along the rim of the canyon, just behind and around the rest stop building. Pets can be on this portion of the trail!
The Painted Canyon Trail departs from this same area. It’s fairly steep to get down into the canyon. It’s about four miles in total length and be aware there is NO SHADE on this trail. It also connects to other backcountry trails throughout the northern portion of the park.
Moment of Zen 2: Buffalo at Teddy Roosevelt National Park!:
Some hiking trails and good stops at the South Unit of Teddy Roosevelt Park:
Boicourt Overlook/trail: The park website says this trail is only .3 miles and handicap accessible–this is “kind of” true. This description is true for the main trail but you can keep going further along the ridge for probably close to another 1/2 mile (that portion is not accessible).
Buck Hill: The entire trail is less than 1/2 mile but it’s quite steep! The steepest portion is paved (though I wouldn’t call it “accessible” as it’s so steep) while the rest of the route is a good, packed-dirt trail.
Wind Canyon Trail: This trail is about 1/2 mile in length. It has a few steep sections but overall this one isn’t too bad. It was a nice overlook of the river!
View of the Little Missouri River from the Wind Canyon Trail
For more info about hiking at the South Unit of Teddy Roosevelt National Park click here!
Teddy Roosevelt National Park Elkhorn Ranch Unit
There are a few ways to get to the Elkhorn Ranch unit:
The easiest (though it is longer) is to take Exit 1, on I-94 at Beach, and go north on Route 16. Then take Black Tail Road to the east until it becomes Belle Lake Road. Then take a left turn at Elkhorn Ranch Road. We went to the Unit this route and found it pretty easy to follow…
The actual location of Teddy Roosevelt’s ranch in western North Dakota
You can also take I-94 west from Medora, to Exit 10 for Belle Lake Road. Google will get you there going this way though it is out in the middle of NOWHERE with a lot of twists and jogs. We brought this route back to the highway and found it fairly easy to follow.
Note: while they were in great condition when we were there, be aware most of these roads are dirt!–Your car may get a little dusty!
View from our campground near Elkhorn Ranch
It’s all dirt roads to get there but they’re in pretty good shape and your sedan can make it, at least in good conditions. 🌞(In mud or snow, you’re on your own! 😇)
Enchanted Highway
On the way back to the Black Hills we checked out the Enchanted Highway!
Most people can only take so much Interstate driving (and that only gets you so far in North Dakota) and the straight, flat, state routes can get a little dull too. So spice things up with this interesting little stretch of highway that runs 32-miles north and south between Exit 72 on I-94 and the tiny town of Regent, ND and Route 21 (that’s right, western North Dakota is so rural they just identify places based on their corresponding exits on the highway!)
An enterprising, local sculptor put a series of large, metal critters (ants, grasshoppers and kinda freaky-looking fairy tale creatures) all along the highway. It’s worth a looksie if you’re heading that way anyway! (There are even signs on the highway to help you find this!)
We had a good time in NoDak! I’m not “dying” to go back again but Teddy Roosevelt National Park is definitely worth a drive to this random state that is often one of the last on everybody’s 50-state list! 😀
Like what you read here today? Please feel free to leave a comment, like, or share this post! Add your email at the bottom of the page, or the sidebar to the right, to be notified when a new post is published.
In this post, I review the Misty Moon trail starting at the trailhead at West Ten Sleep Lake and continuing to Lake Helen.
Are you looking for a moderate hiking trail that really lets you enjoy the wilderness of the Bighorn Mountains in Wyoming? Check out the Misty Moon trail from West Ten Sleep Lake to Lake Helen in the Cloud Peak Wilderness!
Where is the Misty Moon trail?
Trail #63, the Misty Moon trail, is one of the most accessible, main trails to access Cloud Peak and Bomber Mountain. It starts at the trailhead behind West Ten Sleep Lake (this is also where the trail for Mirror Lake/Lost Twin Lakes begins.
To reach the trailhead take Forest Route 27 to where it terminates. FR 27 is located off of US 16 in the southern Bighorn mountains. You will turn at the sign for (and location of) the Deerhaven Lodge. Boulder Campground, Island Park Campground, and West Ten Sleep Campground are also all located off of this road.
What is the trail to Lake Helen like?
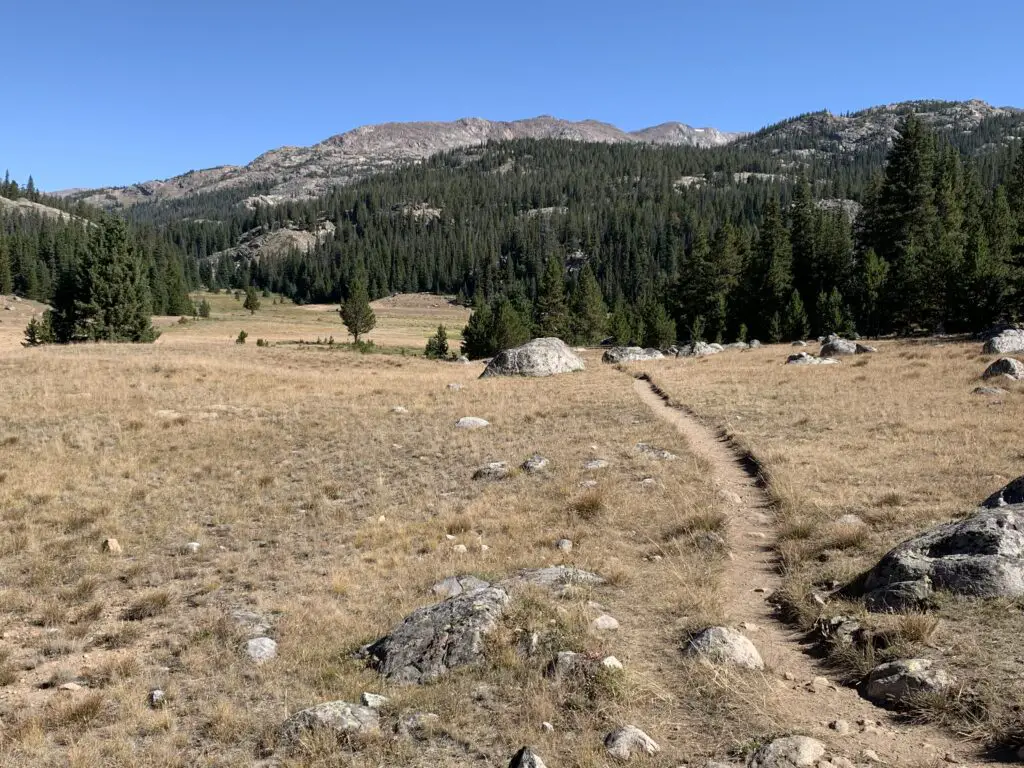
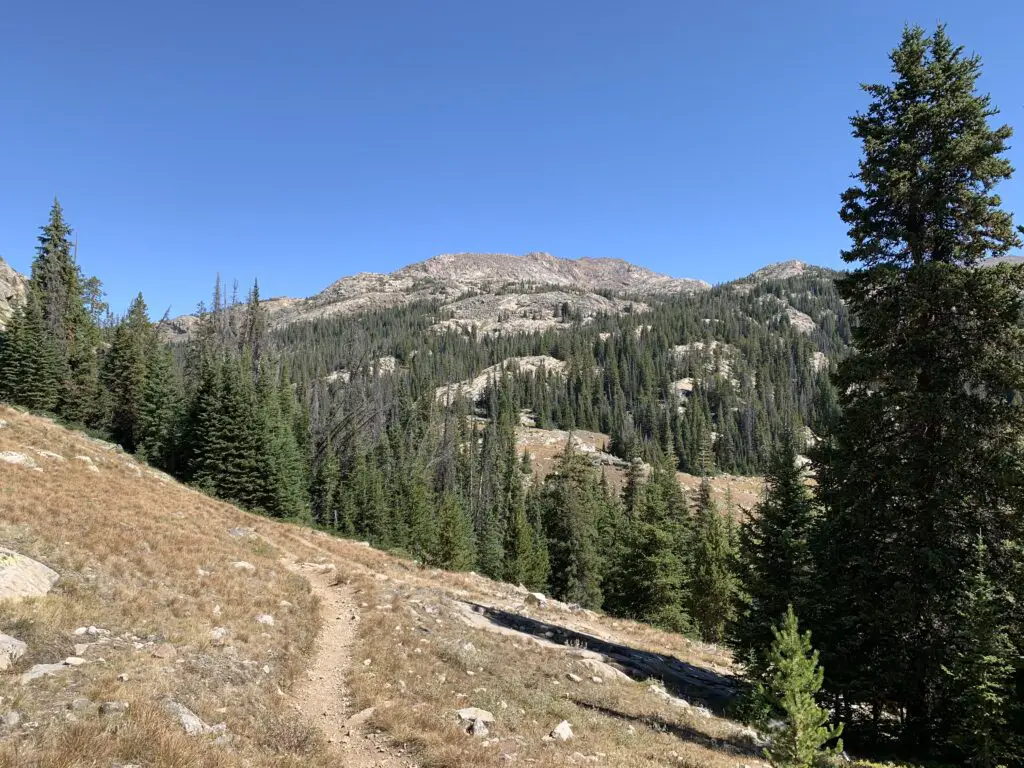
The first few miles of the trail are LOVELY. You start by meandering on a flat trail through the woods around West Ten Sleep Lake.
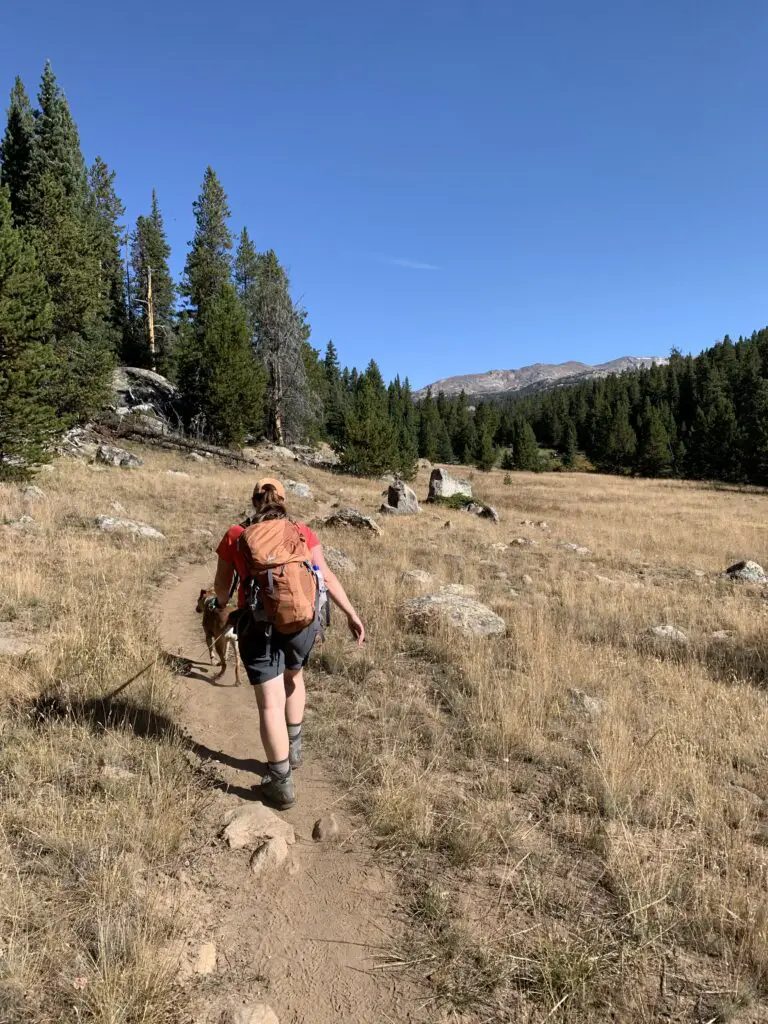
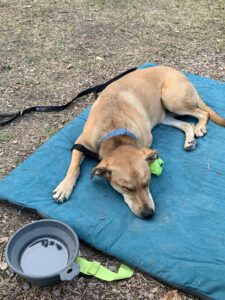
We saw a momma moose and baby bedded down in the tall grass near the lake! Be sure to give these animals PLENTY of space, especially with dogs. Most momma animals can be INCREDIBLY aggressive when they’re protecting babies, and moose have been known to kill dogs–we kept Puppers on a leash and she was too distracted by smells to be aware of our new friends.
Puppers and I on the Misty Moon Trail
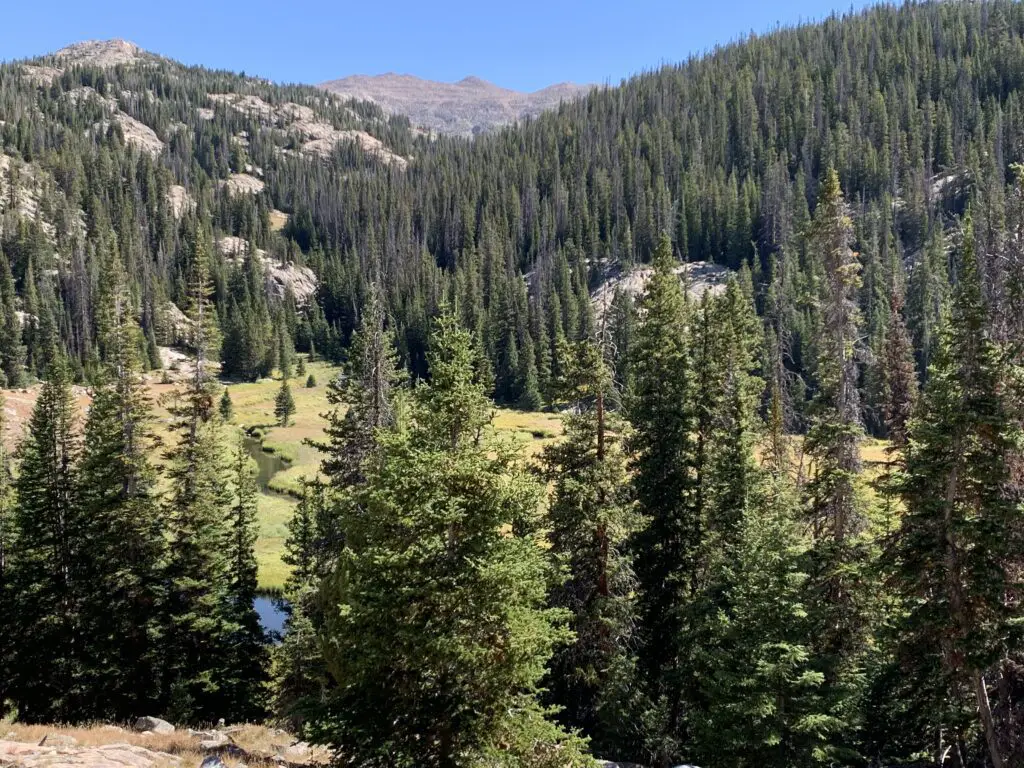
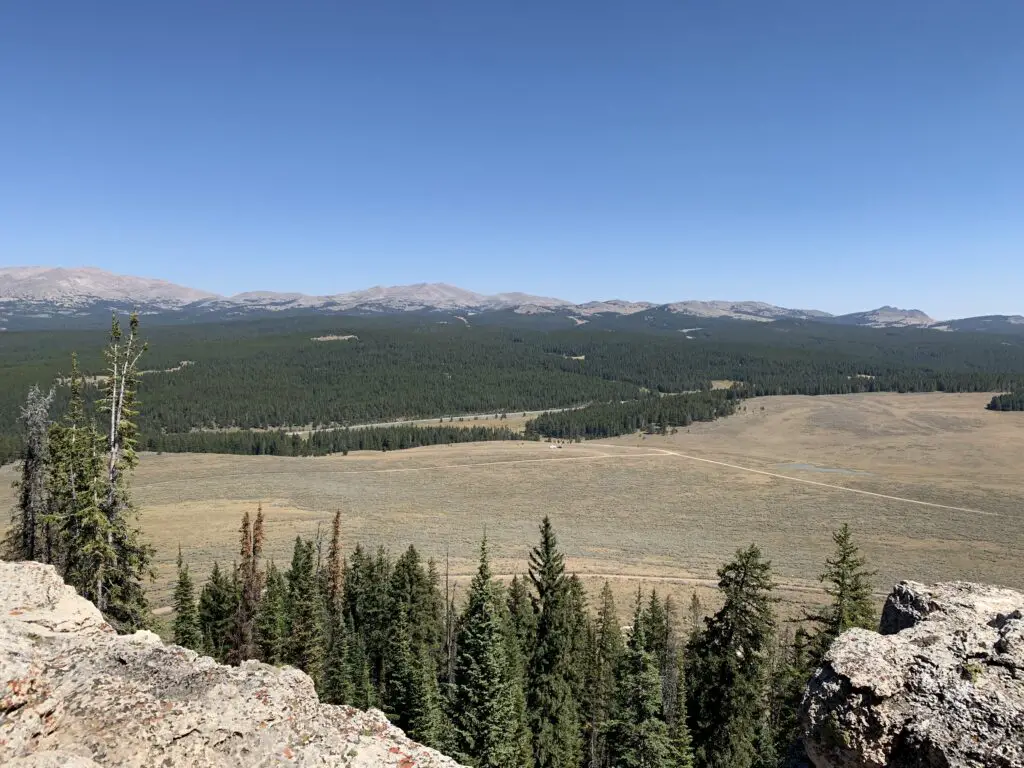
Once past the lake, you start a gradual climb through several grassy meadows and forested areas, with great views of the mountains beckoning you along the way.
The trail undulates the whole way so while there are a few short, steep spots, there are no lengthy, spirit-crushing climbs–I think this contributed to the trail feeling easier than it actually was.
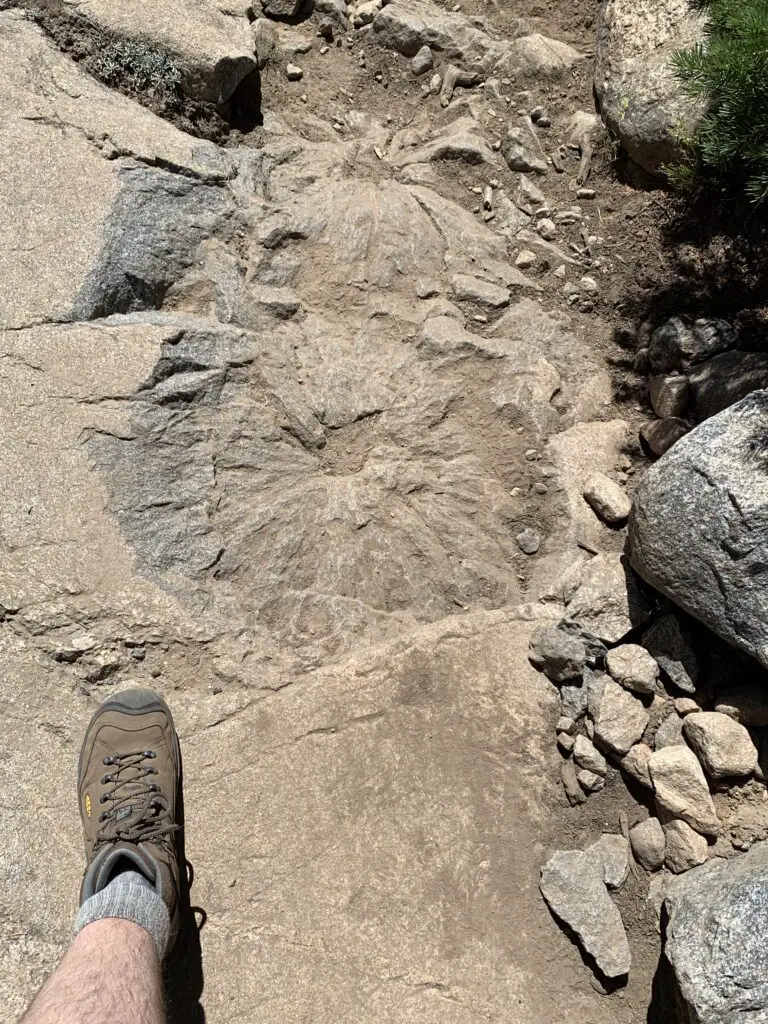
We saw a bunch of these indentations on the rocks, not sure if it’s some kind of fossil? Looks like a plant left them…🤔
About halfway to Lake Helen, the trail becomes steeper. This is where you hit the rocky sections. There are no large boulder fields to cross and no scree slopes to navigate (on this portion of the trail) but the rocks are big enough that they cause a lot of uneven terrain that you’ll need to manage. Hiking boots are definitely recommended for this trek!
I think older kids could do this trail. It’s a longer one and they may need some help in the rocky areas, but overall I would say it is moderately difficult.
The hike didn’t actually seem that bad while we were doing it. Both Mr. Trekker and I were pleased at how good we felt throughout. Especially considering we carried heavier packs than usual (we brought A LOT of water) and we hadn’t hiked much this summer as it’s been so warm. Also, the trail STARTS at around 9000 feet (you gain around 1000 feet in elevation over its five-mile length. Lake Helen sits at almost exactly 10,000 feet.)
Mr. Trekker and I were both pleased that we didn’t feel the altitude too much (it probably helped that we camped at 9000 feet the night before). If you aren’t used to these altitudes though, you’ll definitely want to take it easy.
The Trekkers seem to be doing better with altitude in recent years. It used to be that just driving to Estes Park in Colorado (which sits at around 8000 feet) was enough to make me feel funny. Now we’ve camped and hiked higher than that on multiple excursions in Colorado, Wyoming, and Montana and done quite well. They claim your body “learns” how to adjust to the altitude better the more you experience it and I think that may be true. (Living at 3000+ feet for the last decade probably hasn’t hurt either. 😉)
We considered going all the way to Misty Moon Lake but that would have added several miles to our already 10-mile hike. All three of us were feeling good when we arrived at Lake Helen so we figured we’d just spend a relaxing lunch at the lake and head back.
As it turned out it was good we did decide to turn back. Even though she was raring to keep going when we reached the lake, by the time we got back to camp Puppers was hurting. This was the first time she’s ever really had issues on the trail. This is one of the longer trails we’ve ever done with her (though she’s done 10 miles with us before). This trail is REALLY rocky, in parts, which means it’s probably also one of the toughest trails we’ve ever done with her. We did LOTS of rock hopping on the way down and she was obviously aching by the time we got back. She seemed to make a full recovery within a few days though! (In her defense, my hips were sore for several days afterward, as well.)
Obviously, I can’t speak to the trail past Lake Helen (since we didn’t do it. 😉 I do know that Misty Moon Lake is only about 300 feet higher than Lake Helen but it takes two more miles of hiking (each way) to get there.
Also, my understanding is once you get past Misty Moon Lake the trail gets much tougher. There are some scree slopes and boulder fields (namely on the way to the wreckage site at Bomber Mountain and to reach the actual Cloud Peak). Also, once you get past Lake Helen you are basically above treeline the entire way. This means there is NO SHADE at all so make sure you bring sun hats, LOTS of water, and sunscreen if you’re planning to go this route. There is also NO PROTECTION if you’re caught out in a storm.
I cannot stress this enough: if storms appear imminent PLEASE get below treeline as safely and quickly as possible. It is INCREDIBLY dangerous to be above treeline during a lightning storm. Safety should ALWAYS be your first priority!
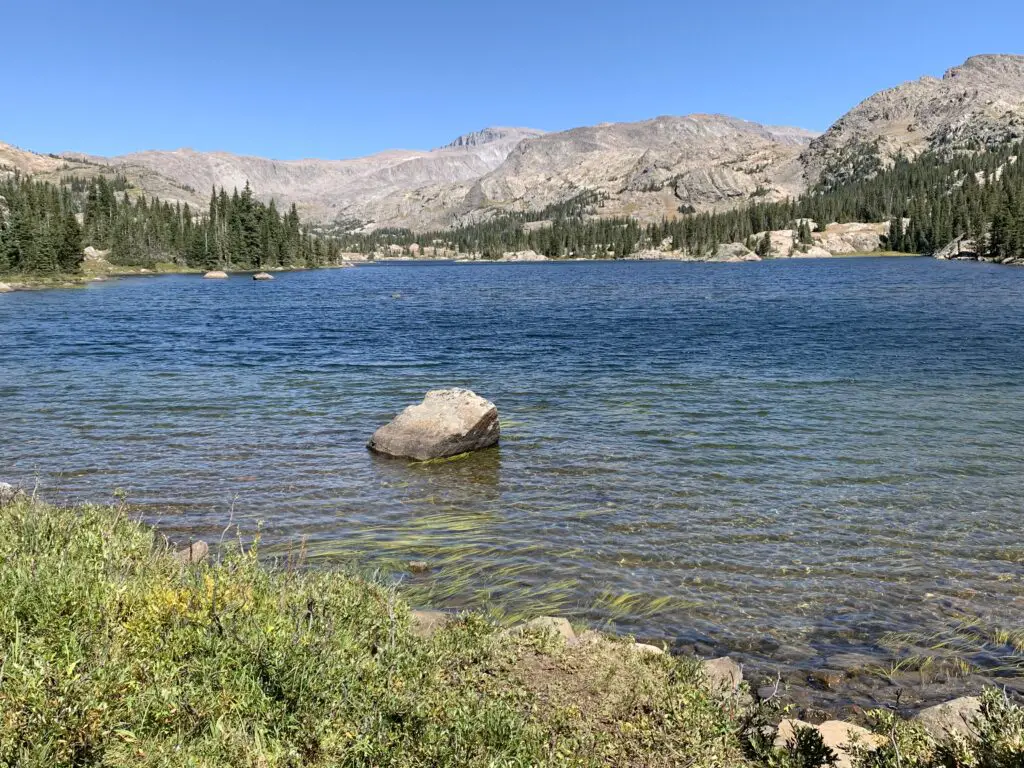
Lake Helen! (Bomber Mountain is near the tall peak straight up from the rock in the water. Florence Pass is through the saddle even further to the right.)
From Lake Helen you can see Bomber Mountain and the high-altitude, Florence Pass to the right. What you cannot see is Cloud Peak (as often as we have visited the Bighorns we have yet to see that site. It’s VERY isolated. 😝) From what I have heard from other hikers though, you CAN get views of Cloud Peak from Misty Moon Lake.
Let’s talk about Bomber Mountain and Cloud Peak
Cloud Peak and Bomber Mountain reach altitudes higher than 12,000 feet so altitude sickness starts to be a concern when you spend lengthy amounts of time at these altitudes. Potential hikers should also be aware the snow can be quite deep on these trails through July! Also, mosquitoes are said to be HORRIBLE in the summer (we had no problems at all on Labor Day weekend and we didn’t use any bug spray. 😁)
Bomber Mountain: This used to be an unnamed mountain in the Bighorns. That is until a World War II-era bomber crashed here while on a training mission in the early 1940s. If you know where to look you can still view the wreckage. (Don’t ask me how to get there, I don’t know. 😉. For more info on this hike you can click here)
You can check with local forest offices for information on how to get to the site. From what I’ve heard there are also rock cairns that help direct the way but you need an idea of where to look.
Please be respectful if you visit this site as several soldiers did lose their lives in the crash.
There are no actual trails that go to Bomber Mountain or Cloud Peak. (This seems a little odd to me as Cloud Peak is the highest point in the Bighorns and is what the wilderness area is named for, but I digress. 😝) There are some rock cairns to guide your way to Cloud Peak. My understanding is for Bomber Mountain, you pretty much just have to know where you are going.
This being said, PLEASE be sure you have a good, topographical map and a compass with you if you are attempting these hikes. Also, be aware there will likely be some bushwacking involved and you could easily become lost. These routes should only be attempted by EXPERIENCED, backcountry hikers! (Cell phone service is spotty at best in this area. DO NOT rely on it!)
Cloud Peak: “can” be done in one day but it would be a VERY long and VERY hard day (it’s around 24 miles total). People have done it but most suggest doing a 2 – 3 day backpacking trip. (Lake Helen and Misty Moon Lake are popular places to camp for these.) The last three miles to the summit are said to be a boulder field with “house-sized” boulders (per the reviews). The “trail” isn’t super clear either. Some people suggested this is actually a more difficult hike than the notorious Longs Peak in Rocky Mountain National Park 😮 so PLEASE think hard and use incredible caution if you’re considering this trek.
West Ten Sleep Lake Campground
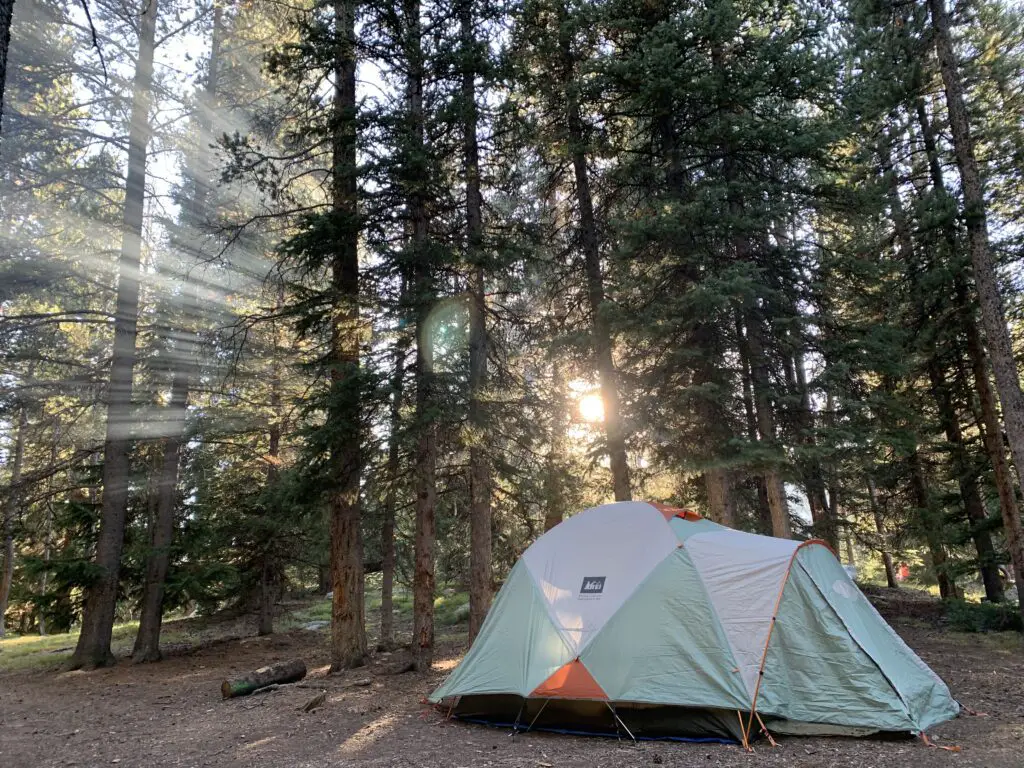
On other trips, we’ve stayed at the Island Park campground but since we were leaving from the trailhead at the lake we stayed at the West Ten Sleep campground on this trip.
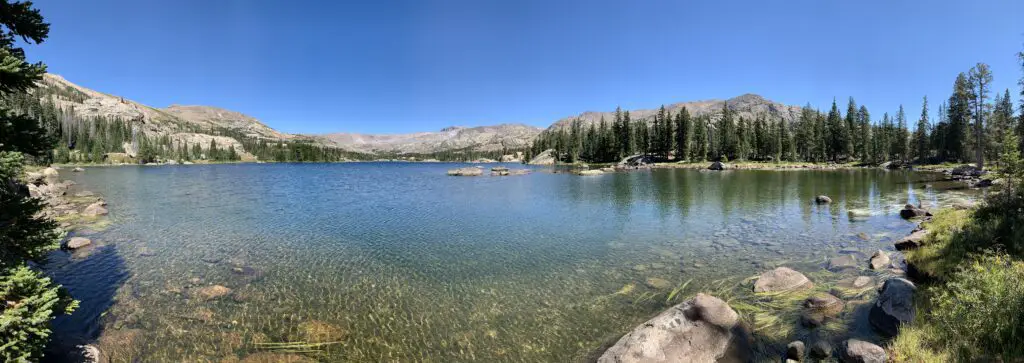
It was LOVELY! Some sites had views of the lake, ours had forest views. But the sites were nicely shaded with lots of soft, pine fluff. The campground was also relatively quiet and quite pretty. It was also only a couple of hundred yards to the beauty of West Ten Sleep Lake!
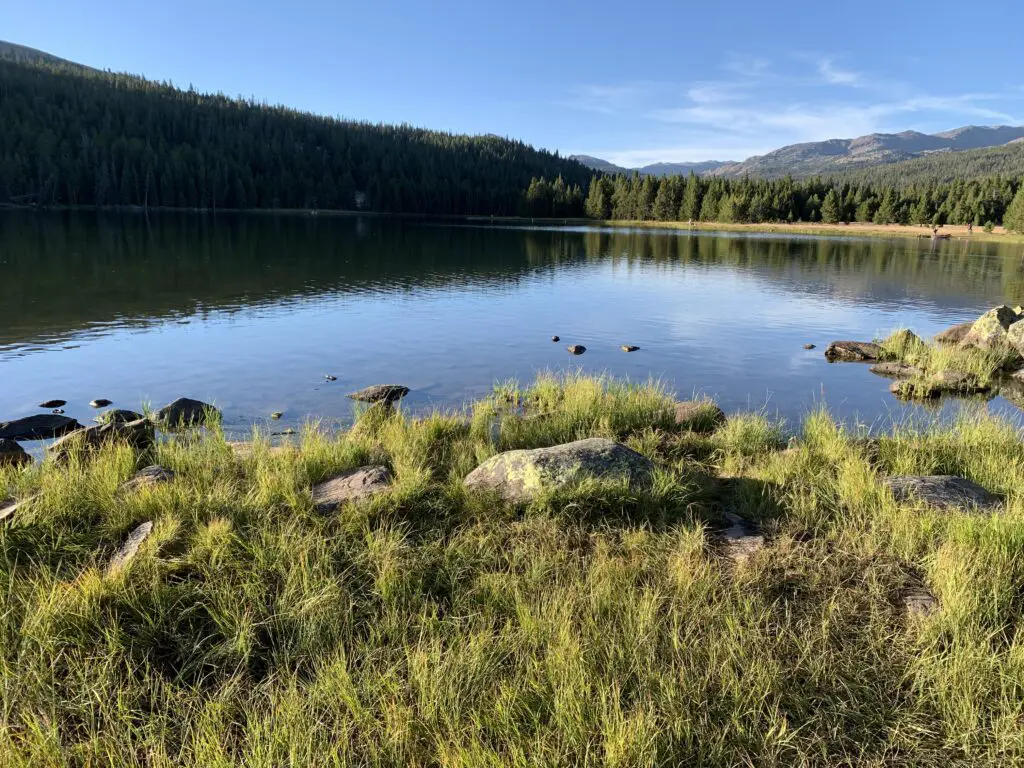
West Ten Sleep Lake!
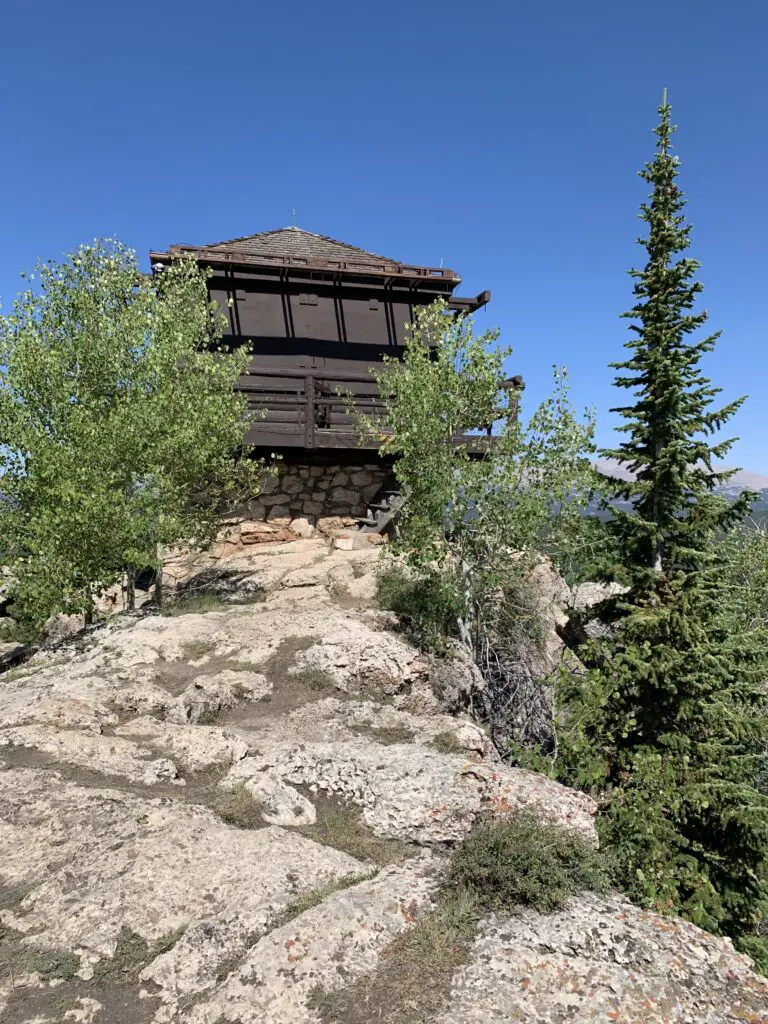
James T. Saban Fire Lookout
The Trekkers have passed this lookout on every trip we’ve made to the Bighorns and we always say, “we should check that out!”…so, we did!
The trailhead for the James T. Saban Fire lookout is found off Route 16 in the Bighorn Mountains, around five miles east of Meadowlark Lake. The turnoff is on the south side of the road. I can’t remember if there are signs telling you to turn but you can see the lookout at the top of the hill from the road. This is also the turnoff for the St. Christopher’s Chapel and there are signs for that site.
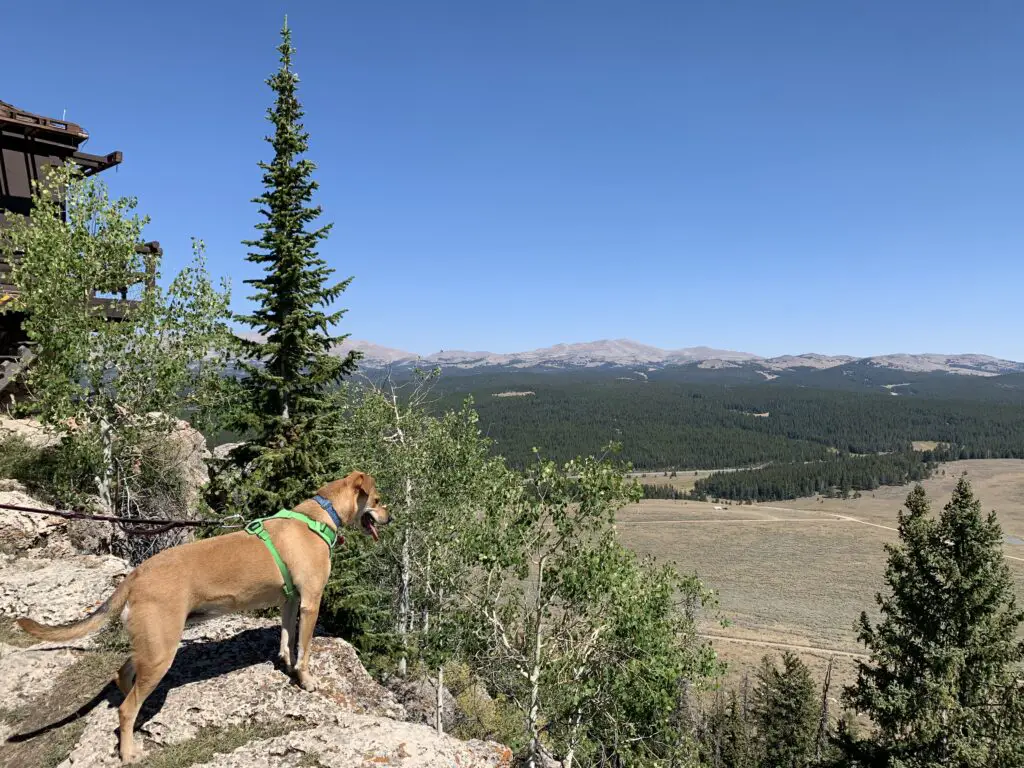
The James T. Saban Fire Lookout!Puppers enjoying the view from the fire lookout!
This fire lookout is easy to reach and offers some amazing views of the surrounding area. It requires a short drive on a narrow, dirt road to reach the trailhead. You’ll want to take it slow and watch where you are driving. In good conditions, I would be comfortable taking almost any higher clearance car, SUV, or truck there. In poor conditions (mud or snow) the road may be impassable.
Once you reach the trailhead, it is about a 15-minute walk (in each direction) to the tower at the top of the hill. It isn’t a bad hike. It gets a little steep in spots but the trek is short enough almost anyone in good health should be able to handle it. (Note: you are at an altitude of around 8000 – 9000 feet in this area so take your time as you may feel short of breath.)
That is Meadowlark Lake in the background
Though it is a bit long and strenuous, the Misty Moon Trail to Lake Helen is a great hike if you want to really get a taste of the Cloud Peak Wilderness area in the Bighorn Mountains!
Have you hiked to Lake Helen, Bomber Mountain, Cloud Peak, the James T. Saban Lookout Tower, or Misty Moon Lake? If so, tell me about your adventures in the comments!
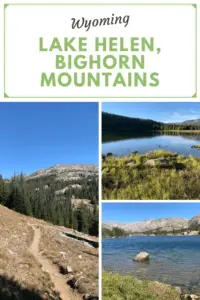
Did you enjoy this post? Pin it!
Like what you read here today? Please feel free to leave a comment, like or share this post! You can also follow the blog on social media by clicking the links below!
In this post, I review these two, fun state parks in southeastern South Dakota!
After more than a decade of living in the state, I finally have a park report from the eastern side of South Dakota (otherwise known as “East River”)! Mr. Trekker had a hankering for orchard-fresh apples and cider one fall (those are hard to come by in the Black Hills) so we decided to explore the eastern half of our state for our anniversary that year.
The Trekkers visited Palisades State Park and Good Earth State Park at Blood Run. Both of these locales were on the smaller side, especially compared to the larger parks that we’re used to on the western side of the state (let’s just be blunt, these are NOT Custer State Park! 😇) We knew they would be more modest going in though, and we really enjoyed them. They were relaxing and the trails were not very strenuous at all. We also found both parks to be relatively easy to locate!
Palisades State Park
You will find Palisades State Park off of 485th Avenue, about 23 miles to the northeast of Sioux Falls and about 10 miles northeast of Brandon, South Dakota. You can reach the park from Exit 400, off of I-90, for 476th Avenue, or from Exit 410, for 486th Avenue (you head north from both of these exits.) Then follow the signs!
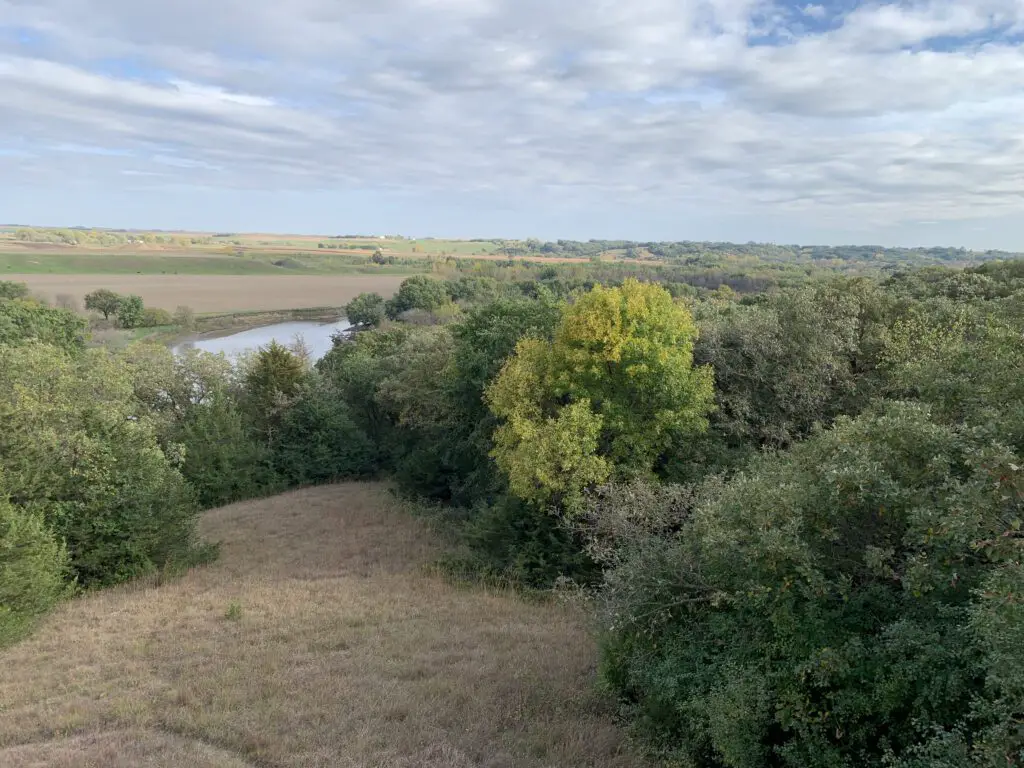
You will feel like you’re driving through farm country and there can’t possibly be a state park out there. (It’s kind of hidden in a gulley created by Split Rock Creek.)
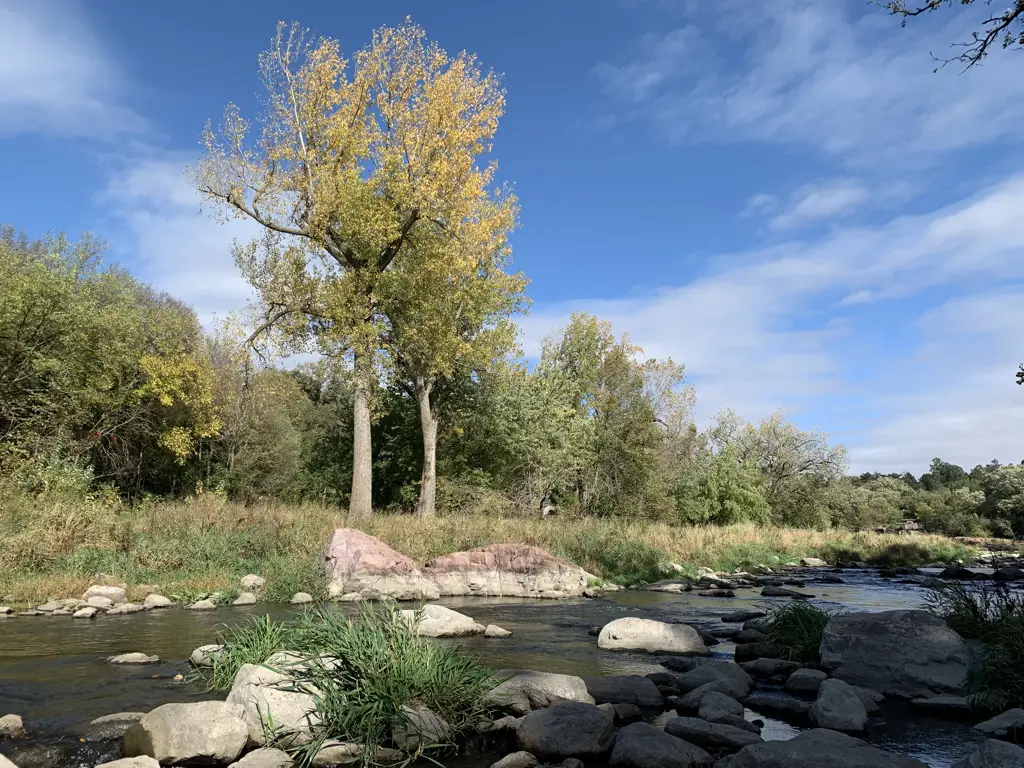
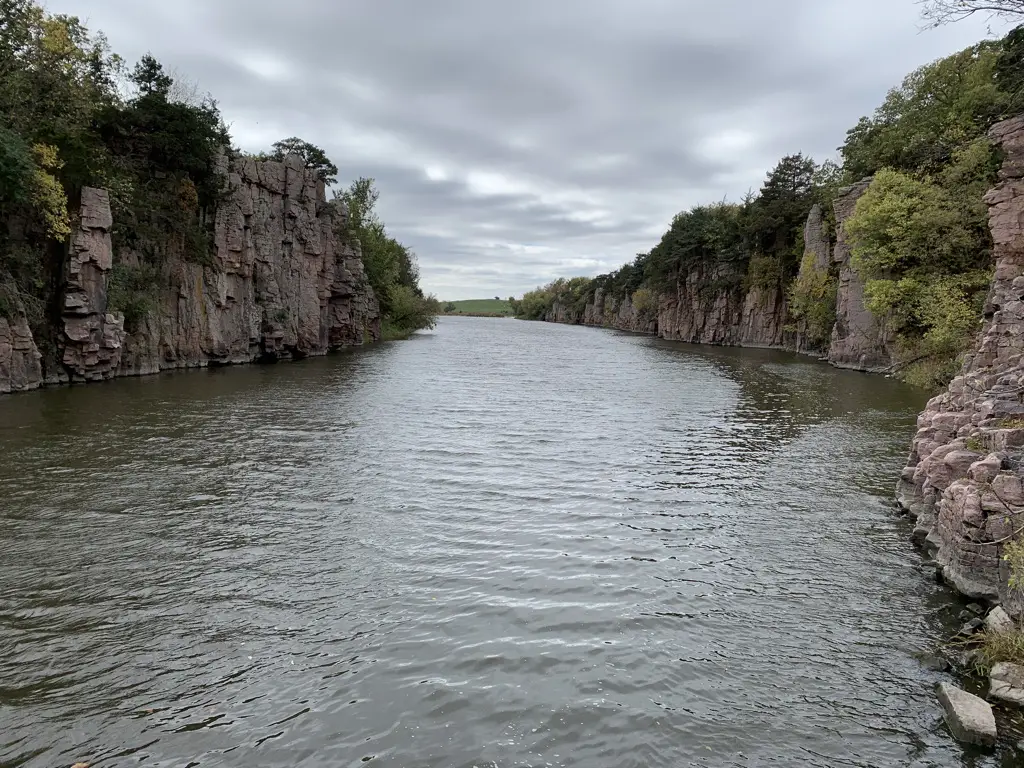
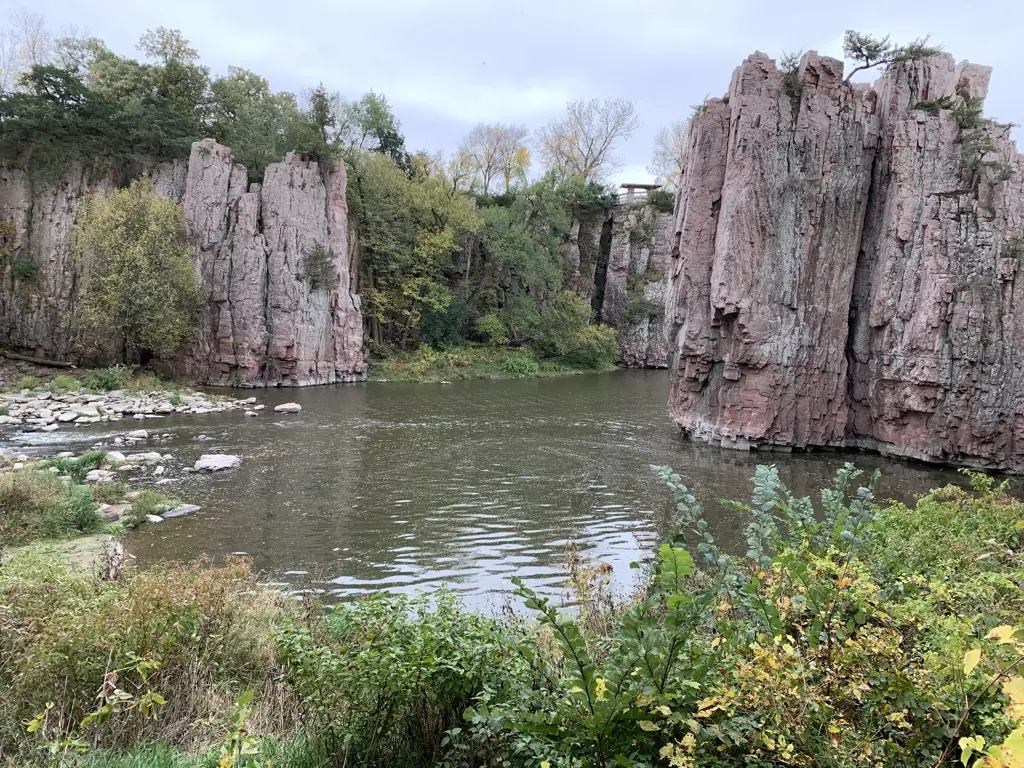
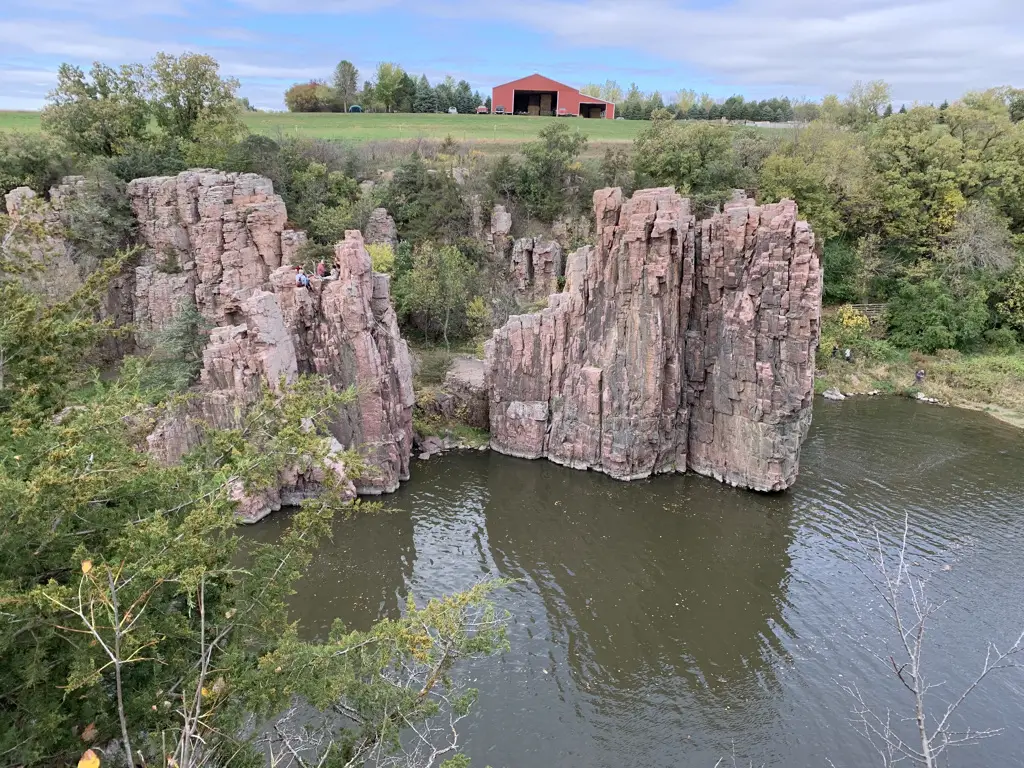
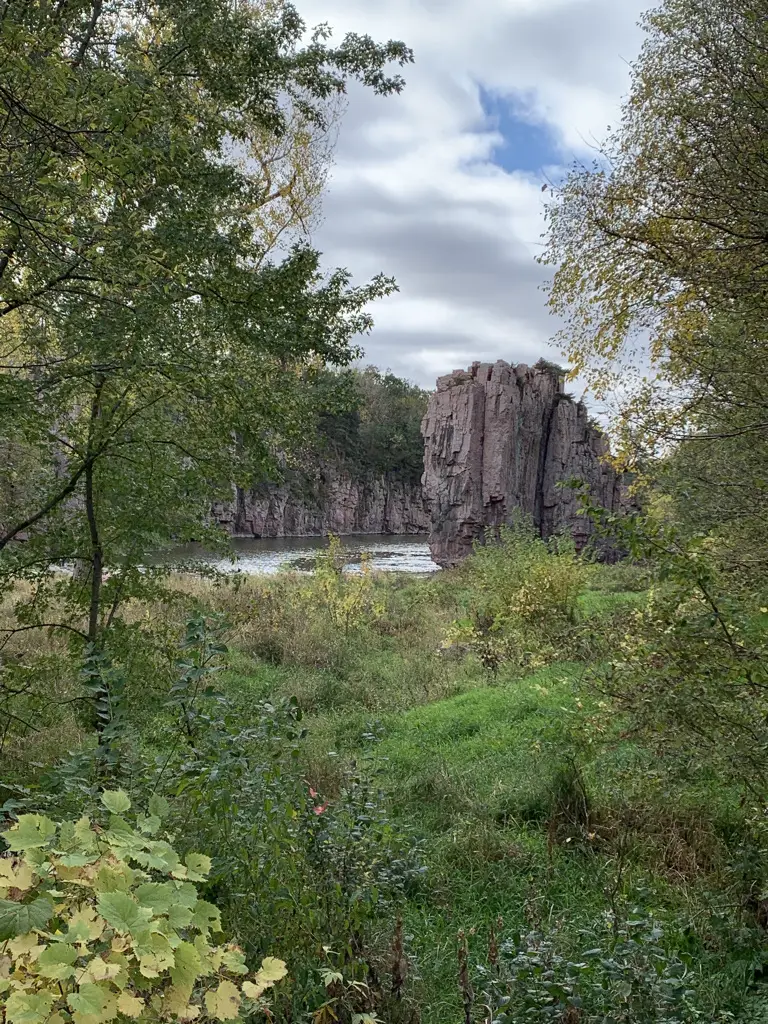
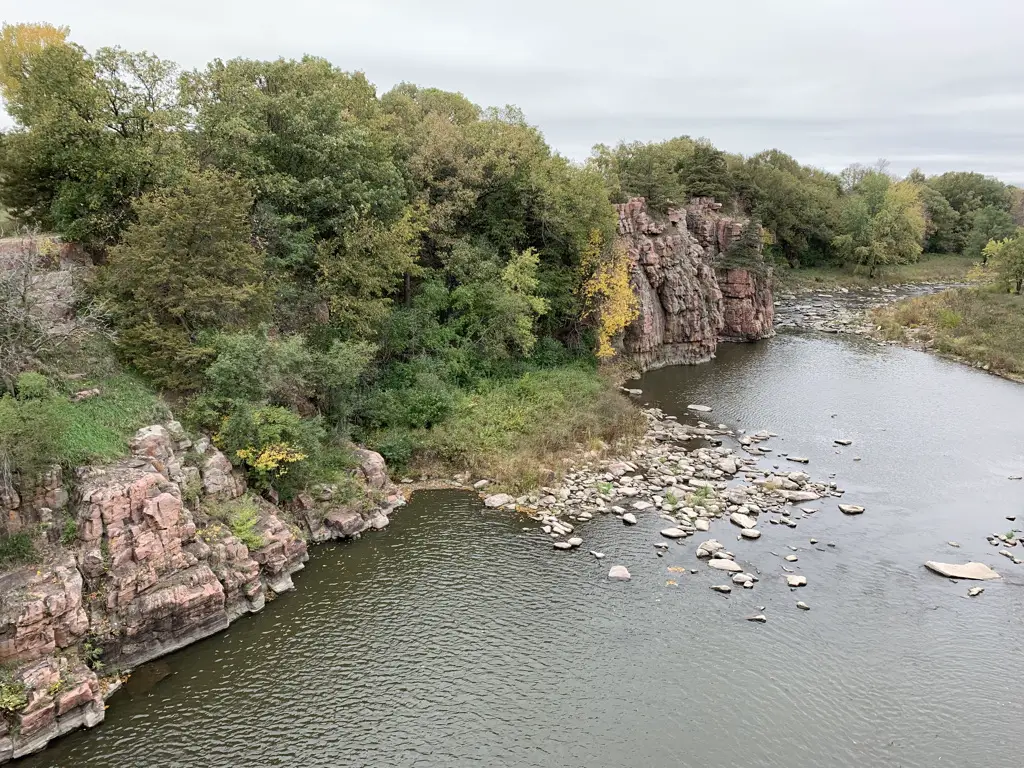
This park is quite pretty. It offers a number of trails, though my favorite was the South Wall trail. It traverses the south wall (hence the name) of the canyon created by Split Rock Creek. A portion of it reminded me of Raven Rock State Park that we used to frequent when we lived in North Carolina (I haven’t done a post on this one yet but don’t worry, it’s on my list!)
Split Rock Creek:
This park had some decent fall color when we were there in early October (though we were actually a little early for this). It was surprising, in the Black Hills we were already almost done with fall color, and out east, they were just getting started (to be fair there are a couple of thousand feet of elevation change between the two. 😉 )
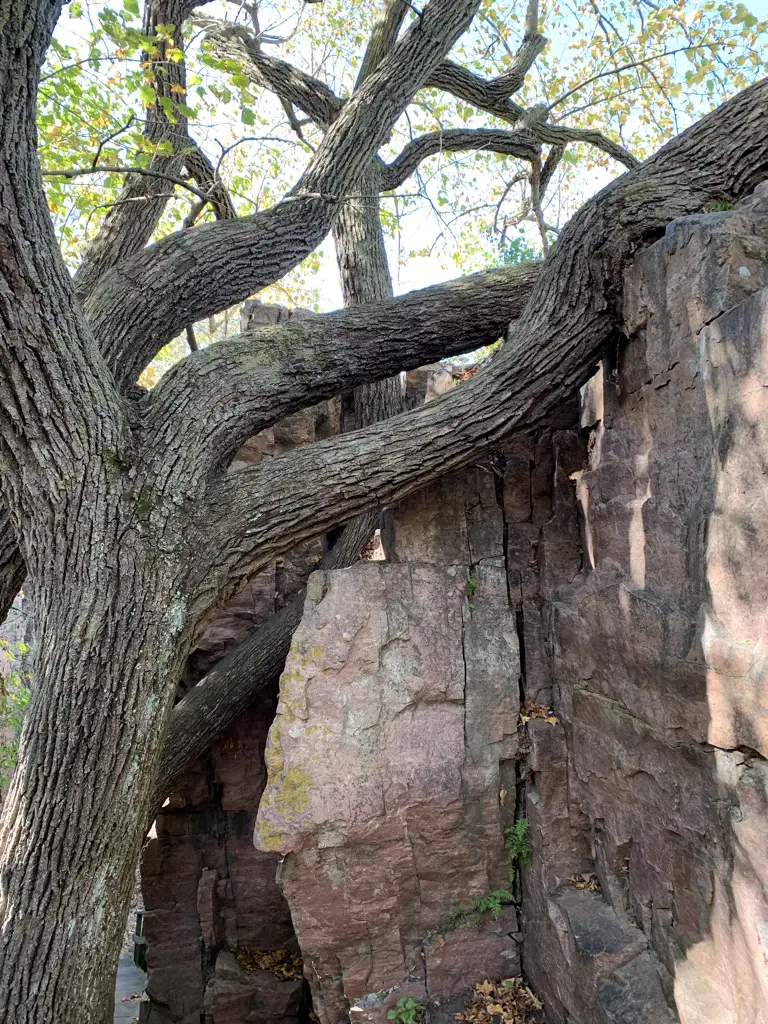
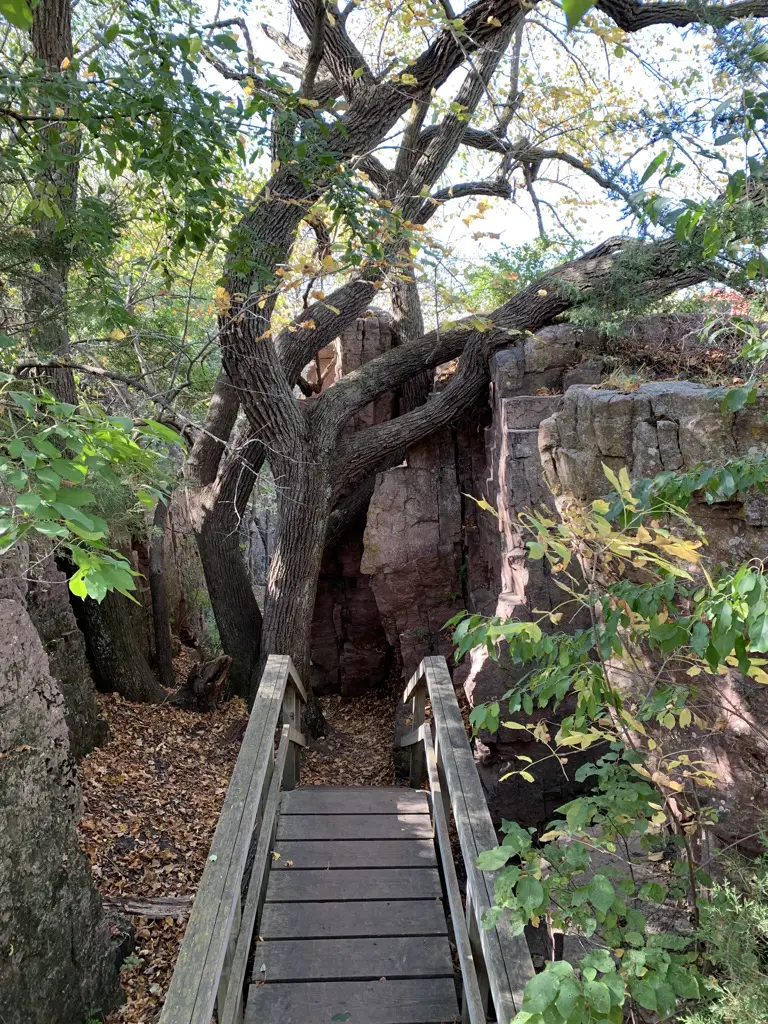
Isn’t this tree cool, the way it grew around the rock? Nature is awesome!
Several of the trails in this park did require a little bit of scrambling on some boulders. This could be more difficult for smaller children or anyone who may have mobility difficulties.
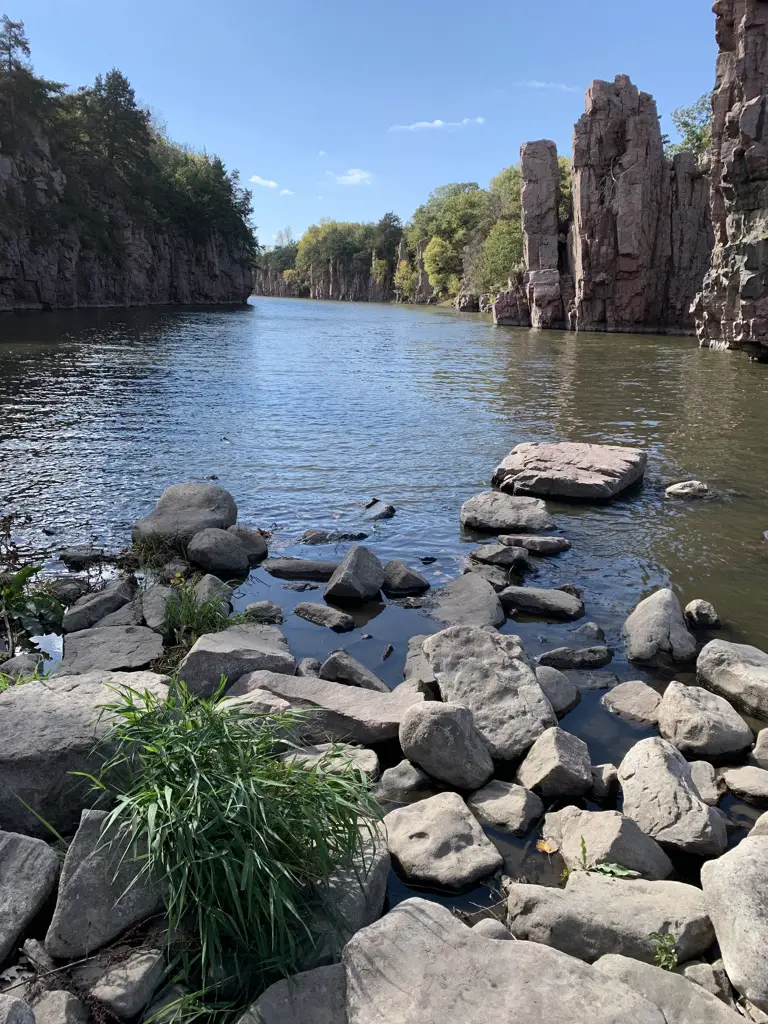
King and Queen Rocks (Yes, that is a farm field above the canyon. I told you this park was in a weird place. 😂 )
King Rock through the trees:
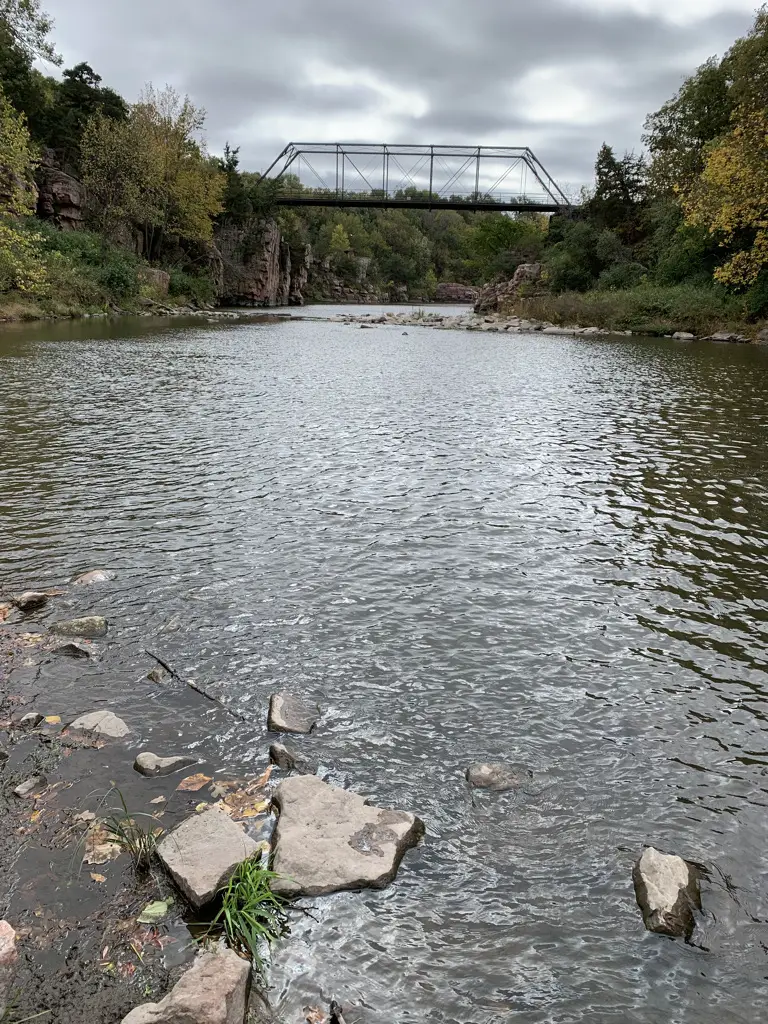
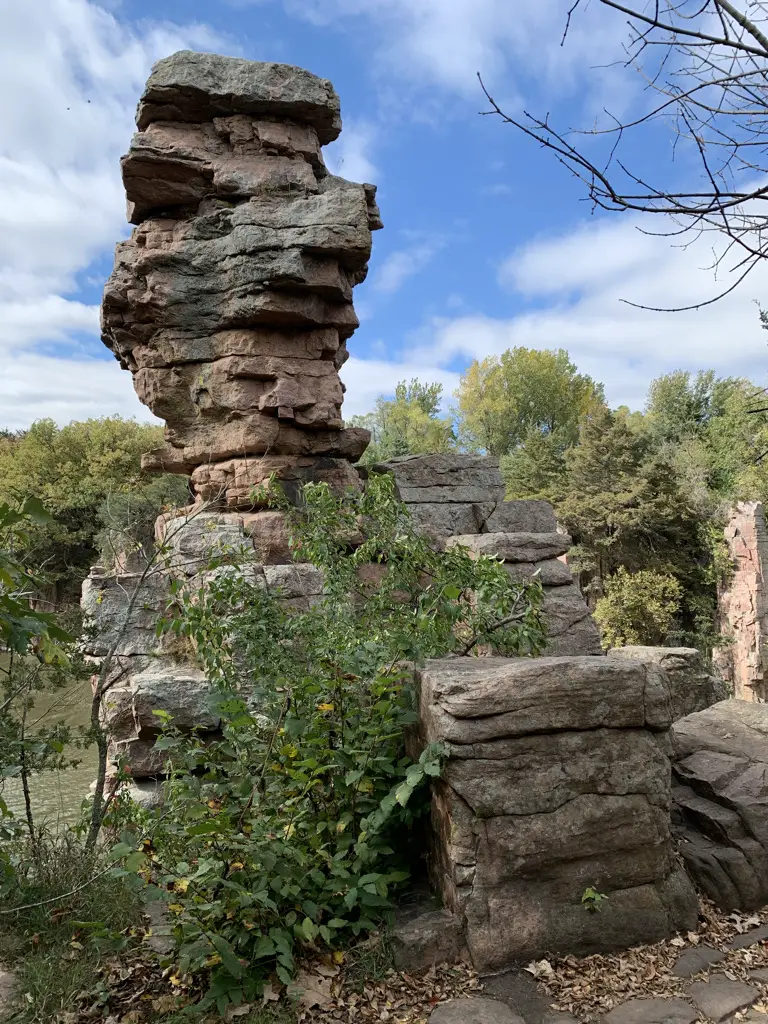
Palisades was definitely the most scenic of the two parks. Below are a few more pictures Mr. Trekker took:
Old railroad bridge over the creekView from the bridgeBalancing Rock
Good Earth State Park at Blood Run
Good Earth State Park at Blood Run is located about 11 miles to the southeast of Sioux Falls off of 480th Avenue. From Sioux Falls get on the Veterans Parkway on the east side of town. Take it south until it meets up with 69th Street (Route 102). Then take that road to 480th Avenue (follow the signs).
This park consists mostly just of hiking trails (which are really more walking paths). There were a number of them, many of which connected and formed loops. This would be a great place for some mild mountain biking, or cross-country skiing in the winter (if the typical South Dakota wind doesn’t scour the paths dry, that is! 😝) While it was closed when we arrived late on a Sunday afternoon 😝 the park appeared to have a new, large and lovely Visitor’s Center.
In case you were wondering, that’s Iowa across the river. 😂
The trails had many maps spaced along them. The only problem was almost all the maps were south-facing and had such terrible sun damage they were difficult to read. 😕 They had paper maps available, which would have been fine, but unfortunately, they didn’t mark the trails with the trail names which made the maps difficult to follow. 😕
The trails were wide, graded gravel, and mostly flat. They should accommodate an off-road stroller/wagon quite well, in dry conditions. This locale isn’t far from town and would be a great place for a run or to walk the dog after work. It would also be perfect for a nice, Sunday afternoon stroll with the family.
Both of these parks were nice, though Palisades was my for-sure favorite. I’d definitely consider going to both again. As both of these have been on my “to-do” list it was fun to visit them and see more of our fair state.
Have you visited either of these parks? Tell me what you thought of them in the comments!
Did you enjoy this post? Pin it!
Like what you read here today? Please feel free to leave a comment, like or share this post! Add your email at the bottom of the page, or the sidebar to the right, to be notified when a new post is published. By signing up for the email list, you will also receive a free copy of the Tranquil Trekker’s Top 10 Tips of Trekking Do’s and Don’ts!
You can also follow the blog on social media by clicking the links below!
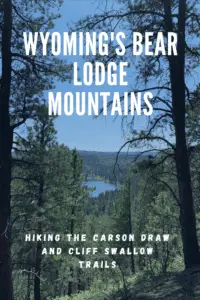
In this post, I review a weekend we spent in the Bear Lodge Mountains of Wyoming.
There is a less-frequently visited portion of the Black Hills in far-eastern Wyoming called the Bear Lodge Mountains. When the Trekkers visited we stayed at the Reuter Campground. It is easy to reach, as it is less than two hours from Rapid City. It is also just a short drive north of Sundance, WY (and I-90).
This was a typical, rustic, National Forest campground. Potable water is available in-season, there are campfire rings and picnic tables at each campsite, and the campground offers vault toilets.
The campsites were decent, this was one of the first times we had an “inner” site so it was closer to other campers. Usually, we go for “outer” sites but there were none available by the time we made reservations. This meant we had to deal with more noise from other campers which is something we are usually able to avoid.
This campground wasn’t my favorite. It was fine, the were plenty of large and shaded sites, but the host wasn’t as available or on top of things as we usually experience. (As an example, the trash DEARLY needed to be changed when we arrived. It’s usually not a good idea to have full trash cans at a campground, at the START of the weekend, in the height of summer. 😝 She also seemed to have a hard time remembering who she had and hadn’t checked in already. 🙄)
We noted another campground in this local area was actually closed and was looking for a host. It seems that campgrounds may be experiencing the same lack of available employees that so many other businesses around the country are right now.
Hiking in the Bear Lodge Mountains of Wyoming
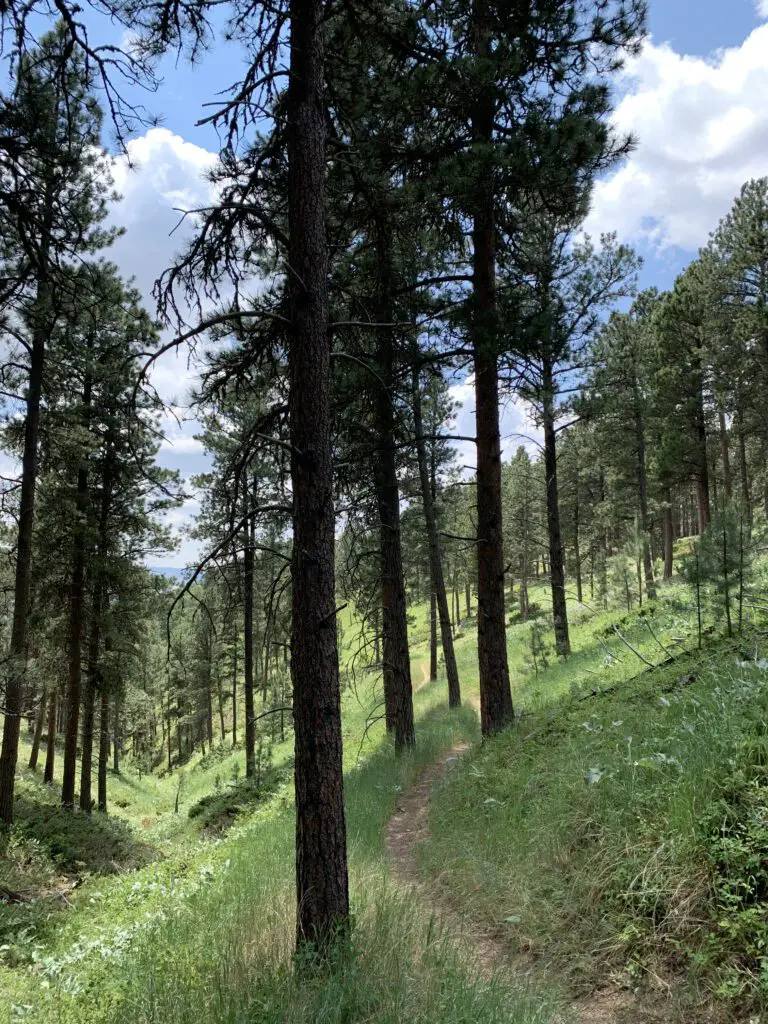
We enjoyed several different hiking trails in the area. Though many were overgrown, they were very well marked with signs and markers. Just watch out for ticks, snakes, and thistles in the tall grass. 😯
Carson Draw Trail including the Carson Draw Spur #1, the Carson Cut Across, and the Reuter Springs Trails
We made a loop out of a portion of the Carson Draw Trail, which we then took to the Carson Draw Spur #1, then went on to the Carson Cut Across, and then the Reuter Springs Trail…
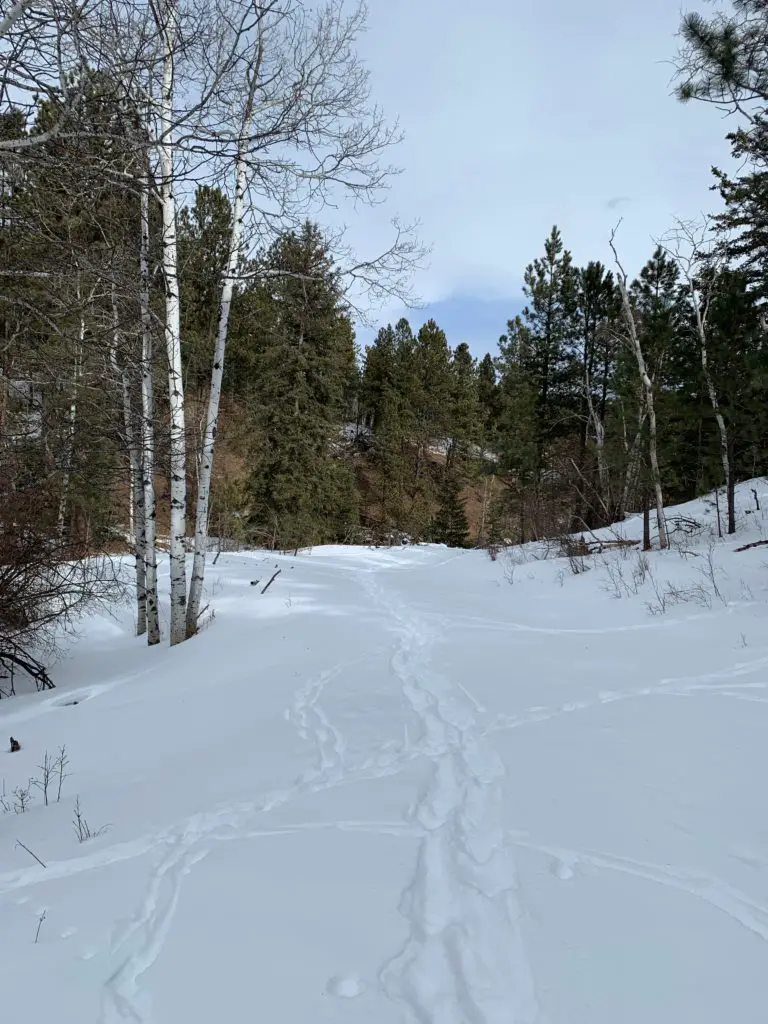
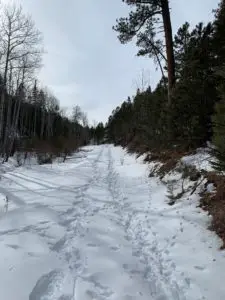
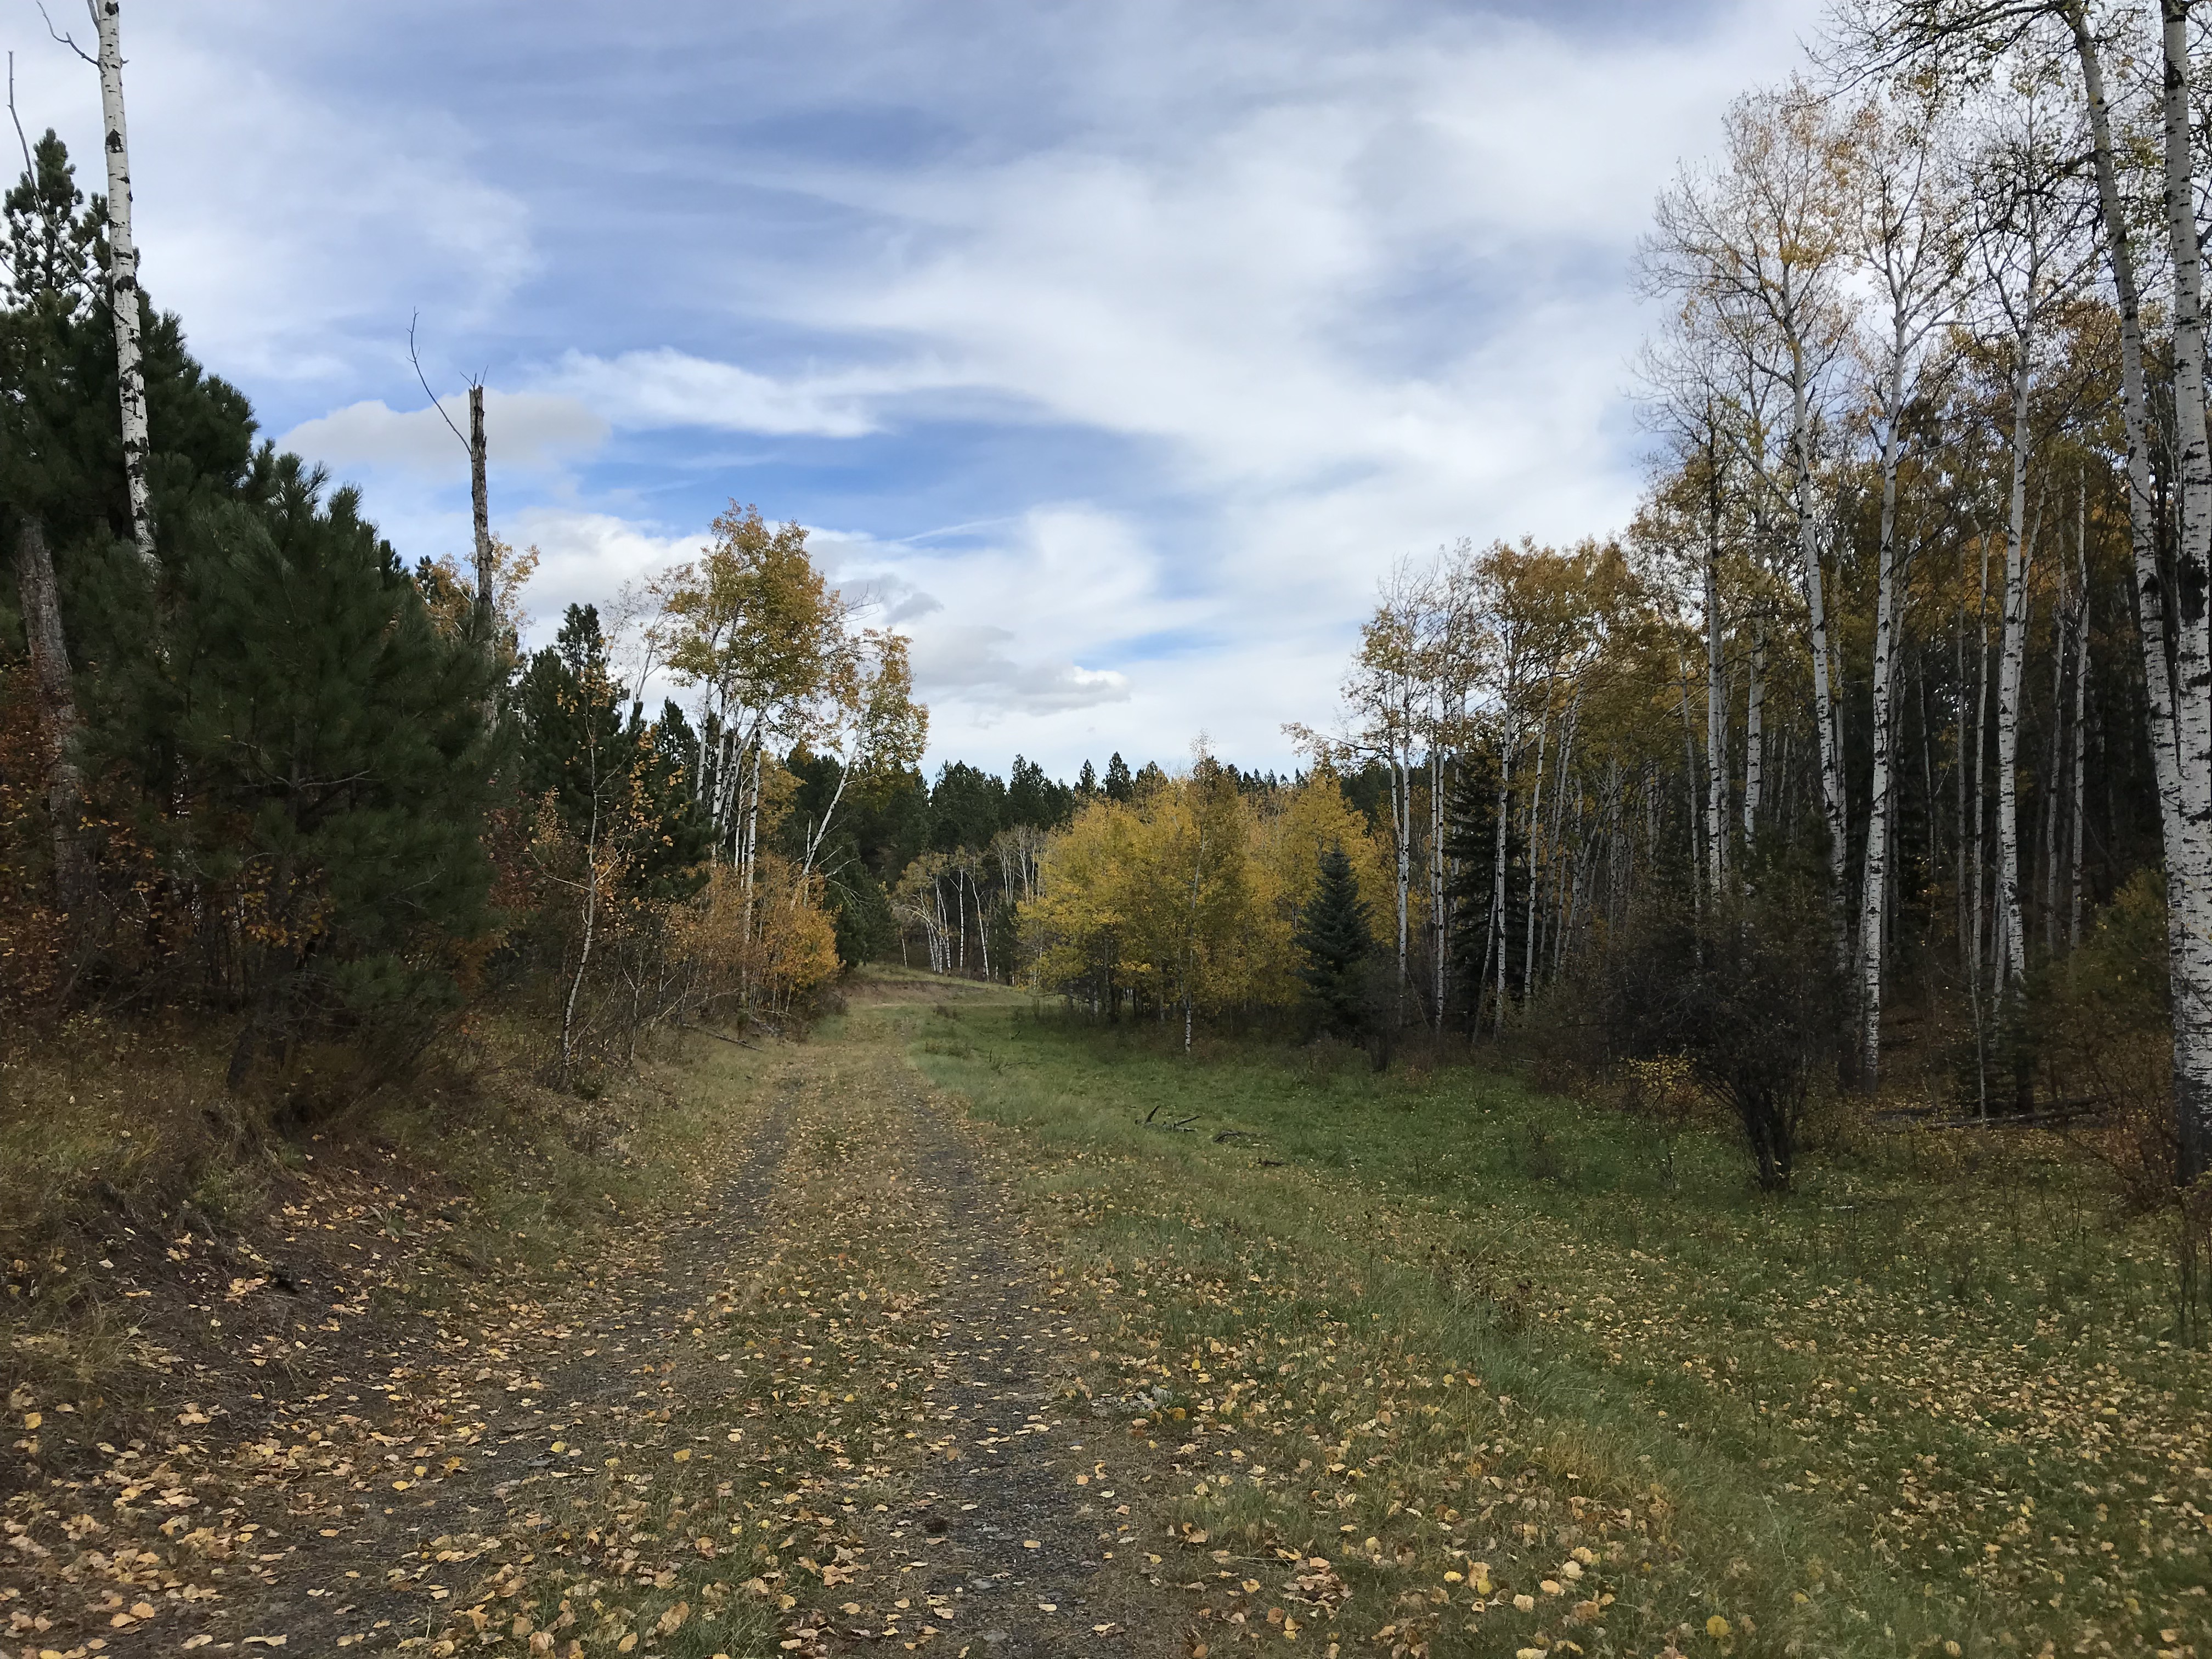
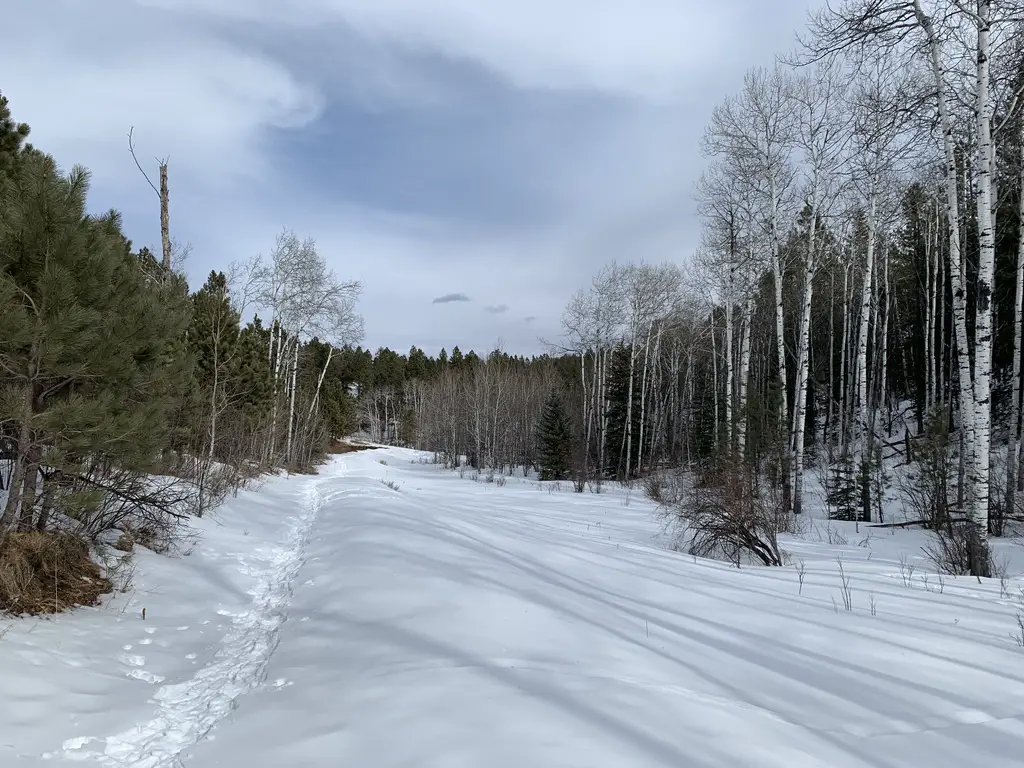
The Carson Draw Trail offers a lengthy and groomed cross-country ski trail in the winter months that is around five miles long. I think this would be a lovely area for skiing. We may also return for a day trip in the fall to check out the leaf colors. We saw several aspen groves that would likely be lovely.
Looking down Reuter Canyon on the Reuter Springs Trail
Unfortunately, going in this direction means that the Carson Draw Spur #1 trail is almost completely an uphill hike. It isn’t overly steep, it’s just a long hill. It was a former forest road so it is plenty wide and graded though it was rather overgrown.
The Carson Cut Across was much nicer. It was short (less than a mile) with only a small amount of elevation gain. It was also nicely shaded and more like a typical, single-track, hiking trail.
Even though it meant a long uphill slog on the Carson Cut Across, I would recommend taking this loop counterclockwise as we did. It means prettier views of the Wyoming prairie and grasslands opening up before you, on your way down the hill, as you exit Reuter canyon on the Reuter Springs Trail. Also, portions of the Carson Draw Spur #1 trail were VERY STEEP as you went downhill shortly before it reached the Carson Cut Across. I was happy we didn’t have to hike UP that!
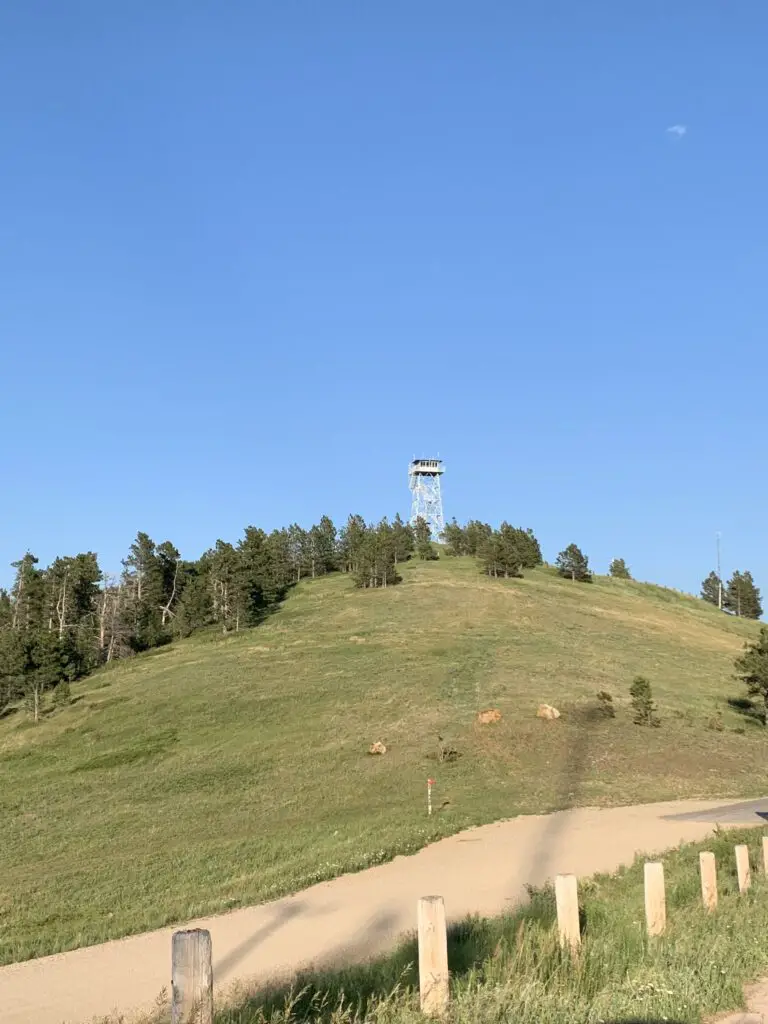
Warren Peak Fire Lookout Tower
Warren Peak Fire Lookout
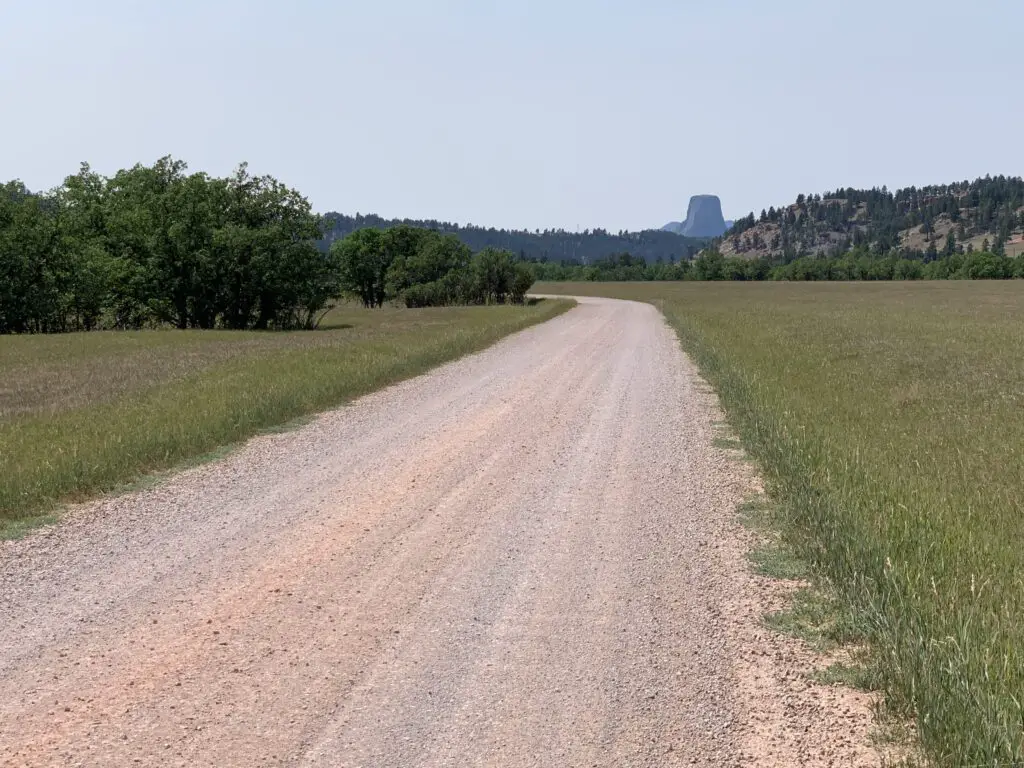
The Warren Peak Fire Lookout Tower works in conjunction with the Cement Ridge Tower, which sits to the southeast, on the border of South Dakota and Wyoming. (I discuss that lookout here). It offers 360-degree views of the surrounding mountains and prairie. On a clear day, you can see portions of Montana, Wyoming, the mountain Crow Peak in South Dakota, Devils Tower just a scant 20 miles away, all the way to the Bighorn Mountains much farther to the west!
Devils Tower as seen from the Bear Lodge Mountains:
Cliff Swallow Trail
So, I am NOT trying to be a Negative Nellie here but we did NOT see ANY swallows OR their nests on this trail (and I’ve talked to other people who said the same thing!😝) The only place we could have possibly seen them was one overlook fairly early into the hike where we saw some cliffs across the canyon. They were probably a good half-mile away though and we couldn’t see any birds using the binoculars.We’ve definitely seen more of these cool featherlings on other trails that don’t even advertise themselves as “Cliff Swallow” trails. 😝 So I’m gonna have to give this trail a rating of…FAKE NEWS! 😂
This trail can also be done in a loop. I would again recommend taking it counterclockwise. Going this route you start at the bottom of the canyon and travel along the bubbling, Beaver Creek. The trail went through some very lush greenery, with lots of deciduous trees and ferns (this also meant it was VERY green…and humid. 🥵) There was also little breeze down in the canyon and there were TONS of cobwebs strung amongst the greenery that spanned the trail (thanks to Mr. Trekker for taking one for the team on this one and going first, to knock them all out of the way. See guys, THIS is how you woo a lady. 😉)
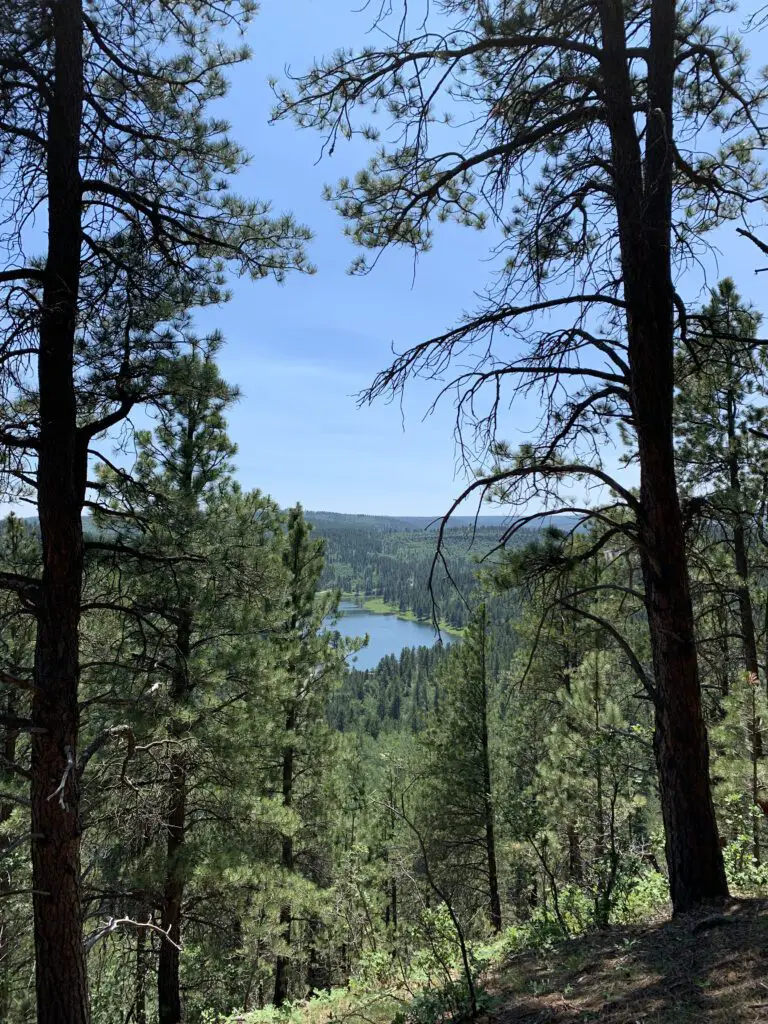
Cook Lake as seen from the Cliff Swallow Trail
As you continue down the trail you ascend some mild switchbacks that take you up the hill. Here you will notice a transition to a drier, ponderosa-pine-forest-environment that is more typical of the Black Hills. There was also a blessed breeze at the top and it was less humid (though there could be more sun depending on the time of day as you’re traversing the canyon rim at this point). Our experience was the entire trail was a mix of sun and shade and we were there around the middle of the day.
Again, I strongly suggest you take this loop counterclockwise. The ascent of the hill is more gradual and you’ll have nice views of the lake as you emerge from the canyon. If you go clockwise the trail goes straight up the hill!
This isn’t a bad trail at all, older kids could certainly handle it. It was definitely shorter and easier than the Carson Draw/Carson Draw Spur/Carson Cut Across/Reuter Springs loop (thankfully because it was also HOTTER that day! 🥵) That trail wasn’t bad either, though. I would probably give both a rating of “moderate”, just on opposing ends of the spectrum.
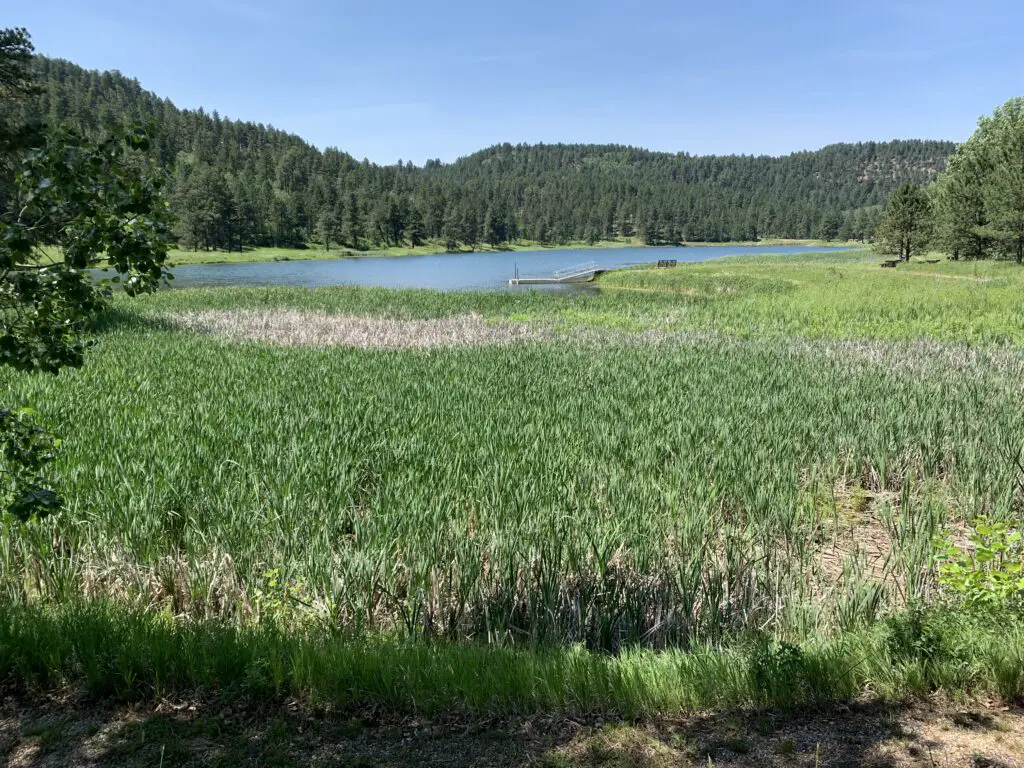
Cook Lake
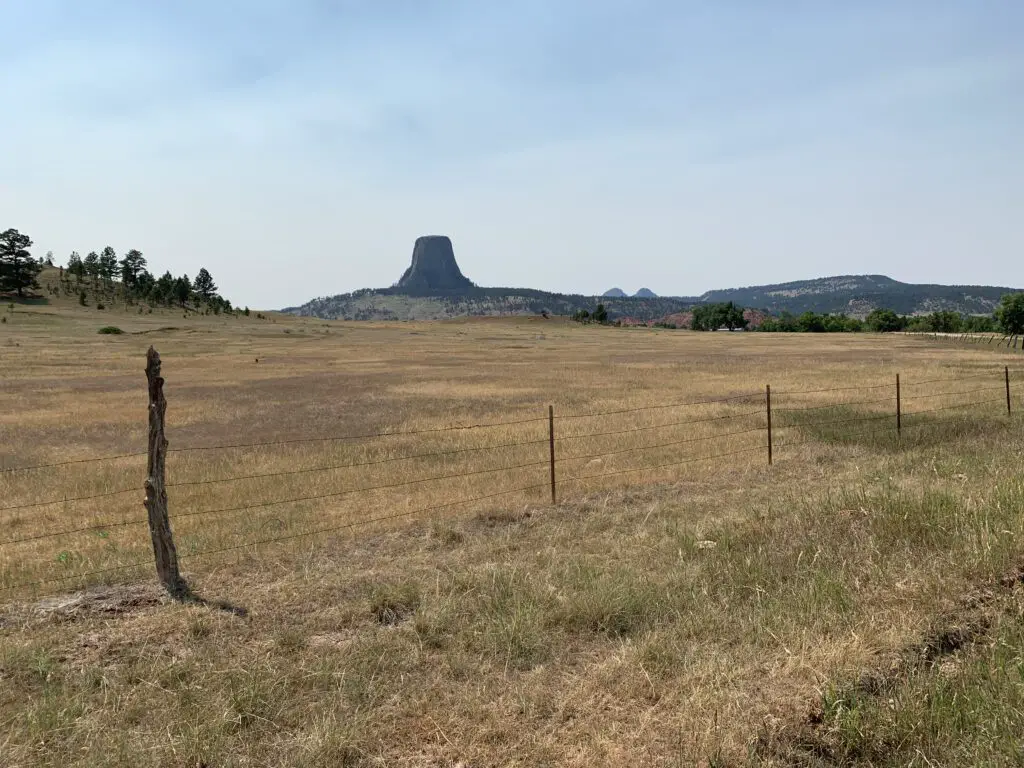
To finish the second day of hiking, we took a back road out to Devils Tower, just because it was close and we could. 😉 Also, the Devils Tower General Store sells ICE CREAM! 🍦😀😀
That monolith points to ice cream! 😁Sleepy puppy after hiking!
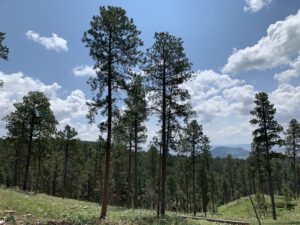
In general, these Hills seem to be more lush and overgrown than is typical in the South Dakota Black Hills. They reminded us more of the lusher ecosystem you find in the northern portions of our Hills.
Not sure if this may indicate they are wetter and may mean they have fewer wildfires here on average (as you don’t hear about them much.) This could also explain why we found there were fewer good lookout/viewpoints here, many of our open spaces in the Black Hills come from burn scars. 😝
I found I didn’t like the Bear Lodge Mountains quite as much as the Black Hills we know and love. They were more rustic and less developed. They actually reminded me a bit of State Forest State Park in Colorado (you can read about that little-known location here and here!) It seemed less organized, you were kind of left more on your own to figure things out.
It wasn’t nearly as busy and touristy as the South Dakota Black Hills though this also meant it was far less crowded. (Admittedly we only experienced a small corner of this area.) It made me think of a green island rising from the sea of brown that is the dry grassland of eastern Wyoming. 😇
Have you ever been to the Bear Lodge Mountains of Wyoming? Tell me about your experience in the comments!
Did you enjoy this post? Pin it!
Like what you read here today? Please feel free to leave a comment, like or share this post! Add your email at the bottom of the page, or the sidebar to the right, to be notified when a new post is published. By signing up for the email list, you will also receive a free copy of the Tranquil Trekker’s Top 10 Tips of Trekking Do’s and Don’ts!
You can also follow the blog on social media by clicking the links below!
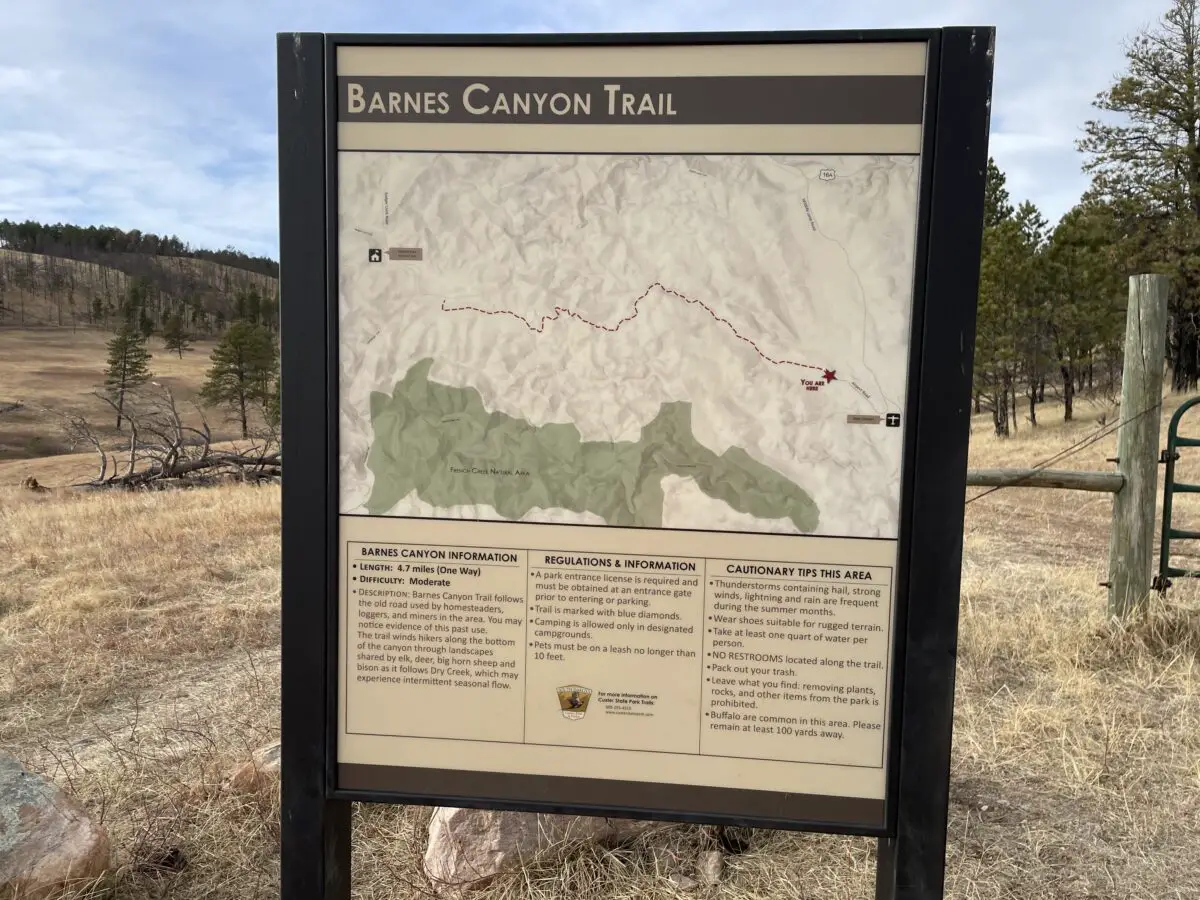
In this post, I review a newer, lesser-known trail in Custer State Park.
The Barnes Canyon Trail is a relatively new hiking option located within Custer State Park. It is a great path as it is broad and easy to follow (being that it used to be a road 😉). Because it is so wide and well-graded it is appropriate for almost everyone in your party.
Where in Custer State Park is the Barnes Canyon Trail?
The trailhead is located on the eastern edge of the park, near Custer State Park Airport. It also connects through to the Badger Clark Memorial Trail which is located off of Route 16A, found farther west, and deeper within the park. (I discuss this portion of the trail in another post.)
How long is the hike?
The hike is around 10 miles in total length (4.7 miles in each direction). You only have to traverse as much of it as you want, of course. The road is out-and-back and was once used for forest and logging access. (It has now been closed to motorized vehicles.)
Many old maps show that the trail makes a loop. We didn’t see any obvious evidence of this on our hike. We found on several websites that the loop can be difficult to follow as one of the sections is heavily overgrown, not well-maintained, and not well-marked. If you want to try the whole loop be my guest, but be sure you have good maps and a compass with you as it may require some bushwhacking of your own trail.
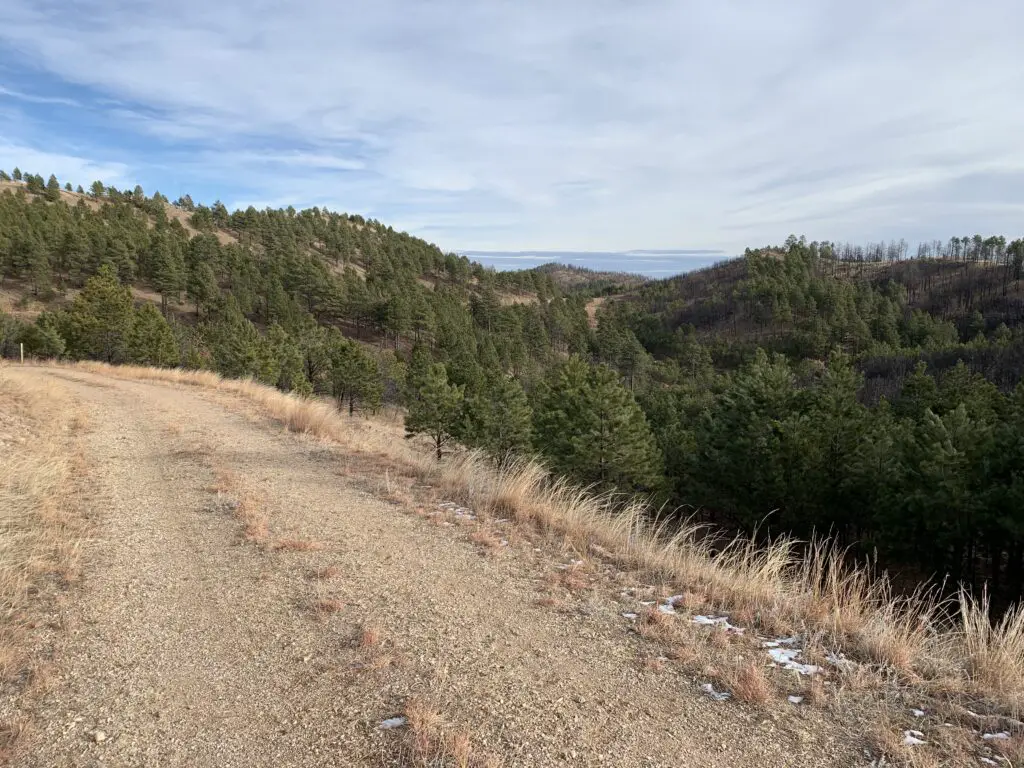
This road is basically what the entire tail looks like
What will you see on the Barnes Canyon Trail?
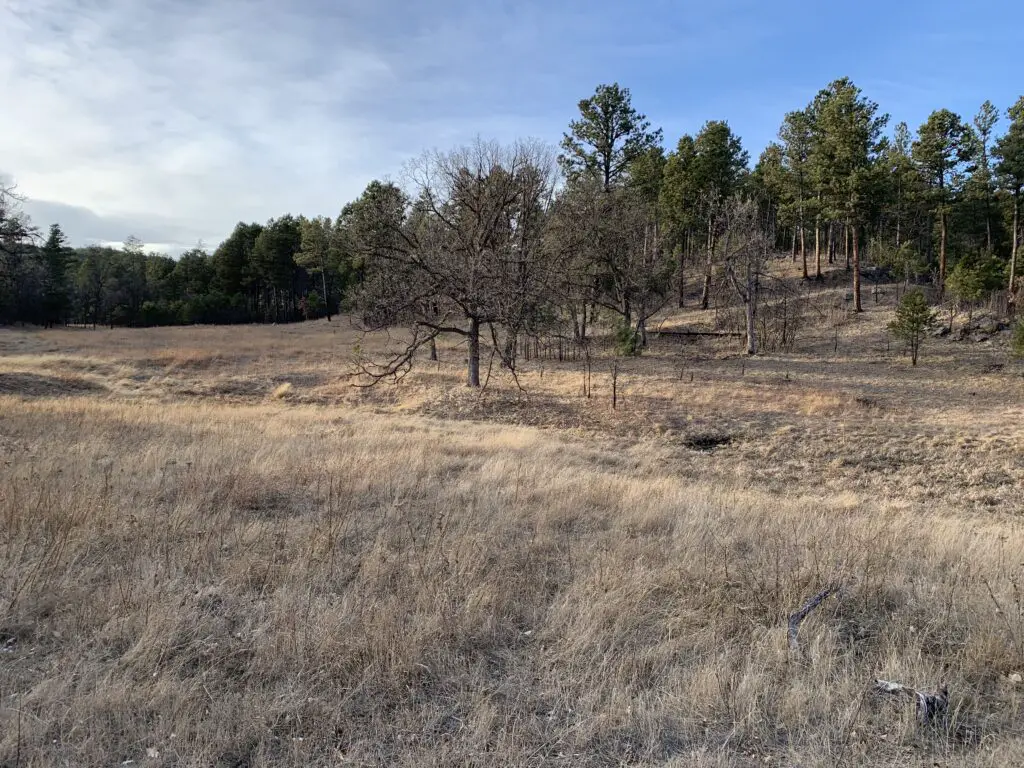
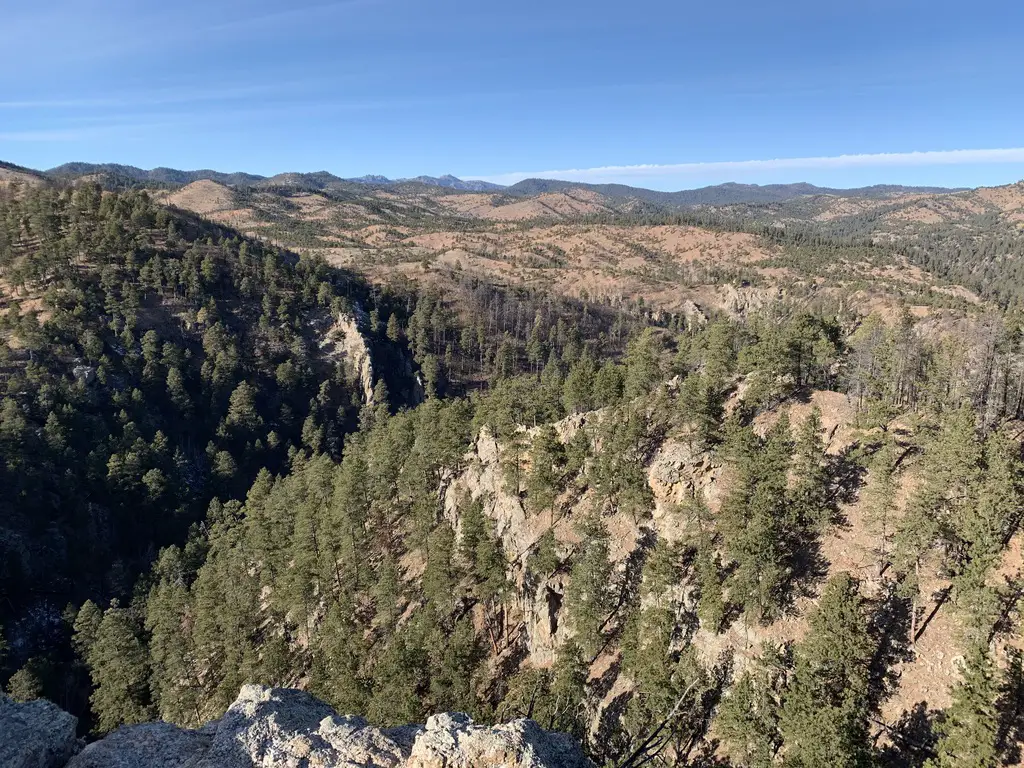
The route includes hills and dips, but traveling east to west it generally traverses uphill. It isn’t a very steep or difficult trek, however, so it should be appropriate for almost anyone. In several places, it offers nice views of the surrounding prairies and wooded hillsides. While the majority of the trail mostly runs through forestland, you do cross a few meadowy areas, as well.
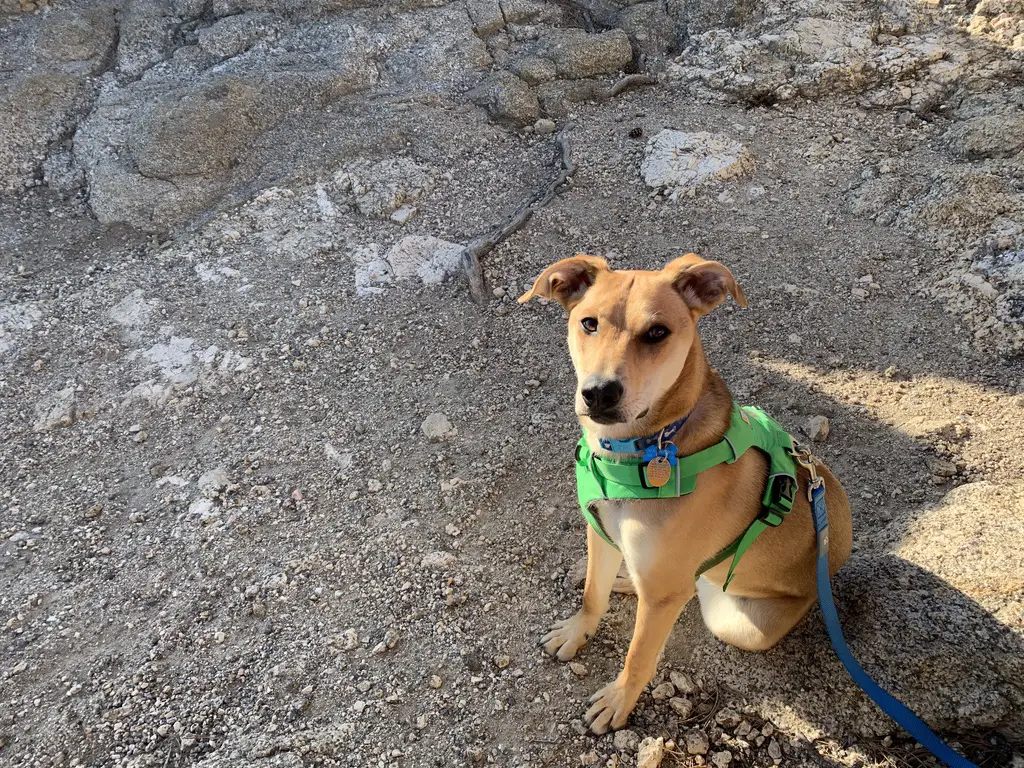
One nice thing about this trail is that it allows you to get out into the middle of Custer State Park. Here it is quiet and far from the many tourists that are frequently in the area. You may spot many different wildlife on your trek including deer, buffalo, elk, and bighorn sheep, not to mention a wide variety of birds and other forest critters. This is also a very quiet hike as the trail does not run near any major roads. Use your time here to soak up the tranquility, peace, and natural sounds of the forest.
When is the best time of the year to hike this trail?
This trail is appropriate to use at any time of the year, though it could be difficult to reach in deep snow or very muddy conditions. Also, if you attempt this hike during the colder months, you may want to bring traction devices, such as Yaktrax, to help you manage any icy sections that may form in shaded areas, especially on hills.
If you’re looking for a great trail that isn’t difficult but offers some beautiful views of the flora and fauna that make up the amazing scenery of the Black Hills, check out the Barnes Canyon Trail in Custer State Park!
Have you tried this new-ish trail? Tell me what you thought of the route in the comments!
Did you enjoy reading this post? Pin it!
Like what you read here today? Please feel free to leave a comment, like or share this post! Add your email at the bottom of the page, or the sidebar to the right, to be notified when a new post is published. By signing up for the email list, you will also receive a free copy of the Tranquil Trekker’s Top 10 Tips of Trekking Do’s and Don’ts!
You can also follow the blog on social media by clicking the links below!
In this post, I review this popular trail found in Custer State Park!
The Lover’s Leap Trail is one the Trekkers always enjoy at Custer State Park! This route is a great option almost any time of the year. It is of moderate length and is family-friendly.
Lover’s Leap Trailhead
The trailhead is located on the south branch of Highway 16A. To reach it you park in the lot for the old schoolhouse which is almost directly across the road from the Peter Norbeck Education Center. It also sits between the Custer State Park Resort and the Coolidge General Store on the south side of the road.
Hiking the Lovers Leap Trail in Custer State Park
This is a great loop trail! You will start with a bit of a strenuous hike up the side of the hill. From there you can choose which fork of the loop to take (we’ve enjoyed the trail in both directions).
If you choose the left fork, you will continue up a fairly strenuous climb to the overlook, this is also the “Lovers Leap”. If you choose the right fork, you will traverse a more gradual (though lengthier) trek that eventually climbs to the overlook near its end.
We have completed this trail on several occasions, though our favorite route is by taking the right branch at the fork. This trek takes you along the edge of the hill for a distance, on an almost shelf-like trail that gives you a nice view of the area through the trees. Eventually, you will wind your way down through a valley with a creek that meanders through it.
*Be aware, that this lower portion of the trail can get rather soggy and muddy during very wet times. You will see various trails that branch off from here, some are game trails, and others are used by people just walking from the road and parking lot into the creek to fish. Watch carefully for signs so you stay on the correct trail.*
This trail is Puppers-approved!
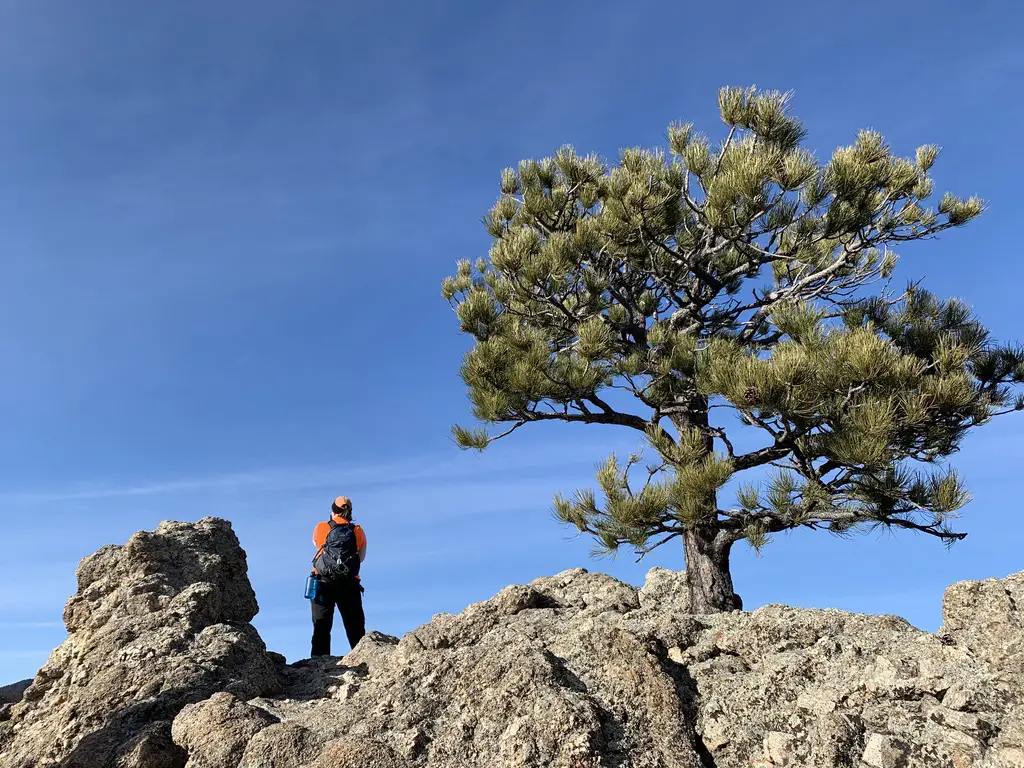
There are some awesome views available from the lookout point. You will understand how the point got its name when you reach it. Be careful peering over the rocks, it’s a LONG way down from there! 😮
This one got my acrophobia going a bit. There are beautiful views of the pine-covered Black Hills offered from here, however, as well as the South Dakota plains that spread to the east. On clear days, you can even spot some of the rock spires and walls from the Badlands, rising from the flatter grasslands, almost 100 miles away!
Things you will see on the Lover’s Leap Trail
Depending on the time of year, you’re likely to see and hear many different birds throughout your trek. Chipmunks and squirrels may also scold you from the branches of nearby trees for invading their territory. Watch for two varieties of deer, both mule and white-tail, who call the park home, as well.
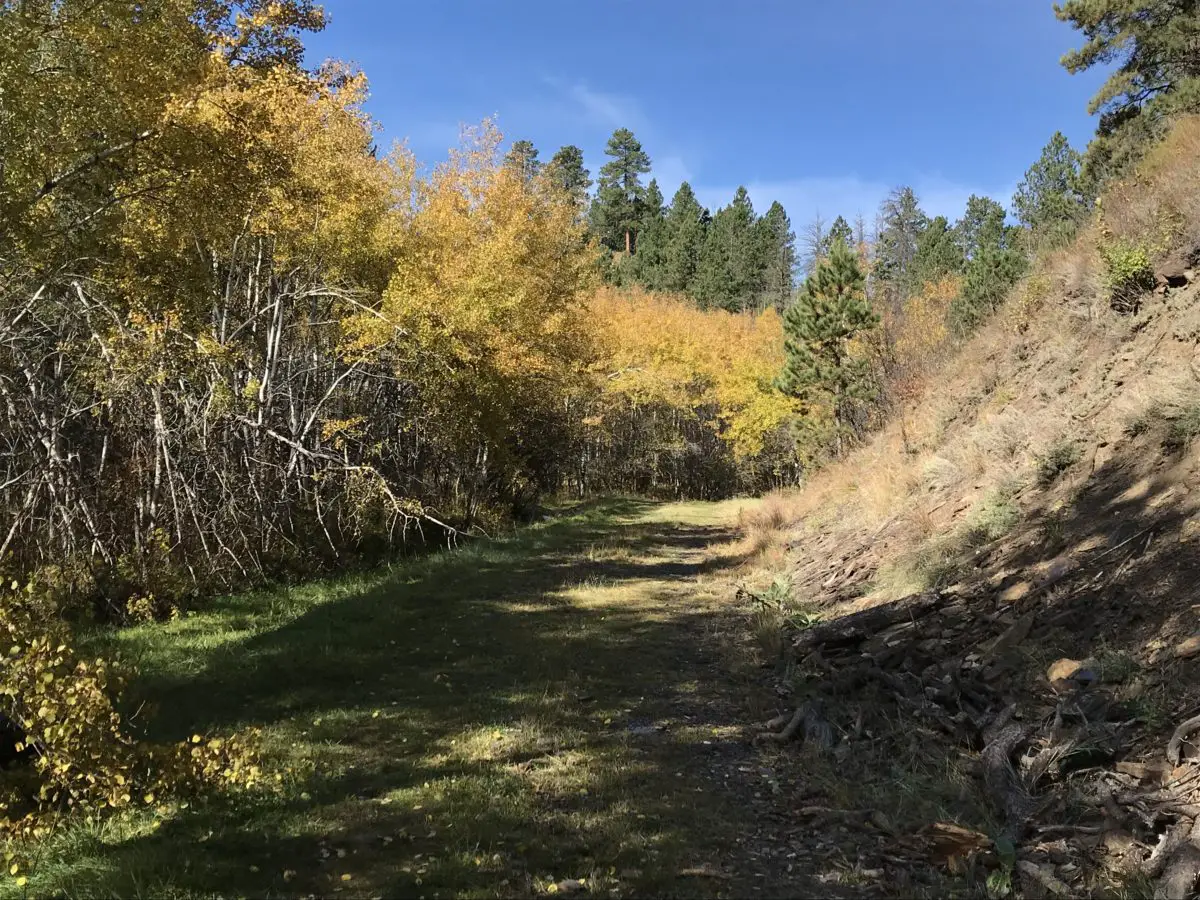
You can enjoy this trail almost any time of year, though snowshoes and/or traction devices may be warranted when snow and ice are present. This path is also a great option during the fall when the vibrant yellow of the aspen leaves contrast well against the dark, forever-green of the ponderosa pines.
The Tranquil Trekker surveys the scene!
How difficult is the Lovers Leap Trail?
I would rate this trail as moderate. It’s not overly long and much of it is shaded in the summer so it’s a cooler, hiking option. The path is also fairly wide and well-graded in most places with no real need to scramble over rocks unless you want a better vantage point at the lookout.
While this route has a few lengthy climbs, much of it rolls over the lower-elevation Black Hills that are found in this area. Visitors should be aware the park still sits at around 4000 feet or more, so if you are not used to the thinner air at these altitudes, you may notice some lightheadedness or shortness of breath when you exert yourself.
The next time you’re visiting Custer State Park and you’re looking for a shorter, less strenuous hike, check out the Lovers Leap Trail!
Have you hiked the Lovers Leap Trail in Custer State Park? Tell me about your experience in the comments!
Did you enjoy this post? Pin it!
Like what you read here today? Please feel free to leave a comment, like or share this post! Add your email at the bottom of the page, or the sidebar to the right, to be notified when a new post is published. By signing up for the email list, you will also receive a free copy of the Tranquil Trekker’s Top 10 Tips of Trekking Do’s and Don’ts!
You can also follow the blog on social media by clicking the links below!
In this post, I review the Deerfield Trail (Trail #40) that traverses a portion of the central Black Hills.
At 23 total miles long, the Deerfield Trail (Trail #40) can be accessed from several trailheads throughout the Black Hills. It begins at Deerfield Reservoir (there’s a spur trail that actually circumvents the entire lake), crosses the Mickelson Trail at about the halfway point, and eventually, spans all the way to the Centennial Trail near Pactola Reservoir.
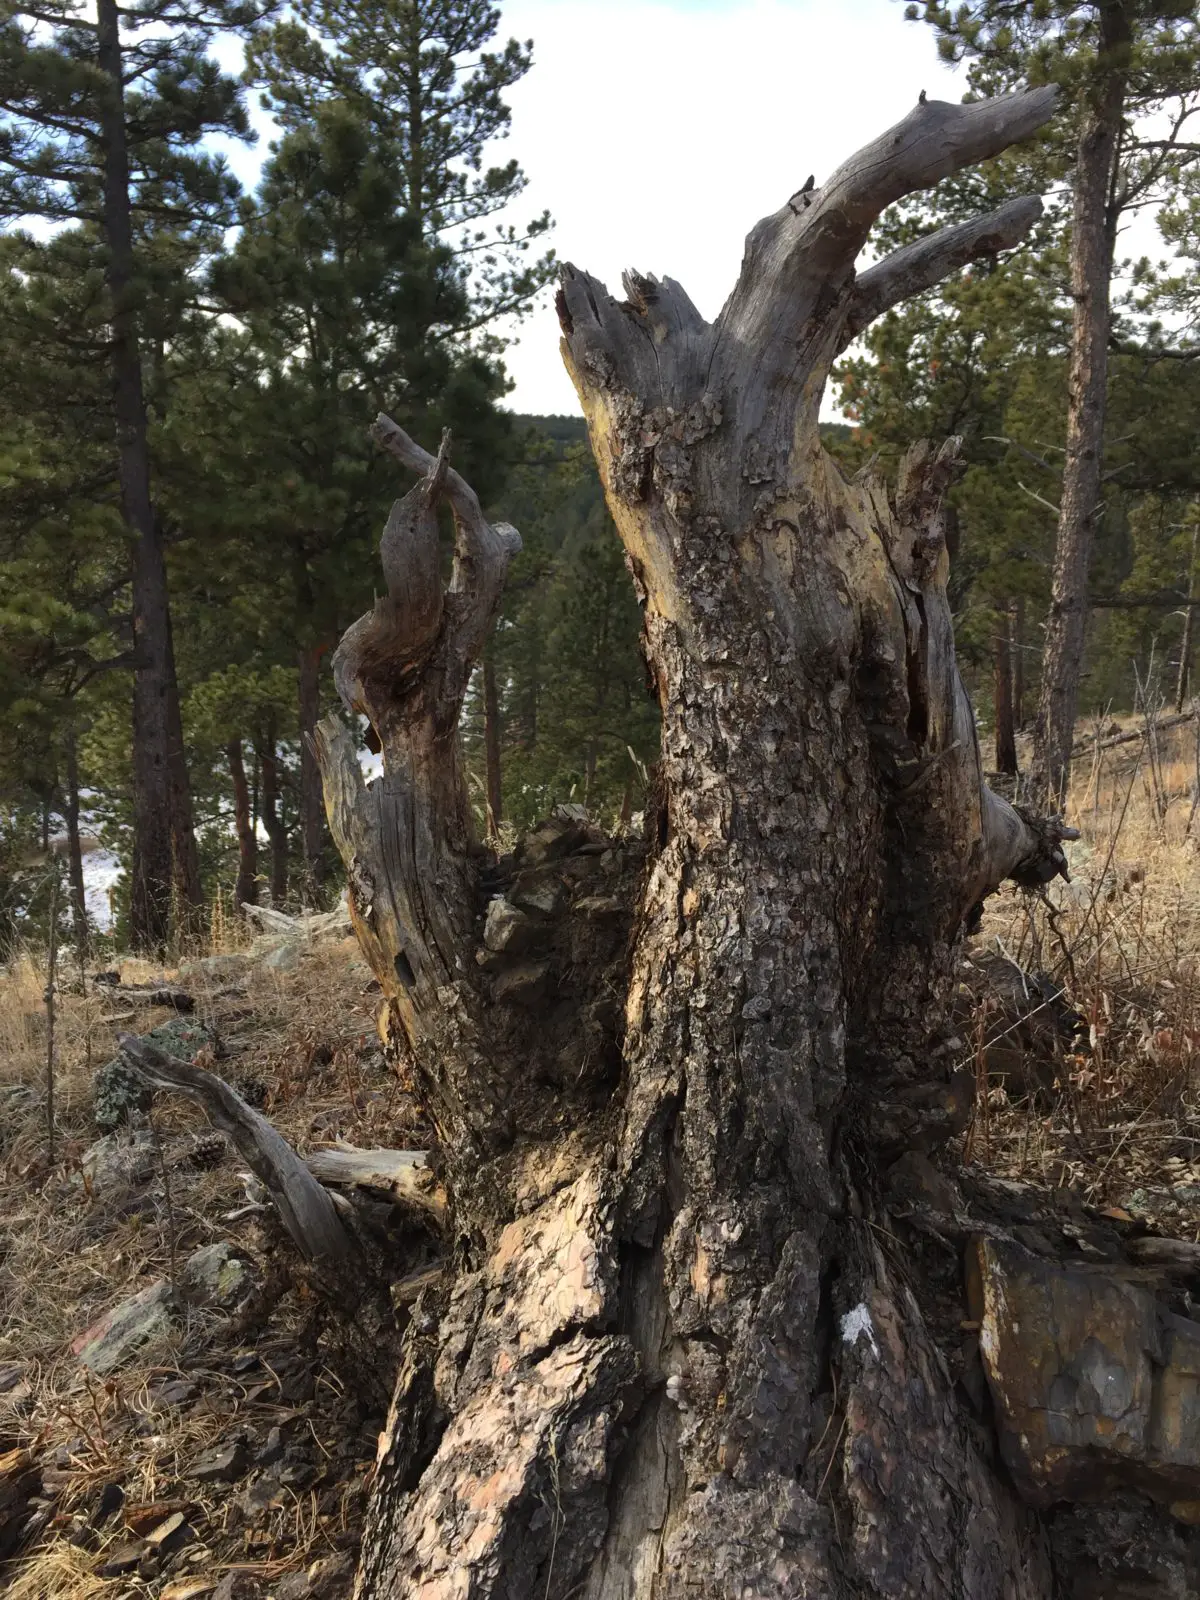
The Deerfield Trail is adorable! It traverses canyons, meadows, valleys, and ridges. Sites that housed old mining camps (and some that are still operating) and the occasional remnants of an abandoned homestead dot its course. This includes one squatter’s paradise that was built directly into the rock! Tailings from old mining sites, remnants of ramshackle cabins, and numerous stream crossings–often with charming, simple, log bridges–are scattered throughout the trail’s length.
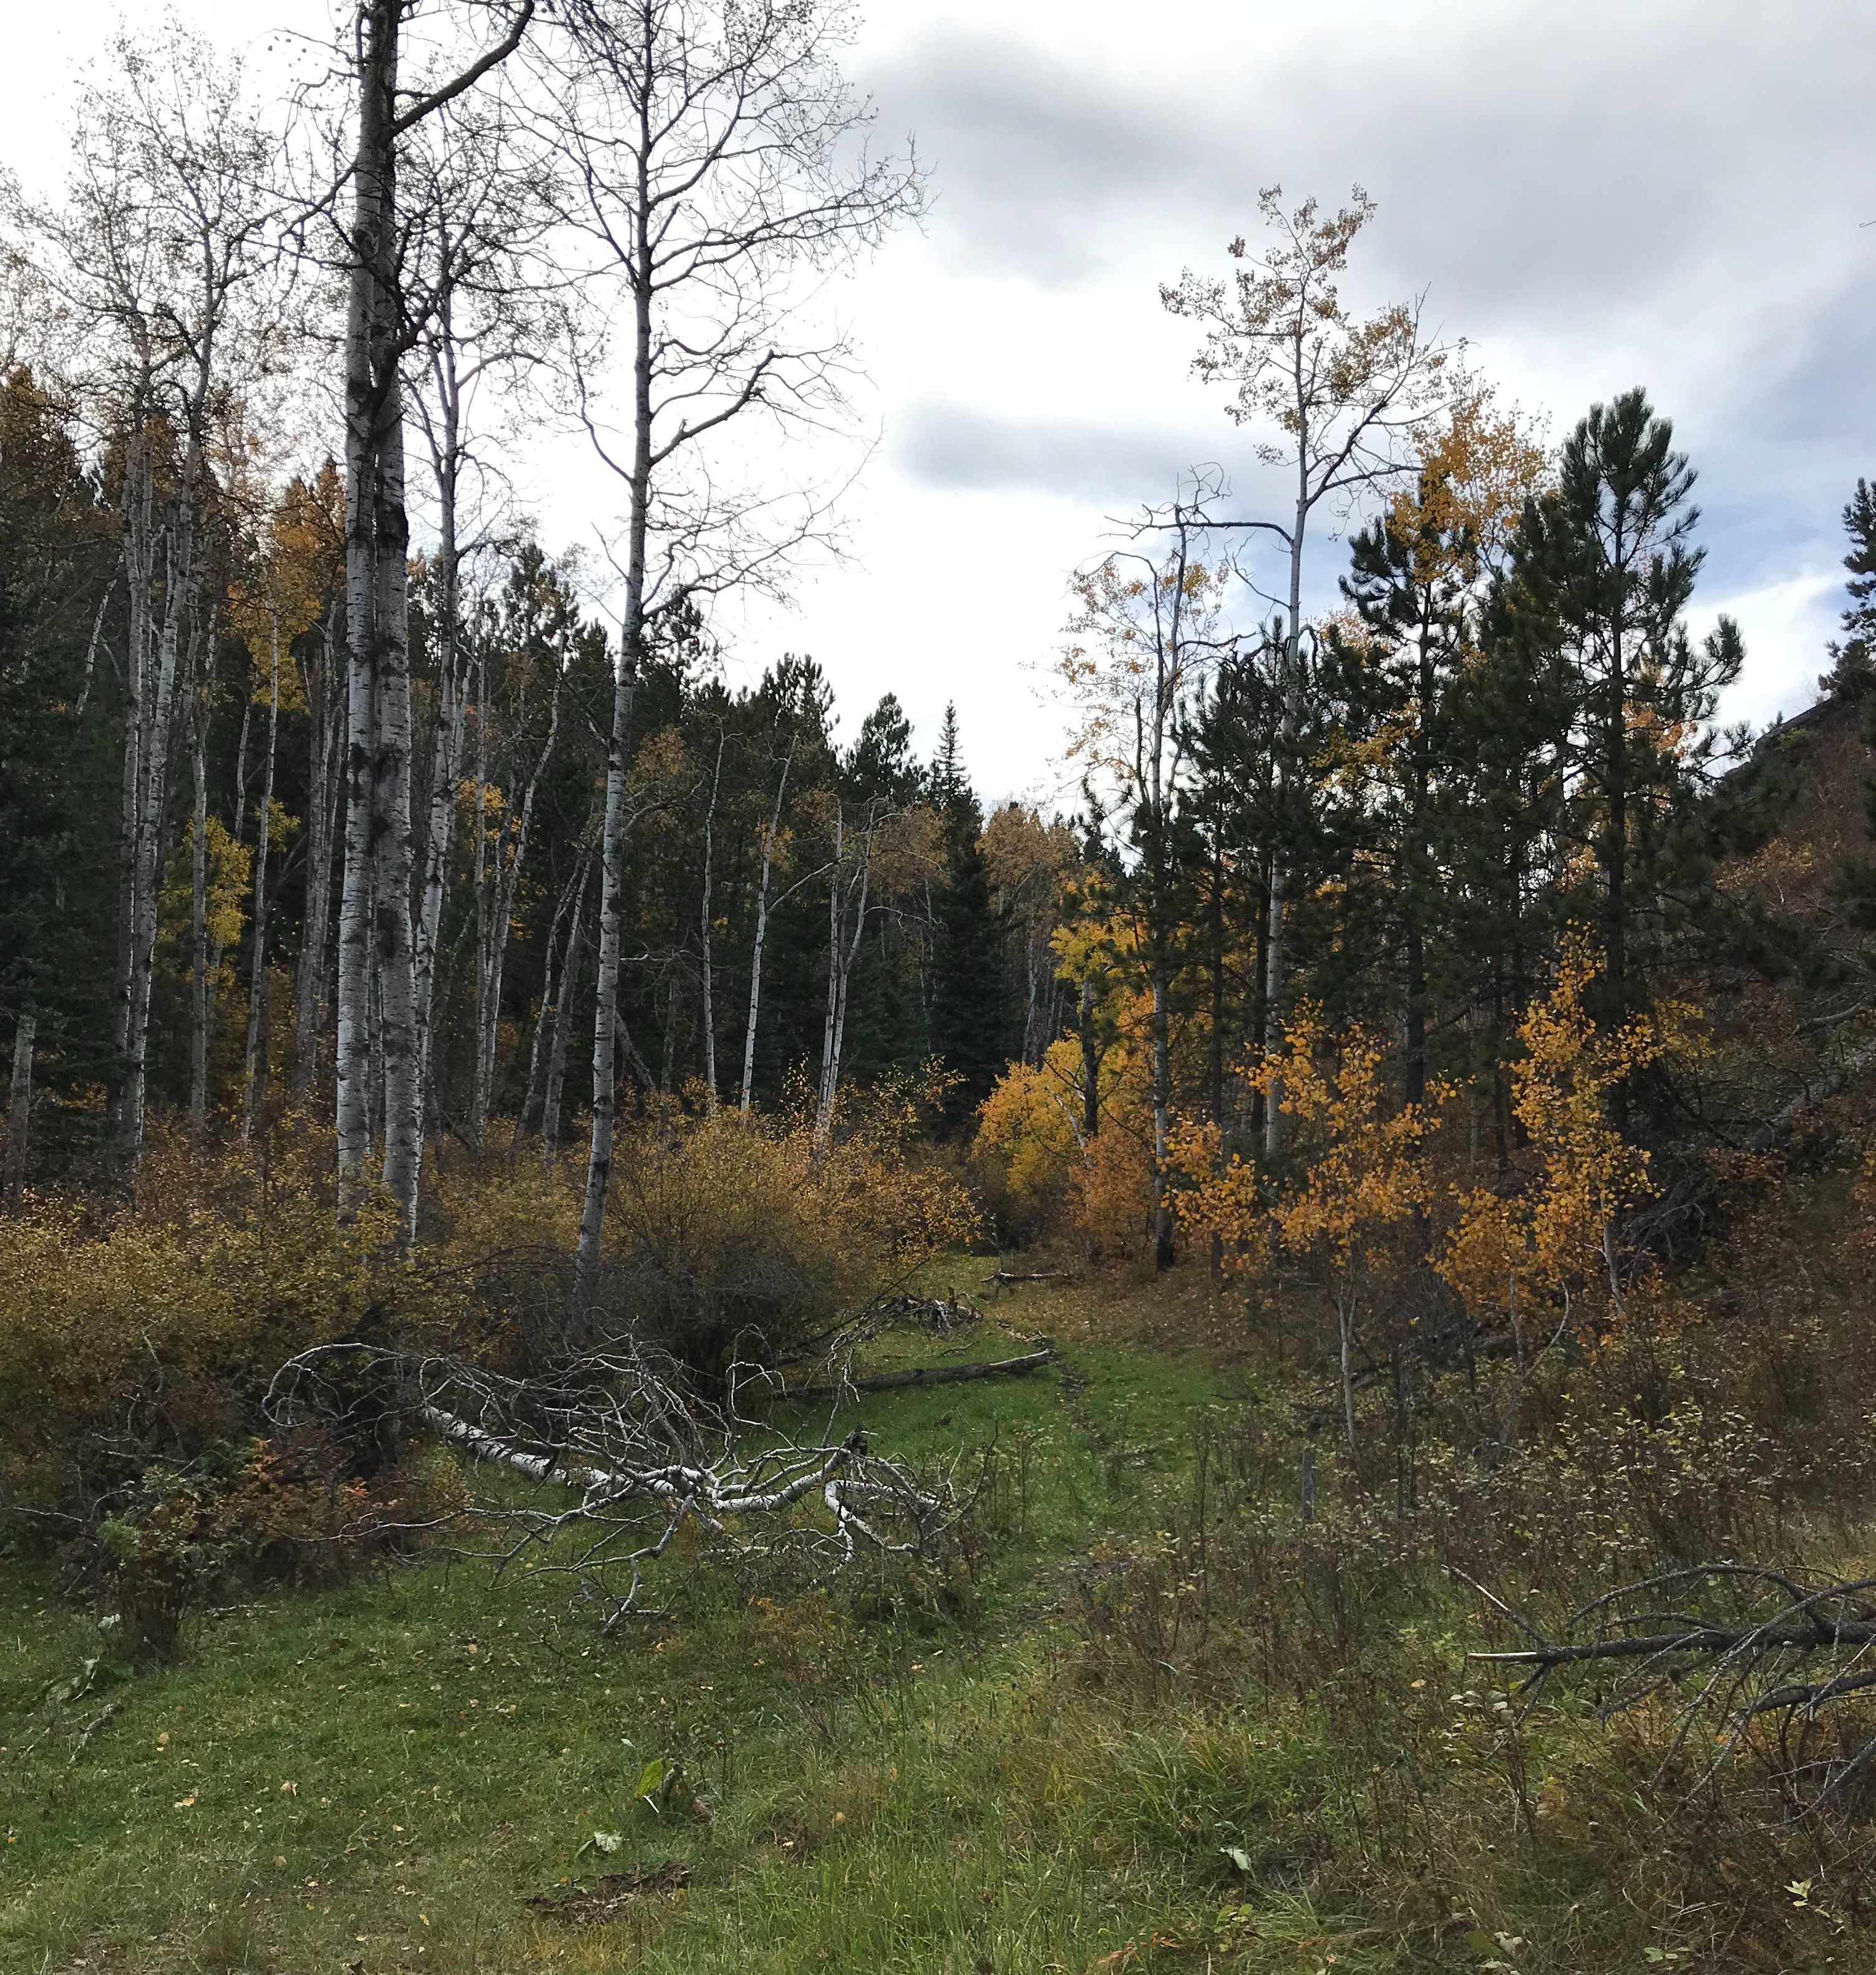
This is one of the forest roads the trail traverses. It was such an iconic site I kept half-expecting to see a horse and cart saunter by! 😂I LOVE the golden leaves contrasted against the still-green grass and the various brown hues of the log and dirt…
Things to See on the Deerfield Trail
The Deerfield Trail runs through several canyons that are similar to those found on Rimrock Trail, that traverses the rim of Spearfish Canyon and others that you see on the Little Elk Creek Trail, near Sturgis. The canyons are especially gorgeous in fall as the never-ending green of the spruces, that blanket the canyon walls, contrasts with the yellow and orange of the aspens and red of the plants that frame the creek.
Several sections of this trail run along ridges that are reminiscent of those found in the Eagle Cliffand Big Hill areas in the Northern Hills.
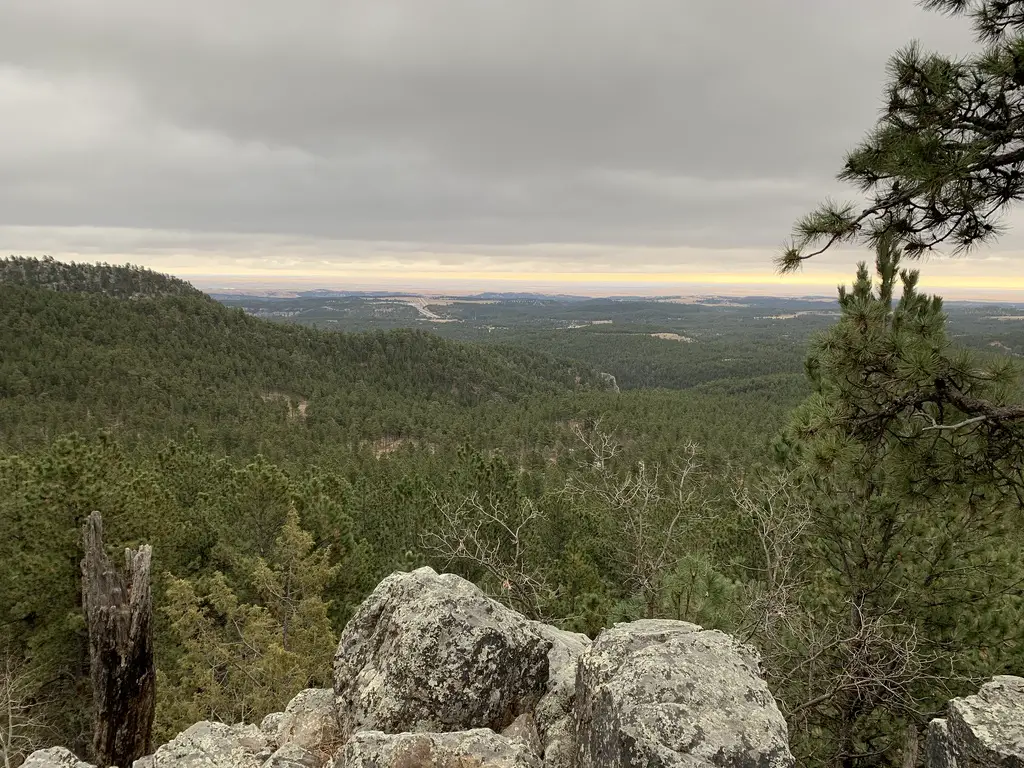
This is another trail system that crosses multiple ecosystems, similar to the trails that traverse the rim of Spearfish Canyon. The canyon sections are lush and green, while the ridge sections are comprised more of a drier, arid prairie.
Treks on the Deerfield Trail can even include a variety of weather depending on which side of the mountain you find yourself. You may start off your hike in sunny, blue skies, veiled with wisps of cirrus clouds. By the time you reach the ridgeline, a cold breeze can be blowing darker, heavier clouds in. Then, after a quick lunch, you can retrace your steps to the other side of the hill and return to a warmer, sunlit forest.
Things To Do on the Deerfield Trail
The Deerfield Trail is open year-round, for various activities, including horseback riding, hiking, mountain biking, and snowshoeing/cross-country skiing, depending on the time of year.
Large portions of the route follow old logging and forest roads that are wide and well-graded, so travel is often smooth. (Some of these are still in use so keep your ears and eyes open as you may have company on the trail).
While the entire route could be completed in one attempt with an overnight trip–or a VERY long day trip (if you had a car at each end)–it is usually conquered in sections (as the Trekkers are attempting). It should also be noted that some of the trailheads may be difficult–or impossible–to reach in the snowy months (at least with a typical, road-worthy vehicle).
The elevation for this trail is moderate compared to many of the other, longer ones in the Black Hills. While some sections will get your heart pumping, many consist of scenic, tranquil afternoon hikes in the woods.
One of the best features of this hike, for me, is its solitude. Some portions are more heavily traveled than others–namely the canyon sections–but often you’ll find you have the trail to yourself (especially in the colder months). It’s not unusual for the only evidence of others having used the route to be the deer, elk, coyote, and often, mountain lion tracks–usually following the deer tracks! 😳–that remain in the mud or snow. Don’t be surprised if you see the flags of some white-tail deer tails flying high as they dash out of your way as you traverse the trail!
Elk print!
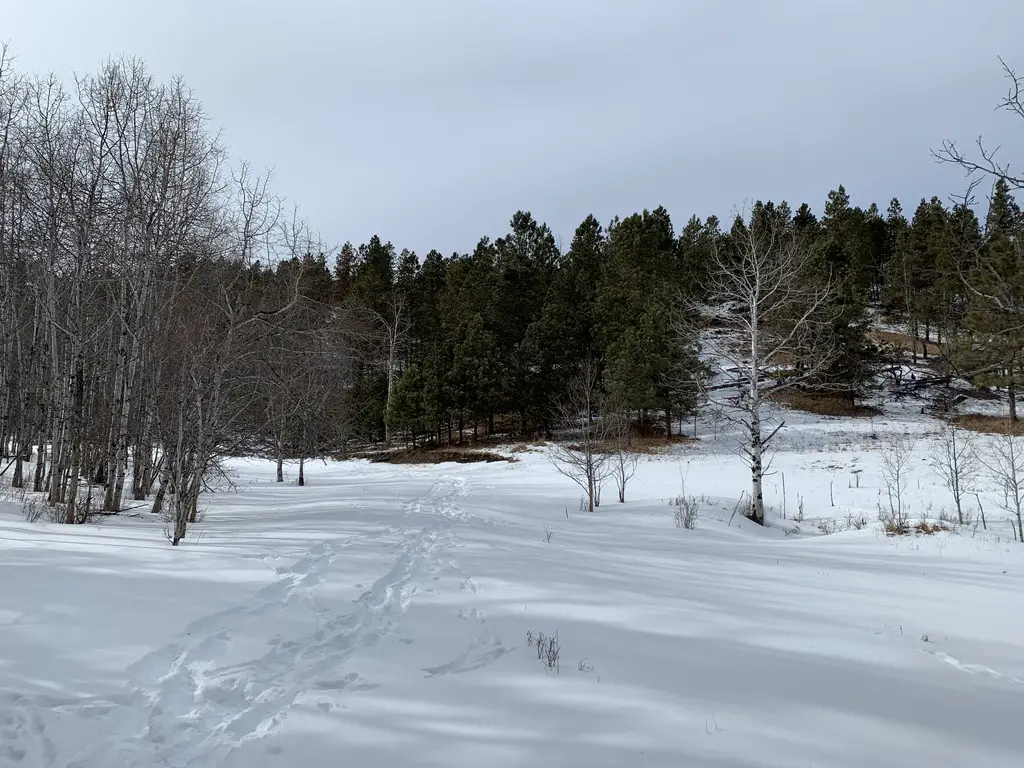
Below is a picture from the same area on the trail, but at different seasons (fall and winter).
A few more pictures from this scenic trail!
If you’re looking for a peaceful, casual hike through some beautiful countryside, consider giving the Deerfield Trail a try!
Have you hiked portions of this trail? What were your favorite parts? Tell me about them in the comments!
Did you enjoy this post? Pin it!
Like what you read here today? Please feel free to leave a comment, like or share this post! Add your email at the bottom of the page, or the sidebar to the right, to be notified when a new post is published. By signing up for the email list, you will also receive a free copy of the Tranquil Trekker’s Top 10 Tips of Trekking Do’s and Don’ts!
You can also follow the blog on social media by clicking the links below!
In this post, I review several “secret” hiking trails that are found off of Sheridan Lake Road, not far from Rapid City.
If you regularly drive along Sheridan Lake Road, west of Rapid City you may have noticed what look like several random parking areas. You would be right! These are the starting points for several “secret” hiking trails. (They aren’t really a “secret”, they just aren’t as well-known as other local trails).
It is a bit harder to describe how to reach these, as they don’t have signed trailheads (though they do sit right near the road and their parking lots are obvious). I will do my best to give accurate descriptions. All of these routes can be used by hikers, bikers, or horses, and are appropriate for winter sports.
“The Stratobowl, the Quiet Side”
The parking lot for this trail is found just south of the Victoria Lake Road/Sheridan Lake Road intersection, where the road makes a sharp turn. It’s really just a dirt turnoff with room for only a few cars. Just past the parking area, there is a gate that blocks the old forest road, but you are permitted to walk through it.
This is an easy hike as it just follows an old, fire road on an out-and-back route. It takes you to the cliffs on the northern rim of the Stratobowl, which I’ve discussed before. Be aware, this route has very little shade. As it is so exposed to the sun, it can be a very hot hike when the weather is warm. Also, we have seen herds of big-horn sheep near the cliffs, so if you hike with dogs off-leash, make sure to watch for them.
In my opinion, of the several routes I will be discussing today, this trail offers the best views of both the Stratobowl area as well as the canyon that Spring Creek flows through.
“The Sheep Place”
We call it this because there is a sign near the trail that labels it as a “Big Horn Sheep Study Habitat” (funnily enough, we have never seen a sheep here 😝).
The Trailhead
This trail is located almost exactly seven miles from the Catron Boulevard /Sheridan Lake Road intersection. The parking area is on your left before you round a curve and see a sign for the Peace Ranch. Right before you reach this parking area you will pass another small, parking lane on the other side of the road. There are trails here, as well, that are mainly used by mountain bikers (though hikers can also use them). They eventually meet up with the Coon Hollow Trail system.
The Hike
This is a great, local trail. We have always enjoyed it as a quick place to take the dog for a walk on a Sunday afternoon or when you just want a quick jaunt on a cold, windy day. It’s also a good place to sneak in a short hike before a summer thunderstorm (we have raced the thunder back from here on several occasions!)
A series of old, fire, and forest roads offer several different out-and-back options in this area. Be warned, there are no real maps that cover these trails and the roads aren’t reliably signed. On one hand, if you pay careful attention, you shouldn’t lose your way. On the other, if you aren’t paying attention, it is easy to get turned around. Also, the area is surrounded by private ranch land, so it is important to stick to the roads and be respectful of any “private property” signs you may see.
Three Options
The first old road that breaks off to your left is the shortest of the routes. It will take you to the edge of a cliff on the northwestern edge of the Stratobowl.
If you continue past that fork, the next road you come to is longer. It will also, eventually, wind you to the edge of the Stratobowl, but the views aren’t as good as those from the first fork as they are obscured by trees. I have heard a rumor that there may be a way to loop these trails together, but if it exists we haven’t found that route yet.
There is another unnamed trail that continues straight after the second road forks to the left. It eventually works its way all the way down to Spring Creek.
You can’t always access this option as there is a gate that is sometimes closed. I’m not actually sure who controls it (if it is private landowners or the Forest Service). Either way though, if the gate is closed, please respect it and don’t use that route.
This trail is the longest of the three options, and the steepest, as it works its way down the cliff face to the creek, far below. We have yet to complete this entire route but it is on our “to-do” list.
I would rate the first two options as “easy” as they stick to the forest roads and have very little elevation gain. The third is more “moderate” because it wanders into the woods and requires more strenuous hiking when ascending and descending the cliff face. The easier routes are more exposed to the sun, so they can be quite warm in the summer.
The above trails are fairly well known, so expect to have some company on your trek.
I hope you’ve enjoyed my reviews of these many routes found near town. If you’d like to read about other trails that are located close to Rapid City, you can click the links below:
Have you enjoyed any of these trails? If so, let me know in the comments!
Like what you read here today? Please feel free to leave a comment, like or share this post! Add your email at the bottom of the page, or the sidebar to the right, to be notified when a new post is published. By signing up for the email list, you will also receive a free copy of the Tranquil Trekker’s Top 10 Tips of Trekking Do’s and Don’ts!
You can also follow the blog on social media by clicking the links below!
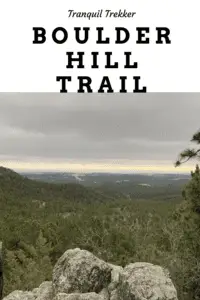
In this post, I review another trail found not far from Rapid City, the Boulder Hill trail.
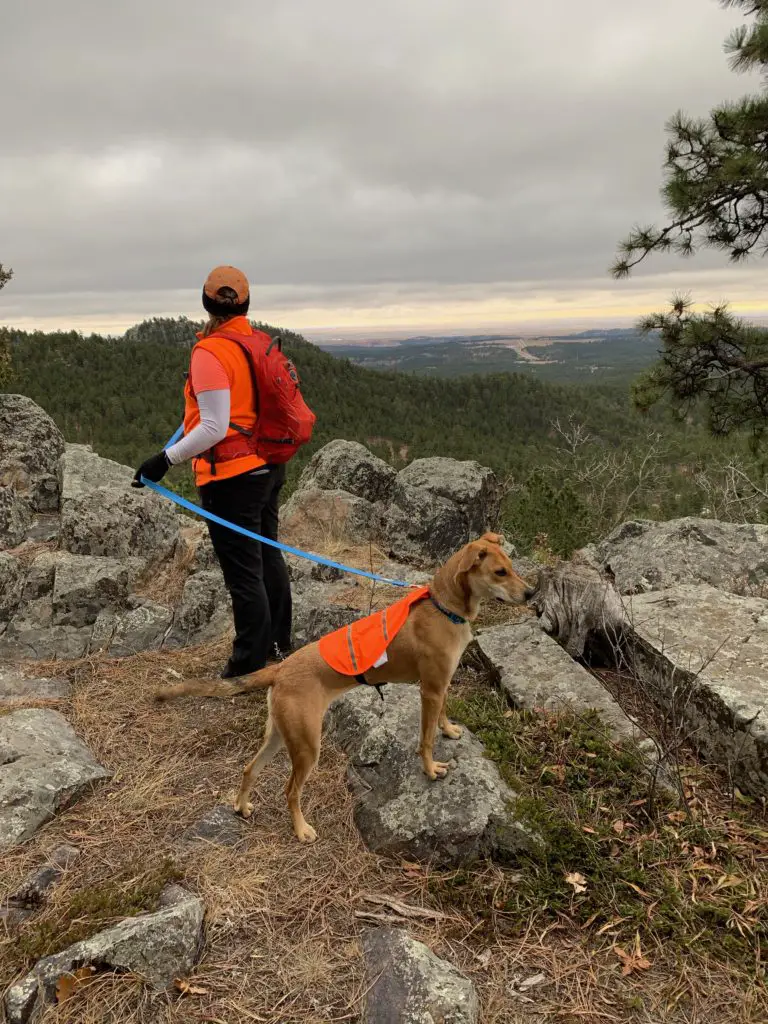
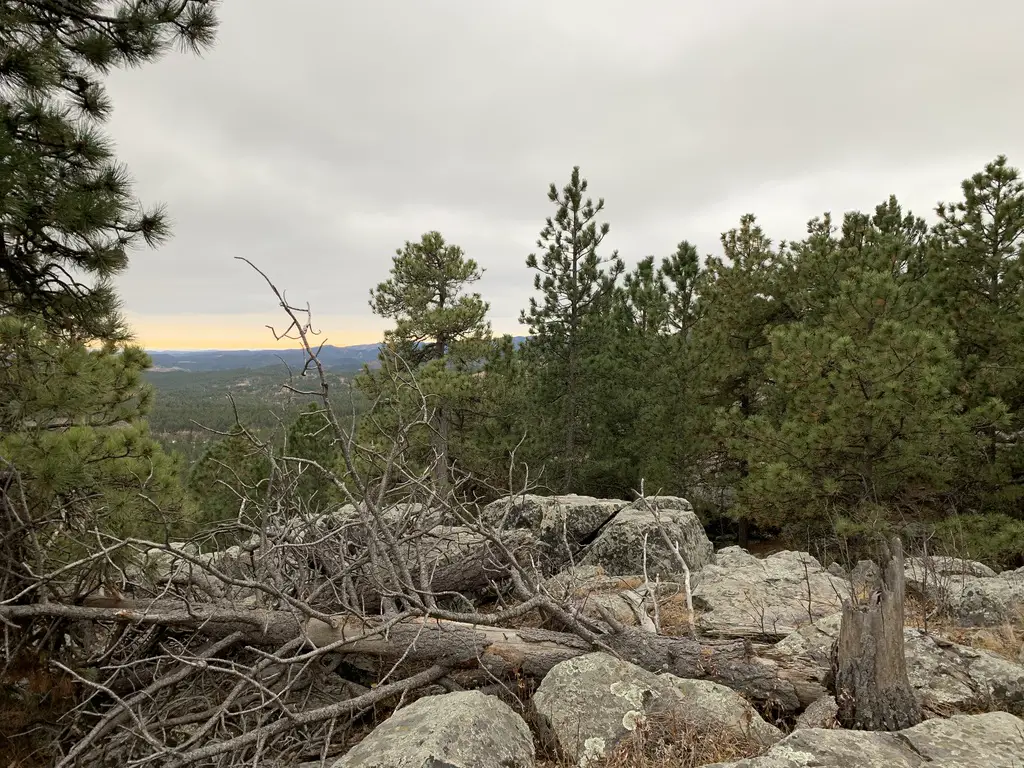
This post is another in my series of local, easy-to-reach hikes that are not far from Rapid City, the Boulder Hill Trail. One thing I like about this route is that it mostly meanders through the forest, so it’s fairly well-protected from the wind, rain, or snow (until you get to the top). This makes it a good choice for times when the weather is less-than-great. It’s also eerily beautiful in the fog.
Where is the trailhead for the Boulder Hill Trail?
You will find the trailhead on Boulder Hill Road, about halfway between Sheridan Lake Road (west of Rapid City) and Highway 16 (south of town.) You can get there from either route.
The road is dirt but it is wide and well-graded, so it is suitable for any passenger car in good conditions.
If the weather is very wet or snowy it could become impassable. Usually though, a four-wheel drive, high-clearance vehicle can be manage it.
There is a sign at the trailhead, but you won’t see it until after you enter the parking lot, as it sits right near the woods. This is the same parking area that is used for the Flume Loop Trail that I discussed in a previous post.
The Pup and I enjoying the trail.
One unique aspect of this hill is that you can actually drive to the summit. There is an old forest road that makes a spur off of Boulder Hill Road. It isn’t marked, so you may miss it if you don’t know where you are going.
We’ve seen passenger cars use the road, but I wouldn’t recommend it. Even during good conditions it is rutted and washed out in places, and it can sport deep mud holes when it’s been wet. We were glad we had Mr. Trekker’s 4WD truck the one time we drove up. It’s not a long route or overly technical, but I find the hike to be far more enjoyable.
With all the rocks at the summit, you can see how the hill got its name.
The Hike
This hike is a bit more challenging than others in this series. I would rate it as “moderate”. It is not difficult, but it is an uphill climb to the summit of the mountain almost the entire way (at least on the way up 😉). About half-way along, it joins with an old, forest road for a short time. It quickly exits back onto a narrow trail into the woods again, though.
Where it meets the road is also where it joins with the other section of the Flume Trail (the Coon Hollow Trail) that I discussed in this post.
Don’t be surprised if the scolding of squirrels and scurrying chipmunks accompany you on this hike. This is also a great place for rock scrambling over the large boulders (hence how this hill got its name).
From the summit, you will be treated to views of Highway 16 as you look to the northeast, towards town. Like many of the trails that traverse the eastern edge of the Black Hills, on clear days you can also see the plains that spread east of town. On REALLY clear days, you can see portions of the Badlands that sit many miles to the east.
From the summit, you can see Route 16 heading toward town. You can also see the prairies that extend far to the east.
If you’re looking for a challenging hike that’s easy to reach from Rapid City, check out the Boulder Hill Trail!
Is this a trail you’ve hiked in the past? Tell me about it in the comments!
If you’d like to read about the other trails in this series, you can click the links below:
Like what you read here today? Please feel free to leave a comment, like or share this post! Want to be notified when a new post is published? Add your email and click the “Follow” button at the bottom of the page or the sidebar to the right. By signing up for the email list, you will also receive a free copy of the Tranquil Trekker’s Top 10 Tips of Trekking Do’s and Don’ts!
You can also follow the blog on social media by clicking the links below!
This website uses cookies to improve your experience. We'll assume you're ok with this, but you can opt-out if you wish. Cookie settingsACCEPT
Privacy & Cookies Policy
Privacy Overview
This website uses cookies to improve your experience while you navigate through the website. Out of these cookies, the cookies that are categorized as necessary are stored on your browser as they are as essential for the working of basic functionalities of the website. We also use third-party cookies that help us analyze and understand how you use this website. These cookies will be stored in your browser only with your consent. You also have the option to opt-out of these cookies. But opting out of some of these cookies may have an effect on your browsing experience.
Necessary cookies are absolutely essential for the website to function properly. This category only includes cookies that ensures basic functionalities and security features of the website. These cookies do not store any personal information.


 There is a less-frequently visited portion of the Black Hills in far-eastern Wyoming called the Bear Lodge Mountains. When the Trekkers visited we stayed at the Reuter Campground. It is easy to reach, as it is less than two hours from Rapid City. It is also just a short drive north of Sundance, WY (and I-90).
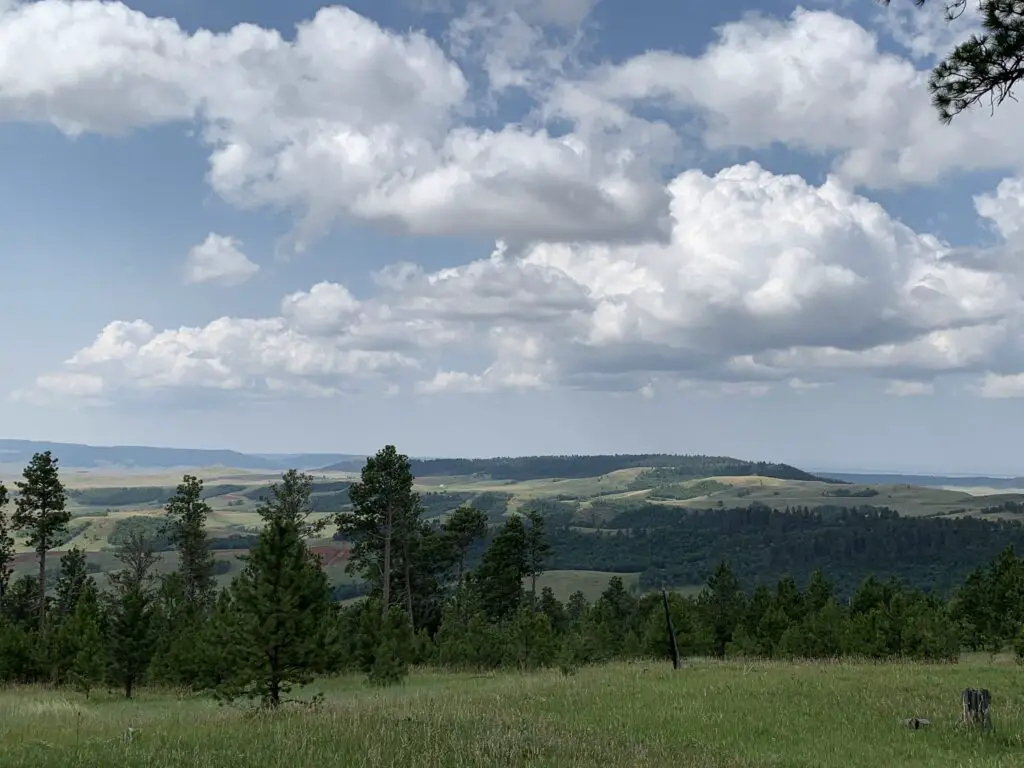


 The Deerfield Trail runs through several canyons that are similar to those found on