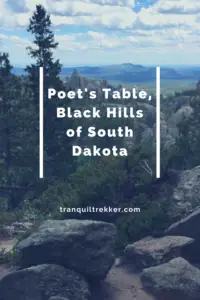
I discuss our various attempts to discover this “secret” Black Hills landmark.
After only two tries, the Trekkers were finally able to locate Poet’s Table! (As it turned out, we almost reached it the first time, and probably would have, had it not been for the mist blanketing everything and the fog hiding the site from view).
If you’re looking for specific instructions on finding this awesome spot…keep looking. I won’t give any details that can’t already be found on Google. Part of the fun is in the search! (I will say this much if you think you’re close…make sure you look up!)
But if you’re looking for hints to help with your search…keep scrolling! 😁
Where is Poet’s Table
Poet’s Table is in the Black Hills, of course! 😉
Our first attempt to find Poet’s Table was in early June on a particularly foggy day–which can be a really cool time to hike in this area. It’s eerily beautiful to see the rock outcrops and spires looming out of the mist.
Our second attempt was a few years later, also in June, and we were actually able to help some visitors from Illinois locate the spot. They were grateful for our assistance as they were eager to ferret out this iconic, Black Hills location.
The only major clue I’ll give you is that this “secret” spot is within Custer State Park. There are no signs or trail markers so you’re going to have to put your sleuthing hat on to find Poet’s Table. The trail is unmarked and is located about a half-mile from the Little Devil’s Tower trailhead, which is about half a mile from Sylvan Lake, on Route 87. It is also not far from the scenic Cathedral Spires Trail.
After about a 1/2 mile hike down the Little Devil’s Tower trail and crossing a footbridge, you will see a fallen log on your right. On your left is a rather large, well-trodden path going off to your left, heading uphill, traversing a bit of a canyon. Take this path.
As you trek this new, unmarked trail, within a few minutes you’ll see another, smaller, also well-trodden trail heading off to the left, toward more towering granite summits. Take this left…
…this is where my directions end, the rest is up to you!
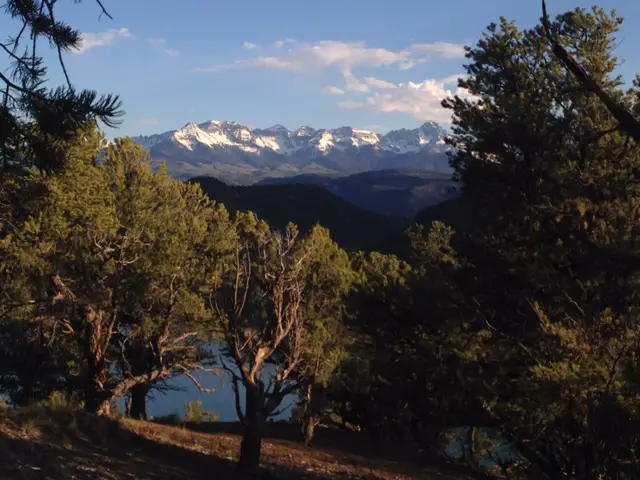
The view from Poet’s Table
Poet’s Table Can be Hard to Find
Don’t get discouraged if you don’t find the site on your first attempt (or even your 3rd!) Just enjoy the hike, the views, and the beauty of the natural world that surrounds you. We found some pretty nifty spots in the area even when we failed to find the actual Poet’s Table. Good luck, have fun, and happy hunting!
Note: There are several other unmarked trails traversing gulleys and canyons in this area. They don’t “go anywhere” per se, but I encourage you to investigate them. This is a pretty amazing area that you’ll have largely to yourself most any time of year (though summer is the busiest time). There are lovely canyons, picturesque granite outcroppings, and the occasional small waterfall to hunt if you’re there during a wetter period of the year.
Trails in this area aren’t overly long but they can get rather steep so watch your footing, especially in wet, muddy, snowy, or icy conditions. The trail is in the Harney Range, which is also one of the higher elevations in the Black Hills (over 6000 ft), so flat-landers should take heed. 😉 Another nice thing about the trails being relatively short, most are half-day hikes or less (though you can, obviously, spend as much time in this area as your heart desires.) You won’t get bored!
Thanks, as usual, to Mr. Trekker for this great shot of Poet’s Table!
Poet’s Table! (and our new friends from Illinois. 😉)
**A few months after our trip, this iconic landmark was vandalized. Fortunately, it has been reset. You can read my feelings about that eventhere.
Have you ever been to Poet’s Table (or got lost trying to find it? Tell me about your experience in the comments!)
Did you enjoy this post? Pin it!
Like what you read here today? Please feel free to leave a comment, like or share this post! Add your email at the bottom of the page, or the sidebar to the right, to be notified when a new post is published. By signing up for the email list, you will also receive a free copy of the Tranquil Trekker’s Top 10 Tips of Trekking Do’s and Don’ts!
You can also follow the blog on social media by clicking the links below!
In this post, I review a wonderful State Park in Connecticut.
I’m going to take a diversion from my typical “out West” posts to write about a park we used to enjoy in New England when the Trekker In-Laws lived there. Gay City State Park is located in Hebron, Connecticut. It’s easily accessible from, I-384, Route 6, or Route 2 off of Route 85, just follow the signs.
Gay City Ghost Town in Connecticut
The park actually encompasses an old ghost town, though few remnants remain other than the foundation from the old mill. The town was originally known as Factory Hollow, though with many of its inhabitants sharing the last name of Gay it was renamed to Gay City upon its sale to the state.
There is also an aged cemetery on-site, where you can still read the inscriptions on some of the gravestones. Please be respectful of this historic location and the final resting place for these individuals.
What you will see at Gay City State Park
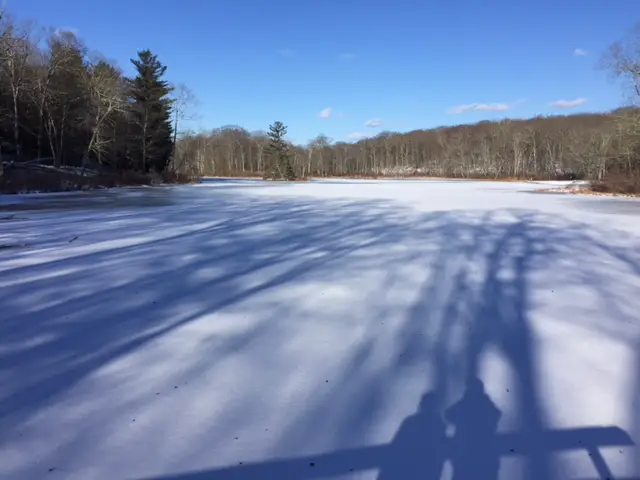
The park offers miles of hiking trails (which are easily convertible to cross-country ski and snowshoe trails in the winter months); a small, scenic lake; a beach, a campground, picnic and swimming areas, and opportunities for a host of other activities. The trails also connect to others outside the park boundaries that venture into other local, recreation areas. For further info, you can visit the website.
Gay City State Park is fairly ordinary compared to those we’ve visited in the Western US, but it’s a place we always enjoyed and tried to visit whenever we were in the area.
The trails are easy in difficulty, wide, and fairly free of roots and rocks. None are much longer than five miles–although you can combine various trails for longer treks-so they’re ideal for families.
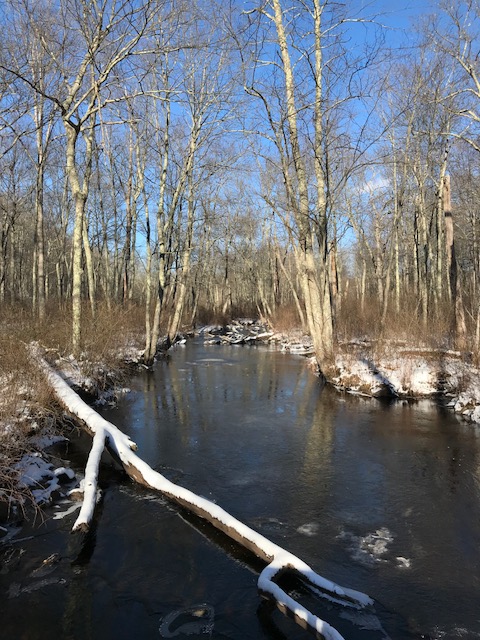
Your trek takes you on a stroll through an old forest comprised of mostly deciduous trees dressed in the leafy clothes of the current season. Only the sound of the babbling brook that parallels much of the trail, the wind in the trees, and the call of the birds flying overhead accompany you.
The area is highlighted by the fieldstone walls that are iconic in the New England countryside. It’s an opportune place to enjoy the lovely fall colors this region is famous for. We usually visited in early winter, enveloped in the tranquil “swish, swish, CRUNCH” of fallen leaves underfoot, from which a nutty smell wafts with each step.
The most recent time we were there was lovely! It was cold (around 18 degrees), but it was sunny, with little wind. As it was the first day in about five that we had seen the sun, we had just recently driven 1800 miles across the country and we had countless, delicious holiday meals weighing us down, it was nice to be able to get out and stretch our legs a bit.
There was just enough snow to make the scenery beautiful, but, as it was powdery, nothing more than hiking boots was needed to trudge through. I was impressed by how many hearty souls we saw out with us, including cross-country skiers and fellow hikers.
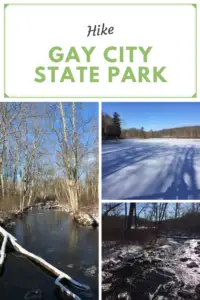
Below are a few pics from our trek. Thanks, as usual, to Mr. Trekker for a few of these!
Shadow Trekkers!
If you’re looking for a fun, outdoor activity in central Connecticut, check out Gay City State Park!
Have you visited Gay City? Tell me about it in the comments!
Did you enjoy reading this post? Pin it!
Like what you read here today? Please feel free to leave a comment, like or share this post! Add your email at the bottom of the page, or the sidebar to the right, to be notified when a new post is published. By signing up for the email list, you will also receive a free copy of the Tranquil Trekker’s Top 10 Tips of Trekking Do’s and Don’ts!
You can also follow the blog on social media by clicking the links below!
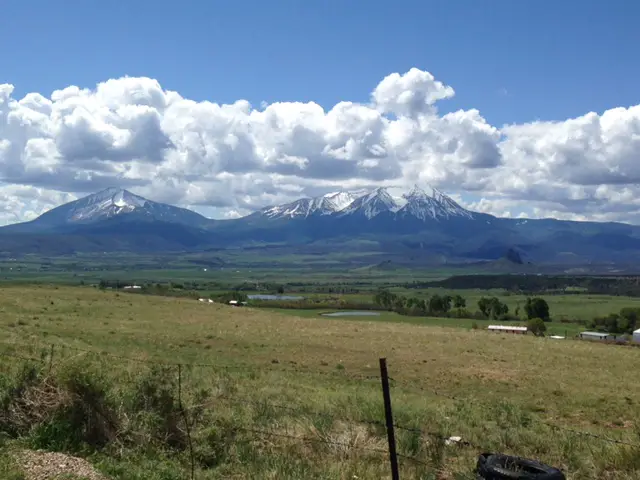
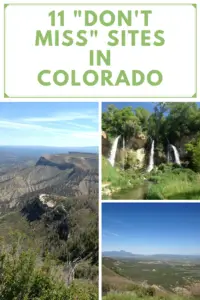
We spent the second week of our 2017 Road Trip enjoying 11 Don’t Miss Sites in Colorado. That state is, by far, one of my favorite locations in the entire country to visit (and we’ve seen the 48 Continental US States!) Its beauty is indescribable and pictures don’t truly do it justice.
The following is a rundown of the highlights of our tour around the state. Thanks again to Mr. Trekker for some of the pictures!
Trinidad, Colorado
Trinidad is an old-school, Western town in far Southwestern Colorado, only about 15 miles from the New Mexico border. It’s a cute little community that’s been well-maintained and has seen some modern updates in recent years.
I’m still adjusting to the whole “pot legalization thing” in Colorado. 😂 It’s not my fault, I was a DARE child of the ’90s, I grew up being taught that it was bad (of course this was by the same people who also taught us that Pluto was a planet–and people wonder why I have a skeptical nature!) Then there’s the issue where it’s legal in the state but not in National Parks within that state because that’s Federal land and it’s still illegal Federally. Like every good Libertarian, I’m willing to tolerate it but *sigh*, does this make anyone else’s brain hurt?
The next day, we headed West from Trinidad on Route 160, bound for Mesa Verde National Park! 12 years ago we visited the park and parts of Western Colorado on our very first road trip, so it was cool going back. Some of it we remembered, but it had been so long that there was plenty that we were seeing again “for the first time”.
Colorado is one of my favorite places to visit. Click here for more posts on this awesome state!
Having just recently survived a bout with an aggressive flu, I was still not my best self at this point, though, as we were entering some beautiful country we wanted to do a little sightseeing. The first pass we arrived at (and the first overlook) we stopped to take some pictures. I stepped out of the car, took one step on the unsteady gravel in my flip-flops, and skidded to my knees. The fall left a lovely road rash in its wake (because this trip just hadn’t been adventurous enough!)
At first, I figured it was nothing, till I looked down and saw red rivulets running down my leg *sigh*. So, back to the car, we went, with Mr. Trekker coming at me with the first aid kit. Unfortunately, it only had alcohol swabs in it and we were FAR from any modern bathroom with water and soap. Needless to say, Mr. Trekker was NOT my favorite person that day! But, kudos to him, he bandaged me up well (albeit painfully) and I now only have a minor scar to show for my misfortune. 😝
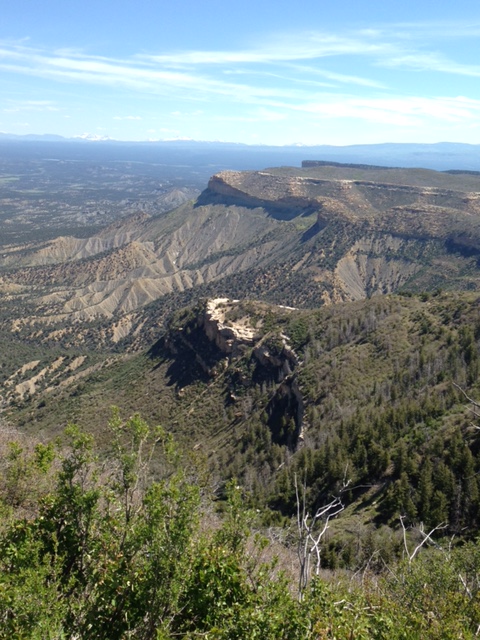
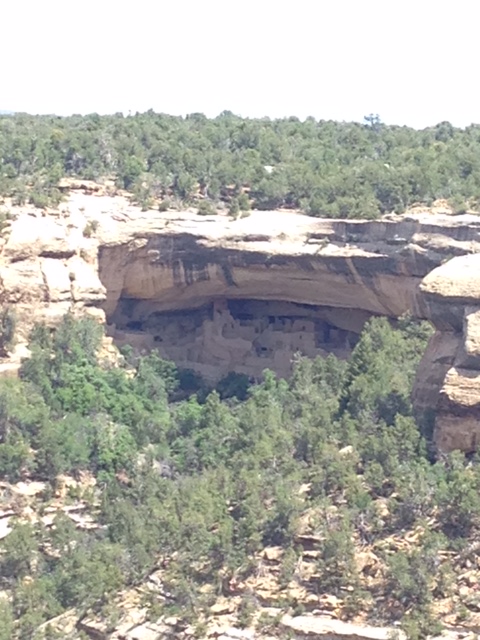
Mesa Verde National Park:
**Author’s note: Just a word of warning, as this is a National Park, no dogs are allowed on any trails (exceptions for Service Animals). They are only permitted in the campgrounds and parking lots.**
This unique park showcases cliff dwellings from the civilizations who lived there thousands of years ago. Some you can view from overlooks, and some you can actually tour (self-guided and ranger-led). They’ve also got a great campground with spectacular star-gazing opportunities.
Our first trip to the park was one of my first camping experiences out West where there’s far less light pollution. I remember being astounded at the light show the night sky put on (and that’s coming from a girl who grew up on an Indiana farm). It was on my first visit to this park that I fell in love with Colorado and “the West”. I didn’t know then that in six years I’d become a “Westerner” myself!
Unlike many of the national parks (such as Rocky), the campgrounds have modern bathrooms—read, flush toilets, and showers. I’d recommend at minimum a 2-day stay to really get the most out of the park.
Cliff dwellingNavajo Canyon
Route 550, the Million Dollar Highway:
On our first trip to this area, we stumbled upon this highway accidentally, completely unprepared for what we were about to experience (it was just the most accessible option to get us where we wanted to go). The second time around we knew what we were in for…and were still awed.
Route 550, in western Colorado, runs north to south between Grand Junction and Durango. It is called the Million Dollar Highway because it is so beautiful it offers million-dollar views as it traverses many mountain passes.
If you’ve never traveled this route, I STRONGLY recommend it, though I’d suggest navigating the road from south to north starting in Durango. This ensures your car is on the inside of the sharp turns the majority of the time. If you’re coming from the north you will find yourself frequently perched along cliff edges with nothing between you and the gaping maw of the canyon below than some thin oxygen (there are no guardrails the majority of the drive as the snowplow drivers need space to push the snow off the cliffs in the winter months).
If you can handle the drop-offs, this drive is a must! This area is referred to as the “Switzerland of America” because its incredible mountain vistas rival those found in the immensely beautiful, European country.
I can testify the views here rival those we saw in Glacier National Park on the Going to the Sun Road (though these are more accessible, depending on your location). Also, this road is open all year, weather permitting.
The most popular portion of the drive (between Durango and Ouray) is less than 70 miles in length, but plan for it to take several hours (that was our big mistake the first go-around). It’s a slow drive, in some areas the suggested speed limit on the curves is only 10 – 15 mph (and trust me, they aren’t joking). It can be slower if you find yourself traveling behind larger, slower-moving vehicles.
The most intense (and most beautiful) portion of the route runs the 25 miles between Silverton and Ouray. Stops are frequently caused by construction in the summer months as workers are constantly fighting the ongoing battle with natural erosion. Rockslides are also common (as well as avalanches in the winter).
This drive can be frightening for us acrophobes with its steep drop offs but the immensely beautiful views are worth it! There’s plenty of skiing, 4×4 trails, hiking, camping, rafting, and a slew of other activities available in this corner of Colorado, so be sure to put it on your “must-see” list.
Telluride, Colorado:
Telluride was about what I would expect from a ski town (the Trekkers are uncoordinated and therefore not downhill skiers). It was lovely, though we were a little early for the summer season so the upper roads weren’t clear of snow or open yet. We walked down the road to view a staple of the town, Bridal Veil Falls. The road up to it was open for hiking, but as I still wasn’t at my best we decided to skip that option this trip. Instead, we opted for lunch at Brown Dog Pizza, a local joint where I can honestly say I had the best cheese calzone I have ever eaten, hands down.
The ricotta cheese seemed as though it had been whipped into an airy froth. I’m no food connoisseur, but it was incredible.
Bridal Veil Falls
Ouray, Colorado (pronounced U-Ray):
The drive into town from the south is one of the most beautiful views I’ve ever seen. THIS I remembered from 12 years ago. You descend from the harrowing Million Dollar Highway and this small oasis of civilization opens up before you in the valley, beckoning you down from the peaks. (If you’ve seen the show “The Ranch” on Netflix, this town is the one used in the opening credits).
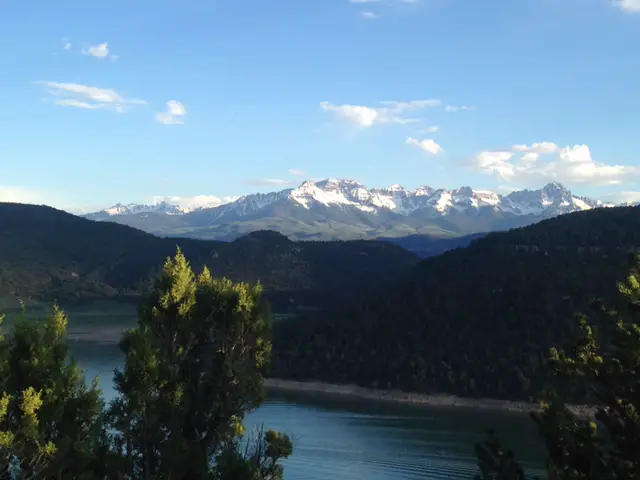
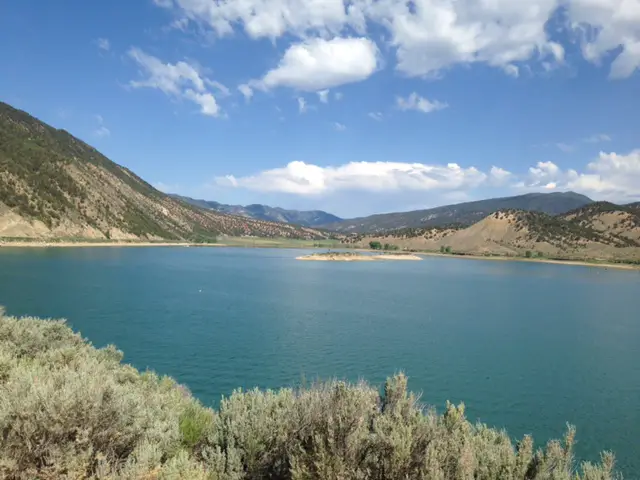
Ridgeway State Park:
Ridgeway State Park has one of my favorite campgrounds we visited on the entire trip (part of the reason we spent three days there!) It’s located just north of Ridgeway on Route 550 (north of Ouray, so out of the peaks). They have a lovely, shaded, tent-camping area that’s back off the road, complete with level, graded tent sites, modern restrooms (and showers!), all surrounded by cedar trees.
This brings me to another point. Apparently, it’s perfectly legal to smoke pot in Colorado State Parks, but don’t you dare hang a hammock from a cedar tree! I’m sure there is a good reason for this due to the risk of damage to the trees, and I’m all about protecting nature, but this just seemed to be a bit of a misalignment of priorities to me! 😝
The park surrounds a picturesque reservoir set against a backdrop of snow-capped Rockies to the east. Its location makes it an ideal base camp for numerous day trips and activities.
Ridgeway State ParkIt was so strange to look to the east and see the Rockies
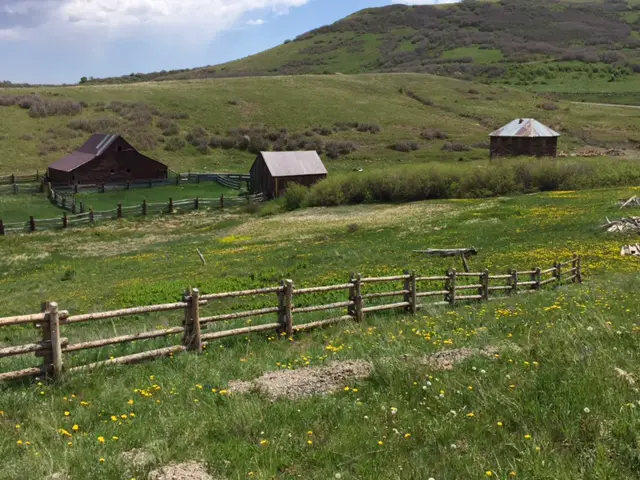
True Grit Film Sites
The park also happens to be near the filming location of the original western, True Grit (the one from 1969 with John Wayne, not the new version). If you’re a good enough detective there are numerous filming sites you can locate in this area (though please be aware, many of these areas are located on private land and you are trespassing if you travel on them without the owner’s permission. Please be respectful of private property!) Click here for some help finding the sites!
We were able to view Mattie Ross’ Ranch, Courthouse Mountain, Chimney Peak, and the meadow where the shootout scene was filmed, without difficulty. The last three can be found off of Route 8 (to reach this travel east from Route 550). You’ll reach The Meadow about ½ mile before the summit of Owl Creek Pass. Courthouse Mountain and Chimney Peak are visible from The Meadow and Sleeping Rock is located at the summit of the pass.
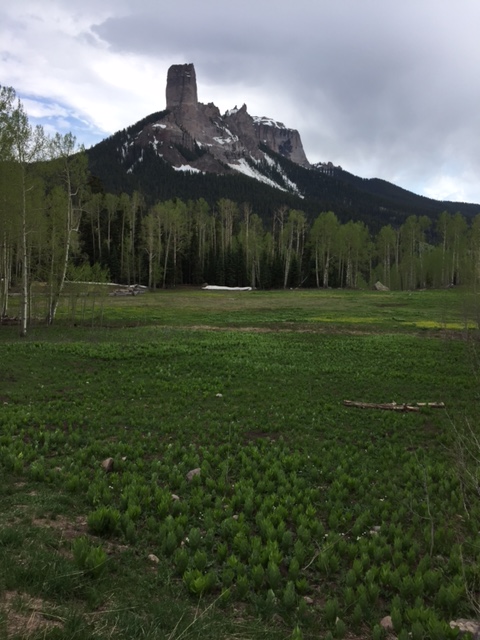
Sleeping Rock (the rock Mattie Ross slept on in the 1969 version of True Grit)Courthouse Mountain and Chimney Peak
Mattie Ross’ Ranch is located off of Last Dollar Road which is found off of Highway 62 (the road from Ridgeway to Telluride).
Mattie Ross’ ranchDeb’s Meadow (where the final shootout scene was filmed)
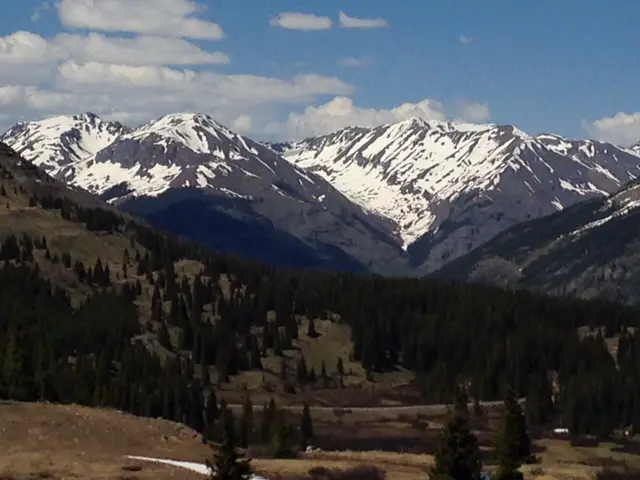
Grand Mesa National Forest:
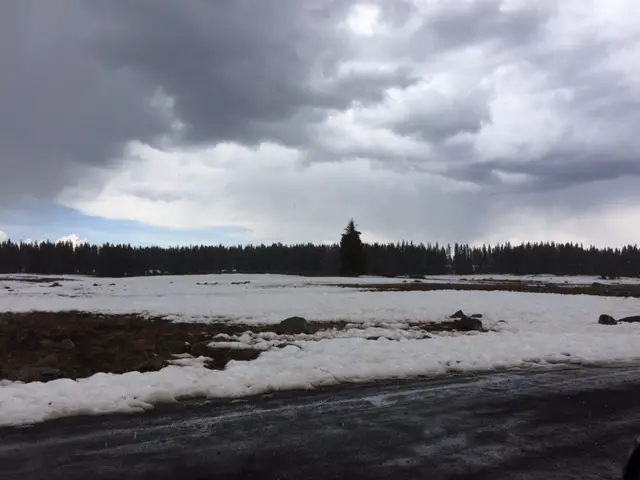
Grand Mesa National Forest is another “must-see” location in the mountains east of Grand Junction. It’s primarily used for cross-country skiing and snowmobiling in the winter months. It’s got some great campground/fishing/hiking opportunities as well, but we were, unfortunately, too early in the season to really take advantage of these options. The hiking trails weren’t yet open as there were still feet of snow drifted on them in some places. Click here for more info on our return trip to Grand Mesa!
During the peak of summer, this would be a prime place to escape the heat though, the day we were there it was near 90 in the closest town on the valley floor and it was in the ’40s, and raining/snowing large glops on us at the summit.
Snow on the summit, this was June 6th ya’ll!
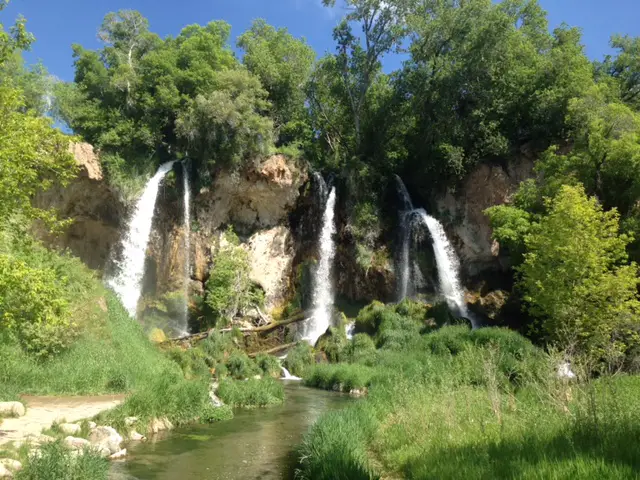
Rifle/Rifle Falls, Colorado:
We spent our final hotel stay of the trip in the small town of Rifle, Colorado. This is an adorable, little town with an awesome state park!
Rifle Falls State Park was absolutely beautiful. It was the only place I’ve ever been where you can traverse walkways that stick out over the TOP of the falls! The caves at the bottom were picturesque as well (and provided a cool respite from the summer heat).
Rifle FallsA different view of the falls
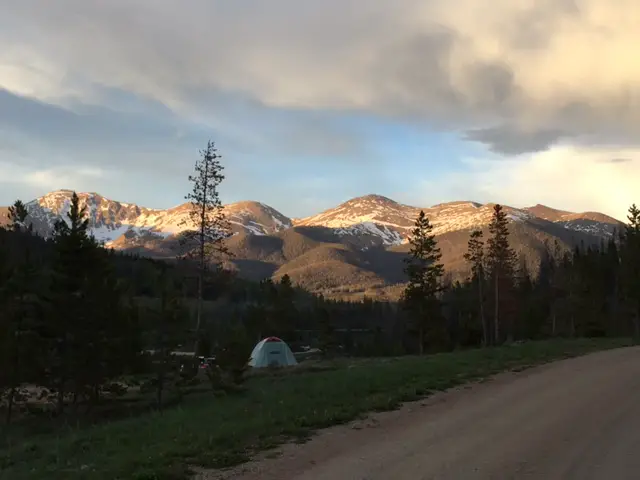
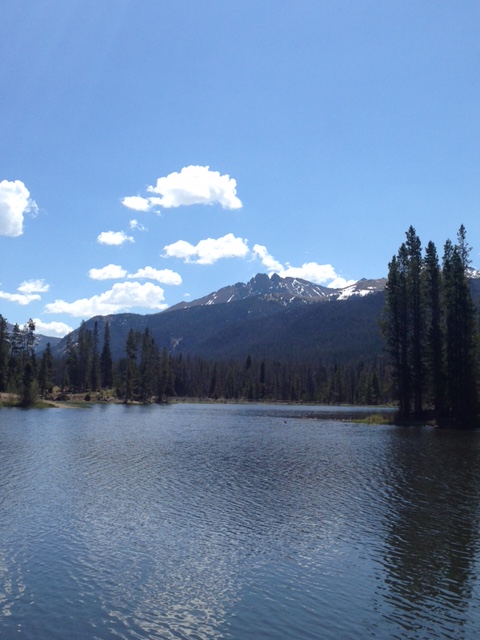
State Forest State Park:
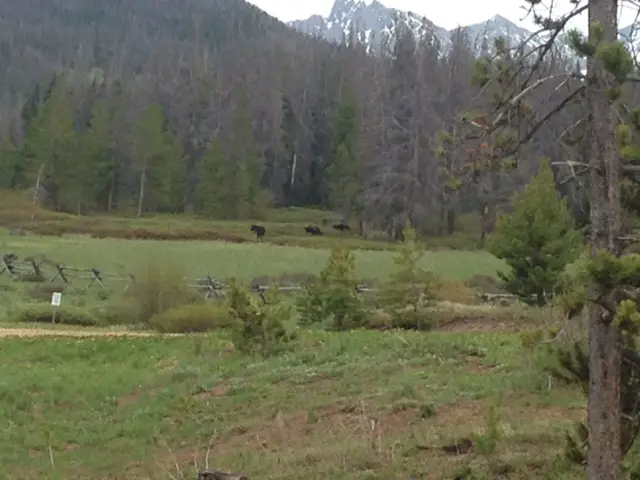
$20/night for a campsite; going several days with no indoor plumbing (or showering); a DISGUSTING pit toilet (seriously, it was an upside-down pail sitting over a stinky hole in the ground); BUT…eating dinner while a cow moose and two calves eat theirs, in a field, a few thousand yards away with the Rockies as a backdrop…PRICELESS!!!
We spent the last three nights of our trip at State Forest State Park which is renowned for its moose sightings (many were re-introduced here back in the 90s.). The park actually claims to be the “Moose Viewing Capital of the World!”
It definitely offered the best moose sightings we had ever experienced…until our Labor Day camping trip in the Big Horns later that year…you can read about that here!
This view reminded us of the Garden Wall at Glacier NP.Alpenglow over the Western Rockies (Rocky Mountain National Park and the Never Summer Mountains are basically due east from here, right over those mountains.)Ranger LakesMoose from the campsite
CLOSE ENCOUNTER of the Mountain Lion Kind!!!
The final night of our trip I had a true close encounter (at least I think I did, it was dark and it was over fast!) It was late and we were the only people still up in the half-full campground. Our campsite was perched on a hill backed by the forest and fronted by a lake.
The first night, we spied a moose family skirting the campground using a gully to get to the lake for their evening drink, so we knew it was a popular thoroughfare for the local wildlife. We were waiting for the fire to burn down and out of the corner of my eye, I spotted movement in the empty campsite across the road (maybe 30 yards away and downhill from our site). At first, I thought it was a deer I had seen meandering around earlier that evening…and then I realized the “deer” had a long tail…
Interesting side note, many stories I’ve heard of people spotting mountain lions start with, “I thought it was a deer till I realized it had a long tail…” 😮
…then I thought it was a dog from one of the neighboring campsites, but I was pretty sure he was in the tent with his family…and the creature I spotted didn’t move like a dog…
Its movements were stealthy, fluid, and sleek; beautiful actually. I couldn’t tear my eyes away. It almost glided across the ground. It reminded me of watching a cat jumping onto a high shelf when you’re sure any minute it will send objects flailing into space but instead it glides gracefully around them.
It was visible for only a few seconds, once it saw me it hightailed it out of there (which is exactly what we WANT wild animals to do!), and I wasn’t able to get Mr. Trekker’s attention quickly enough for him to see it. We looked for tracks the next morning and didn’t find any but the ground was very dry and hard so this wasn’t a surprise. I can’t prove it but…I think I saw my first mountain lion that night (that’s my story and I’m sticking to it! 😉)
Oregon Trail Ruts, Guernsey, Wyoming:
On the last day of our trek, we stopped for lunch in Guernsey, Wyoming at the Oregon Trail Ruts State Historic Site. There we viewed wagon wheel ruts left forever engraved on the landscape by the pioneers traveling the Oregon Trail.
You could almost hear the lowing of oxen, the clanking of household items, and the creaking of the wagons as they slowly made their way across the prairie. You could almost smell the rank odor of animal and human sweat mixed with the constant cling of dust stirred up by the plodding of the animals’ hooves.
It was humbling to think that we traveled almost 3500 miles on our two-week road trip, crisscrossing across eight states and visiting countless places in our air-conditioned, all-wheel-drive car, with a suspension that gently glides across any bumps in our path (on the paved or graded gravel roads we drove on). Whereas these people traveled thousands of miles in a wagon train, a trip that took MONTHS as they slowly crept their way across the bumpy, muddy, rutted, rock-strewn ground, and lived under constant threat of death by exposure, disease, or attack.
When I got sick we drove five minutes to the local Urgent Care, it took maybe an hour to get seen, then we went to the Walgreens across the street for medicine and I was back in the hotel room on the road to recovery 20 minutes later. Back in the days of the wagon trains the same ailment likely would have meant DAYS of misery as the best of potential outcomes.
The Oregon Trail Wheel Ruts
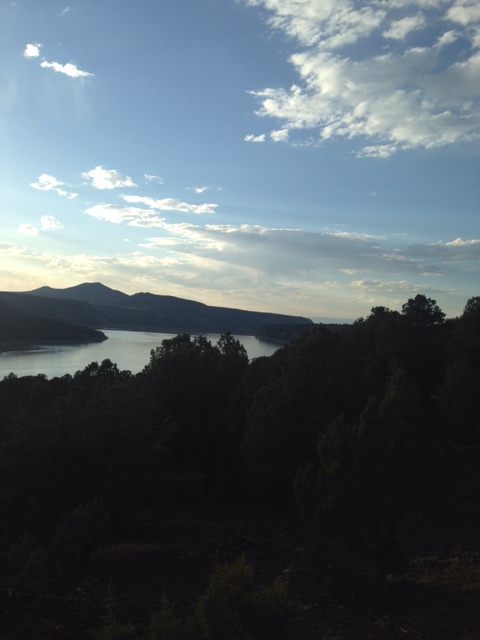
A few final pictures from our jaunt around Colorado. If you haven’t been there, I STRONGLY encourage you to put it on your bucket list. You won’t regret it!
The RockiesRifle Gap ReservoirOdometer reading as we pulled into the driveway (No! We didn’t drive around the block an extra time to get it to 3500, I don’t know what you’re talking about!) 🙂
Have you visited any of these places? Tell me about your adventure in the comments!
Did you enjoy this post? Pin it!
Like what you read here today? Please feel free to leave a comment, like or share this post! Add your email at the bottom of the page, or the sidebar to the right, to be notified when a new post is published. By signing up for the email list, you will also receive a free copy of the Tranquil Trekker’s Top 10 Tips of Trekking Do’s and Don’ts!
You can also follow the blog on social media by clicking the links below!
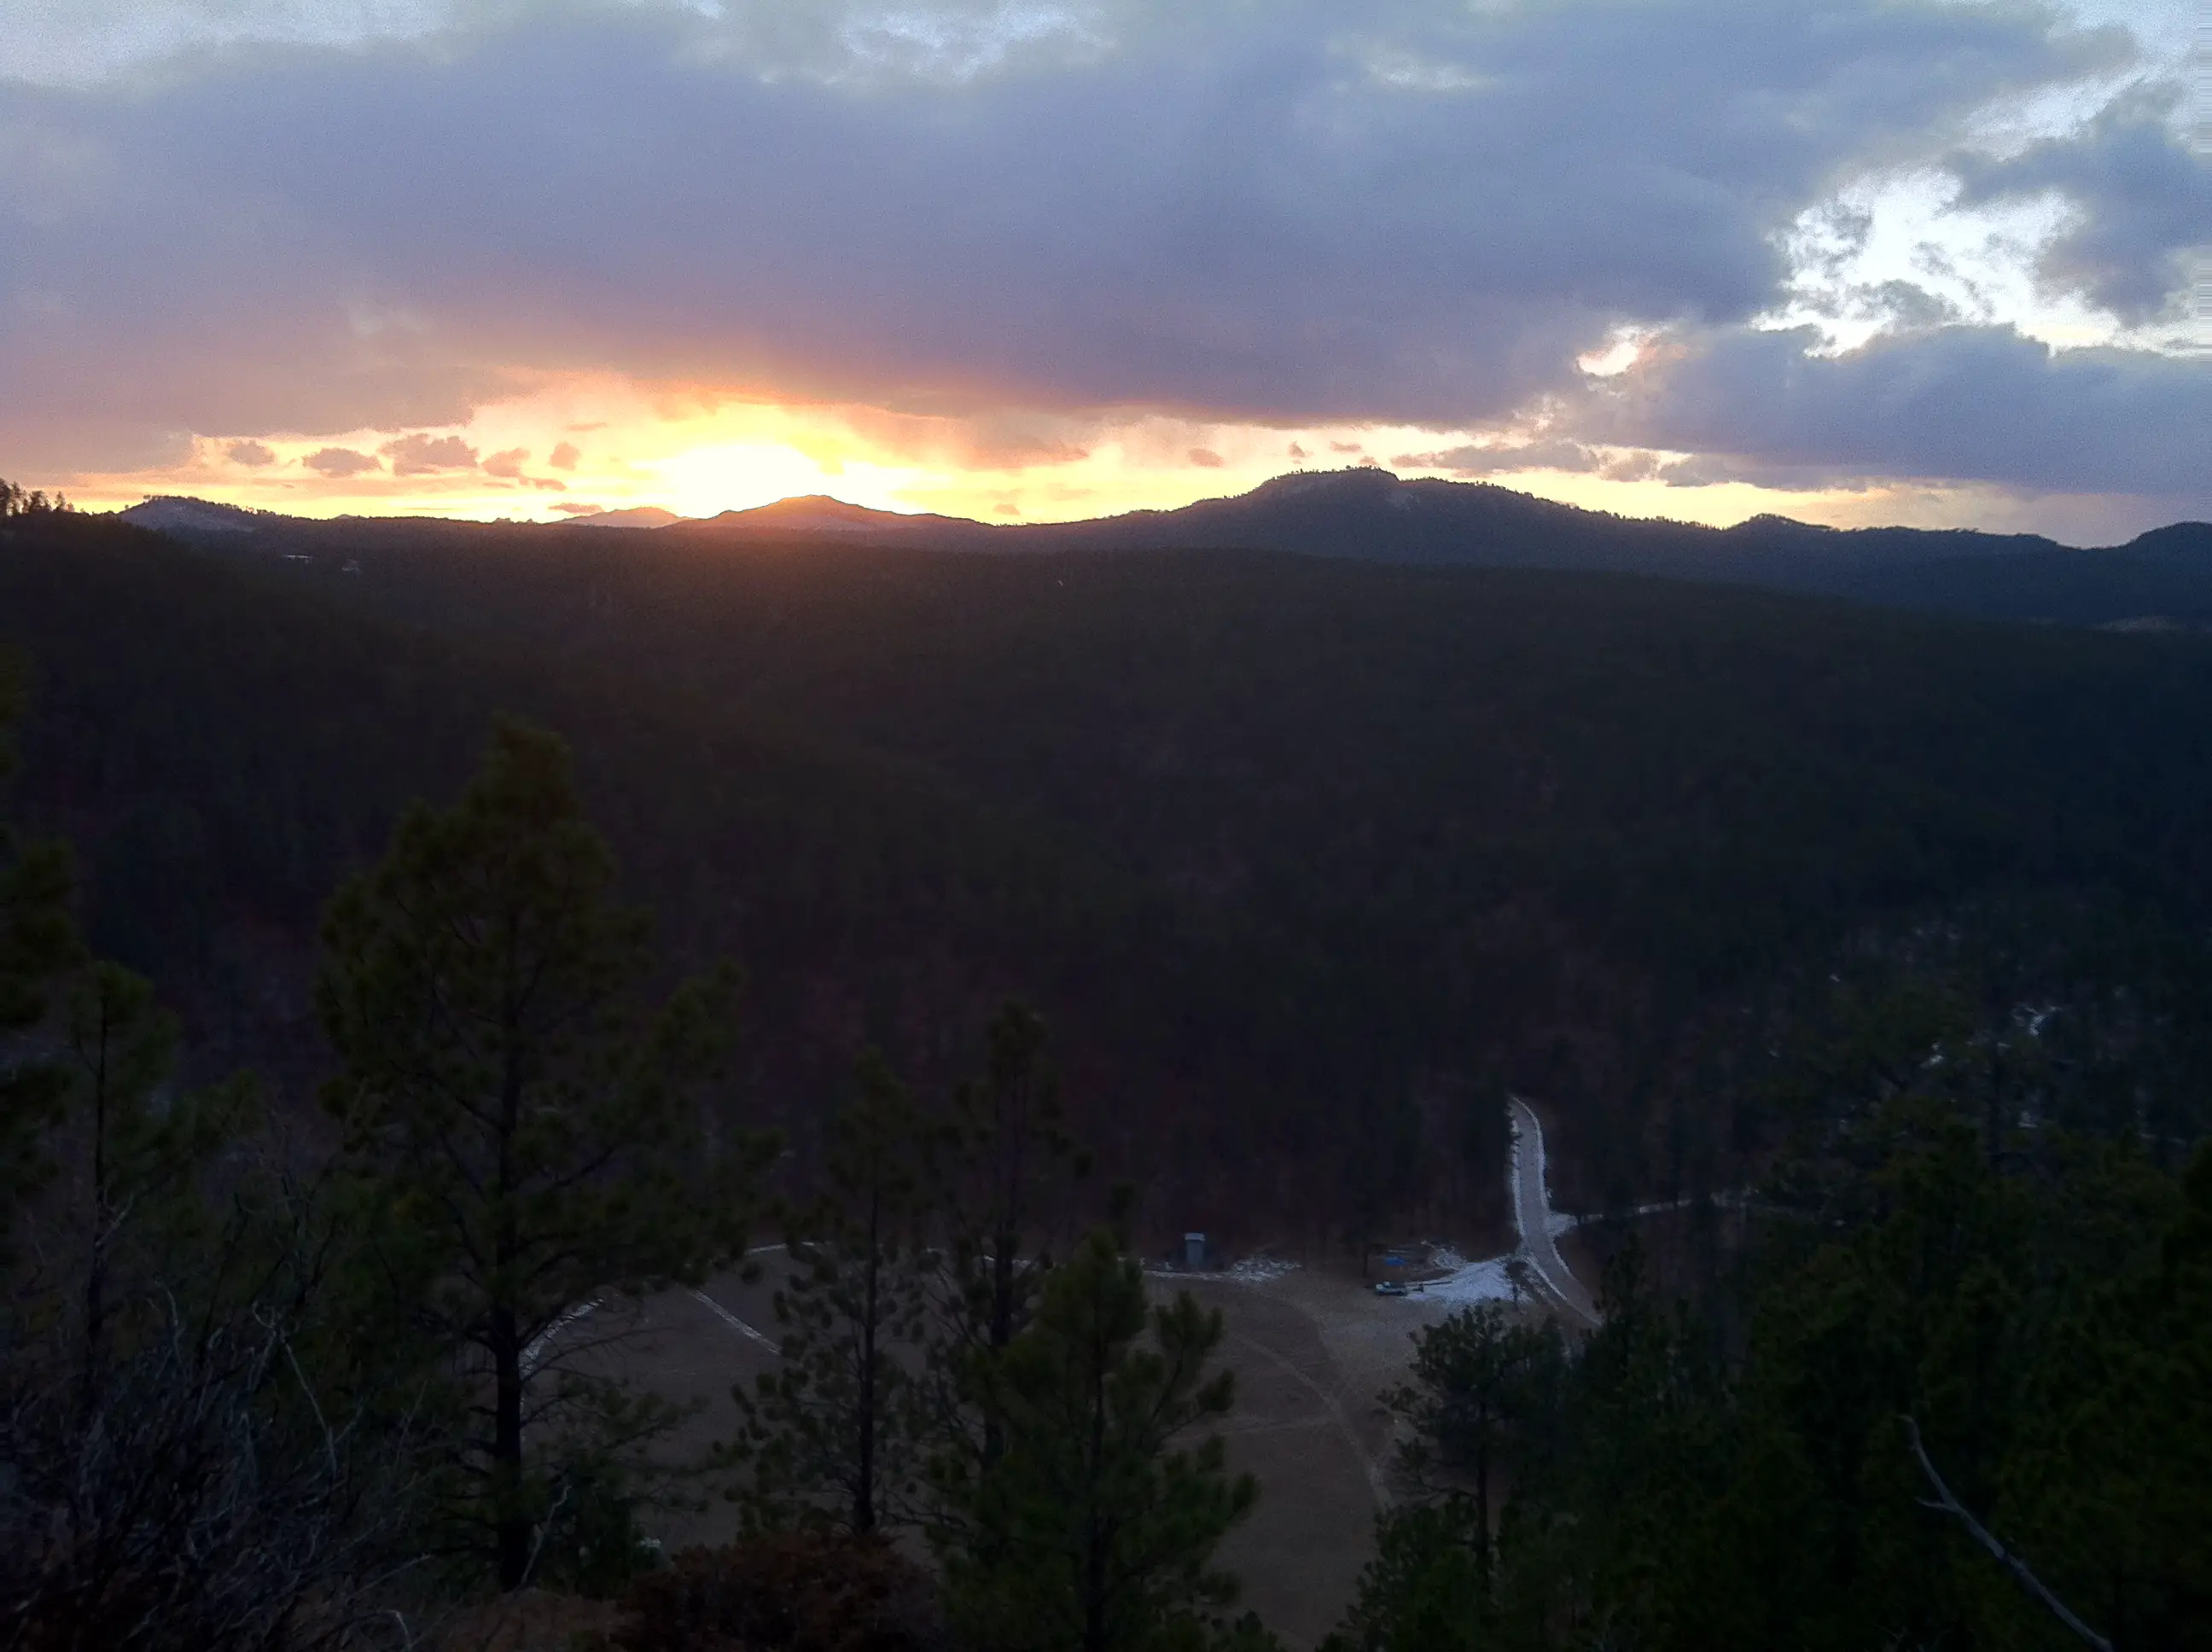
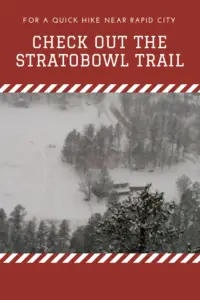
In this post, I review the Stratobowl trail near Rapid City, SD.
The Stratobowl Rim Trail is a simple hike near Rapid City that offers spectacular views of the Black Hills and a local, historical site. The Stratobowl is a great trail for a short hike. It’s only around one mile each way, so it’s amenable to almost any skill level.
Where is the Stratobowl?
The Stratobowl is located off Route 16, about a half-mile south of Old McDonald’s Farm. There is no roadside sign highlighting the trail, but there is an obvious parking area just off of Highway 16. If you’re there during daylight hours, it’s likely you’ll see other vehicles.
Hiking the Stratobowl
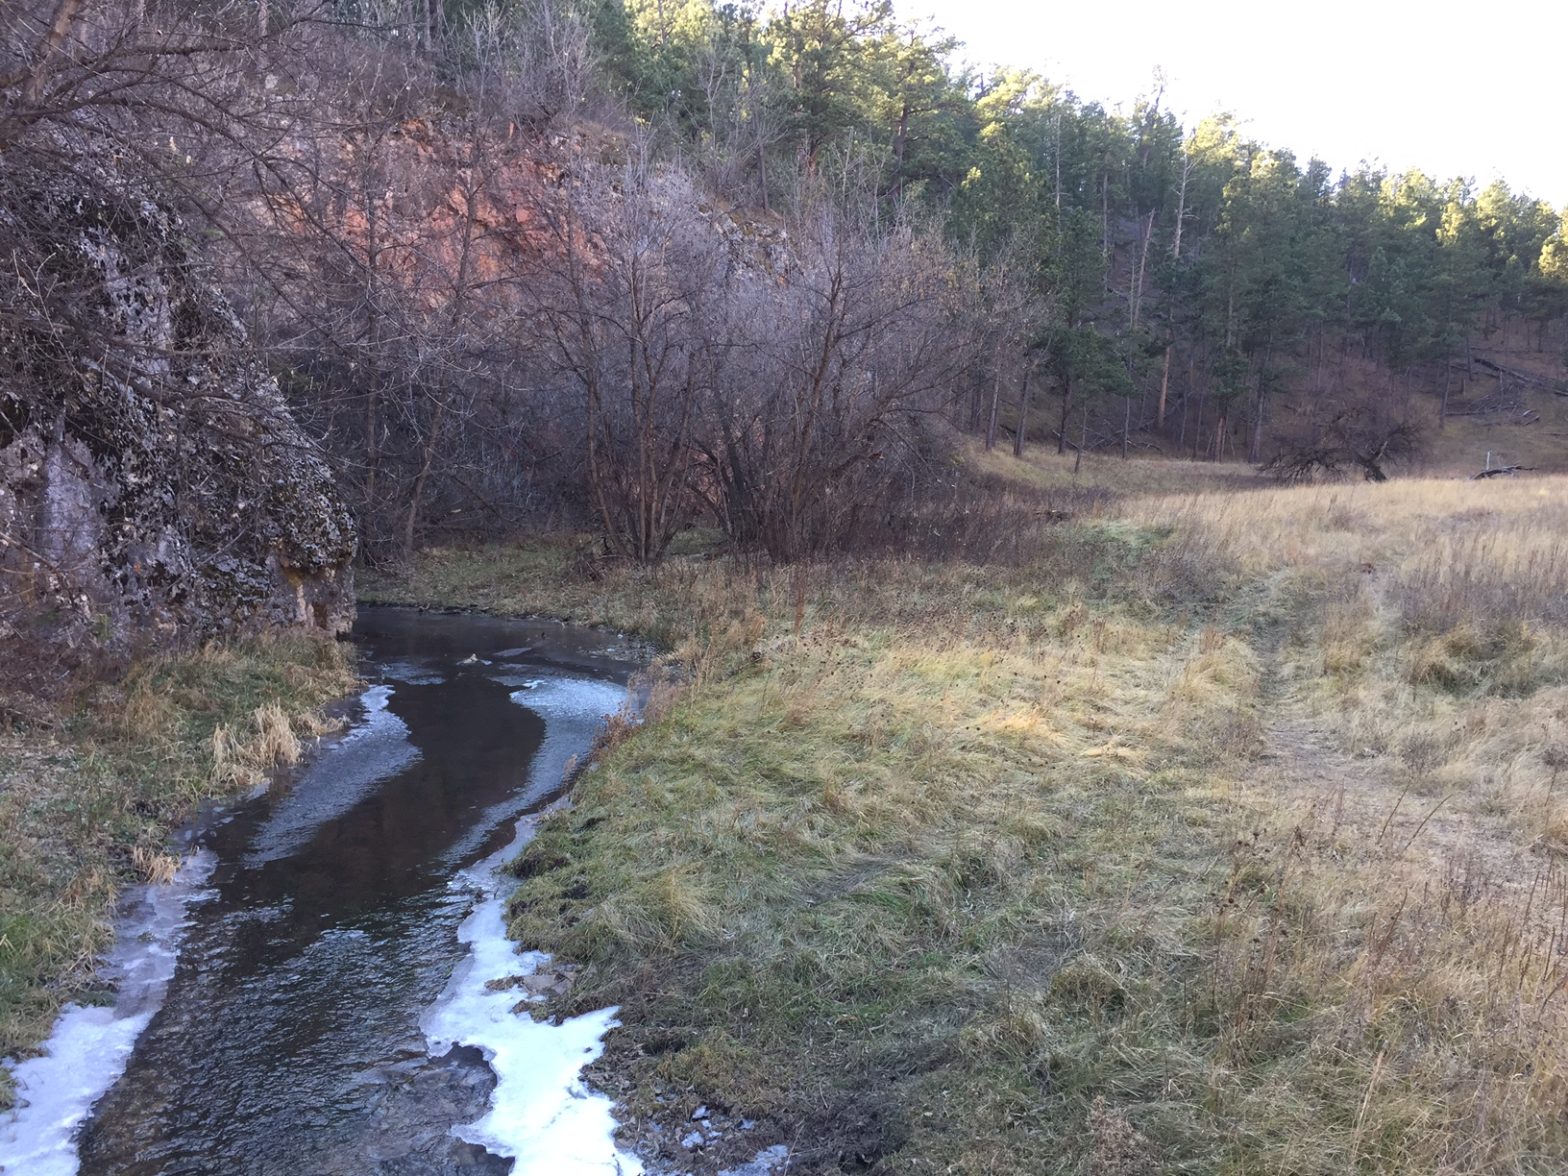
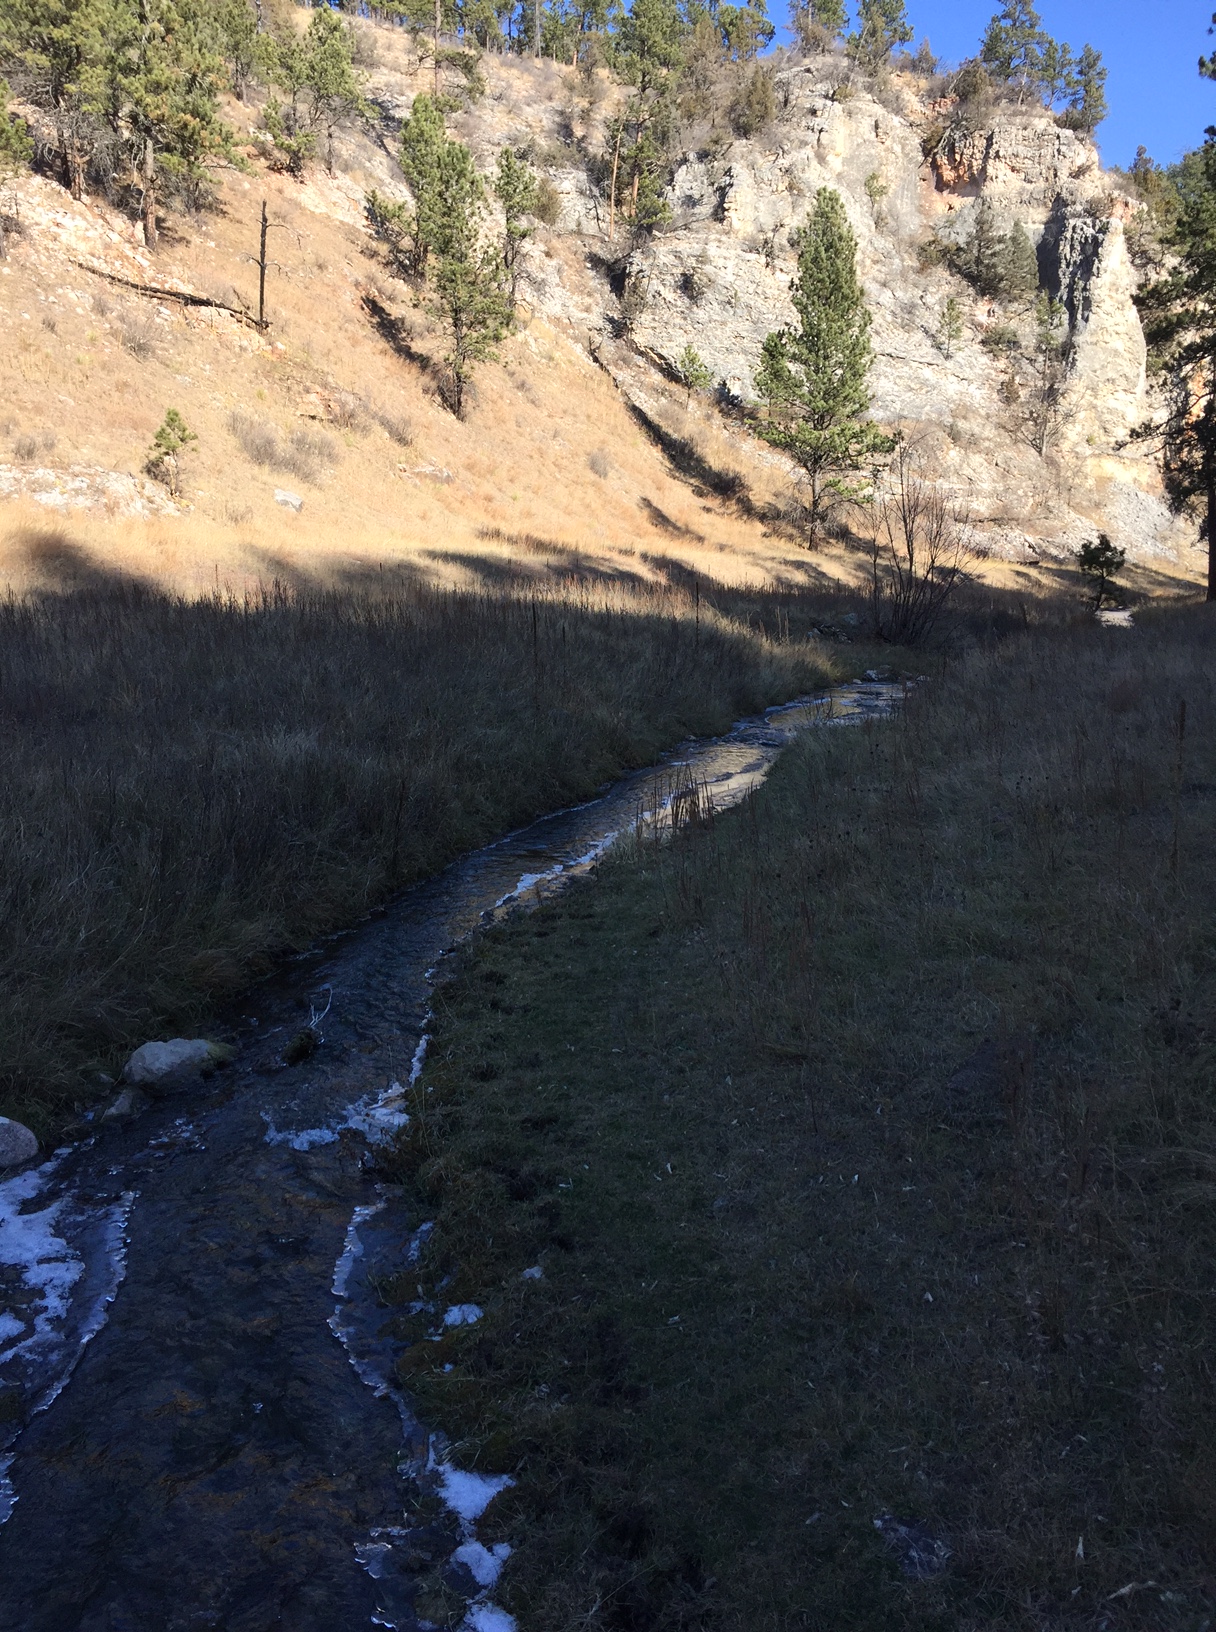
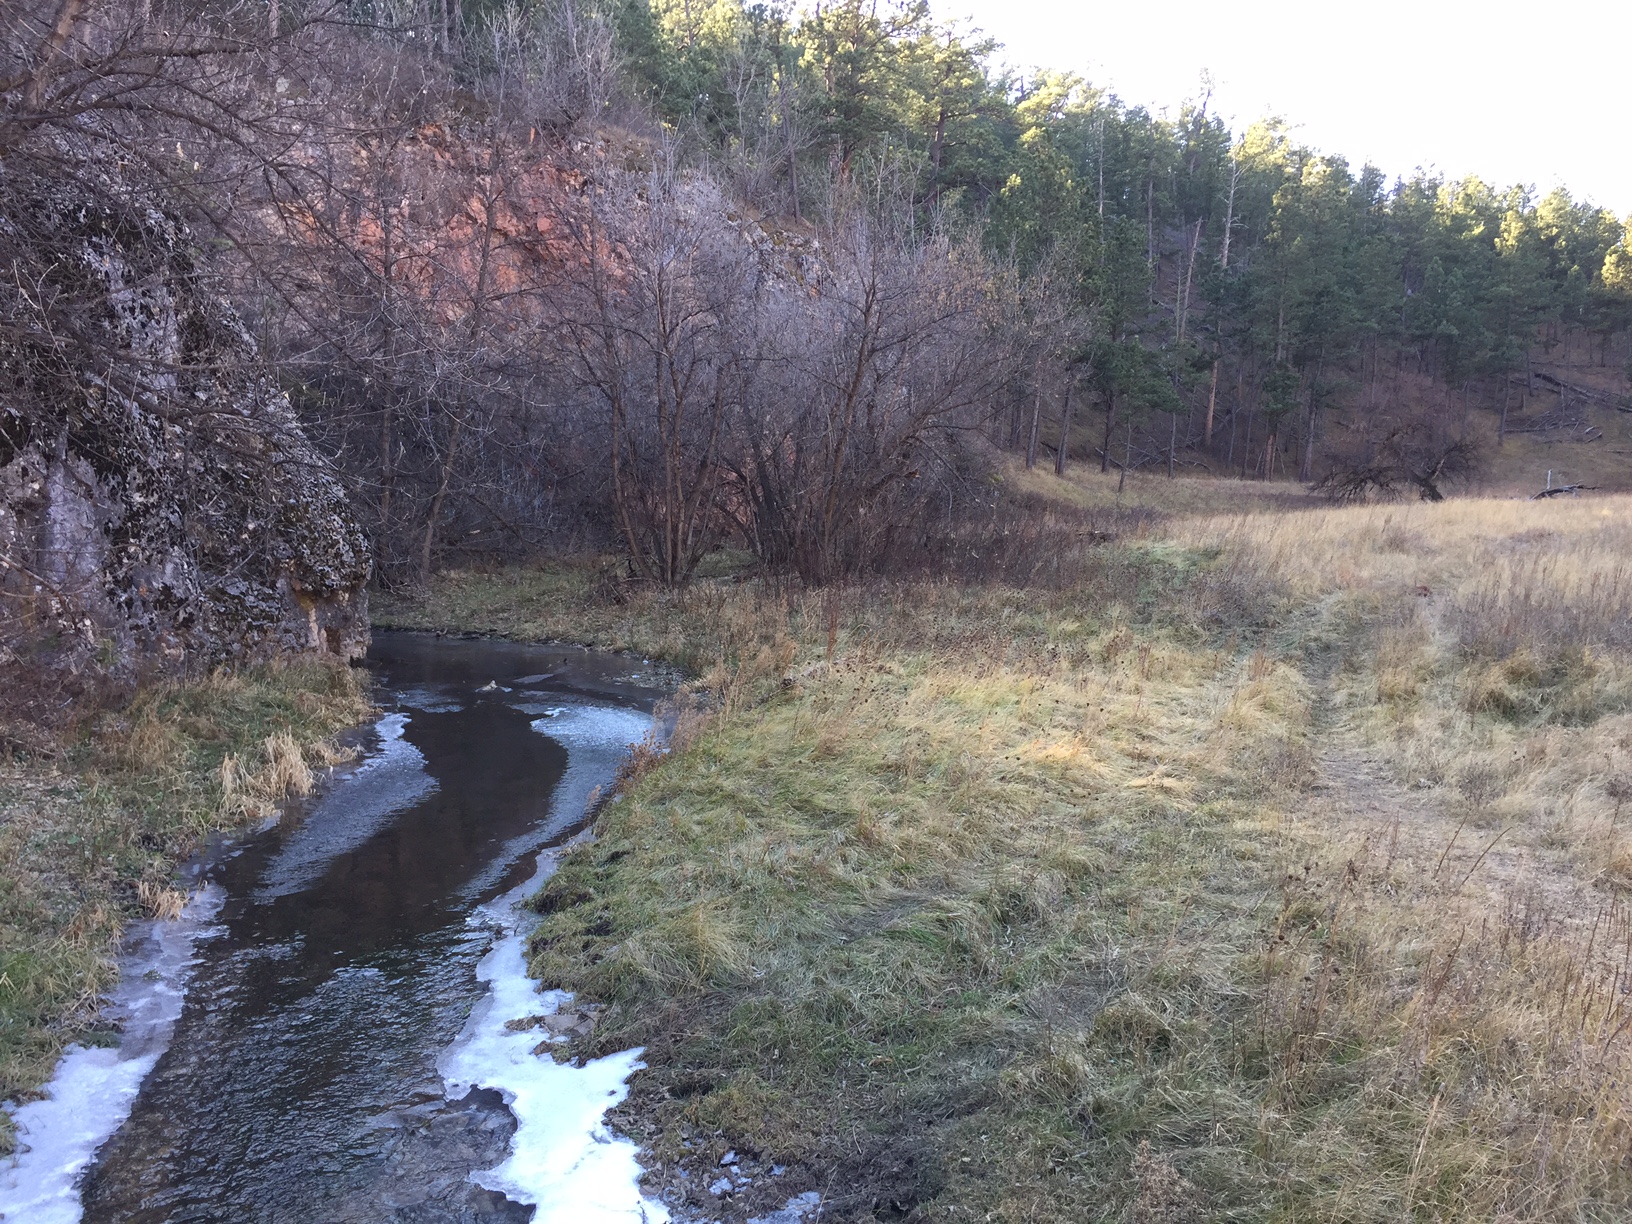
The path is comprised of simple, rolling hills on an old access road that traverses through pines and offers a prime opportunity for spotting deer and wild turkeys. A substantial logging operation was recently completed there (necessitated by pine beetle damage) so chances of viewing wildlife are now even more likely.
At the trail’s terminus, the road opens onto the rim and the yawning chasm that is the actual Stratobowl. From here, a valley formed by Spring Creek spreads out before you with homes dotting the canyon floor. You’ll also often see vultures soaring the thermals…below you!
The Stratobowl is also a prime place to watch the sun setting over the expanse of the Black Hills (and being so close to town it’s convenient for an evening hike). The name stems from the bowl-like shape of the valley created by the surrounding terrain. The north side of the rim can be reached from several other trails/old logging roads off of Sheridan Lake Road to the north (I discuss these options in this post.)
This setting was the site of high-altitude, manned balloon flights that took place in the ’30s (there are several monoliths on-site detailing these); it also currently hosts an annual hot air balloon launch. Be aware, you may hear the haunting sound of howling wolves when hiking. Do not be alarmed though, wolves are not usually found in the Hills and those you hear are safely contained at Bear County, just a few miles away.
Thank you Mr. Trekker for this sunset shot of the StratobowlThe Stratobowl in the snow!
This trail is perfect for an afternoon or after-work hike, or if you’re just looking for an easier place to take the kids or the dog that’s close to home. It’s gorgeous in almost any kind of weather and the trail is family-friendly. This is another great one to add to your list of fun hikes found near Rapid City!
Do you enjoy hiking the Stratobowl? Tell me about it in the comments!
Did you enjoy this post? Pin it!
Like what you read here today? Please feel free to leave a comment, like or share this post! Add your email at the bottom of the page, or the sidebar to the right, to be notified when a new post is published. By signing up for the email list, you will also receive a free copy of the Tranquil Trekker’s Top 10 Tips of Trekking Do’s and Don’ts!
You can also follow the blog on social media by clicking the links below!
In this post, I discuss activities available above-ground at Wind Cave National Park.
**Author’s note: Just a word of warning, as this is a National Park, no dogs are allowed on any trails (exceptions for Service Animals). They are only permitted in the campgrounds and parking lots.**
Wind Cave National Park, located near Hot Springs, South Dakota, is best known for the sites it offers below-ground. However, it also provides plenty of opportunities for hiking above-ground, as well!
Hiking trails at Wind Cave National Park
There are several trails found throughout Wind Cave National Park and countless route combinations and loops can be made depending on how long of a hike you are interested in. These include the Rankin Ridge Trail, and one of our favorites, a loop formed by the Lookout Point Trail.
It includes a short skirt where the Sanctuary/Centennial Trails run together and then continues on to the final portion of the hike which is solely comprised of the Centennial Trail. This is all located in the southern portion of the park.
Where is the trailhead for the Lookout Point Trail?
The trailhead we use for this hike (the Norbeck Trailhead) also marks the southern terminus of the 111-mile Centennial Trail. This route traverses the spine of the Black Hills.
The Lookout Point trailhead can be found off Route 87 in Wind Cave National Park. There are numerous ways to reach it but we usually take SD 79 south out of Rapid City, to US 18 west heading to Hot Springs. We then take US 385 north out of Hot Springs until it connects with Route 87 north.
To return to Rapid City you can retrace your steps, or if you’re interested in a longer, more scenic route, you can choose from a variety of options north through Wind Cave, Custer State Park, and the Black Hills. Have I mentioned a map is helpful when adventuring in the Hills? 😉
What You Will See on the Lookout Point Trail
The Lookout Point loop can be completed in either direction though we prefer starting on the Lookout Point Trail (the climbs going this direction are less steep). The hike starts off along a small creek and then almost immediately takes you up a steep hill (fortunately the climb is of relatively short duration and once you reach the ridge above, the terrain is fairly flat for some time).
The correct route through this area isn’t always clear due to NUMEROUS game trails left by the many four-legged critters traveling to the creek for water, so be very watchful so as not to lose the path. The signage on the trail is decent but (even with previous experience) we’ve ended up following well-worn buffalo paths instead of the actual trail. Luckily, we were able to recognize our error early on and quickly correct it.
Once you jump on the Sanctuary Trail portion of the loop (about halfway through), the ecosystem makes a clear change as you descend from the open grassland of the prairie into a forested canyon. The descent is rather steep so take care not to slip on loose scree (or if ice is present).
See if you can spot an unusual item in the Black Hills, cedar trees! They appear to favor this protected, damper area.
This portion of the trail is also characterized by the rock cliffs towering far overhead.
The creek through the canyon
The bottom of the canyon consists of a long, narrow meadow. When you reach the floor of the canyon, be sure to turn left onto the Centennial Trail to keep to the loop (a right turn will put you on the Highland Creek Trail).
There are several prime lunch spots along the creek and watch for remnants of the ungulates (deer and elk) whose bones are scattered throughout this area (whether they met their demise by flood or they were drug here by fanged animals, we will never know).
Follow the canyon and its babbling creek for about two miles until you emerge dramatically into an open meadow. A portion of the Centennial Trail will soon break off on an uphill branch to the right, while you will continue straight along the creek and eventually the trail will curve to the left. It then ascends one final rise which brings you back to the trailhead.
The creek through the meadow (notice how it is just beginning to freeze)
Wildlife on the Lookout Point Trail
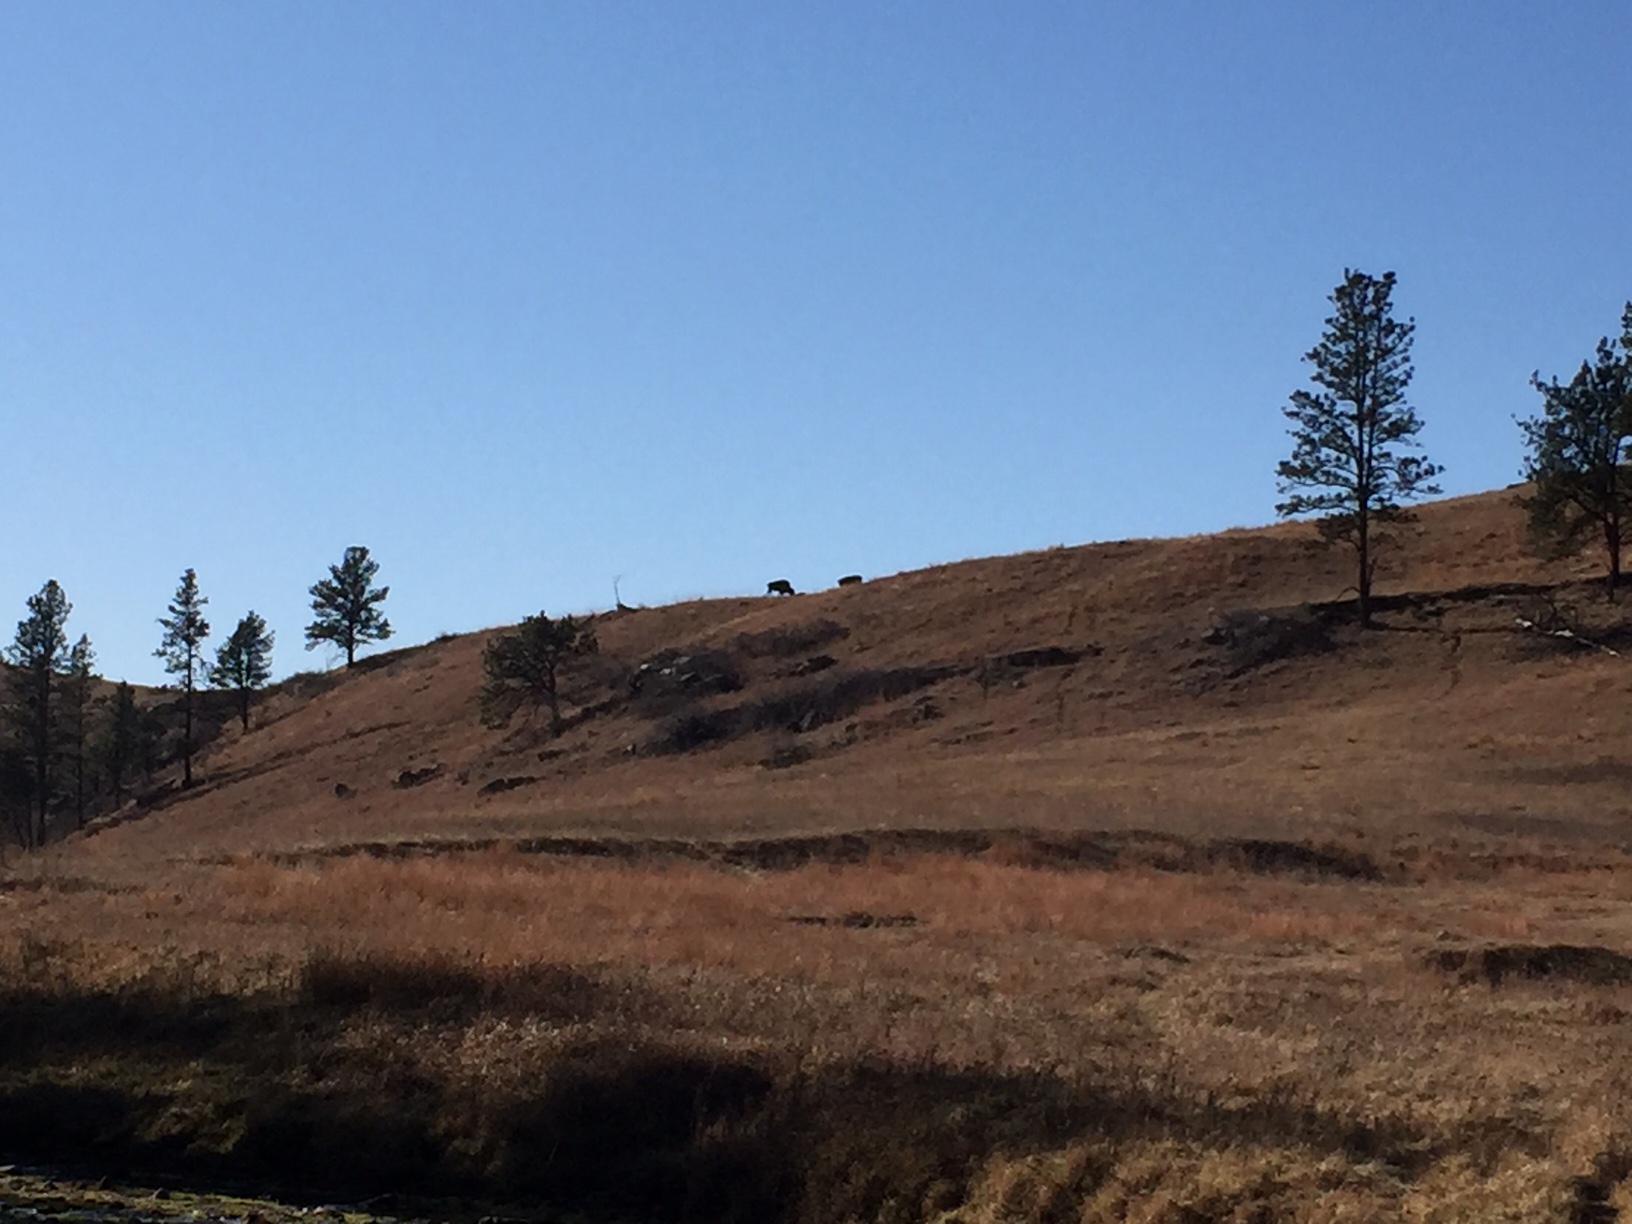
Be sure to keep VERY ALERT for buffalo in this area. They are numerous and we see them every time we hike in this park. It is rare that we don’t have to alter our route to skirt a buffalo (or 30). They seem to favor the same trails the humans use so be prepared to go off-trail and give them a wide berth.
Fortunately, this area is highly visible, open prairie so even if you have to go well off-trail you’re usually able to keep at least one trail marker in sight. It’s always advisable to bring a topographical trail map and compass when hiking these areas (or anywhere, really) to assist you in maintaining your direction if you need to go off-trail.
Always remember, if the animal is reacting to you (acting agitated in any way, huffing, stomping its feet, etc.) you are TOO CLOSE and should move away (calmly and slowly) as soon as possible. As long as the animal’s space is respected there are rarely any altercations but it should always be remembered that these are wild (not to mention LARGE) animals and they may react aggressively if they feel threatened (this is especially true in the spring when calves are present).
Buffalo on the ridge, near the end of the hike
On this day’s hike the buffalo we saw didn’t even bother to get up and stop chewing their cud as they watched us wander by. We have had buffalo turn to follow our every step until we’re out of sight when calves were present (and we were intentionally skirting them at the time). We’re also often scolded by prairie dogs for “invading” their area when altering our course away from the buffalo.
This brings up another safety point, give the prairie dogs space too. According to the Forest Service, their fleas carry plague (yes, as in the Black Plague) which can be passed to you if you get too close and are bitten by said flea. Also, the animals may bite if they feel threatened, though they aren’t usually aggressive. In addition, rattlesnakes and black widow spiders favor abandoned prairie dog holes (not to mention these holes offer a prime opportunity to twist an ankle if you aren’t careful) so it’s best to treat these “prairie dog towns” with respect, as well.
Be sure to keep a sharp eye out for coyote, elk, and deer in this area as this is prime viewing territory for that type of wildlife. Be careful to also watch trail signs at junctions in these locales as there are several intersections and it is easy to get on the wrong trail.
To Conclude
This entire loop can be completed in about three hours (dependent on your skill level, speed, and how many sightseeing breaks you choose to take). The trail is relatively easy with only short, moderate-difficulty climbs and is around five miles in distance for the entire loop. This area is also lower in altitude than many areas in the Hills and may be easier for the “Lowlanders” to handle. 😉 In the summer, be prepared for unrelenting heat and little shade on the prairie section (though the ever-present prairie wind will offer some respite).
So, when visiting Wind Cave, don’t let the amazing sights below ground deter you from enjoying the numerous opportunities available above ground as well!
Have you hiked in Wind Cave? Tell me about your experience in the comments!
Did you enjoy this post? Pin it!
Like what you read here today? Please feel free to leave a comment, like or share this post! Add your email at the bottom of the page, or the sidebar to the right, to be notified when a new post is published. By signing up for the email list, you will also receive a free copy of the Tranquil Trekker’s Top 10 Tips of Trekking Do’s and Don’ts!
You can also follow the blog on social media by clicking the links below!
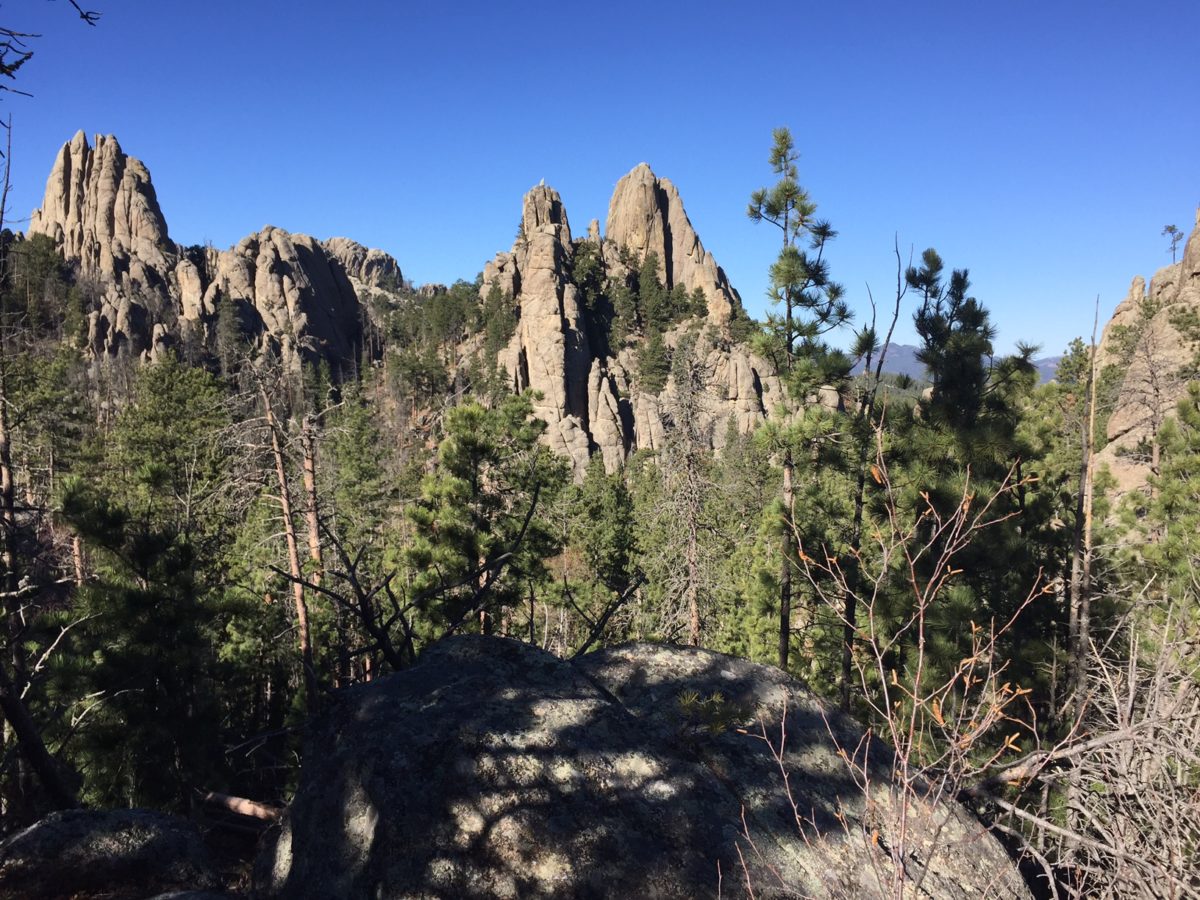
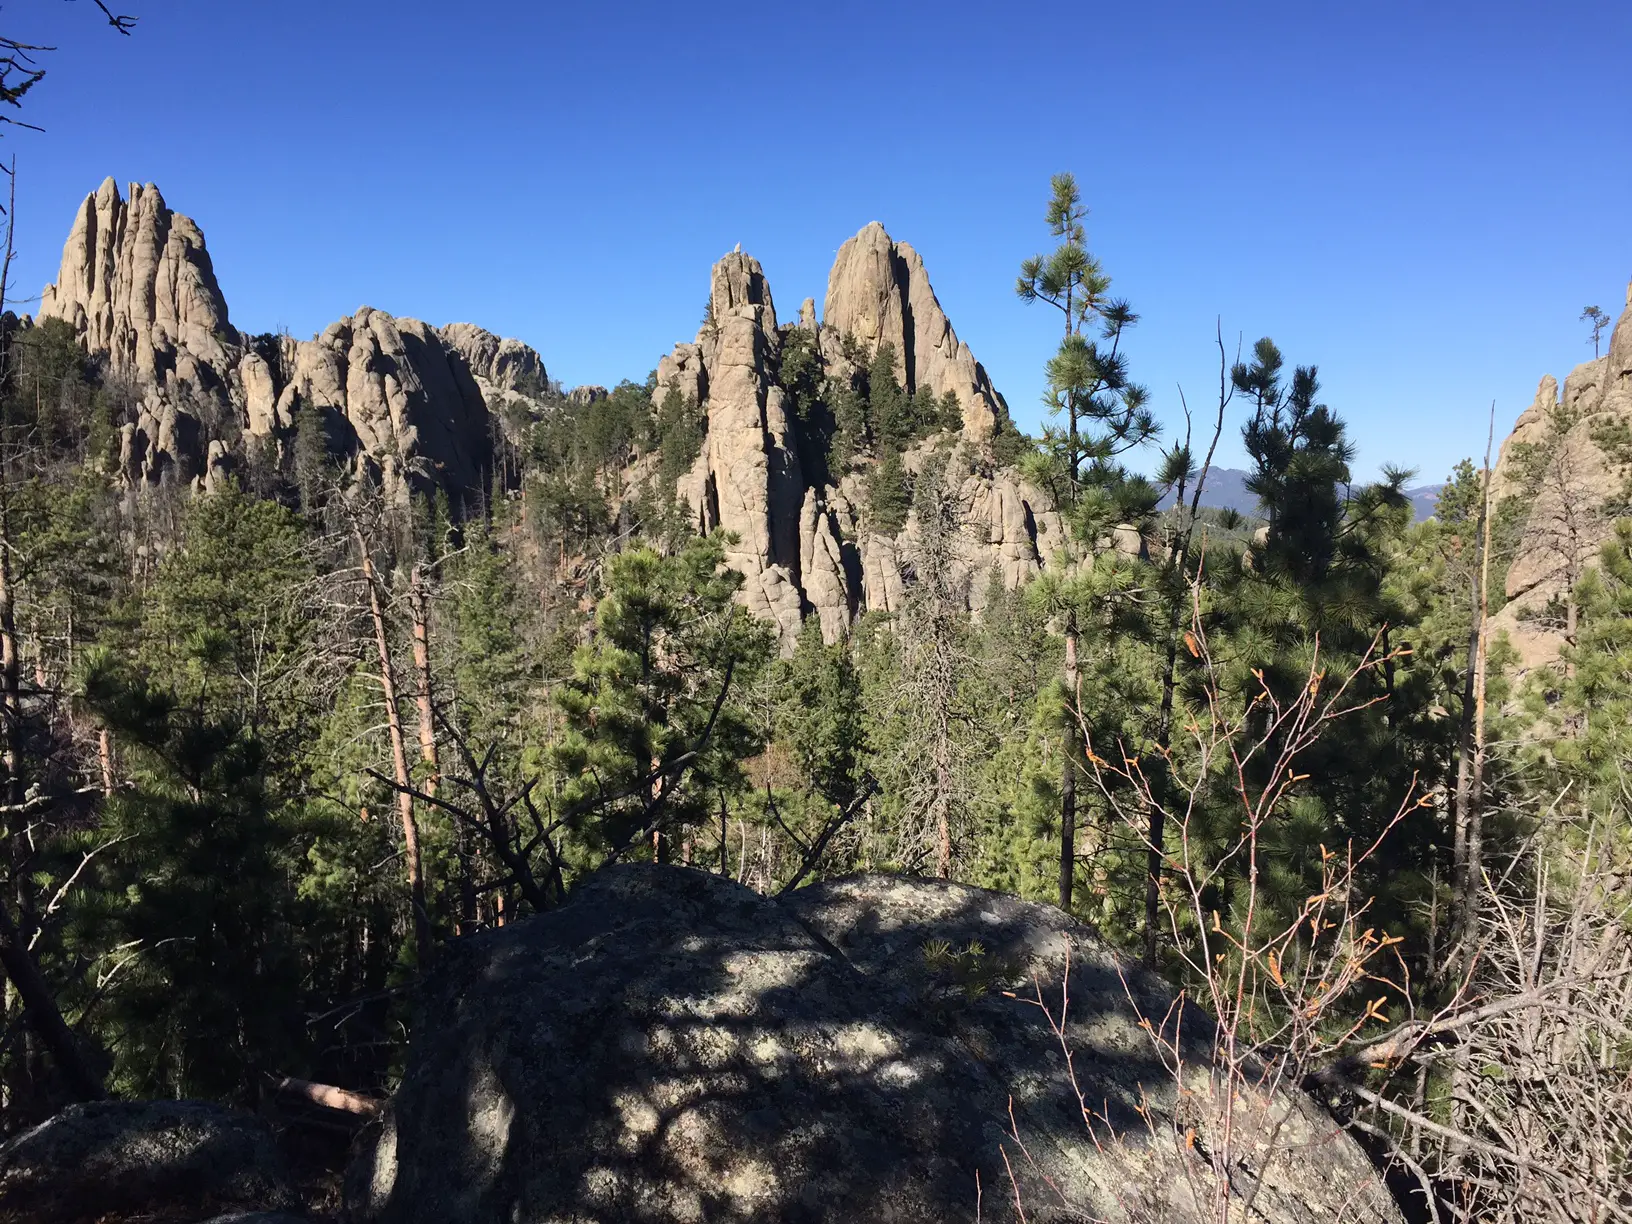
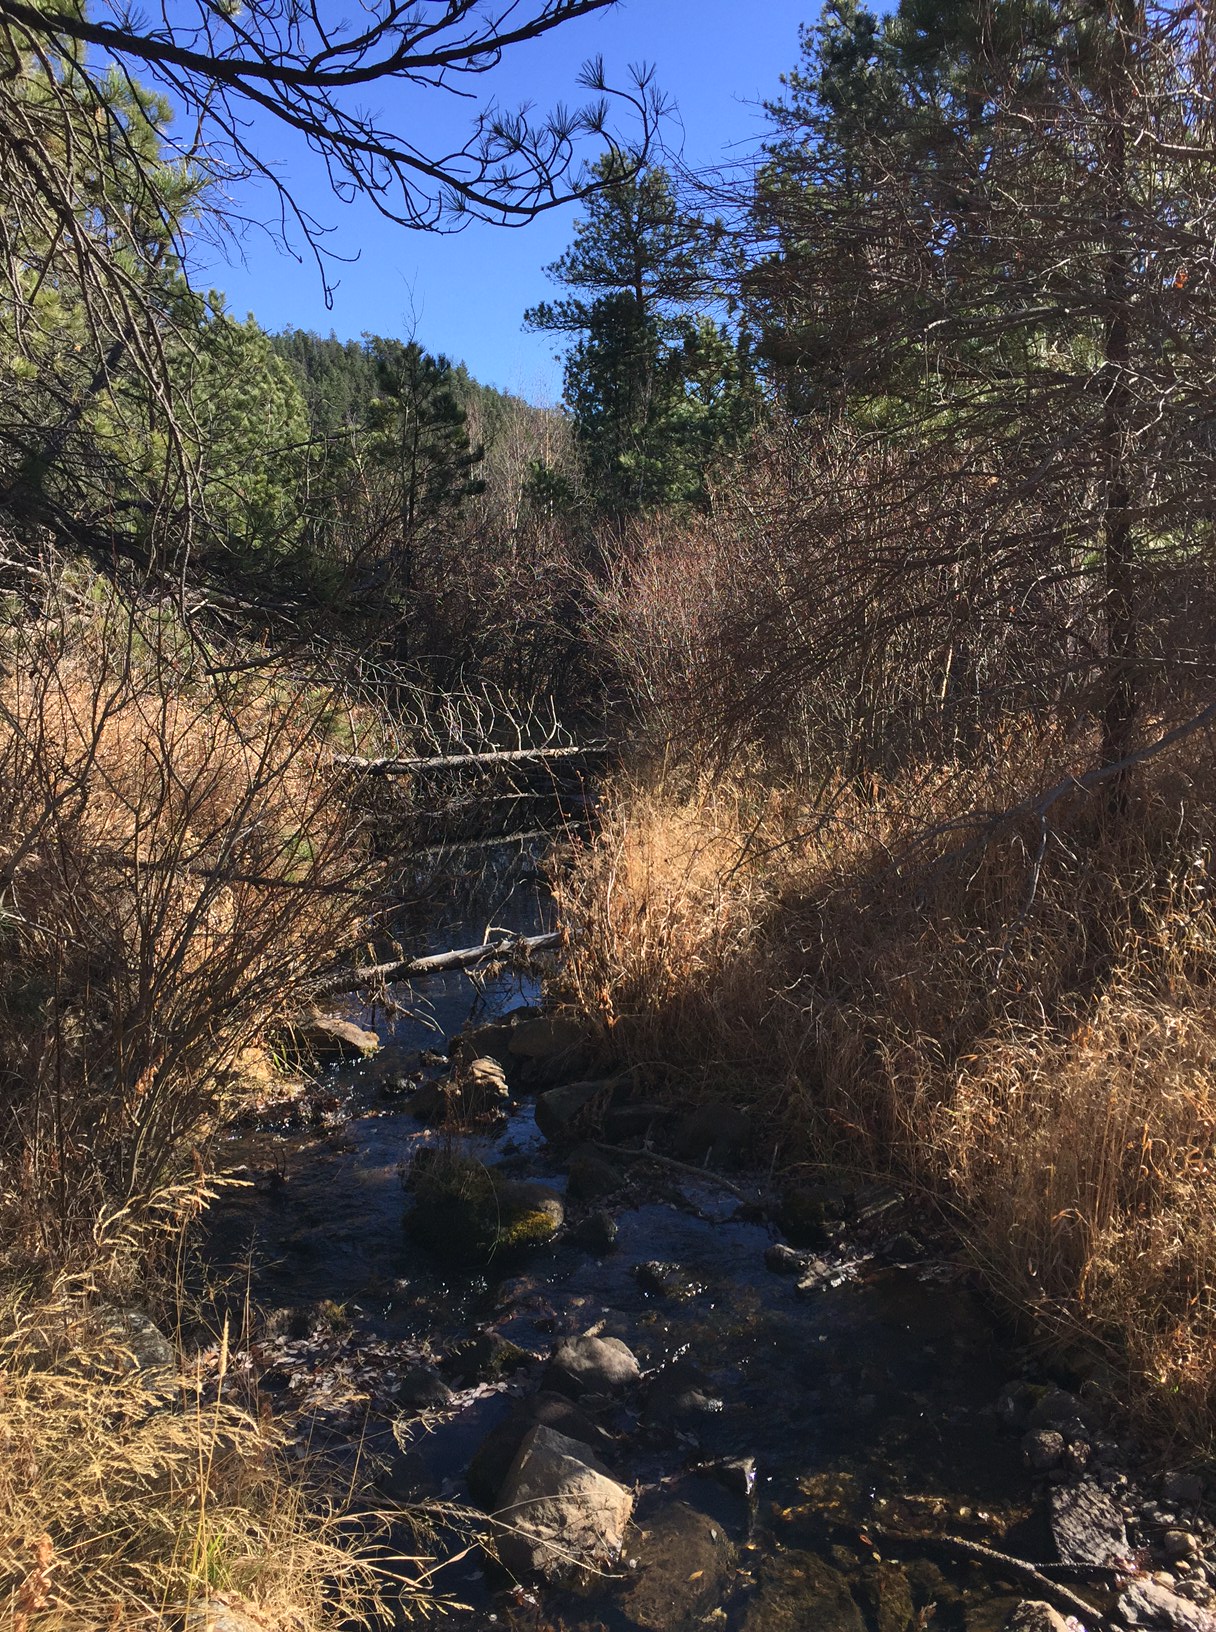
In this post, I review some hiking trails found in the Black Elk Wilderness, in the Black Hills of South Dakota.
The Black Elk Wilderness covers a portion of the central Black Hills, in the Mount Rushmore/Horsethief Lake portion of the Harney range (now the Black Elk range) of South Dakota. There are some great hiking trails that traverse this area!
Hike the Horsethief Lake Trail to Grizzly Bear Creek Trail in the Black Hills
One great option is to begin at the Horsethief Lake Trail. The trailhead can be found at the Horsethief Lake Fishing/Rec area which is located off of Hwy 244, west of Mt. Rushmore.
Note: this is one turnoff east of the drive for the Horsethief Lake Campground.
There is a larger parking area right at the lake. The trailhead is located at a small parking area just to the east of here–there is a sign.
We took the Horsethief Lake Trail (Trail #14) to the Grizzly Bear Creek Trail (Trail #7) which traverses a lovely canyon area and parallels Grizzly Bear Creek for a time.
This portion of the Black Hills is particularly vulnerable to storm damage as it was decimated by the Pine Beetle plague in recent years. Due to this, there are several hazards to watch out for in this area, including blow-down sections of trees and falling limbs/trees if windy conditions are occurring.
What you’ll see hiking through the Black Elk Wilderness
The hike was lovely. Much of it traverses canyons, surrounded on all sides by towers of granite. There are several beautiful, lookout points with views of the surrounding Hills and the prairie stretching far to the east. The trail is in a largely wooded area so it would be fairly shaded in the warmer months, and as you climb there is usually at least a moderate, cooling breeze (that can be downright chilling in the cooler months).
Portions of this trail are open to horses as well so be watchful for the equines (and be careful not to step in what they leave behind).
The portion of the trail we completed was of moderate difficulty, was well-developed, and was fairly wide. There weren’t many rocks/large steps to negotiate and while there were few trail markers, they weren’t needed as the path was evident.
It should be noted that the lower part of the Horsethief Trail is frequently wet and muddy so waterproof shoes/boots are suggested. In the winter/early spring, thanks to snow-melt and the nearby creek it is often extremely icy and slick. This portion of the trail is located in a canyon under a canopy of trees so it doesn’t get much sunlight to melt the ice. We have seen several inches of thick, hazardous ice on this trail in the early spring that required our Yaktrax to navigate safely.
Other trail loops in the Black Elk Wilderness
If you’re up to the challenge, a loop can be made of this trail using the Horsethief Lake Trail to the Grizzly Bear Creek Trail to the Centennial Trail (Trail # 89). This will then eventually take you back to the Horsethief Lake trail almost at the Trailhead (the loop can be completed in either direction). This entire loop would be around 10 – 12 miles. While this is within our ability level, we weren’t sure about the steepness/difficulty of the remainder of the trail, and daylight was growing short so we chose to stop at about the halfway point, have some lunch along the creekside, and return the way we had come.
Numerous trails connect throughout the Harney (Black Elk) range. Depending on your skill level and how long you are willing to commit to being out in the wild you can hike any combination of these, ranging from a simple hike of a few hours to a backpacking trek of several days.
For those non-locals who may be wondering why I keep referring to this area as the Harney (Black Elk) range, I’ll explain. Harney Peak is the highest mountain in the Black Hills (and the tallest east of the Rockies). It stands out among the surrounding peaks of the Harney Range. The Black Elk Wilderness area comprises much of this range.
Black Elk was a Lakota, Holy Man who lived around the turn of the century, the Wilderness area is named after him.* A few years ago, it was decided that Harney Peak would be renamed Black Elk Peak in honor of this great man and as a tribute to the local, Lakota culture. As it has been such a short duration of time since the change, many of the books/maps regarding this local area (and the signs currently posted) will still carry the former name of the mountain/range.
*If you’re a history buff or just interested in American Indian culture, I highly recommend the book Black Elk Speaks by John Neihardt. It’s a biography of the Holy Man’s life based on interviews Neihardt completed with him in his final years. It is a very interesting, fairly objective account of a man growing up in a changing world. It discusses Black Elk’s nomadic life before General Custer and his soldiers arrived and the way this life changed after gold–or as Black Elk called it, “the yellow metal that makes white men crazy”–was found in the Black Hills.
Below are two pics that Mr. Trekker took of our hike:
The granite spires surrounding the canyon we were hiking inGrizzly Creek
Save/span</
For more information on other trails available in the Black Elk Wilderness, click here.
Have you hiked this portion of the Black Elk Wilderness? Tell me what you thought of the beauty here in the comments!
Did you enjoy this post? Pin it!
Like what you read here today? Please feel free to leave a comment, like or share this post! Add your email at the bottom of the page, or the sidebar to the right, to be notified when a new post is published. By signing up for the email list, you will also receive a free copy of the Tranquil Trekker’s Top 10 Tips of Trekking Do’s and Don’ts!
You can also follow the blog on social media by clicking the links below!
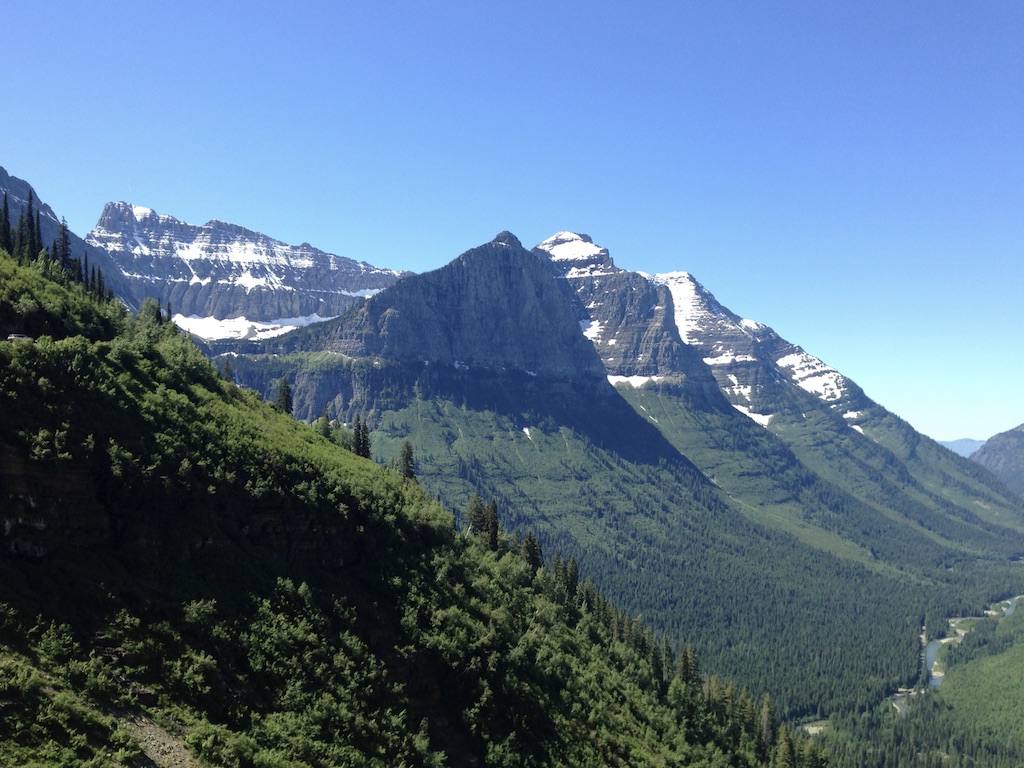
In this post, I review the early portion of the Swiftcurrent Trail (before the Pass) at Glacier National Park.
Author’s Note: Since we visited Glacier in 2016, the Park Service has implemented a complex, ticket system for visiting the park in the summer. To be honest, I can’t make much sense of it as it involves multiple tickets being required to enjoy various activities around the park. For more information on this system, visit the park website and/or contact the park office.
Also, just a word of warning, as this is a National Park, no dogs are allowed on any trails within the park (exceptions for Service Animals). They are only permitted in the campgrounds and parking lots.**
Our trip to Glacier National Park was an incredible experience and we barely scratched the surface of the adventures available. We’re already making a list of the new things we want to try on our next visit (that’s the problem when we go on vacation, we don’t cross places off our list, we just find more stuff we want to do!) I’d encourage everyone to make it a priority to visit the park if you’ve never been there. Its beauty is awe-inspiring, and no one knows how greatly it may be changed in the next few decades.
The last few days of our trip we hiked the early portion of the Swiftcurrent Trail (before the Pass) and then headed home via the Beartooth and Chief Joseph Highways. It’s always fun to include a little adventure on your way home. It helps to make the return trip something to look forward to, as well!
Swiftcurrent Trail at Glacier National Park
The Swiftcurrent Trailhead is found off the parking lot for the Swiftcurrent Lodge near Many Glacier, on the east side of the park, north of St. Mary’s.
It’s an interesting trail and it varies in difficulty depending on how you choose to navigate it. It traverses as far as the Granite Park Chalet, which is a seven-mile hike to the top of Swiftcurrent Pass. There it meets up with the Highline Trail coming from Logan Pass to the south, and The Loop trail coming from Going to the Sun Road to the east.
This is a beautiful trail that starts as a relatively flat, easy path. It then progresses into a strenuous hike on a narrow trail with sweeping dropoffs, if you choose to go that far. I wasn’t feeling well that day so we chose not to attempt the entire route this time, choosing only to go as far as Red Rock Falls.
The section of the trail we hiked was well-maintained, smooth, and not too overgrown; it’s also shaded in many parts, depending on the time of day. This was actually my favorite trail of all the ones we did throughout the week, even though it was the least challenging. Similar to other trails at this park, always be watchful for bears (can you guess if we saw any?)
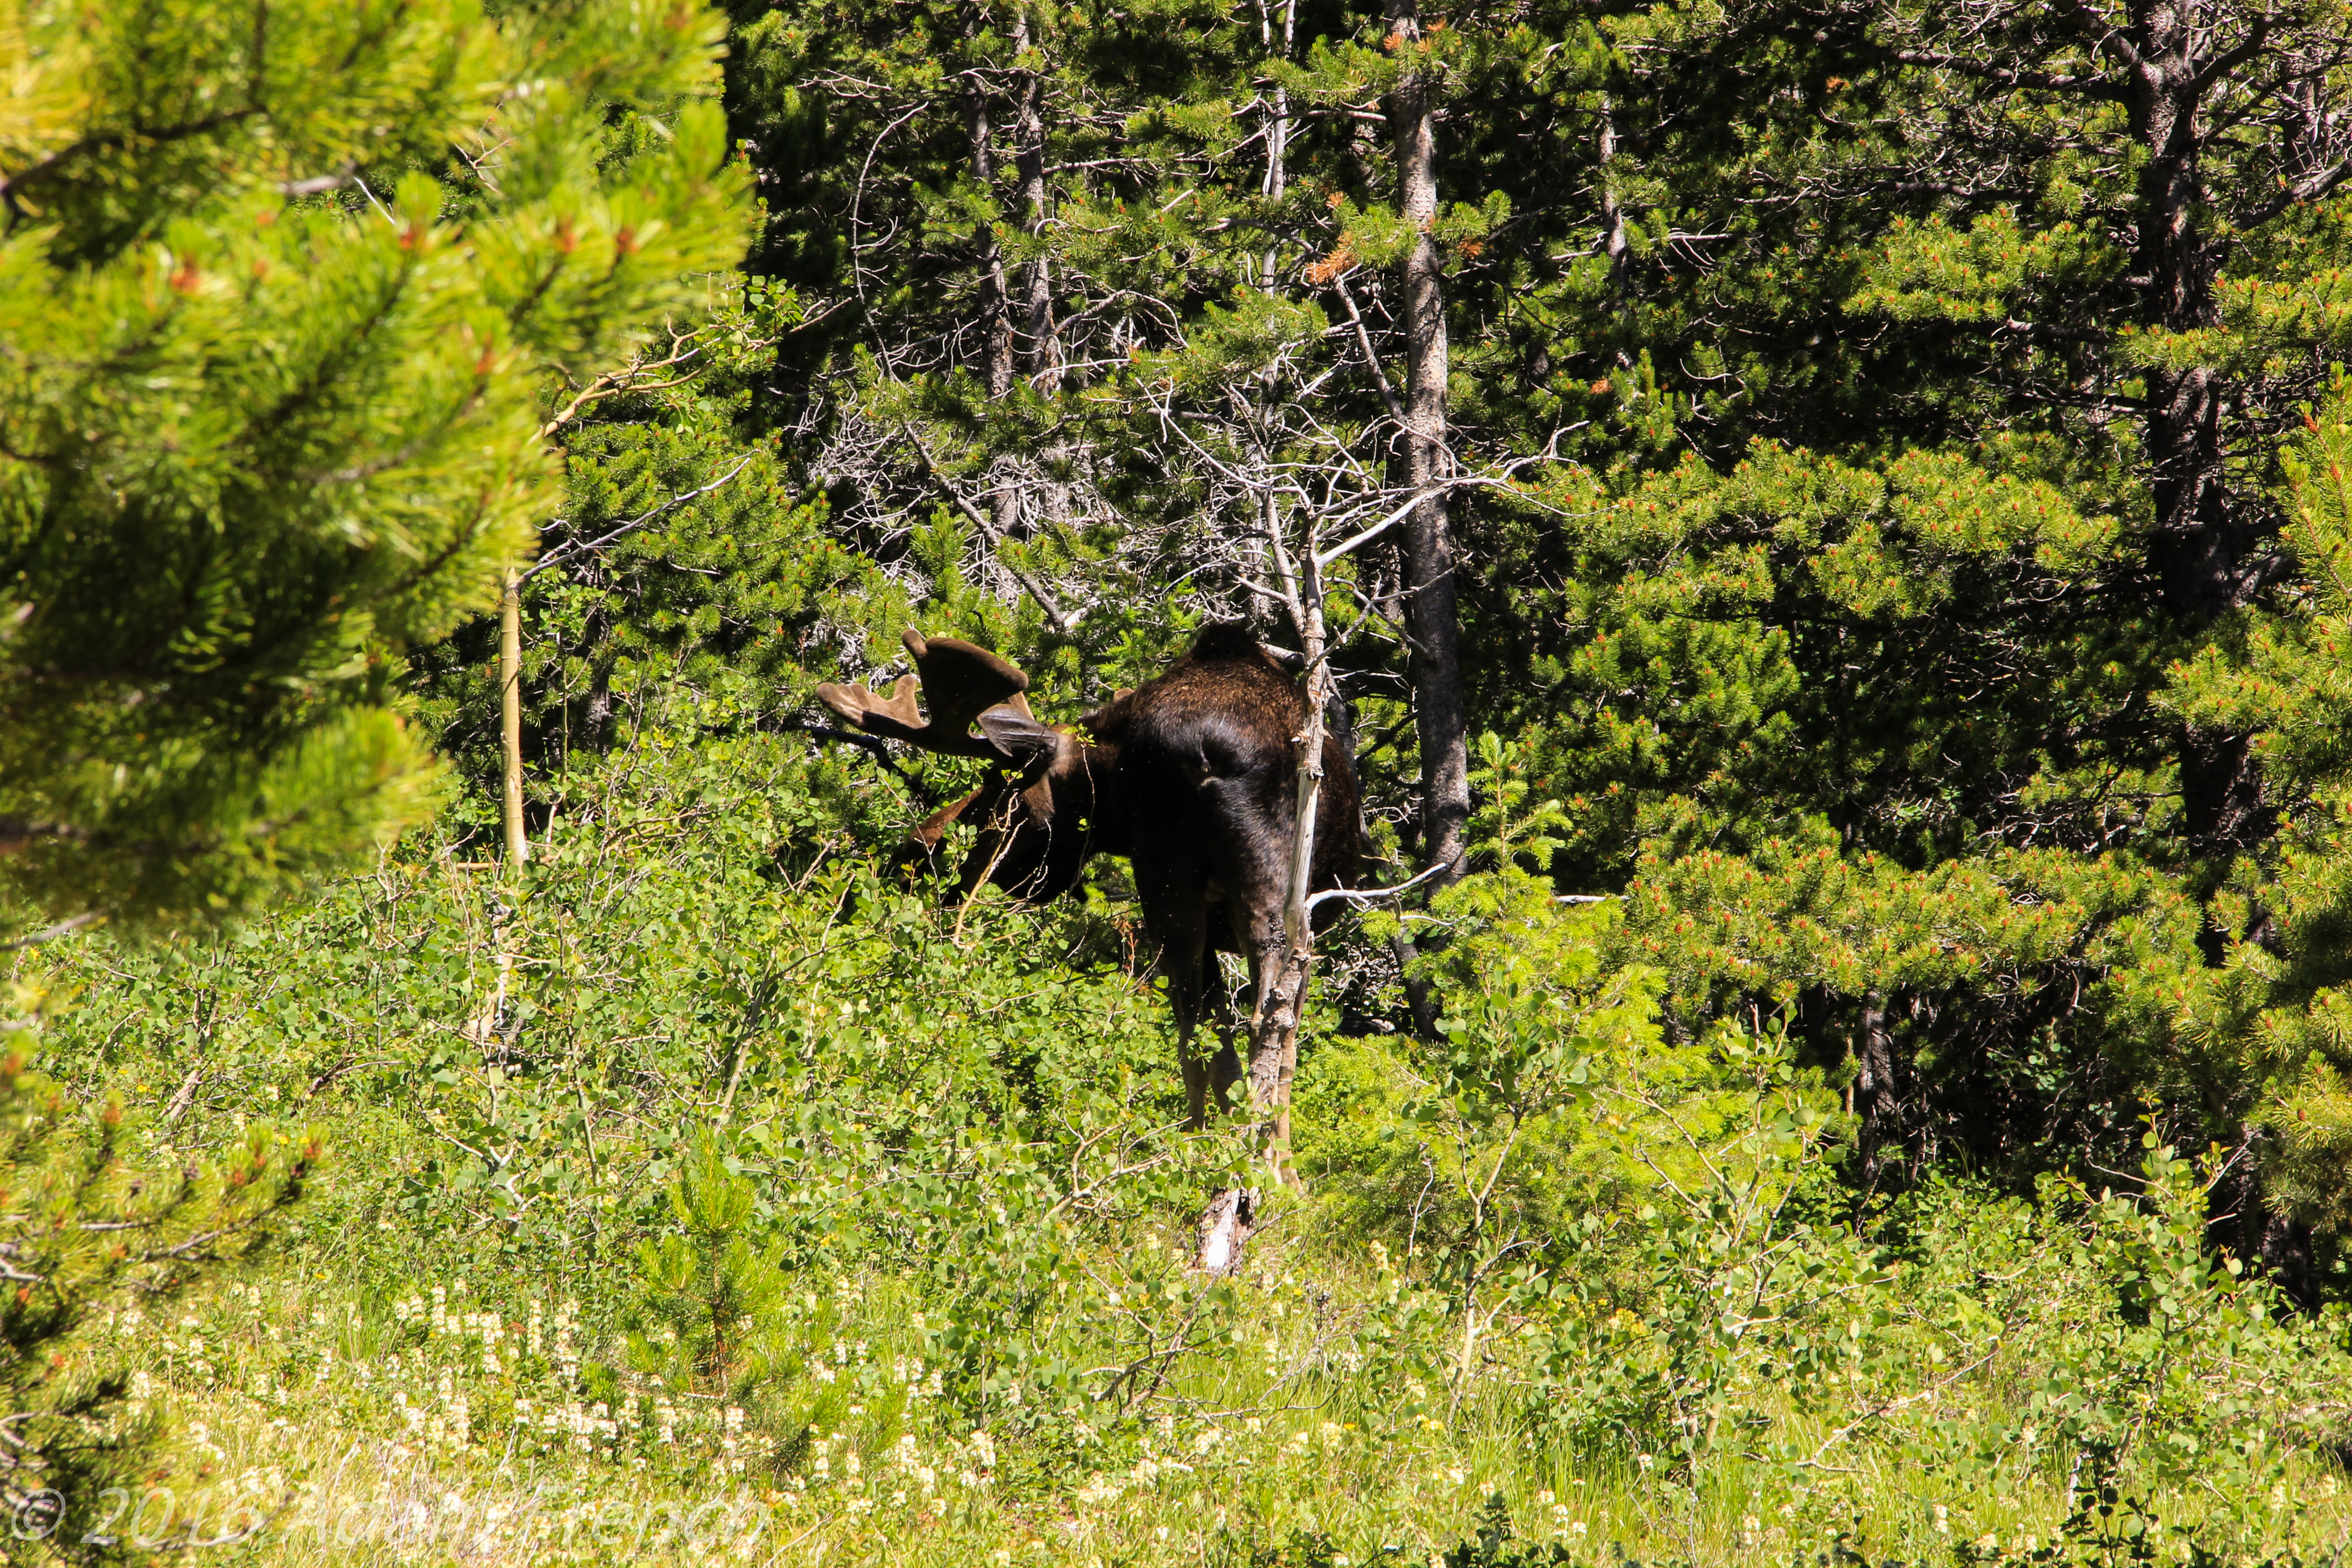
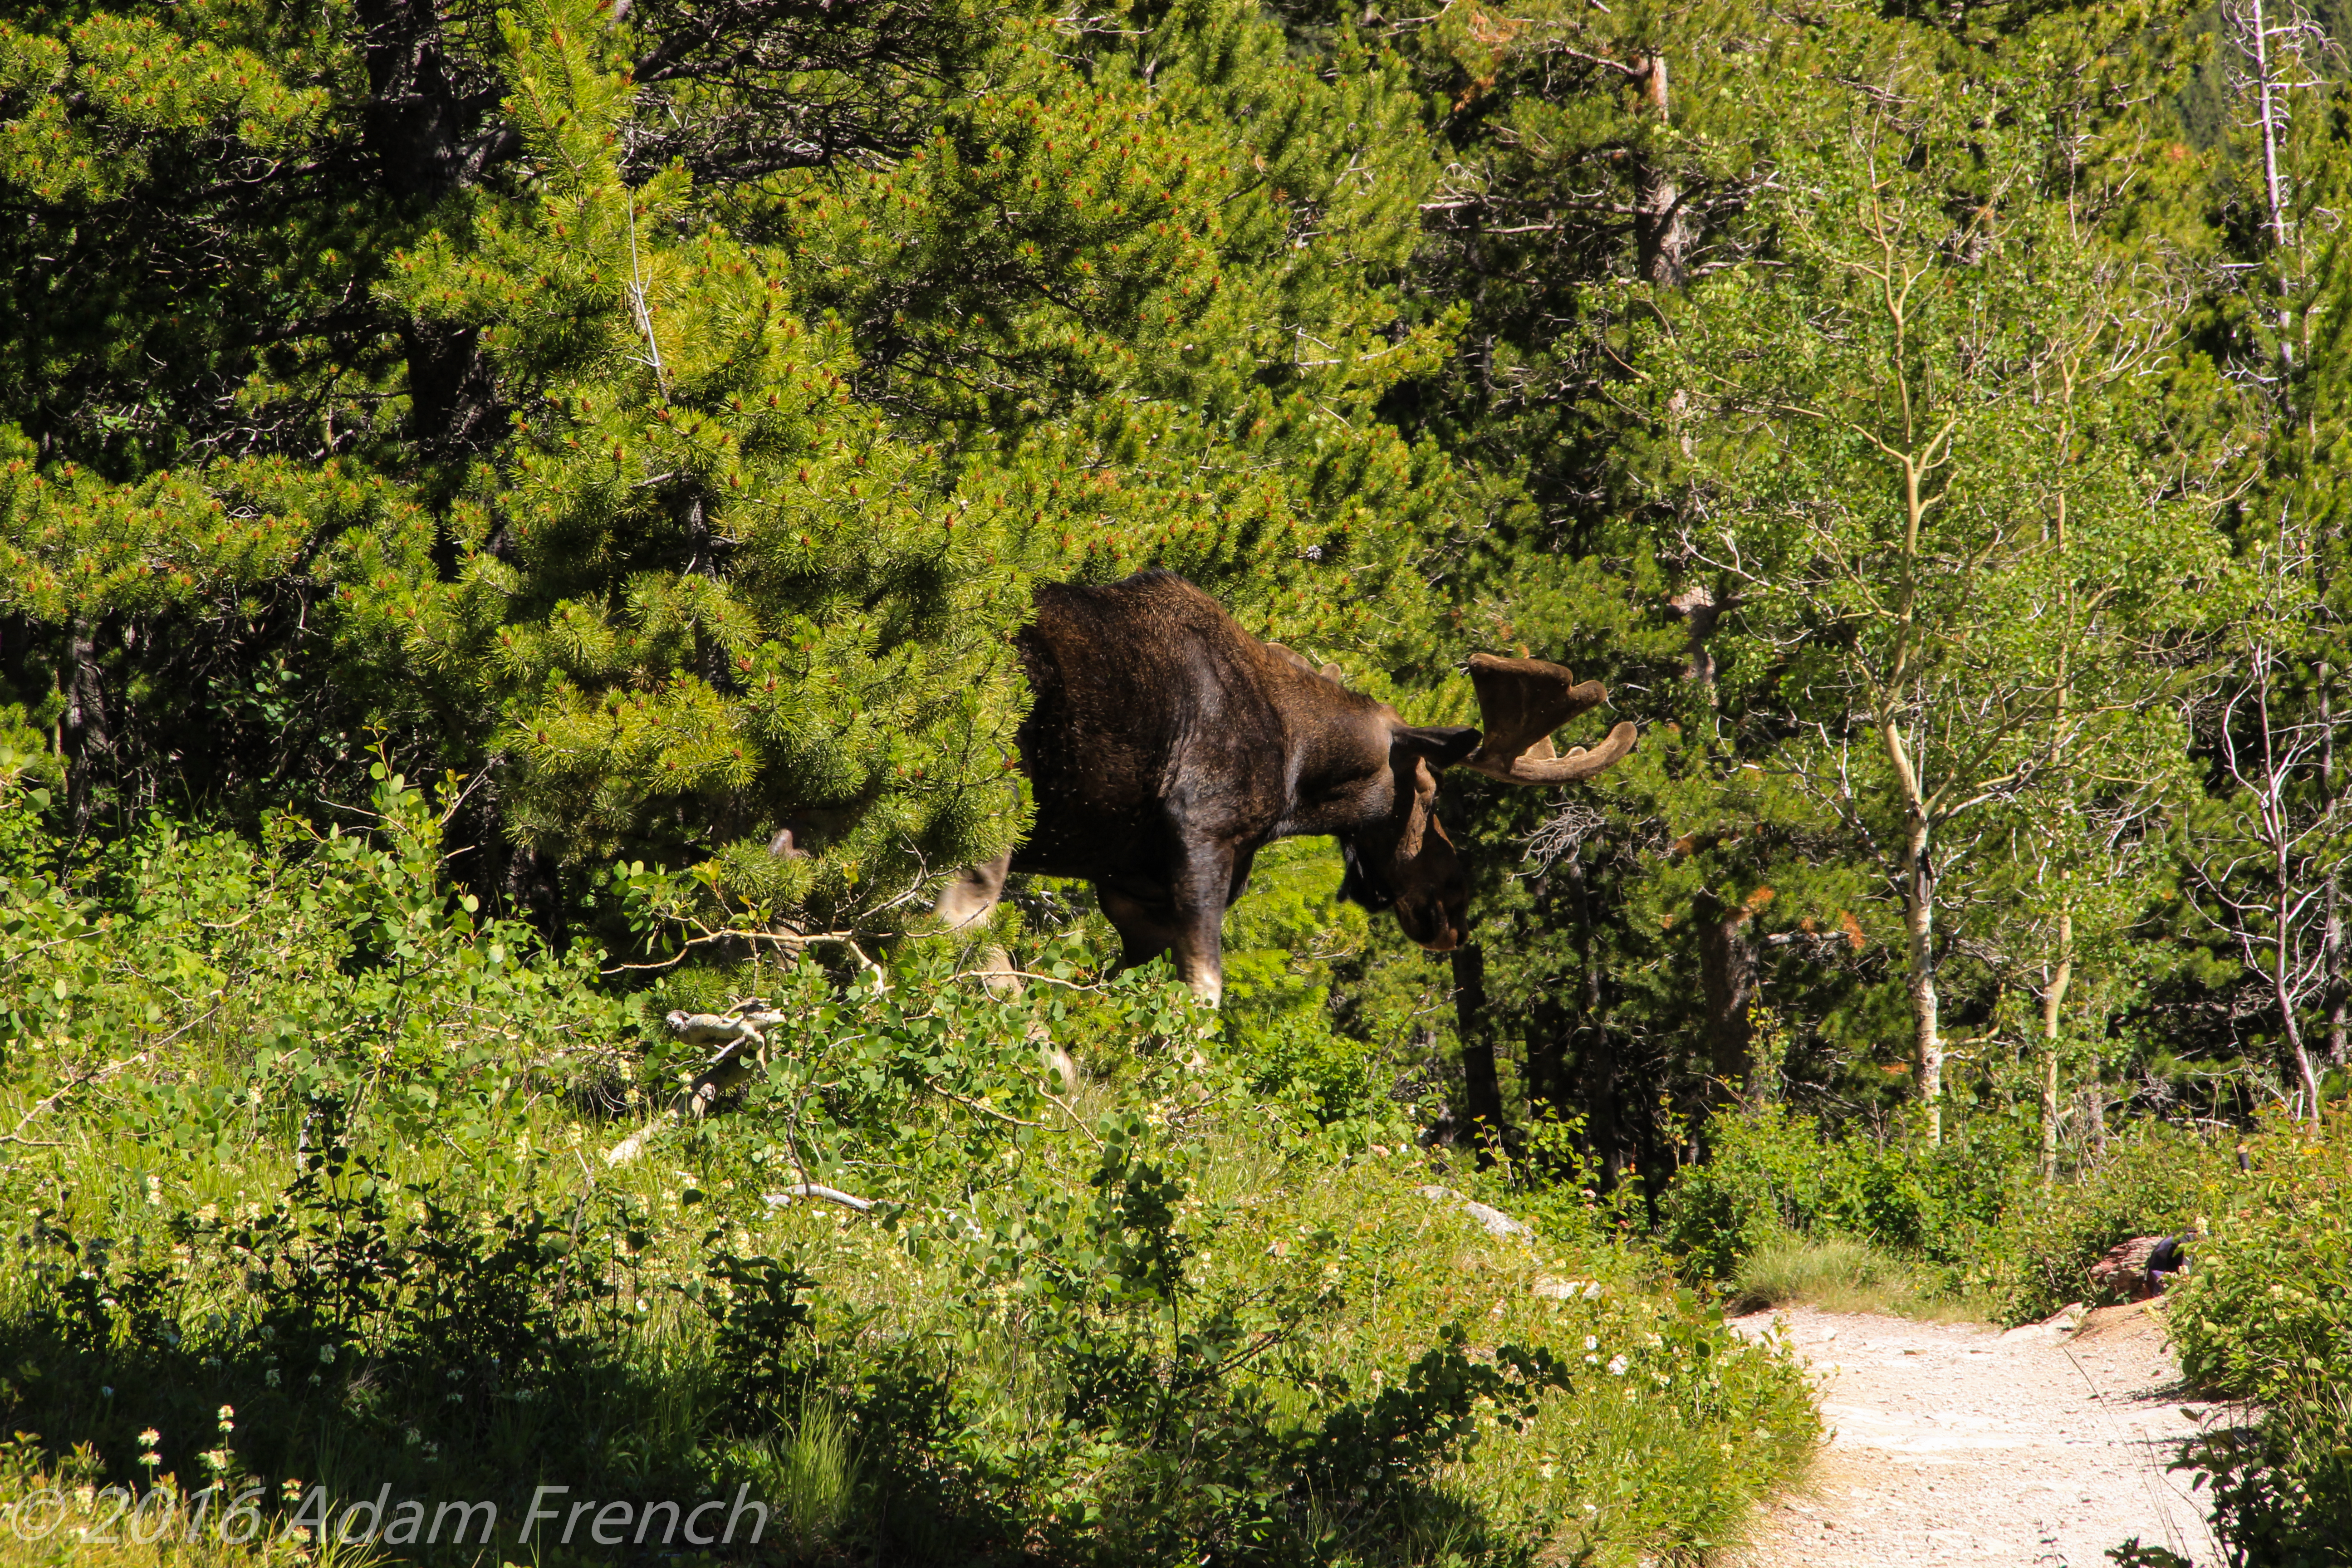
We did have a close encounter with a bull moose! They are frequent visitors to this area as there are several lakes and numerous streams and they like the willows growing nearby. We were made aware of the moose further up the trail by other hikers so we had fair warning–a fellow hiker almost had a head-on collision with the ungulate though as neither he nor the moose was paying close attention!
As we came over a rise we saw a small cluster of people and then spotted the full-grown bull moose just a few steps off the trail. He appeared completely oblivious to the commotion he was causing as he calmly munched on nearby scrub. When he grew tired of the attention he sauntered down the trail and off into the woods.
Fortunately, he was mild-mannered as several hikers inadvertently had closer encounters than would be recommended. Moose are not predators but they are very large and can be very dangerous if they feel threatened (especially during the fall rut or if they’re protecting young). As with any wild animals always admire them from afar and remember the general rule of thumb, if the animal is reacting to you, you’re too close.
Our friend, the mooseHe was CLOSE to the trail
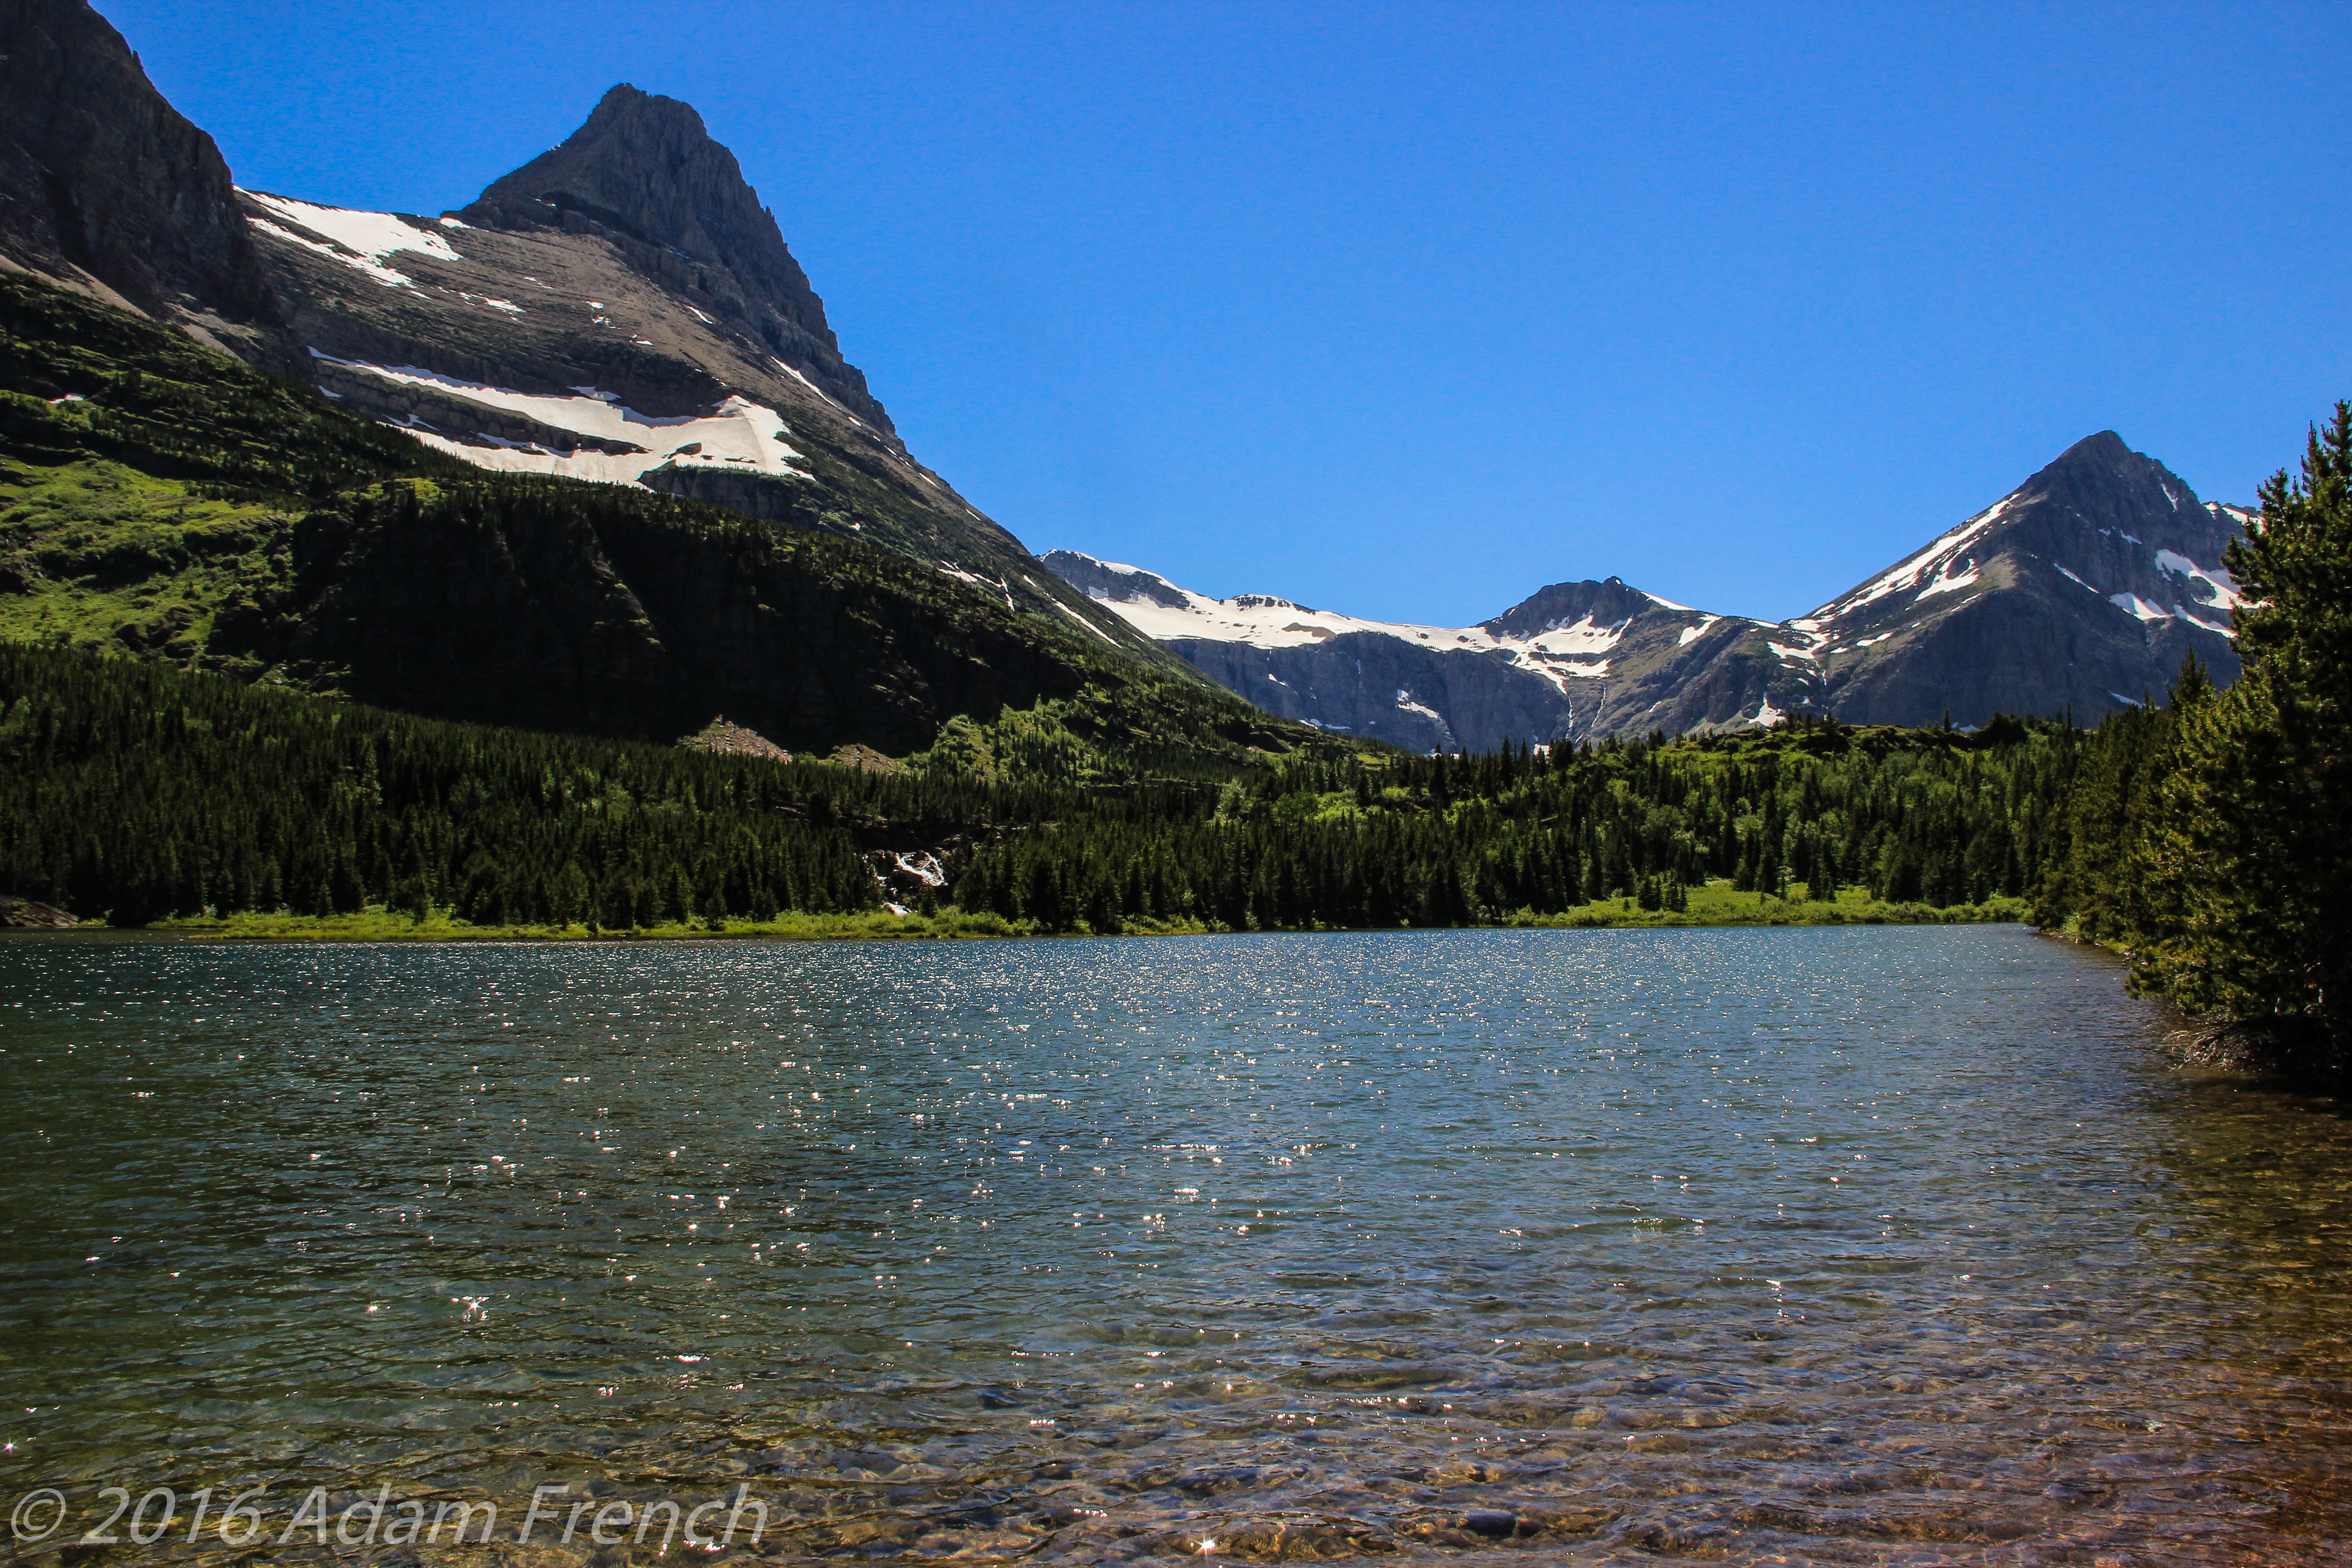
Don’t Miss Red Rock Lake and Red Rock Falls!
Both Red Rock Lake and Red Rock Falls are stunning. After about 1 1/2 miles down the trail you reach your first view of the lake. It expands outward toward the west with Mt. Grinnell and its surrounding range as a backdrop. Then you skirt the lake for about another half a mile and will reach an unmarked side trail breaking off to the left towards the lake/waterfall. You can’t really see the waterfall at this point but you will hear it. Follow the unmarked trail a short distance and you’ll arrive at the base of the falls!
On our return trip from Glacier, we spent several days driving across the Montana plains on two-lane, state roads. I’ve talked before about my love of back roads, and I strongly encourage people to get off the interstate and check out these state highways.
It can sometimes be a shortcut and it’s almost always a welcome change from the drudgery of the highway. Search for alternate routes to mix the journey up a bit so you aren’t crossing the same areas on the return trip as you traversed on your outbound route. Enjoy the drive that gets you to that vacation spot as part of your vacation.
This eases boredom but it also helps you to better appreciate the local culture and people in the areas you visit. You may be surprised at what you might learn–just pay attention to your fuel gauge and the availability of gas when venturing onto backroads. Also, be aware, that cell signal may be weak-to-nonexistent in many of these areas so be prepared to go old-school when searching for travel info. You may need to resurrect long-forgotten methods of acquiring information: travel books, hard copies of maps, and even phone books can be good resources in these areas.
We saw several missile sites leftover from the Cold War and learned about a sapphire mine from a Local (apparently these types of sapphires are only found in this area). I also had no idea Central and Eastern Montana had so many mountains! This was a pleasant surprise as I thought it was all rolling prairie.
Beartooth Pass and the Chief Joseph Highway
On our scenic trip home we knocked other points off our Vacation Bucket List by enjoying Beartooth Pass and the Chief Joseph Highway; two connecting Scenic Byways in southern Montana and northern Wyoming. Be warned, much of this area is tundra with few trees. This means there is little shelter to be found, so if a thunderstorm blows up (which one did while we were there–complete with small hail!) exercise extreme caution as lightning strikes are an especially dangerous risk in these highly exposed areas. This is also a very, high-altitude region. The Beartooth Highway usually does not open until Memorial Day Weekend (at the earliest).
Click here for a post I wrote on our attempt to navigate the route that time of year.
Red Lodge, Montana
I also highly recommend a visit to the town of Red Lodge, Montana. It was absolutely adorable with its friendly, small-town charm. It caters to summer and winter outdoor sports and is located off of US 212, about an hour south of Billings, at the base of the Rockies. The area is perfectly situated to be used as a “base camp” for whatever adventures you are seeking.
Beartooth Pass
Save
Have you hiked Swiftcurrent Trail, or driven the Beartooth or Chief Joseph Highways? Tell me about it in the comments!
Did you enjoy this post? Pin it!
Like what you read here today? Please feel free to leave a comment, like or share this post! Add your email at the bottom of the page, or the sidebar to the right, to be notified when a new post is published. By signing up for the email list, you will also receive a free copy of the Tranquil Trekker’s Top 10 Tips of Trekking Do’s and Don’ts!
You can also follow the blog on social media by clicking the links below!
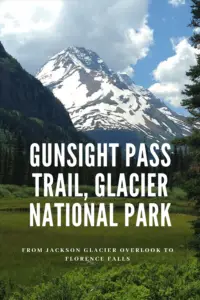
In this post, I review a portion of the Gunsight Pass Trail (starting from the Jackson Glacier Overlook) at Glacier National Park.
Author’s Note: Since we visited Glacier in 2016, the Park Service has implemented a complex, ticket system for visiting the park in the summer. To be honest, I can’t make much sense of it as it involves multiple tickets being required to enjoy various activities around the park. For more information on this system, visit the park website and/or contact the park office.
Also, just a word of warning, as this is a National Park, no dogs are allowed on any trails within the park (exceptions for Service Animals). They are only permitted in the campgrounds and parking lots.**
The Gunsight Pass Trail at Glacier National Park is a great hike that offers scenic views.
Similar to the Swiftcurrent Trail, this is a fairly long route that connects with several others throughout the park. It runs for almost 20 miles, from the Lake McDonald Lodge, past the Sperry Chalet, Gunsight Lake, and Lake Ellen Wilson, to the Jackson Glacier Overlook. The trail offers prime views of several waterfalls along its length. (Both trailheads can be reached from the Going to the Sun Road.) Because of its length, most thru-hikers do it in two days with an overnight stop at one of several backcountry campgrounds or the Sperry Chalet.
The Trekkers aren’t much for overnight camping in the backcountry, so we chose to only attempt the portion that runs from the Jackson Glacier Overlook, on the Going to the Sun Road, to Florence Falls. Both of us entered this hike with a bit of trepidation as it was our first real foray into Grizzly Country. Our goal was to make it to the Florence Falls trail junction (four miles in, making it a total hike of eight miles, round trip).
We had hopes of reaching the falls but wanted to wait to see how we were feeling when we got there. We knew going in that the final mile of the return trip would be a strenuous uphill climb, so we planned to reserve some energy for that (and it was good we did).
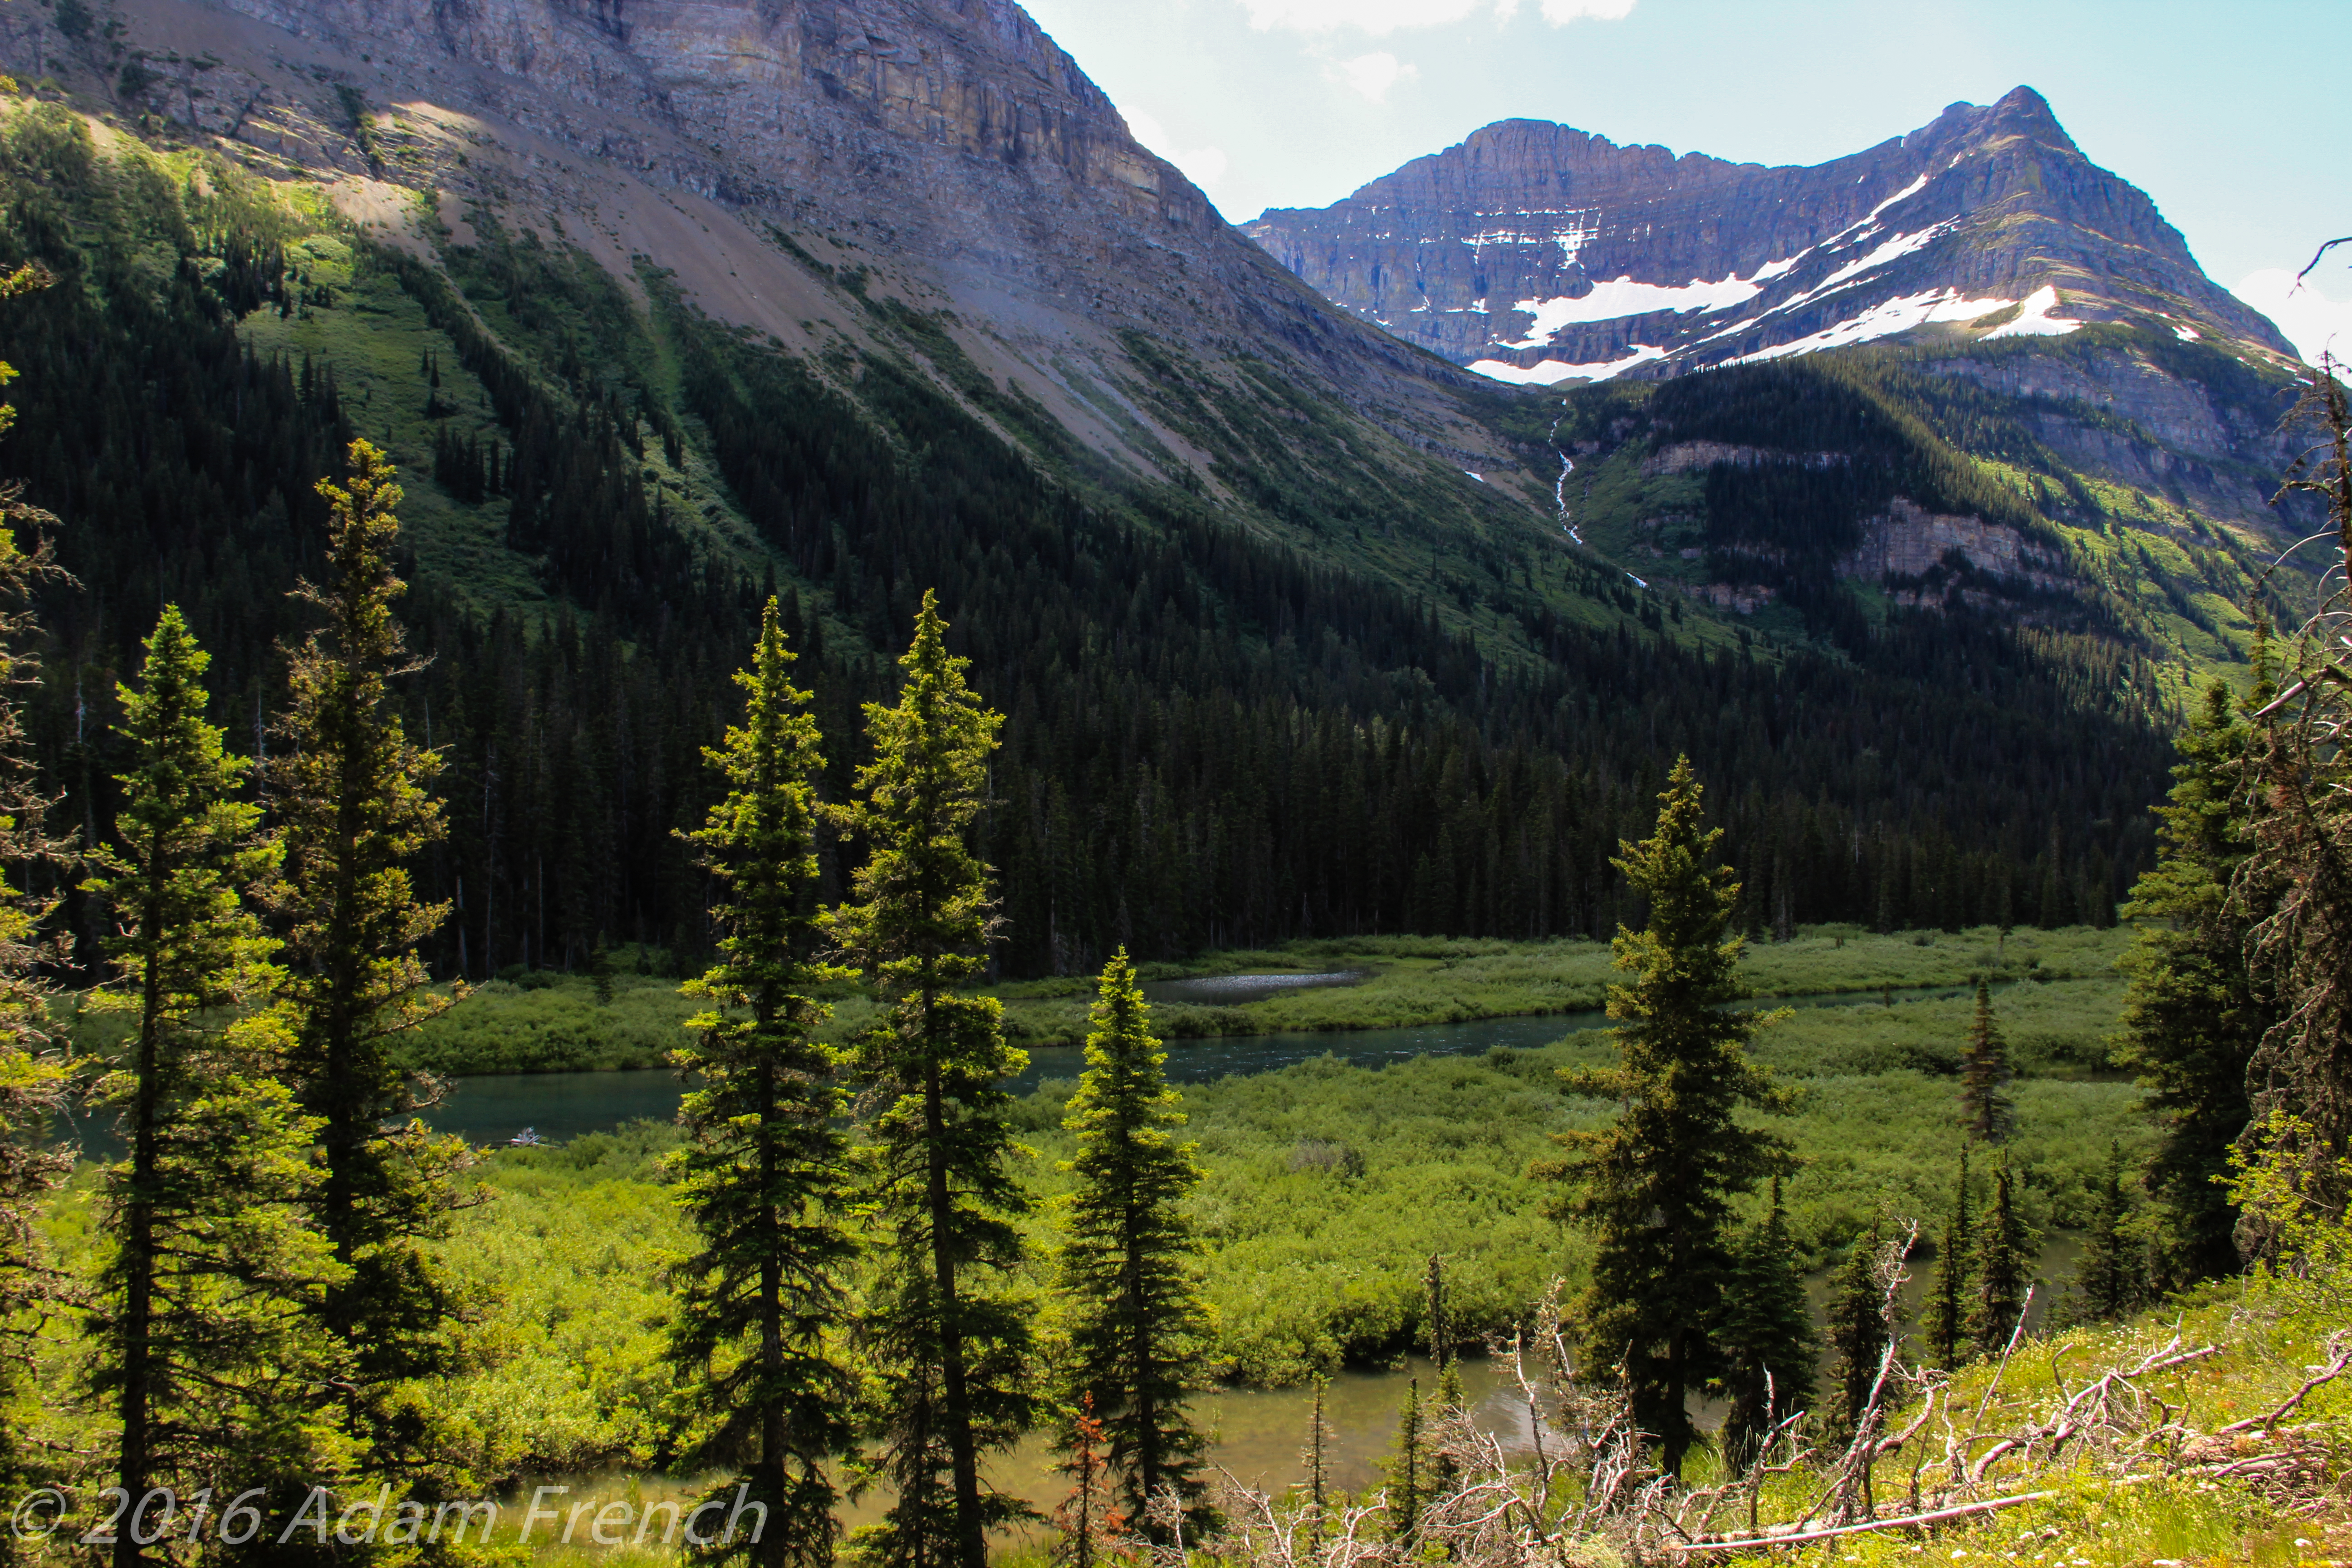
This is a beautiful trail! As it runs largely through the forest, in a lower-lying area, along the St. Mary River, it was a cooler option on that 85-degree day. It is fairly evenly-graded with some beautiful views and was the least crowded trail we experienced in late June (we saw several groups of hikers though none of the “lines” we encountered on a few other trails). The section we chose was the least strenuous portion of the route–it runs along the valley floor as opposed to climbing the peaks as it does in other segments.
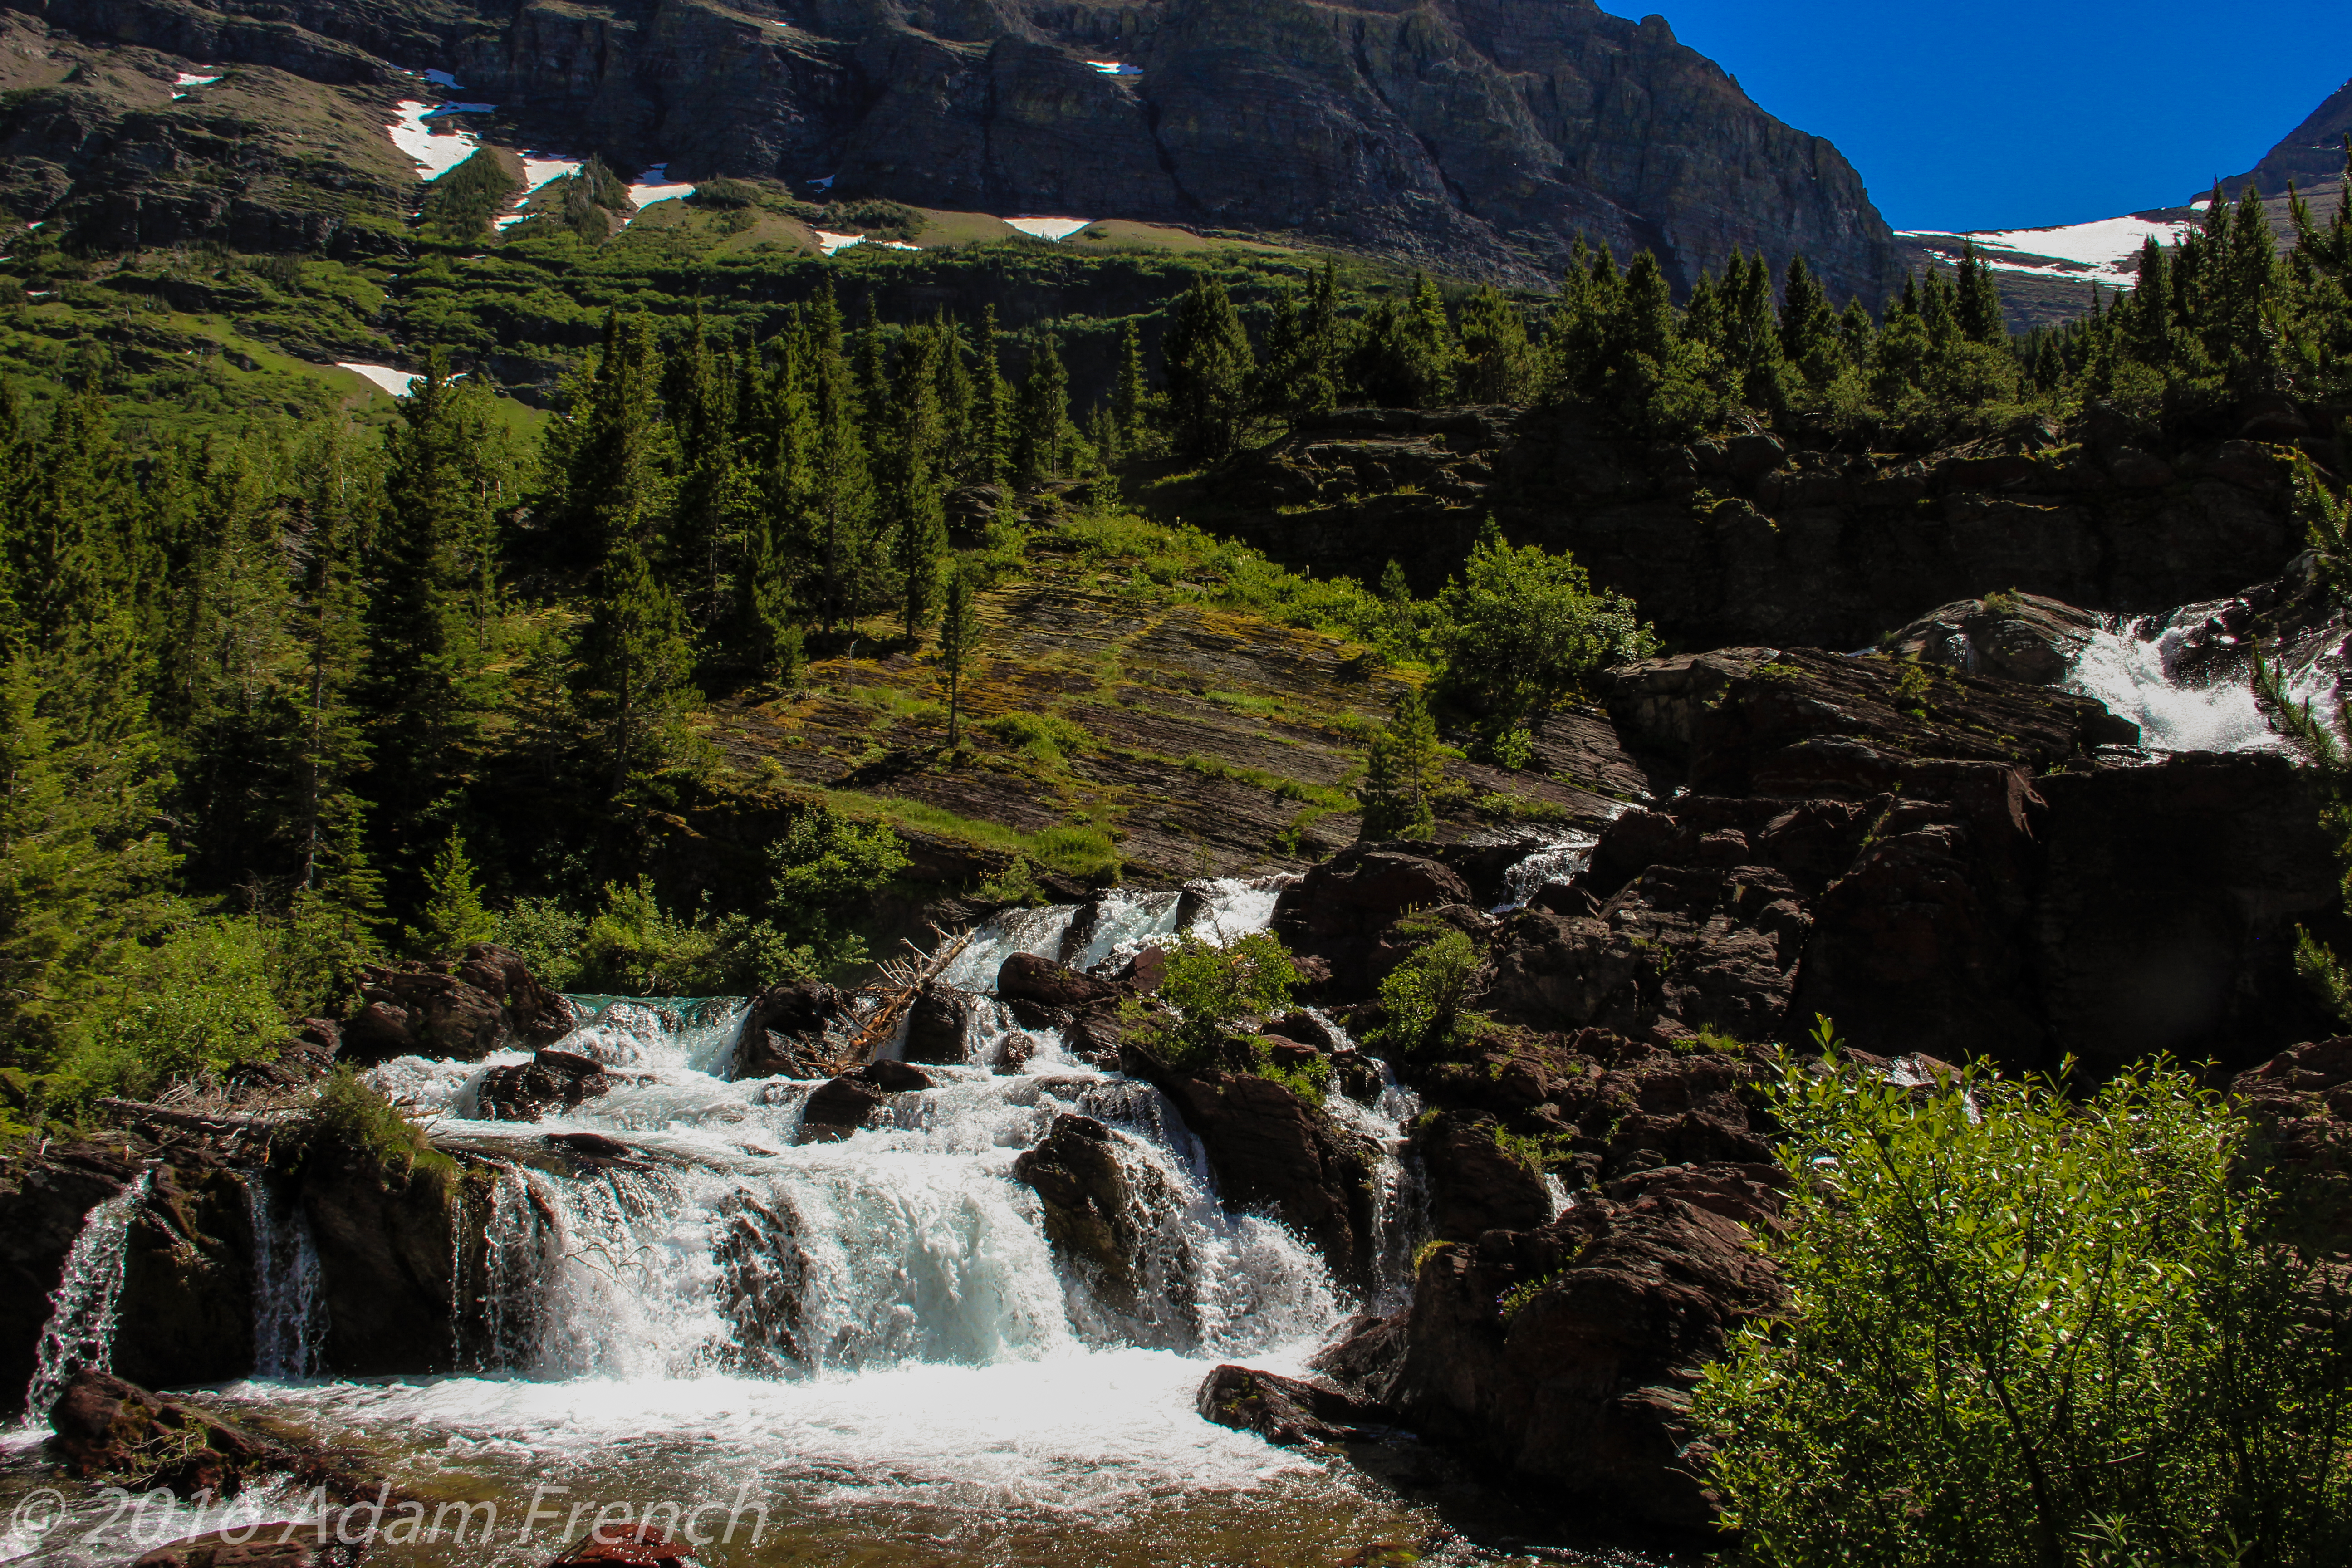
Despite being in the forest, portions of this trail do allow for breaks in the foliage that overlook a marshy area (look for moose!) with incredible views of the soaring mountain peaks and Jackson Glacier as a backdrop. Upon completing the initial steep descent the trail levels off at the picturesque Deadwood Falls.
On your return trip, this is a good place for a break before attempting the final climb to the top. There’s plenty of space to sit on the rocks in the sun or shade (depending on your preference and the time of day) and let the mist from the falling water cool you. The creek below the falls is also an opportunity to dip your feet in the chilly water; just use caution, the current is strong and the rocks may be slippery.
The coursing creek continues to accompany you along the trail. Shortly after passing the falls and the first back-country campsites, you’ll encounter an interesting suspension bridge that crosses the creek.
The suspension bridge over the creekThe beautiful Deadwood Falls
Grizzly Bears at Glacier National Park
The only unpleasant factor on this trail was the huckleberry bushes; they were many and accompanied us for a large portion of the four-mile journey. That time of year they were calf to knee height, though later in the summer they can reach chest to head height.
This causes an especially sensitive situation as the berries are a favorite for grizzly bears in late summer. There are several places where the trail encounters blind corners and hills so be sure to follow standard safety guidelines when hiking in bear country: never hike alone, don’t hike around dusk or dawn, carry bear spray, and make plenty of noise (one of our favorite methods is singing and hand-clapping–this also helps to alleviate trail fatigue).
Also, be aware, that the water rushing in the nearby creek may mask your sounds and could increase the likelihood of surprising one of the large Ursines. We did not see a bear on our hike (have you noticed a trend in our hikes in Bear Country?) though we saw evidence of a very recent pass-through.
Another hazard of the thick bushes was they almost completely obscured the trail in some cases making it somewhat hard to follow. They also hid a less menacing annoyance, bees–as I, unfortunately, found out when one flew inside my hiking boot and stung me for my intrusion.
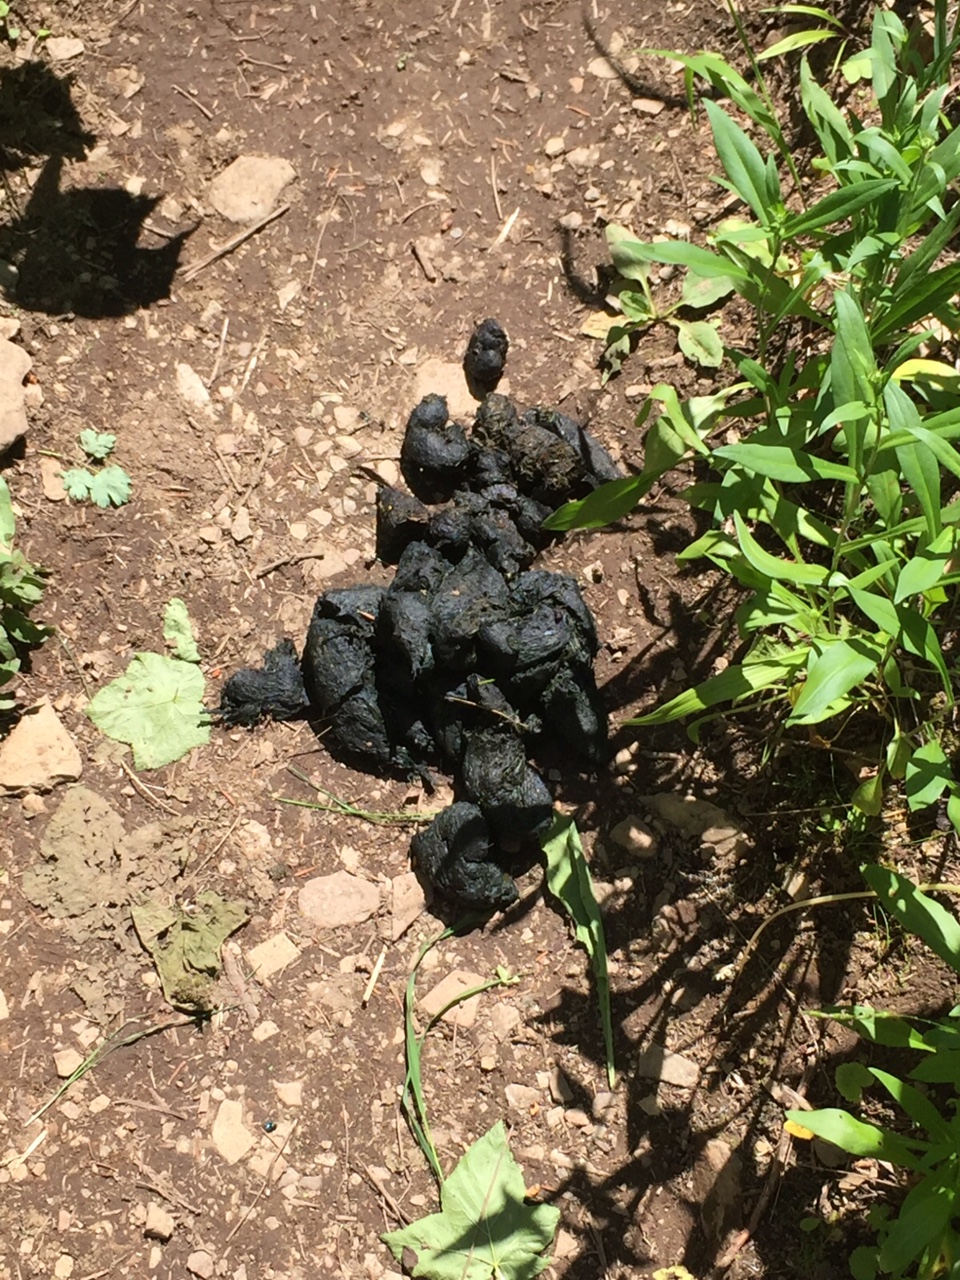
This is gross but it’s shown to make a point. This is the closest we got (and that I ever want to get) to a grizzly. I kid you not, it looked like something that came from an animal the size of a horse!
Wolverines on the Gunsight Pass Trail
We encountered another first on this trail…a wolverine! (It looked nothing like Hugh Jackman! 😝) They are commonly known in this part of the park.
We were traversing one of the clearer portions of the trail, I was in the lead. As I looked down the trail a wolverine came trotting towards us around a bend about 25 feet down the trail. We all stopped…he looked at us…we looked at him…he looked especially cranky as he panted in the heat…then he kept coming!
We’ve never encountered a wolverine in the wild before but I’ve heard stories of their nastiness (apparently they’ve been known to kill moose that have gotten mired in snowdrifts, as well as a polar bear on at least one occasion–seriously!) At this point, I was scanning the huckleberry-covered hillside for an escape route as I did NOT want to have to deal with this critter that is 1/10th my size but can kill creatures many times larger than me! Fortunately, at about that moment, he decided it was too hot for a confrontation and sprinted off into the bushes.
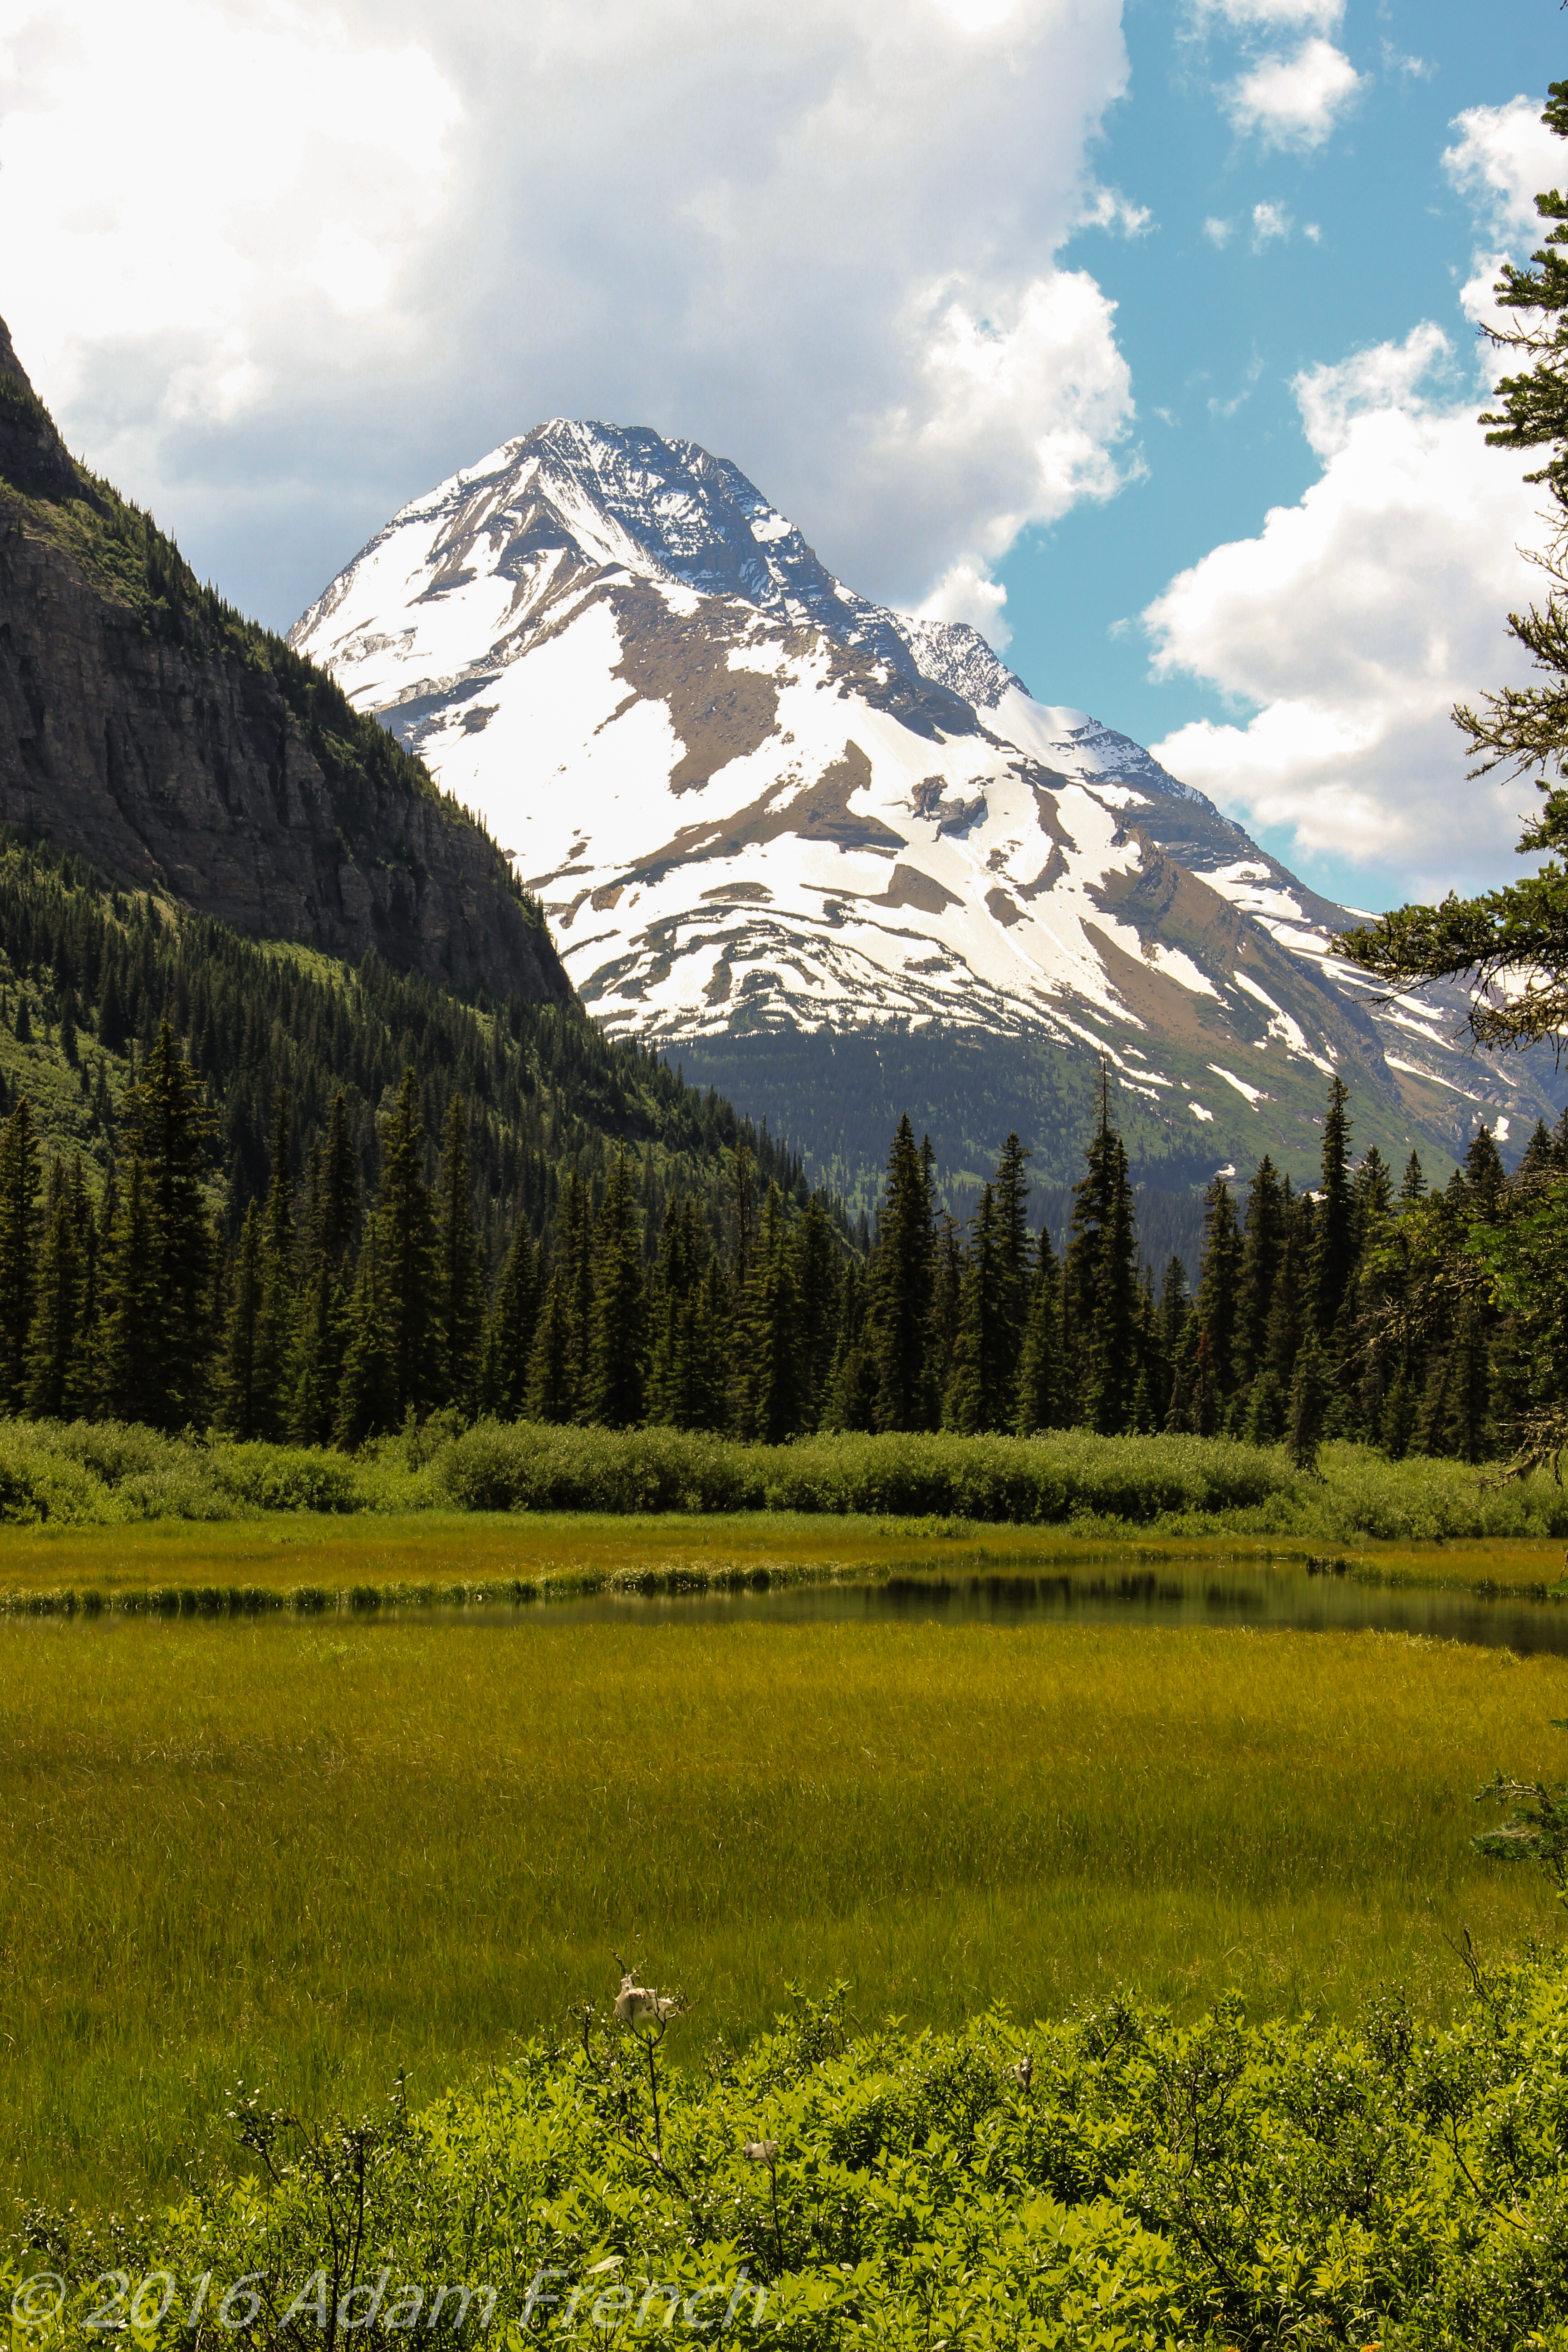
This is the view from one of the lookout points on the trail. Moose are frequently seen in this area (none were there the day we hiked). Jackson Glacier is just out of sight on the other side of this mountain.Another view from the trail lookout
We did reach our four-mile goal but did not make it to Florence Falls. We had the energy to continue on but knew it would have added over a mile to our trek and we still had a hefty climb ahead of us on the return trip. We were also running low on water so we again made the safe choice to turn back–this turned out to be wise as our water barely held out the remainder of the hike. Having faced our fears and successfully trekked eight full miles in the middle of Grizzly Country, we counted this hike as a success!
Have you hiked the Gunsight Pass Trail? What was your experience? Tell me in the comments!
Did you enjoy this post? Pin it!
Save
Like what you read here today? Please feel free to leave a comment, like or share this post! Add your email at the bottom of the page, or the sidebar to the right, to be notified when a new post is published. By signing up for the email list, you will also receive a free copy of the Tranquil Trekker’s Top 10 Tips of Trekking Do’s and Don’ts!
You can also follow the blog on social media by clicking the links below!
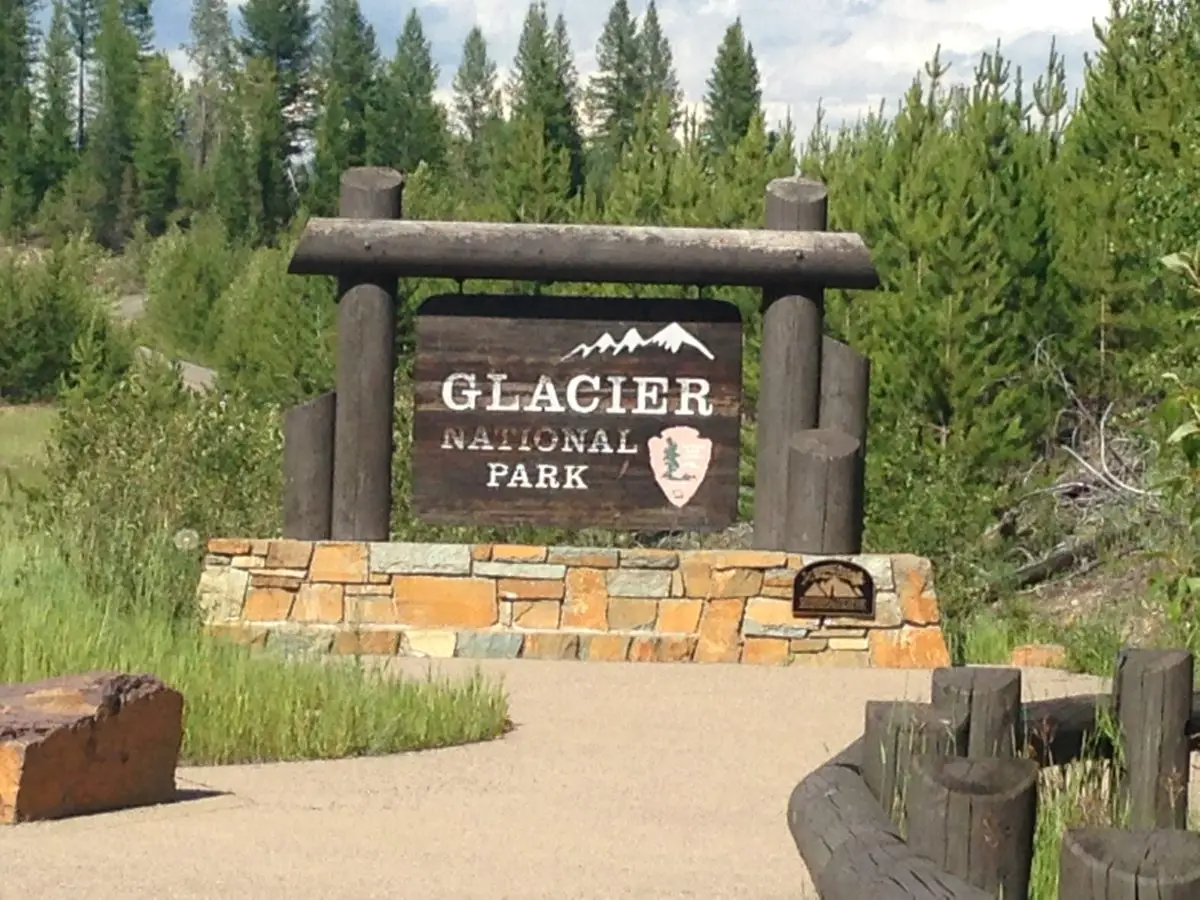
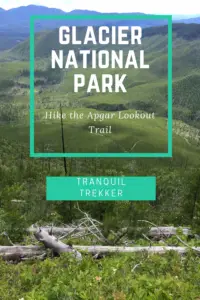
In this post, I review the Apgar Lookout Trail at Glacier National Park, and discuss our failure to reach the summit.
Author’s Note: Since we visited Glacier in 2016, the Park Service has implemented a complex, ticket system for visiting the park in the summer. To be honest, I can’t make much sense of it as it involves multiple tickets being required to enjoy various activities around the park. For more information on this system, visit the park website and/or contact the park office.
Also, Just a word of warning, as this is a National Park, no dogs are allowed on any trails within the park (exceptions for Service Animals). They are only permitted in the campgrounds and parking lots.**
Otherwise known as the “Soul-Crushing Switchbacks Trail” 😮–thank you Mr. Trekker, for that!–the Apgar Lookout Trail traverses Apgar Mountain to the fire tower near the peak, and offers views of Lake McDonald, in Glacier National Park.
Where is the Apgar Lookout Trail?
The easiest way to reach the trailhead is from the West Glacier entrance on the west side of the park. Shortly after passing through the West Glacier entrance gate a road branches off to the left with signs for the Glacier Institute, a horse corral, and the Apgar Lookout Trail. At the next intersection, you’ll turn right towards the horse corral, then continue following the signs to the left which take you to an unpaved dirt road and the trailhead.
Hiking on the Apgar Lookout Trail
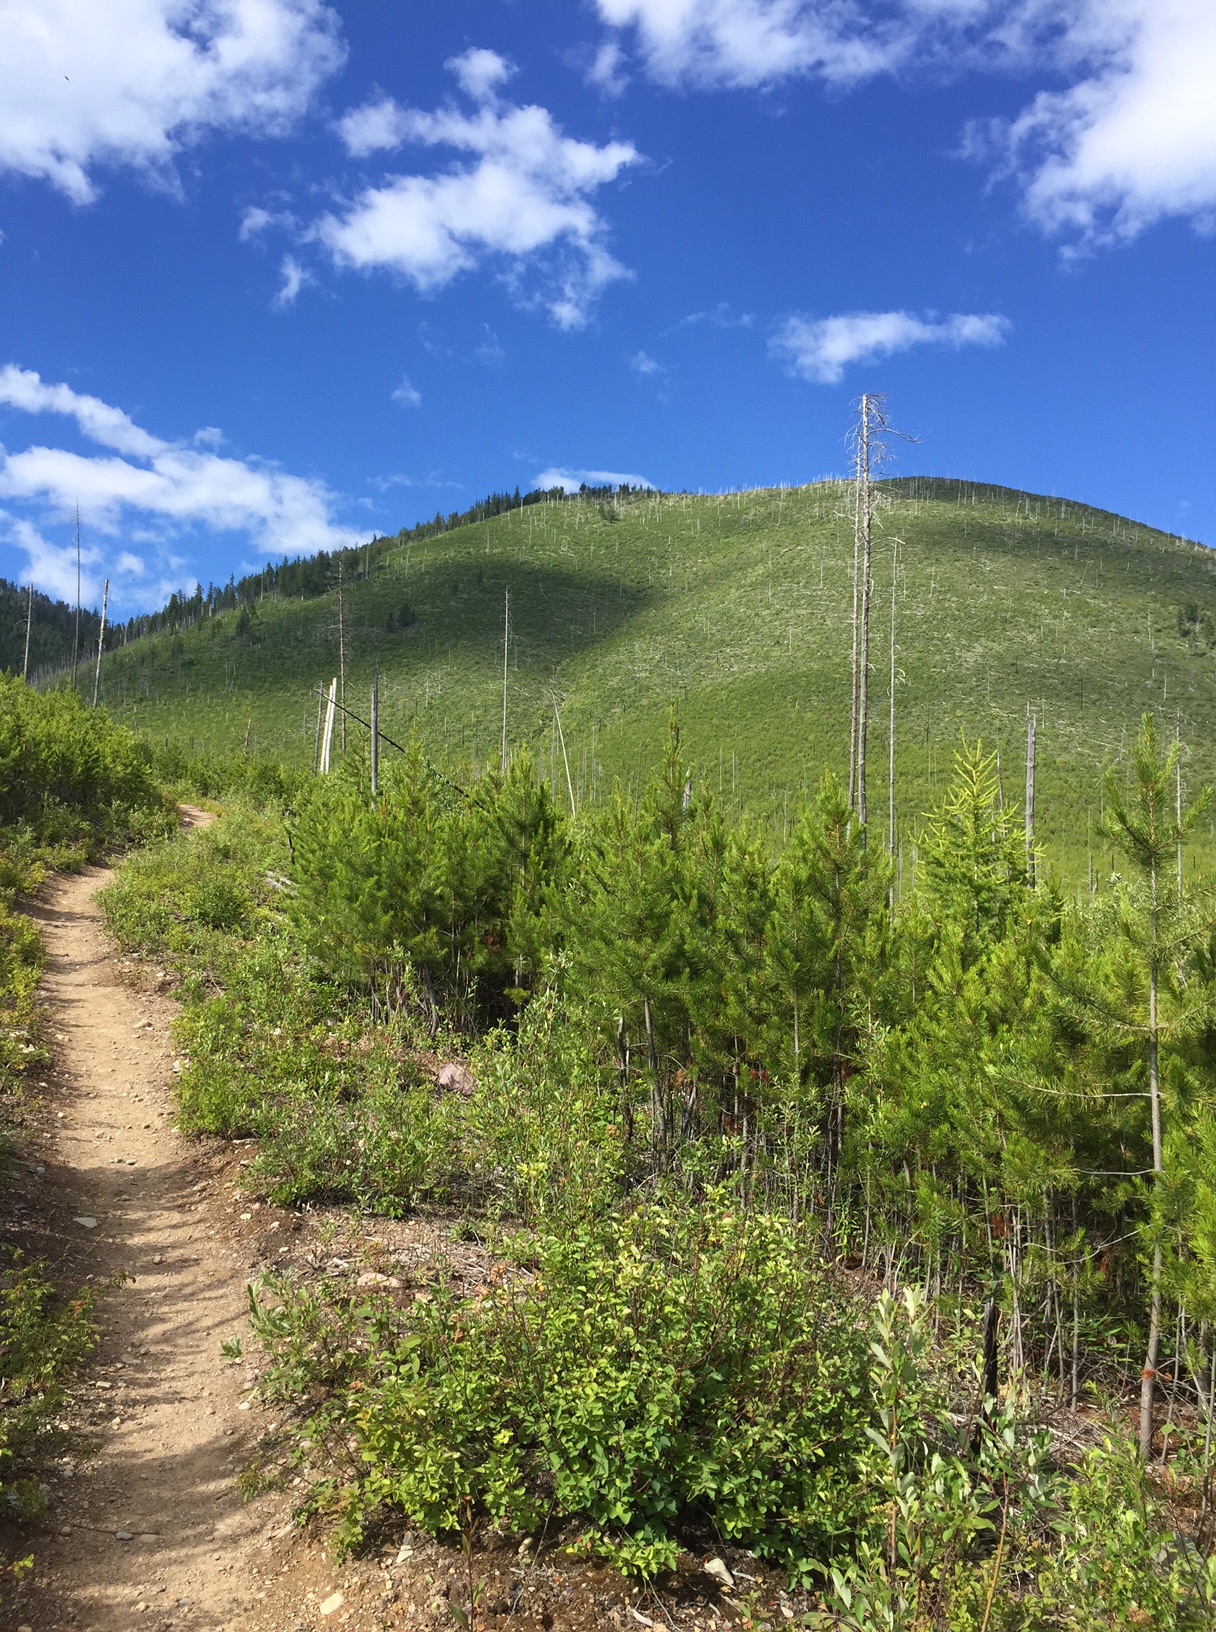
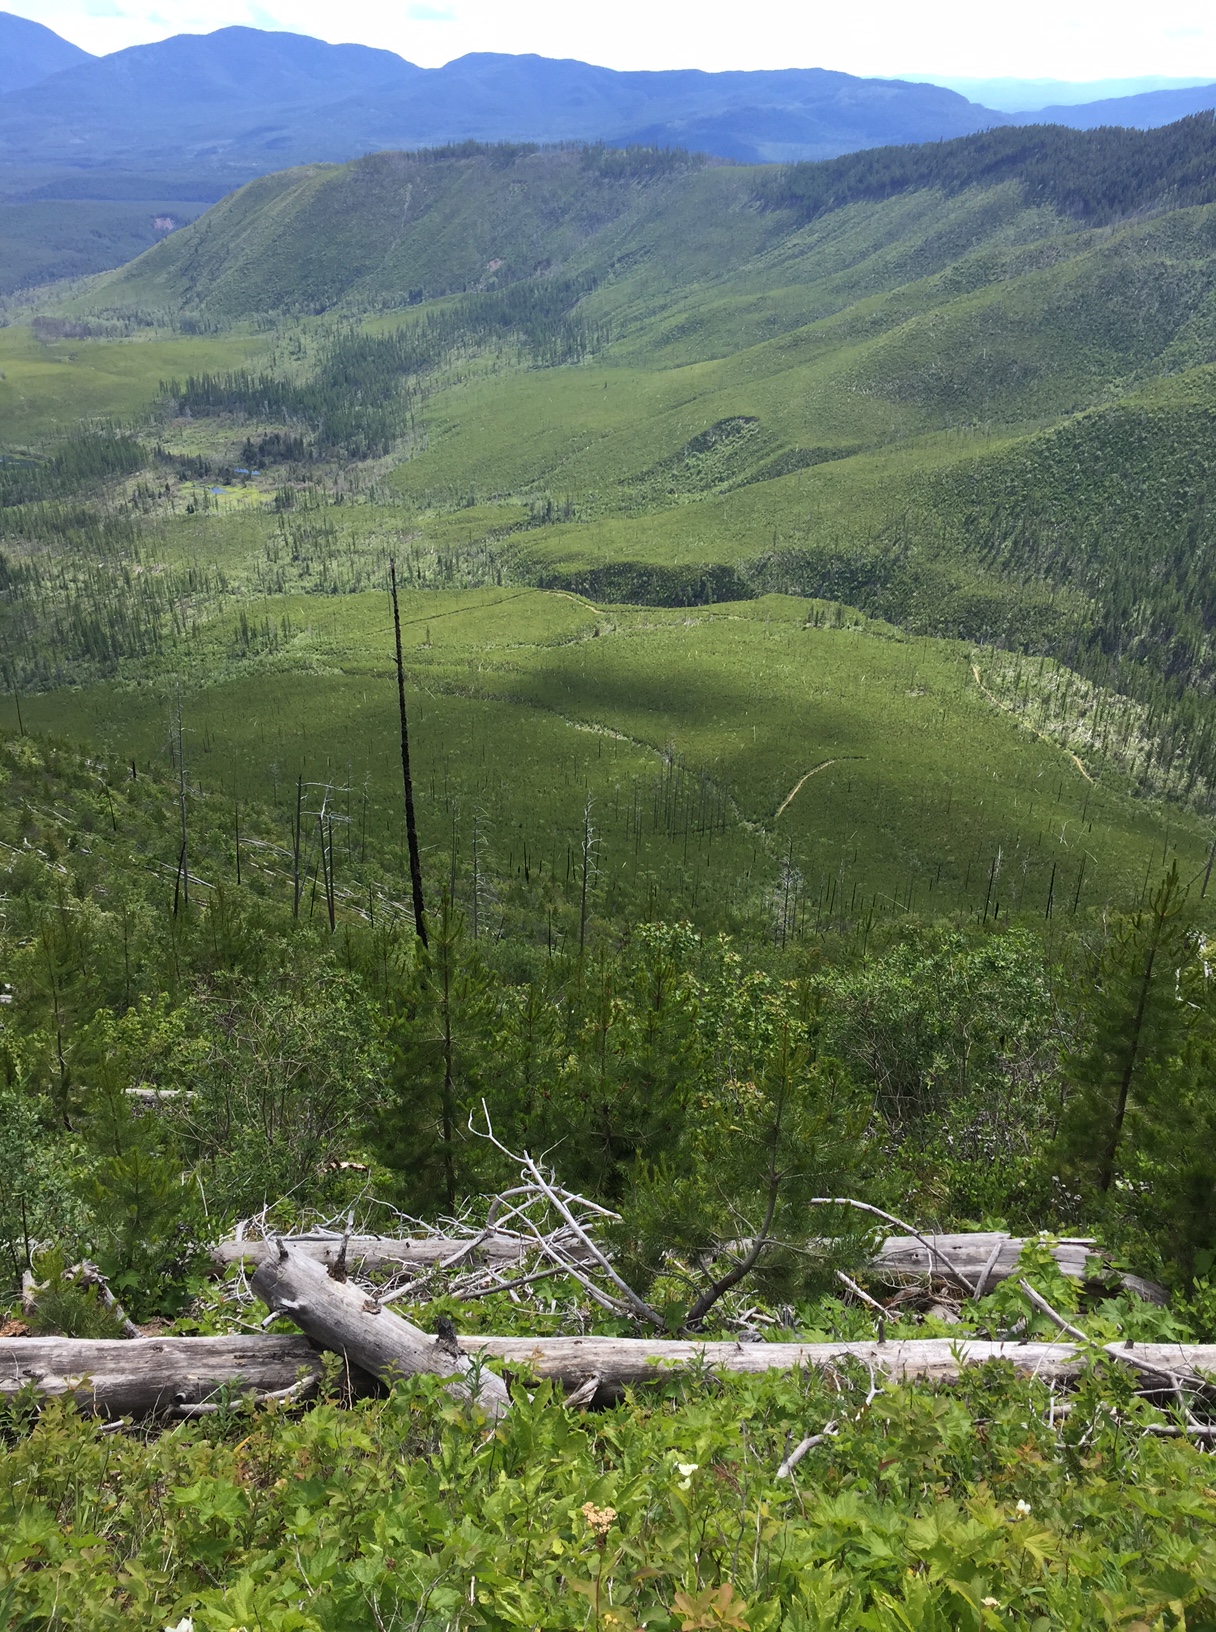
This trek was rough! The trail is interesting because it isn’t that long (only about seven miles round trip); it’s also fairly wide (enough so that two people can walk side-by-side in some cases), and it’s smooth (there aren’t many roots/rocks to trip you up). The first 3/4 of a mile is fairly flat but then the elevation gain begins. You gain almost 2000 feet of elevation in about three miles over a series of three, LONG switchbacks.
We didn’t fully appreciate just how steep it was on the way up, it was the difficulty in keeping our balance on the way down that clued us in. Part of what makes it so difficult is that almost the entire trail runs through a burn scar left by a forest fire from several years ago; so it is completely exposed to the sun.
We got a late start (about 2 pm as we made the attempt shortly after arriving at the park) and it was hot and fairly humid that day (about 85 degrees). I should also note my body does not tolerate heat well. There’s a reason why I rejoiced in our move to the cool Northern Plains after living in the steamy South!
The lack of shade-producing foliage does offer one advantage…this trail allows for incredible views of the surrounding Flathead River Valley!
If you make it to the top, we were told the views of Lake McDonald bordered by the park’s mountains to the north are beautiful. (click here for the webcam view from the summit of Apgar Mountain.)
In my semi-delirious state, I half-heartedly named this “the Butterfly Trail” for the numerous (and lovely) flying insects we stirred up on our trek.
As I’ve mentioned in other posts for this park, beware of bears on this trail. We did not see any but some hikers that were exiting the trail as we were starting out did. Also, three days later, a mountain biker (and park ranger) was tragically killed when he surprised a grizzly on a bike path about six miles from this very trail (outside the boundaries of the park).
The trail–the view is looking upward near the beginning of the LONG climb, this is essentially what the entire trail looks like.
Know How Hard to Push Yourself When Hiking
I’m going to get on my soapbox a bit regarding an important safety tip: KNOW YOUR LIMITS in the outdoors! There is a fine line between pushing yourself to extend your stamina and increase your strength…and putting yourself into a dangerous/potentially deadly situation.
There are some well-known symptoms of exhaustion, dehydration, and heat stress but it also helps to know your body. This takes time and experience to learn what signals your body gives when it’s being stressed and what those signals mean.
As much as it pains my pride to admit it…we didn’t make it to the top of this trail. We decided to turn around about a quarter of the way through the 3rd switchback when the “bent-double” stomach cramps and nausea hit me. I’ve learned from past experience that this is a major sign of dehydration for myself and I didn’t want to push things too far.
Always remember, just because you get to the top, that’s only halfway, you still have to get back down and sometimes going downhill can be more difficult. Exhaustion combined with the pull of gravity on the return trip can prove disastrous–I’ve worn scrapes and bruises resulting from stumbles caused by this dastardly combination on more than one occasion.
So don’t spend all your energy on only half the trail or you may find you’re unable to complete the most important half…getting home!
It’s also important to note, for the benefit of your wallet, that some parks/states require you to pay for at least a portion of the cost involved in a Search and Rescue operation if one is deemed necessary. They’ll come to get you, but the financial toll may remain long after the physical injuries have long since healed. If concern for your own body isn’t enough to convince you to turn back, perhaps concern for your wallet will be.
The view–the Flathead River Valley from near the middle of one of the switchbacks, you can see how far we’d come from the trail below us
Don’t be Afraid to Turn Back when Hiking
It’s difficult to admit we failed on this attempt, but I firmly believe we made the right decision in turning back. It’s easy to get “Summit Fever”, especially when you go into a situation expecting to succeed. The length of this trail was well within our average hiking range and it was fairly easy, technically speaking, so turning back definitely caused some wounded pride.
Don’t be afraid to admit you’ve bitten off more than you can chew though. A reportfrom the years 2003 – 2006 found that 23% of Search and Rescue incidents included people in their 20’s and 66.3% of the victims were male. So the takeaway lesson is, that young males–the ones usually thought of as being the most healthy, strong, and capable–are also the ones most likely to run into trouble. If they struggle, the rest of us shouldn’t feel bad admitting we struggle too!
So guys, take note…find a hiking partner who wimps out before you do so you can turn back and still save face. 😉 I should note, that the cramps relented within minutes once I stopped climbing, found some shade, got some sustenance in me (food and drink), and cooled down.
If you’re looking for a challenging hike on your next trip to Glacier National Park, check out the Apgar Lookout Trail!
Have you attempted these infamous switchbacks? What was your experience like? Let me know in the comments!
Did you enjoy this post? Pin it!
Like what you read here today? Please feel free to leave a comment, like or share this post! Add your email at the bottom of the page, or the sidebar to the right, to be notified when a new post is published. By signing up for the email list, you will also receive a free copy of the Tranquil Trekker’s Top 10 Tips of Trekking Do’s and Don’ts!
You can also follow the blog on social media by clicking the links below!
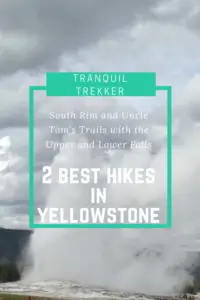
In this post I review Uncle Tom’s and the South Rim Trails, and their views of the Upper and Lower Falls, at Yellowstone National Park.
**Author’s note: Just a word of warning, as this is a National Park, no dogs are allowed on any trails (exceptions for Service Animals). They are only permitted in the campgrounds and parking lots.**
Several years ago, in June, we visited Yellowstone National Park with the Trekker In-Laws. As it was the first time there for all of us we didn’t get much hiking in, we just went full-blown tourist and hit all the “must-see” sights. But Mr. Trekker and I did get to do two very cool, very accessible hikes, the South Rim and Uncle Tom’s trails, which allow amazing views of Yellowstone’s Upper and Lower Falls.
The Trekkers visited during a time of snowmelt so some of the waterfalls were running especially high at the time.
Author’s Note: Not long after writing this post the Uncle Tom’s Trail was permanently closed due to safety concerns and maintenance costs. Unfortunately, future visitors to the park will not have the opportunity to enjoy these cool sites, so I will leave info on this trail up to allow others to experience what we saw. I feel very fortunate that we were able to see these views before they were forever altered.
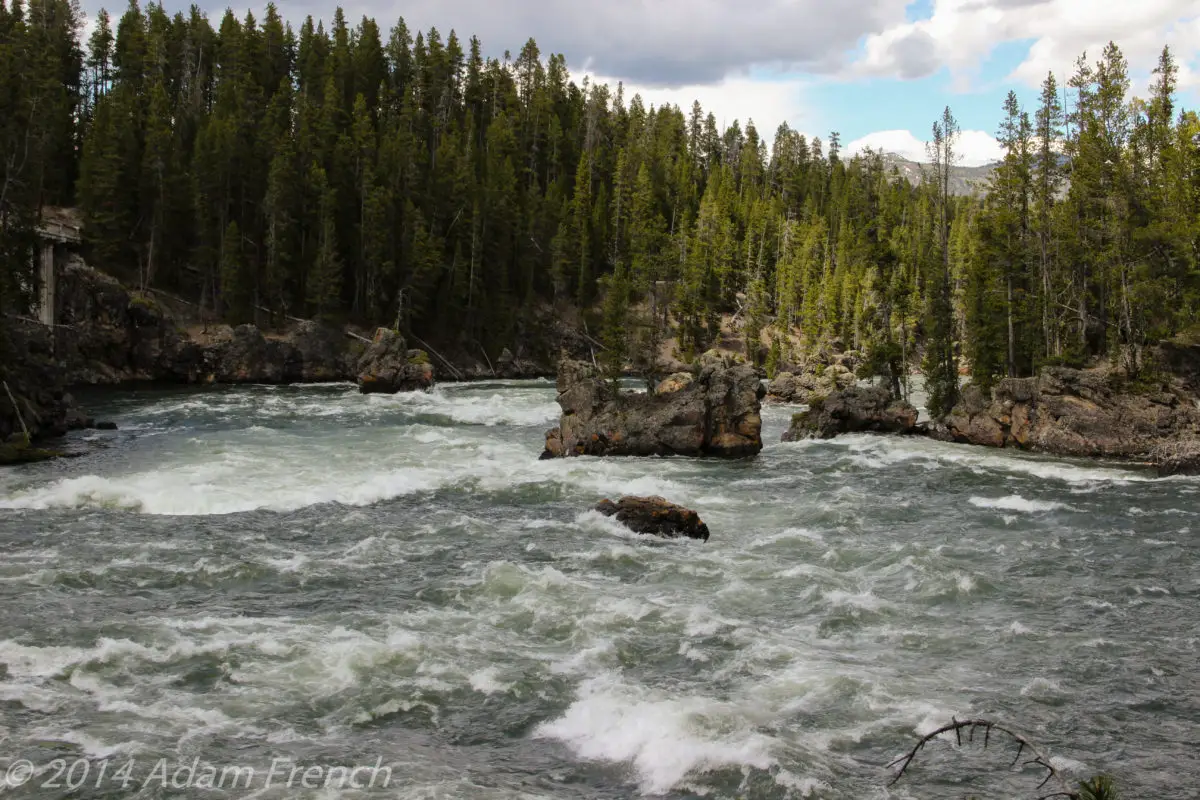
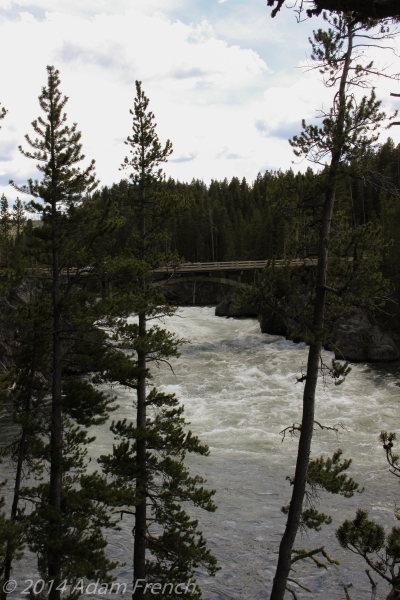
The Yellowstone River:
Where are the South Rim and Uncle Tom’s Trails?
The trails are located in the Grand Canyon of Yellowstone on the South Rim. You access the South Rim Trail from the Wapiti Lake Trailhead, which then joins the Uncle Tom Trail. The trails encompass gorgeous views of both the Upper and Lower Falls of the Yellowstone River. (Only the Lower Falls was visible from the Uncle Tom Trail). The terminus of both of these routes is Point Sublime near Artist Point.
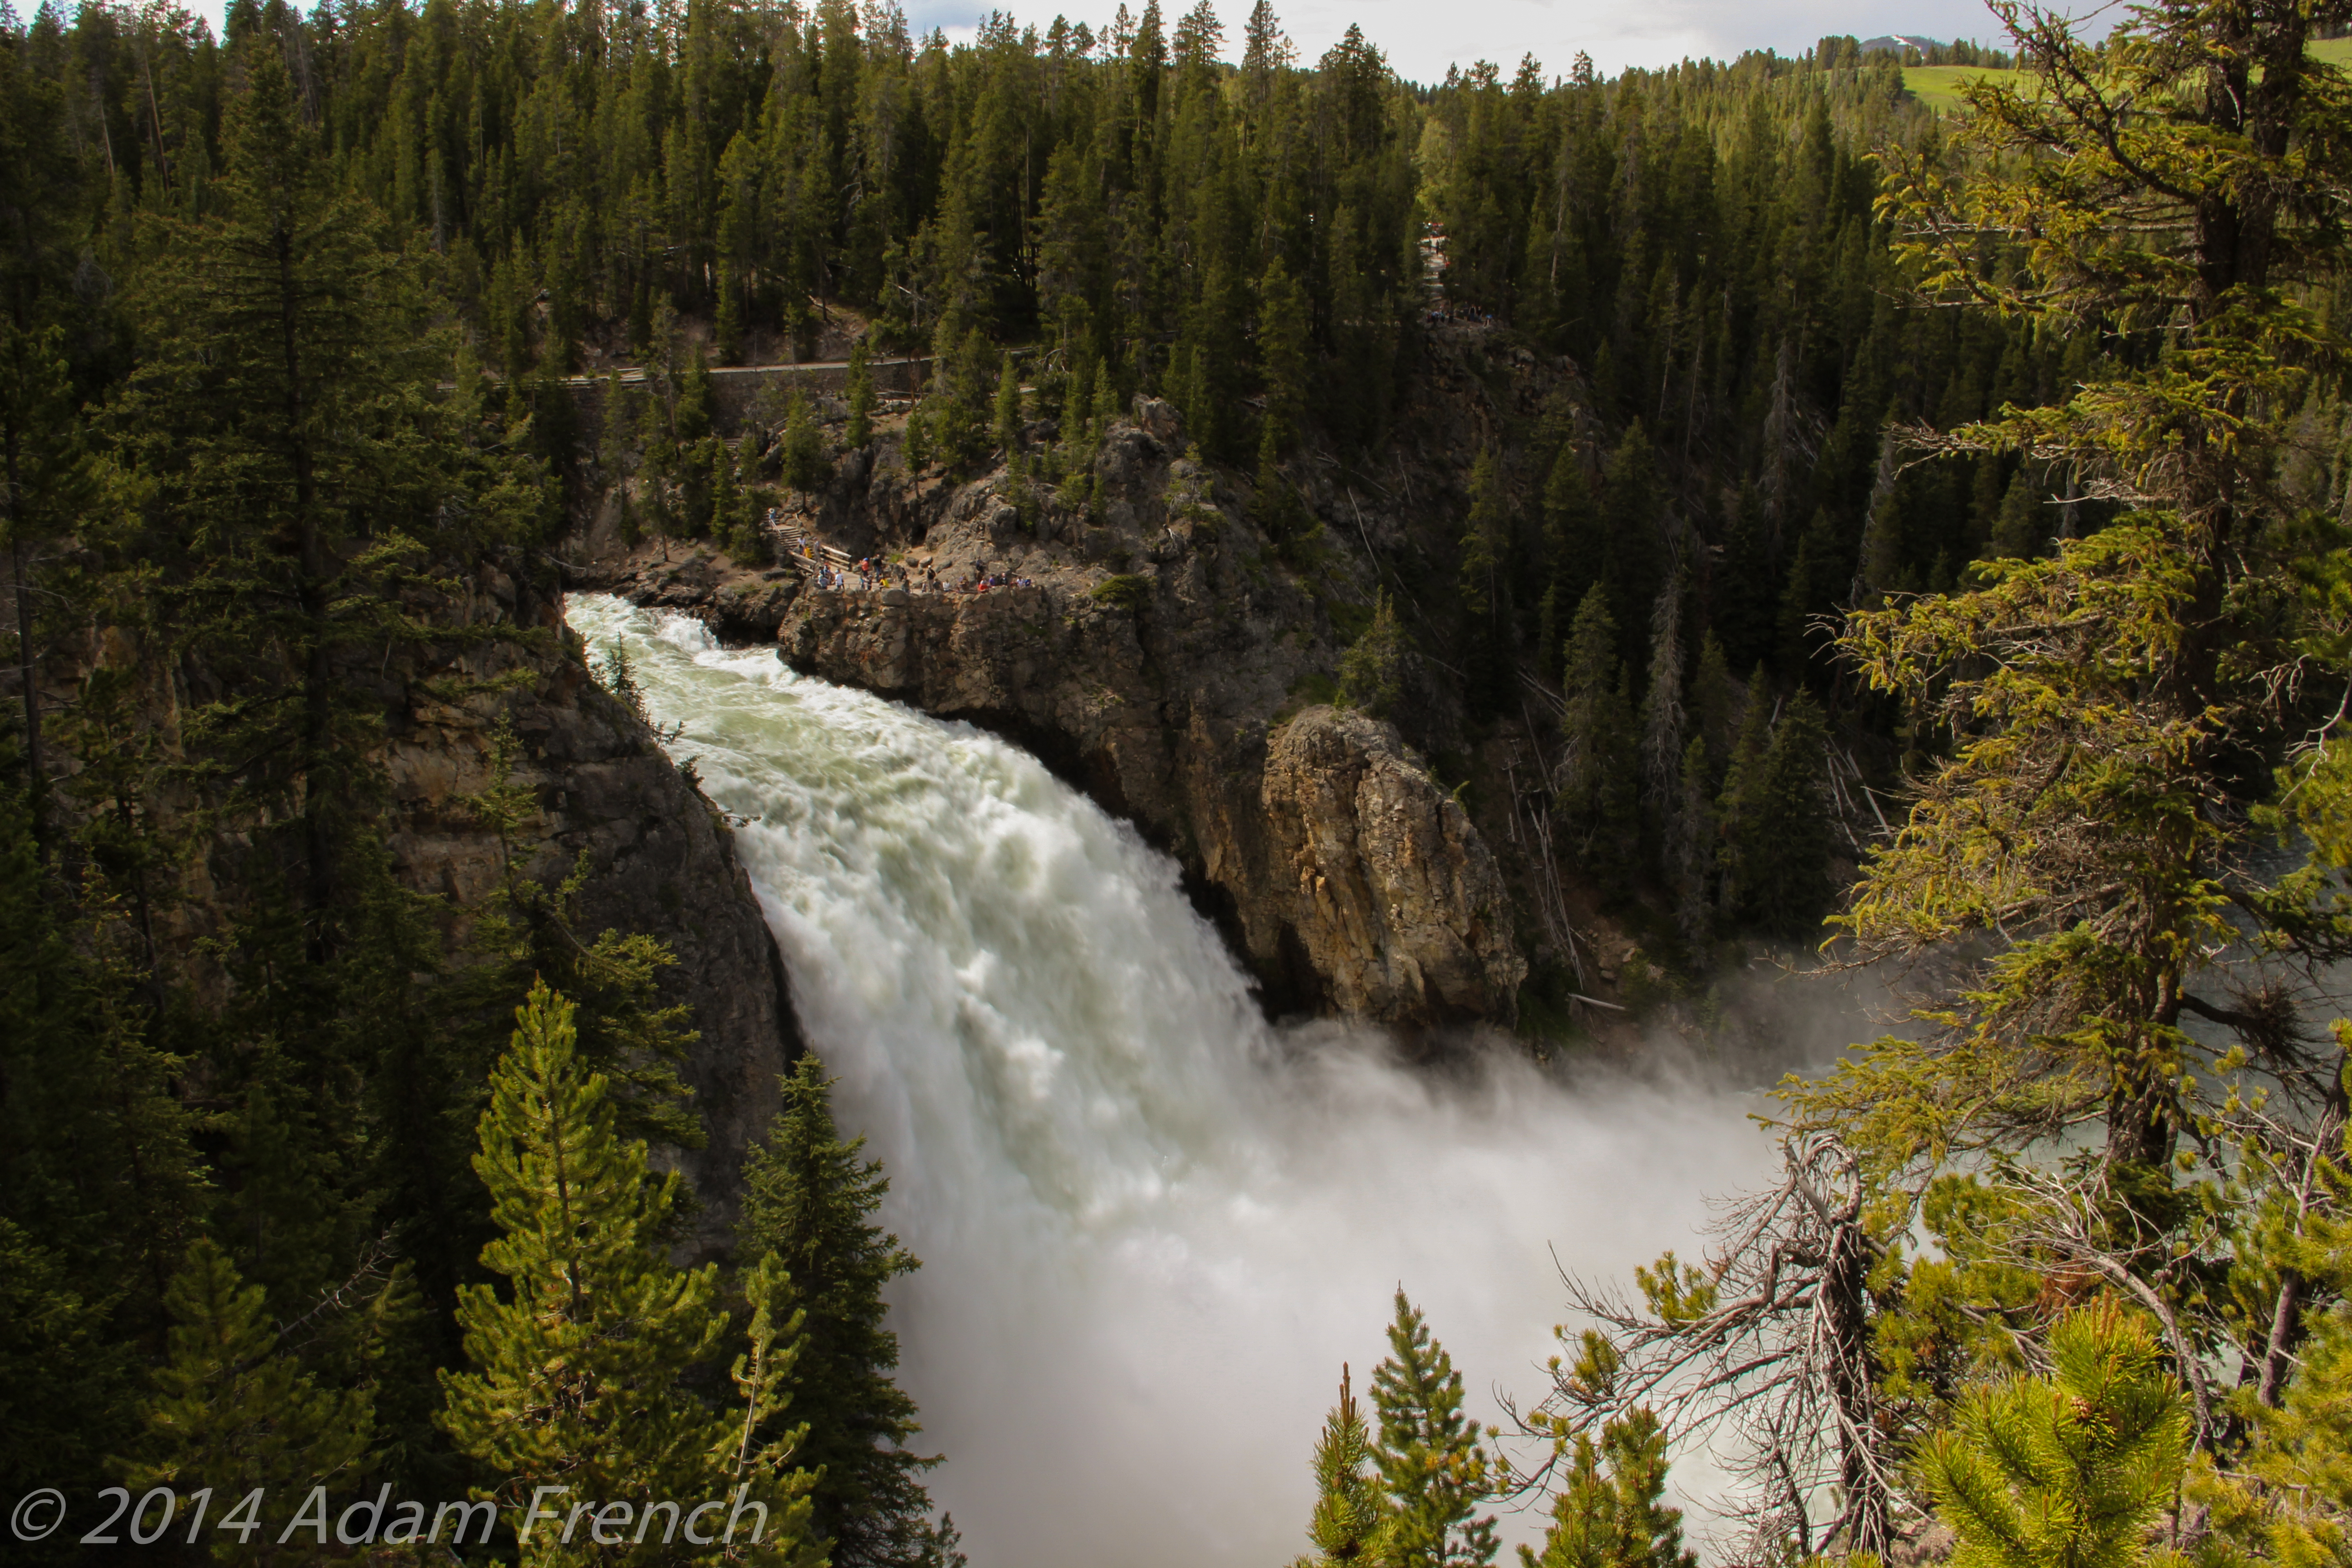
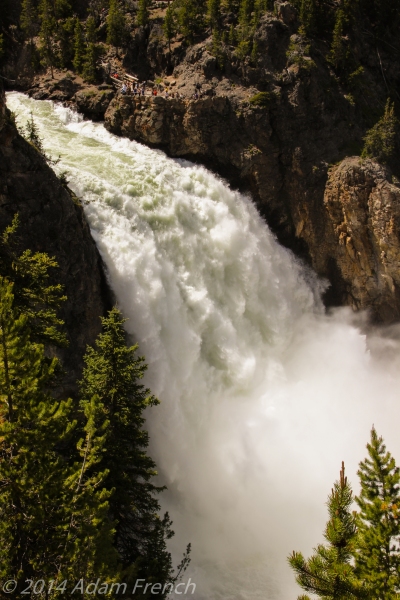
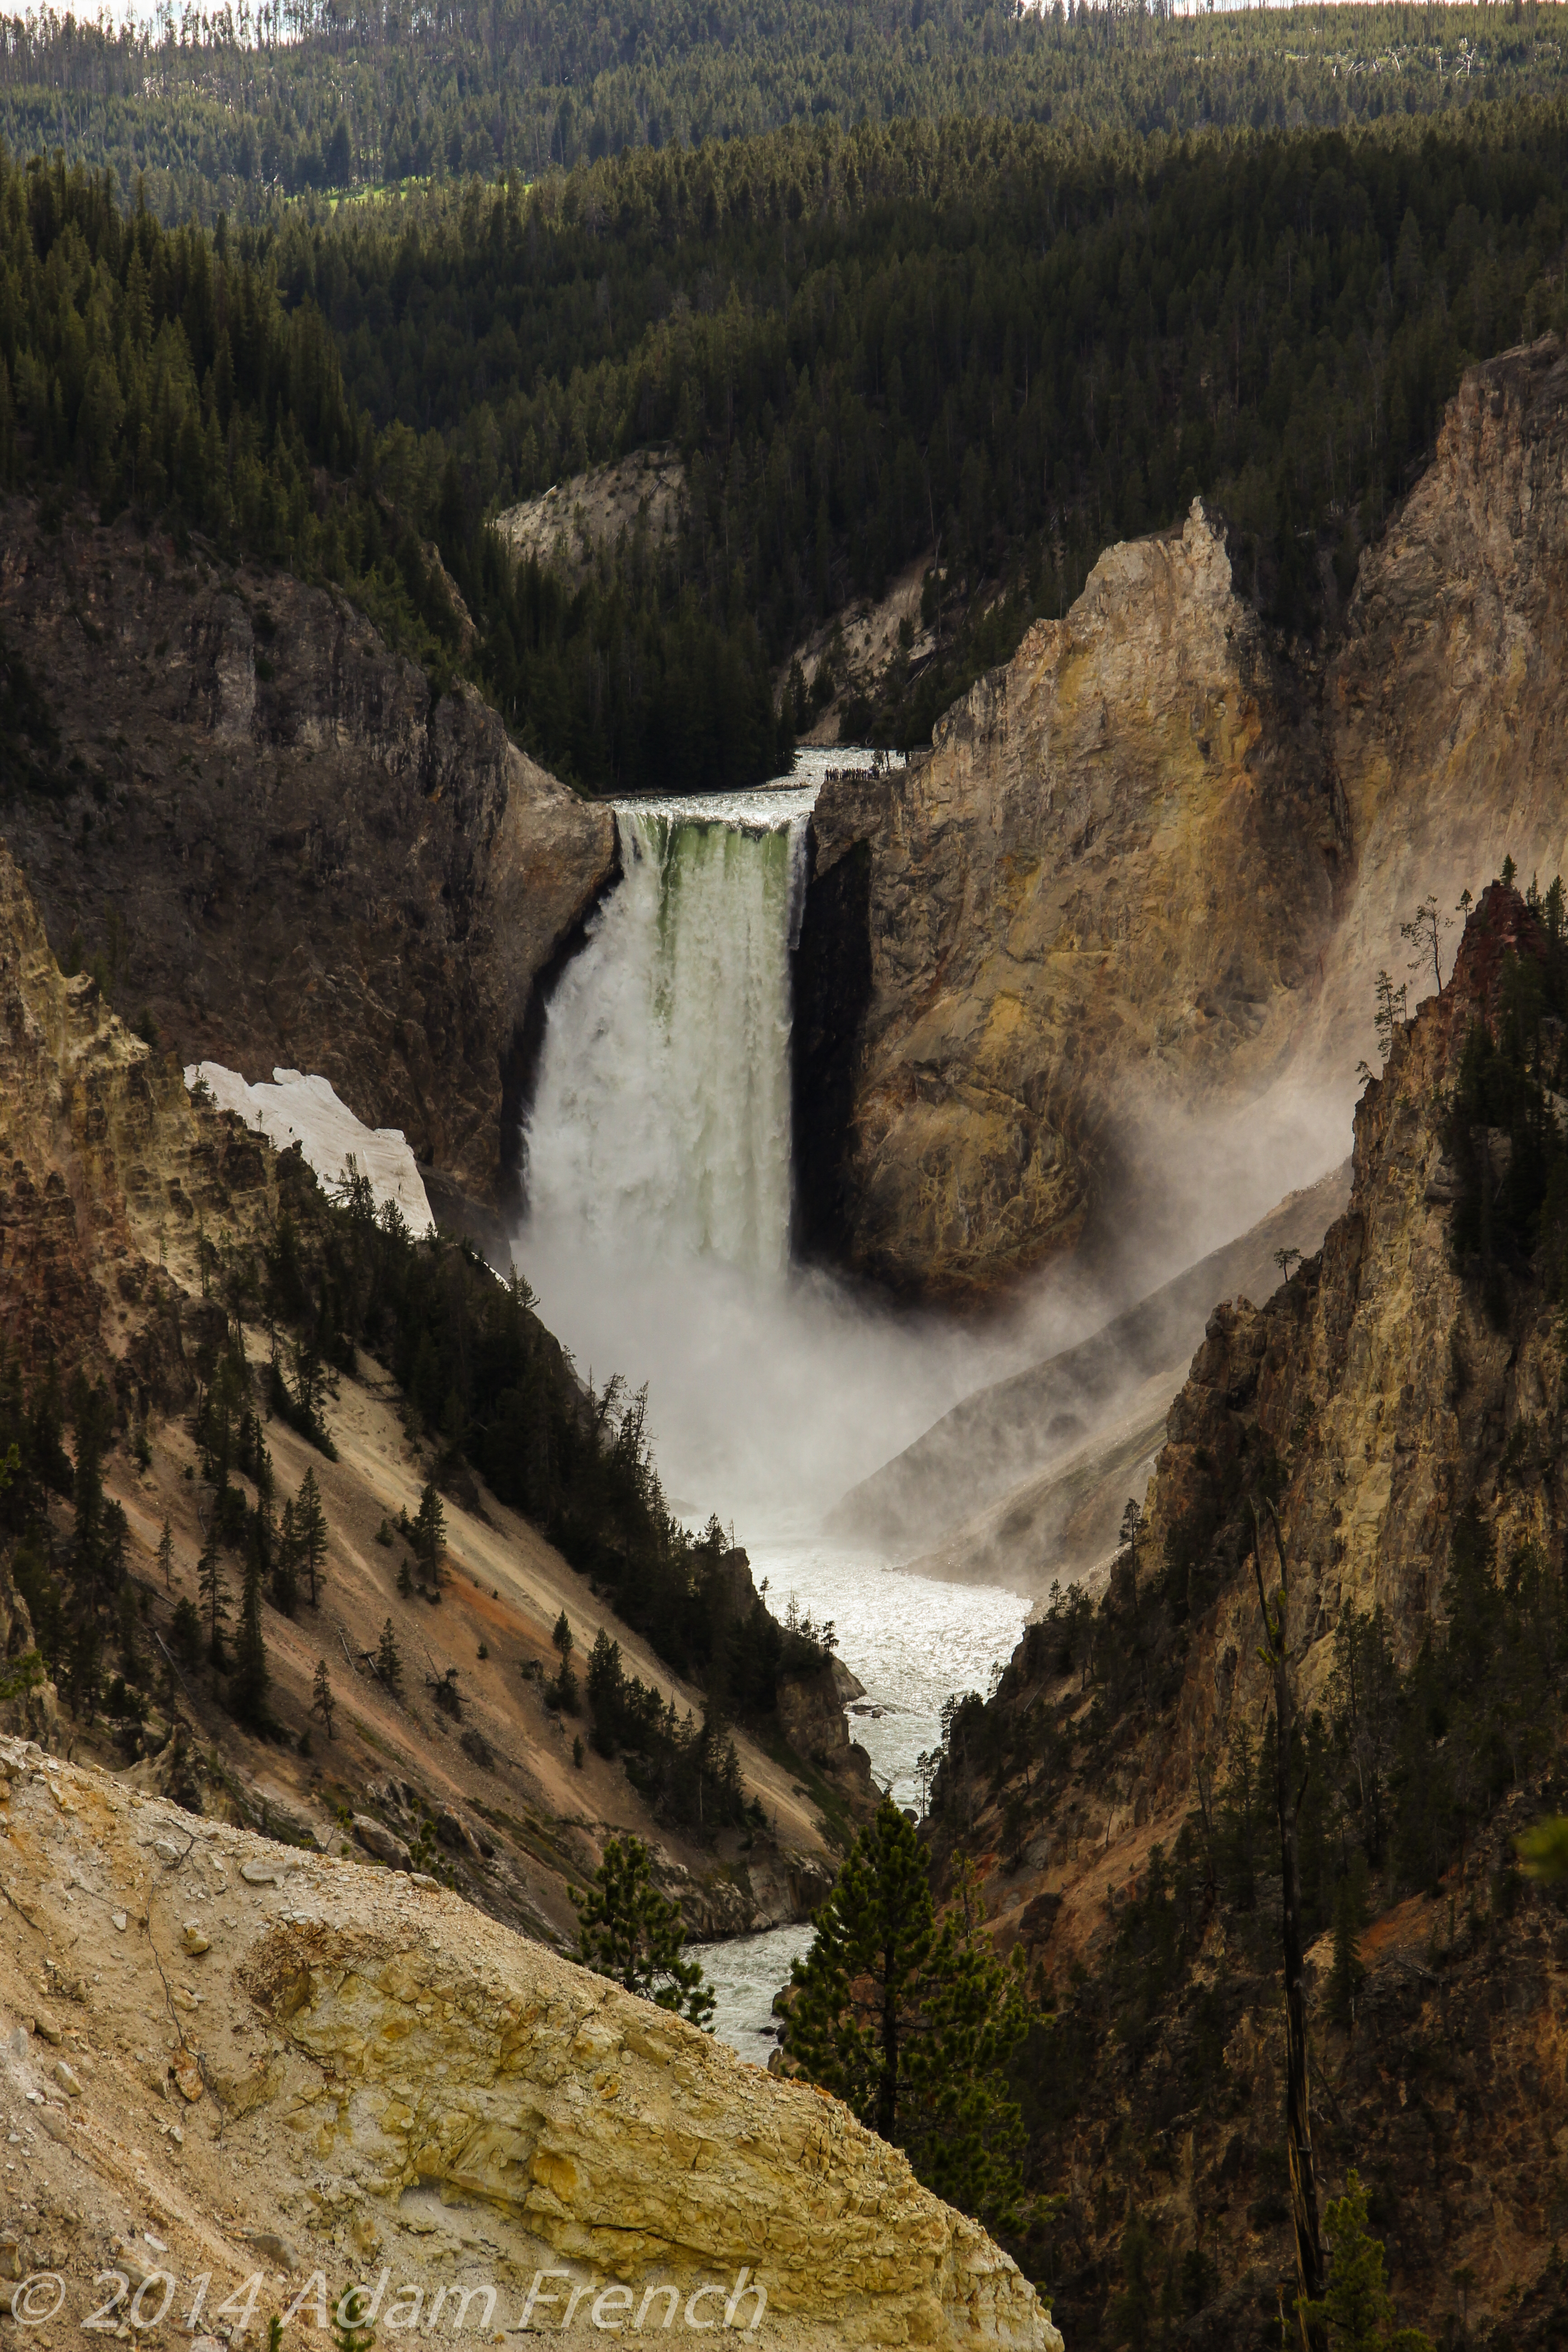
Yellowstone’s Upper Falls
Yellowstone’s Lower Falls
What are the hikes to view Yellowstone’s Upper and Lower Falls like?
Our hike began on the South Rim Trail. In a welcome contrast to the rest of the park, we saw relatively few fellow hikers even though this portion of the trail is easily accessed and has little elevation gain. I highly recommend this peaceful hike with its many beautiful views of the two falls; though as is good practice when hiking throughout the park, always be aware of the wildlife that may be sharing the trail with you (we had no bear encounters on our hike but heard stories of hikers who did).
We had more company on the Uncle Tom Trail as it was more popular. It was named for H.F. Richardson, or Uncle Tom, as was his nickname. In the late 19th Century he began guiding tourists into the Canyon to view the waterfalls and cross the river. At that time the trail consisted of numerous ropes and rope ladders that visitors had to negotiate. Fortunately on our hike, one only had to manage a hefty climb (300+ steps!) on a metal staircase bolted into the rock on the side of the canyon.
As I’ve mentioned plenty of times on this blog, I harbor a hefty case of acrophobia, or fear of heights. I tend to get vertigo and “freeze” when confronted with a lack of earth in front of me–an interesting condition for someone who enjoys hiking in high places regularly. 😝
Due to this, I was a little nervous upon venturing onto the Uncle Tom Trail as I knew the steps bolted into the side of the canyon were composed of perforated steel. That’s right, not only were you hanging off the side of a cliff but as you descended you were awarded with a view of the gaping chasm yawning below you!…or so I thought. In truth, the canyon wall was very rocky and the steps lingered over rock ledges the entire way. Though the steps did hang off the side of the wall and span a chasm, the rock floor you saw was never more than 20 or 30 feet below your feet. To my surprise, I found the descent surprisingly bearable.
The Stairs that made up Uncle Tom’s Trail:
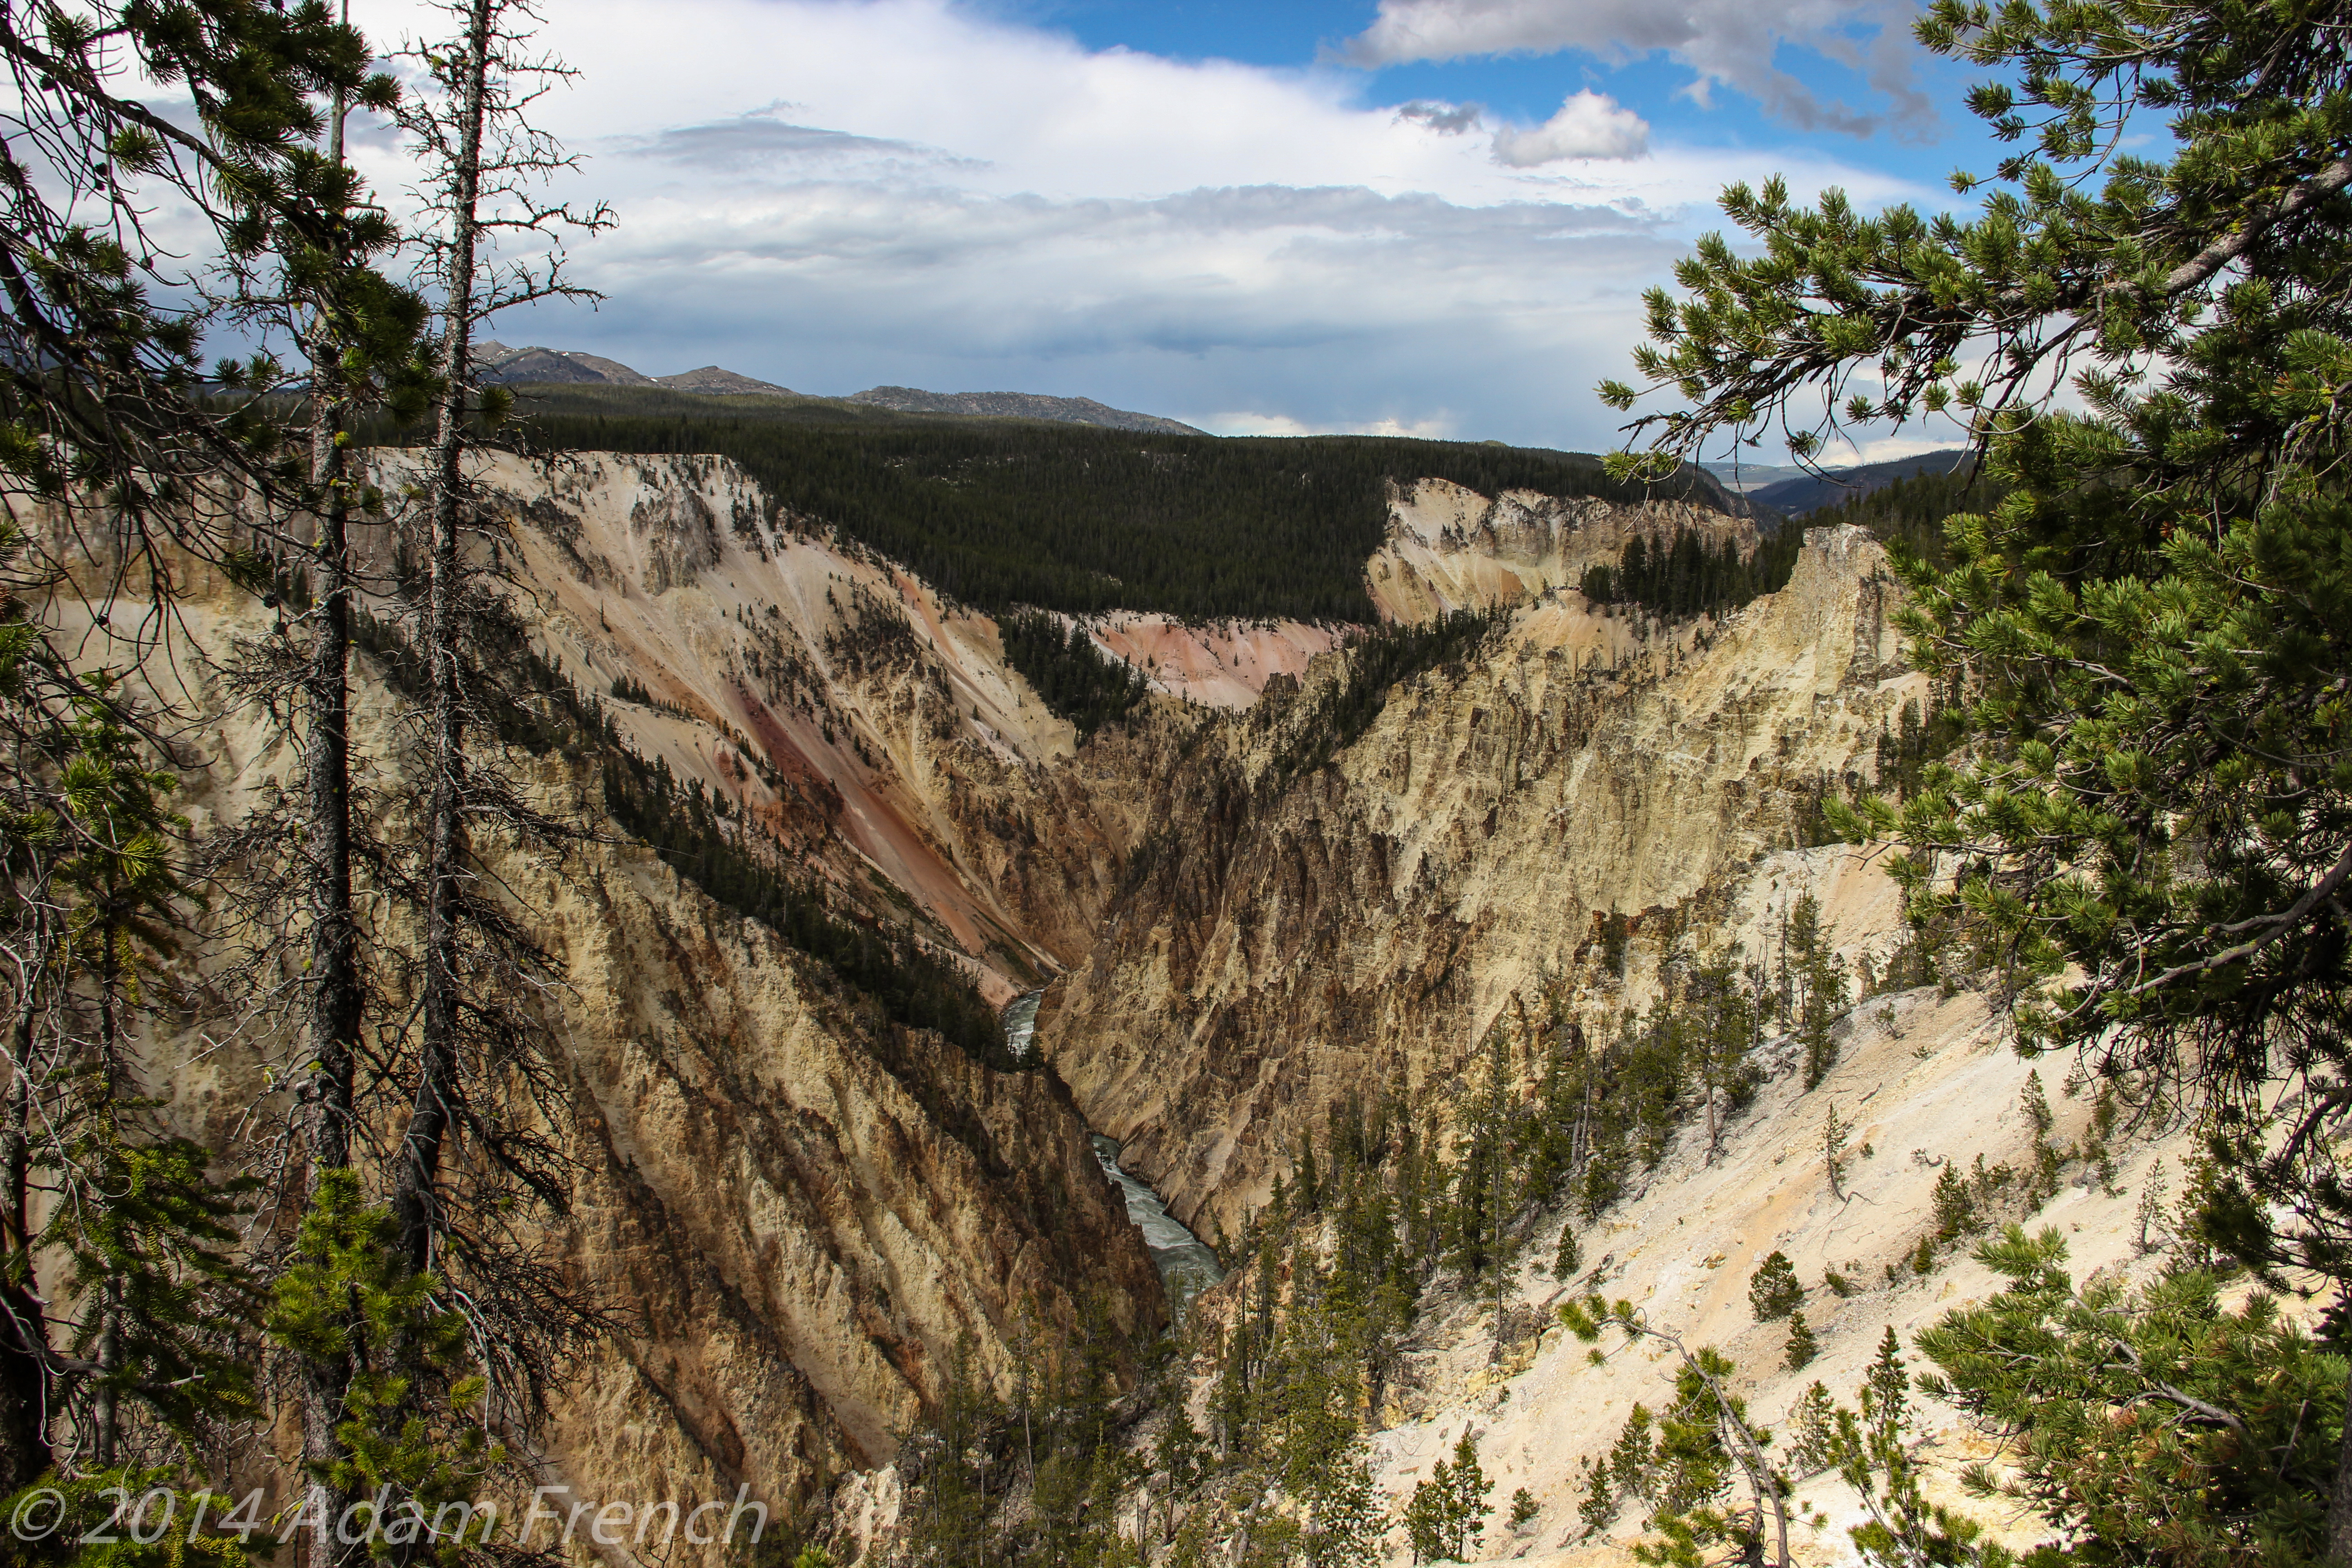
Grand Canyon of the Yellowstone
I’ve been to the “real” Grand Canyon, and while it’s got an exquisite beauty all its own, I think the Grand Canyon of Yellowstone surpasses that splendor in some ways and truly lives up to its name. This canyon is far smaller and more narrow than its big brother to the south, with rock colors that vary between yellows and reds contrasted with the deep greens of the pine trees on the rim. There were also numerous patches of snow still remaining in late June.
So, if you’re looking to stretch your legs a little on your next trip to Yellowstone and want amazing views of the Upper and Lower Falls, check out the South Rim Trail!
Have you hiked these trails? Let me know what you thought of them in the comments!
Did you enjoy this post? Pin it!
Like what you read here today? Please feel free to leave a comment, like or share this post! Add your email at the bottom of the page, or the sidebar to the right, to be notified when a new post is published. By signing up for the email list, you will also receive a free copy of the Tranquil Trekker’s Top 10 Tips of Trekking Do’s and Don’ts!
You can also follow the blog on social media by clicking the links below!
We use cookies on our website to give you the most relevant experience by remembering your preferences and repeat visits. By clicking “Accept”, you consent to the use of ALL the cookies.
This website uses cookies to improve your experience while you navigate through the website. Out of these cookies, the cookies that are categorized as necessary are stored on your browser as they are as essential for the working of basic functionalities of the website. We also use third-party cookies that help us analyze and understand how you use this website. These cookies will be stored in your browser only with your consent. You also have the option to opt-out of these cookies. But opting out of some of these cookies may have an effect on your browsing experience.
Necessary cookies are absolutely essential for the website to function properly. This category only includes cookies that ensures basic functionalities and security features of the website. These cookies do not store any personal information.