In this post, I review the Coon Hollow Trail, located in the central Black Hills.
Another great spot in my series of trails close to Rapid City is the Coon Hollow trail in the Black Hills!
Where is the Coon Hollow Trailhead?
The Coon Hollow trailhead is located just off of US 16, around eight miles south of Rapid City (from the Catron Boulevard/16 Bypass intersection).
Just past the Rockerville exit, turn right onto Silver Mountain Road. Then, take the first right and turn onto a forest road that runs into the woods. Immediately to your left, you will see a large dirt area where you can park. To reach the trail, cross the forest road and look for the footpath that is clearly marked by “Trail 50” placards.
What is the Coon Hollow Trail like?
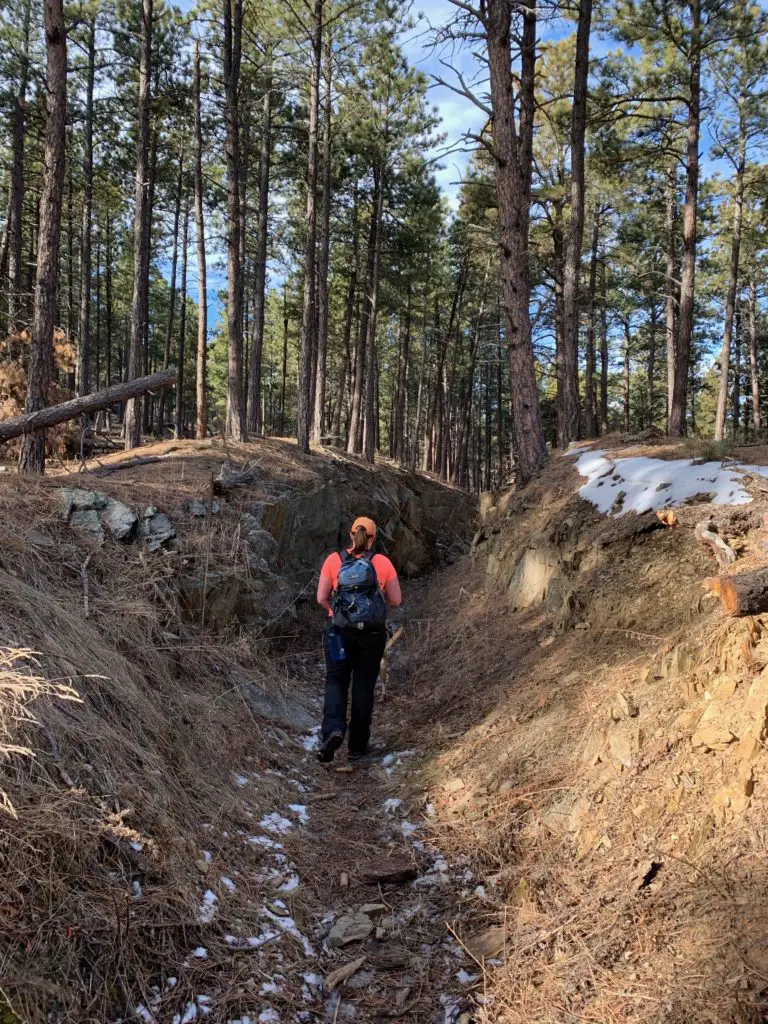
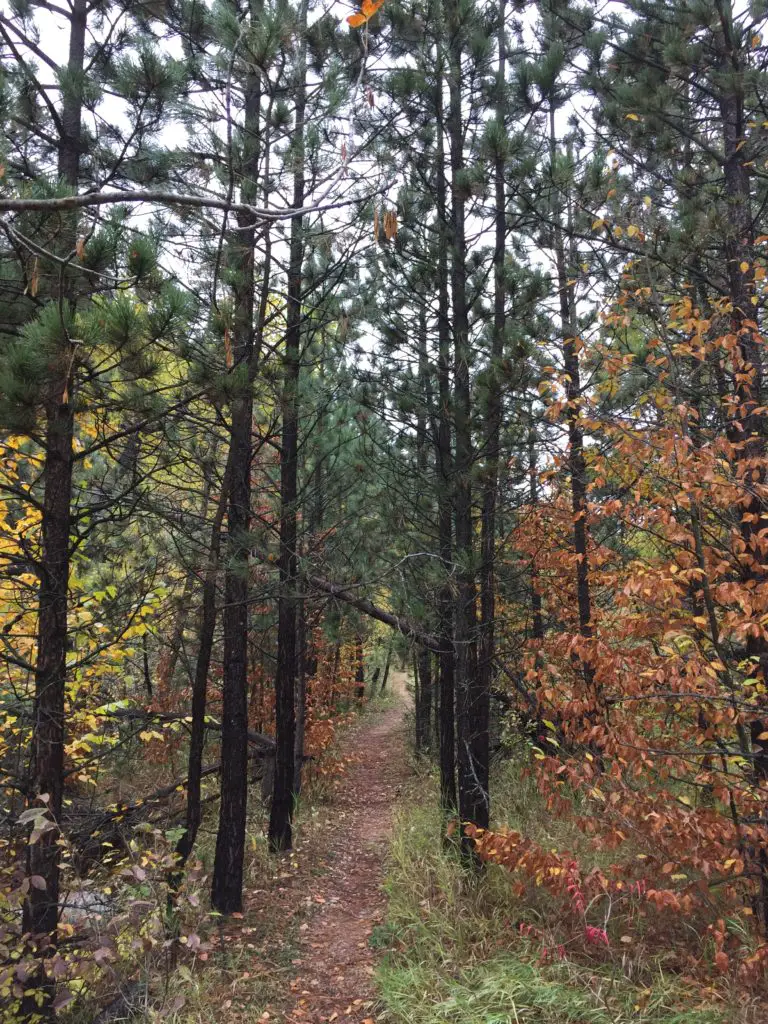
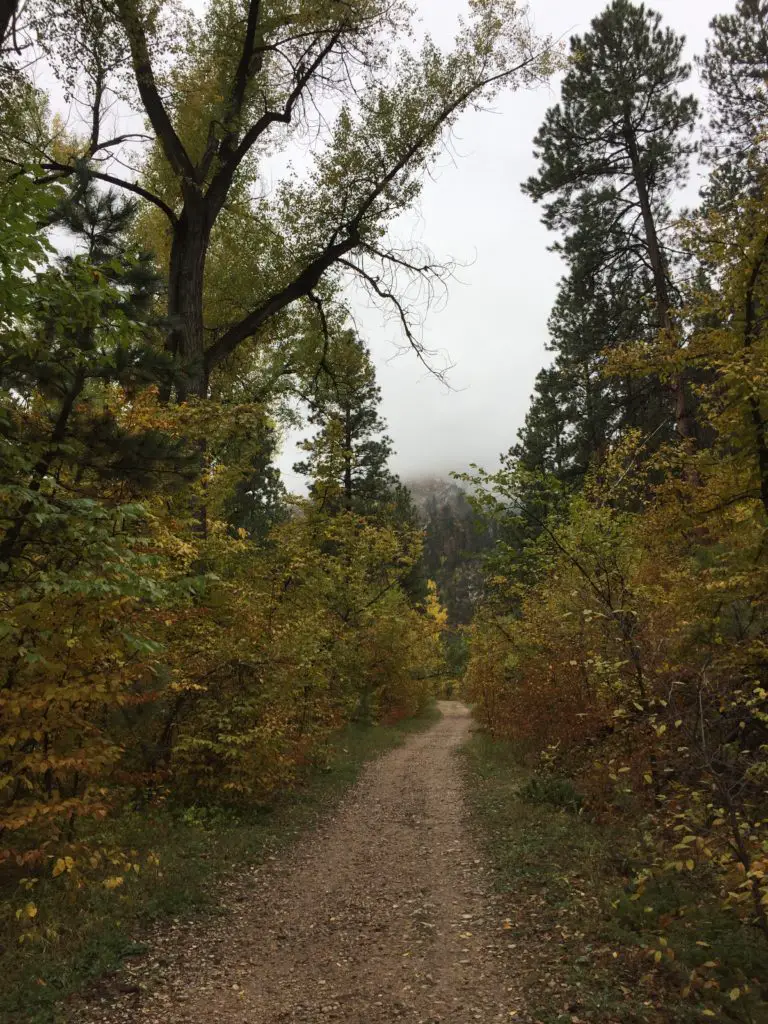
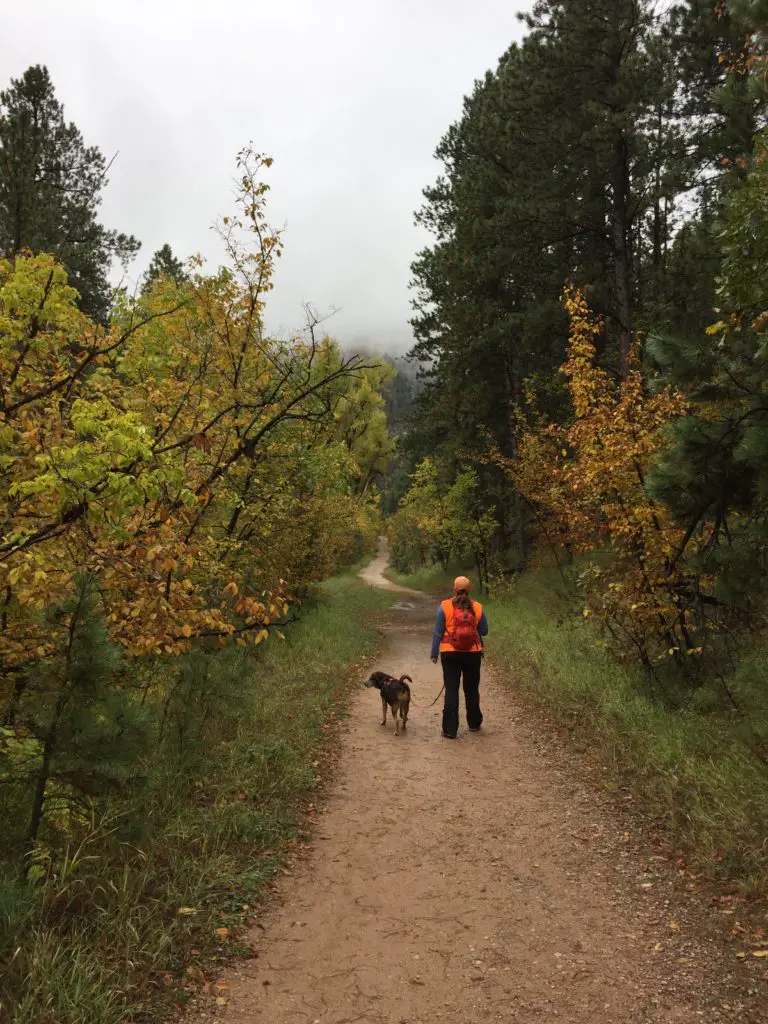
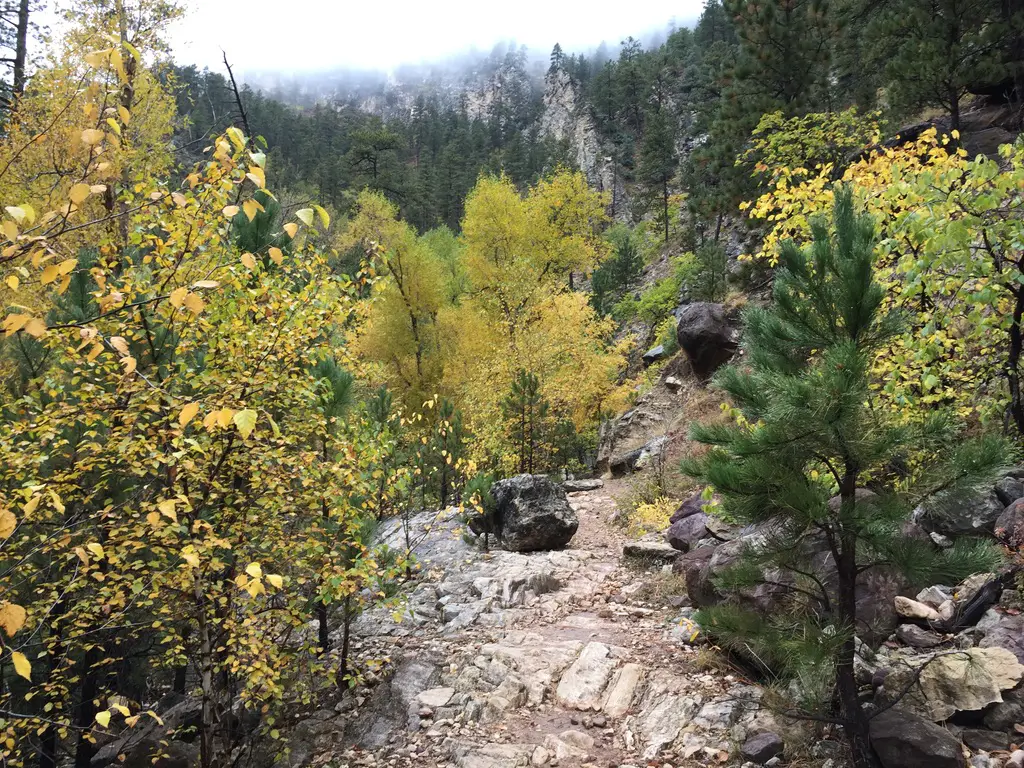
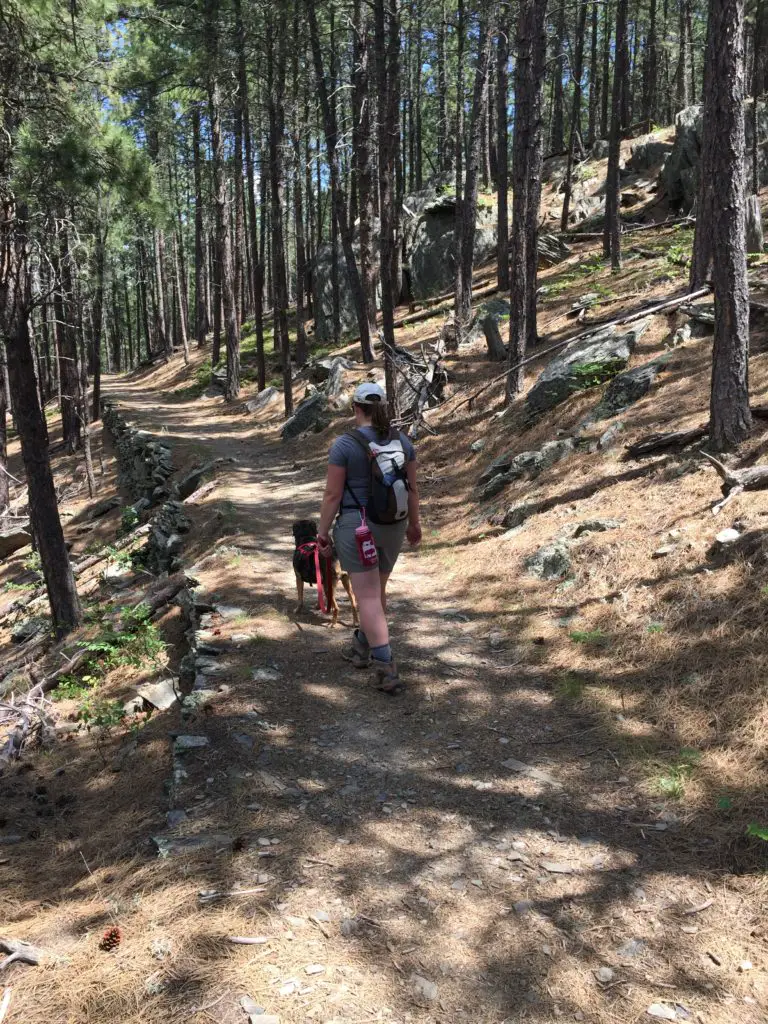
This trail is actually another branch of the Black Hills Flume Trail that I discussed in a previous post. The first 1/4 – 1/2 mile of it is quite steep (and can be downright treacherous in wet or icy conditions). However, once you reach the flume bed, it’s largely flat and wide and is an easy hike.
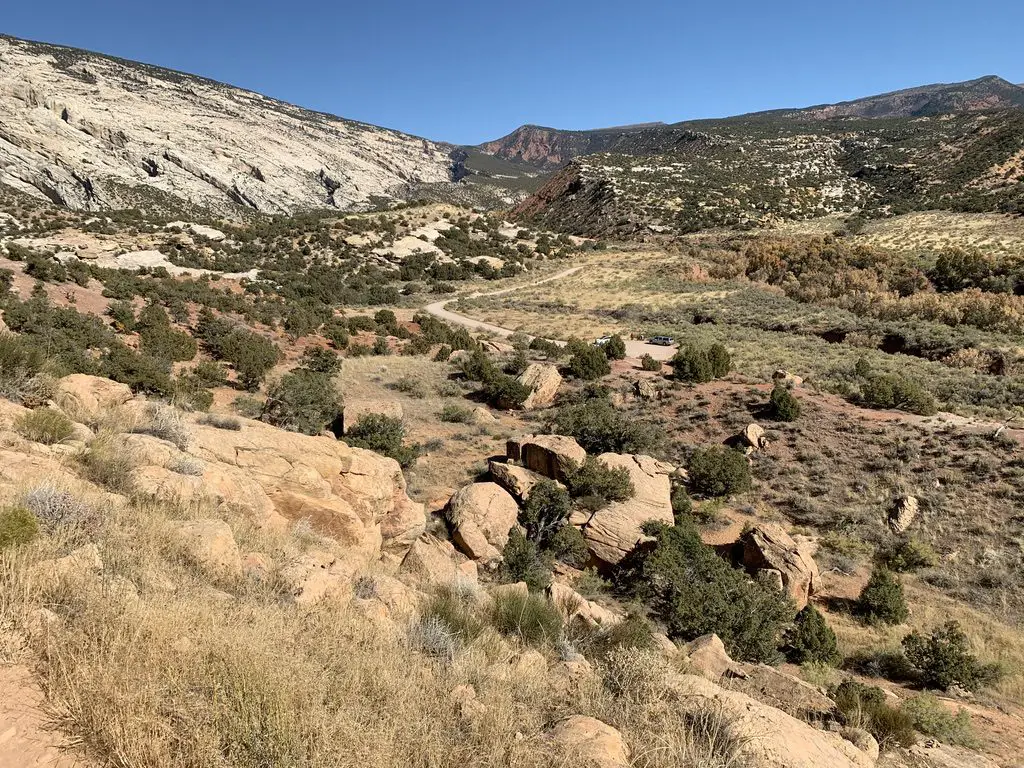
This portion of the trail is around three miles long, each way. It ends at an old forest road where it meets up with the the Boulder Hill Trail. Usually we walk out and back, though you can make loops if you include some of the local forest roads.
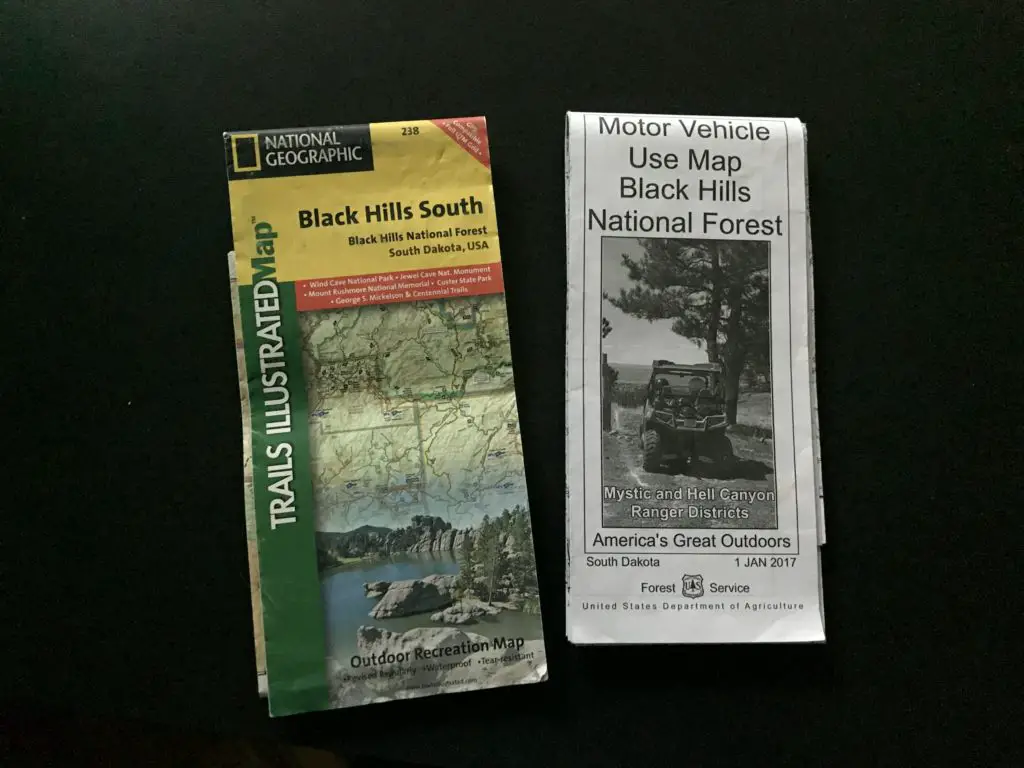
It’s important to always carry updated maps of the local trails and forest roads (like the ones shown below) when you’re out in the woods. This is especially important if you want to combine various routes to make your own loops. The paths are pretty clear in this area, but you can still get turned around if you aren’t familiar with where they all go.
These are the types of maps we frequently use
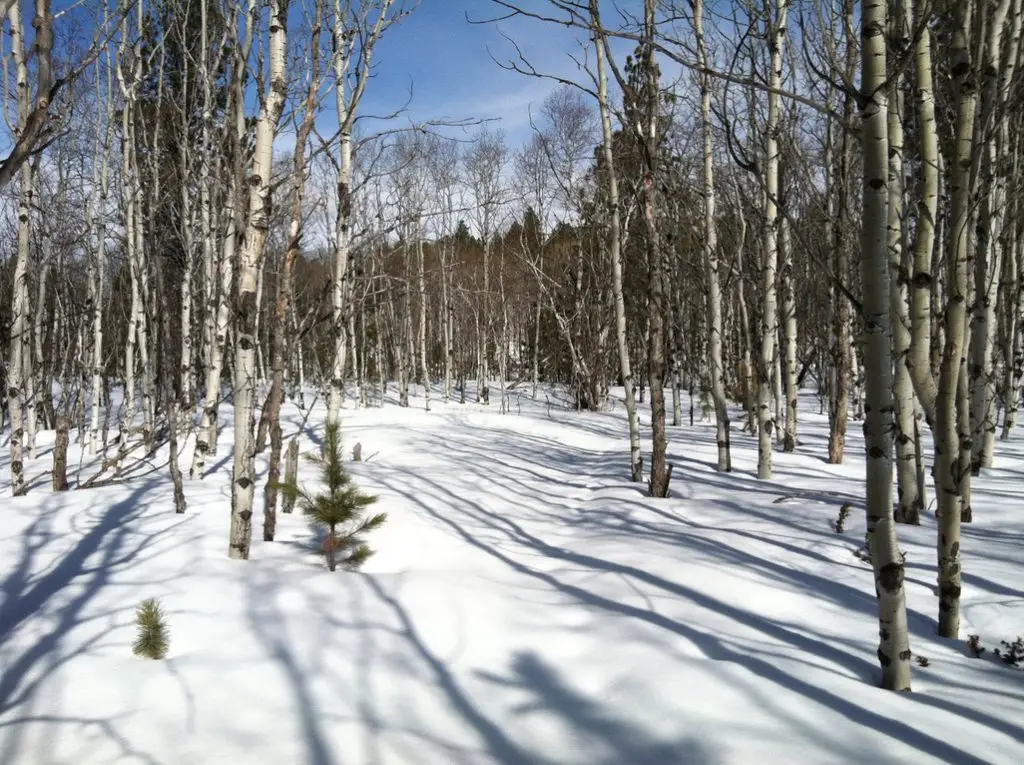
This is a great trail! I would rank it as “moderate”, mostly due to the initial, steep section. (There are also a few portions of it that traverse low-lying areas which can get slippery in the snow or mud.) However, the majority of it is easy as it just follows the flat, flume bed. Once you reach that part, all members of the family should be able to handle the trail easily (including the four-legged ones. Puppers highly recommends this path, as do several of her friends that we met along the way! 🐶)
Me traversing a portion of the Flume Trail. Isn’t it beautiful, the way the sun dapples through the trees? (And yes, it was early January and I was wearing shirt sleeves; part of the reason why I love living in the Black Hills!)
There are many great views of the surrounding forestland available from this trail. In a few places, you can see all the way to Rapid City, and even to the prairies that lie farther to the east.
Coon Hollow Offers a Variety of Ways to Enjoy the Outdoors
One thing I really like about this area is that it contains a variety of trails that are good for both hiking and mountain biking. I also like that there are different trails for bikers and hikers, so the two are kept largely separated.
The actual bike trails are mostly one-track, though none of the areas we’ve encountered are terribly steep or technical. The Trekkers (especially me) are novice mountain bikers, and we’ve been able to manage these routes fairly well. There are also old forest (and fire) roads spread around the area which make for easier biking and hiking options.
If you’re looking for another family-friendly trail to hike in the Black Hills, that is close to Rapid City, check out the Coon Hollow Trail!
Is this a trail you’ve tried for hiking or on your mountain bike? Let me know your favorite parts of it in the comments!
If you’d like to read about the other trails in this series, you can click the links below:
Like what you read here today? Please feel free to leave a comment, like or share this post! Want to be notified when a new post is published? Add your email and click the “Follow” button at the bottom of the page or the sidebar to the right. By signing up for the email list, you will also receive a free copy of the Tranquil Trekker’s Top 10 Tips of Trekking Do’s and Don’ts!
You can also follow the blog on social media by clicking the links below!
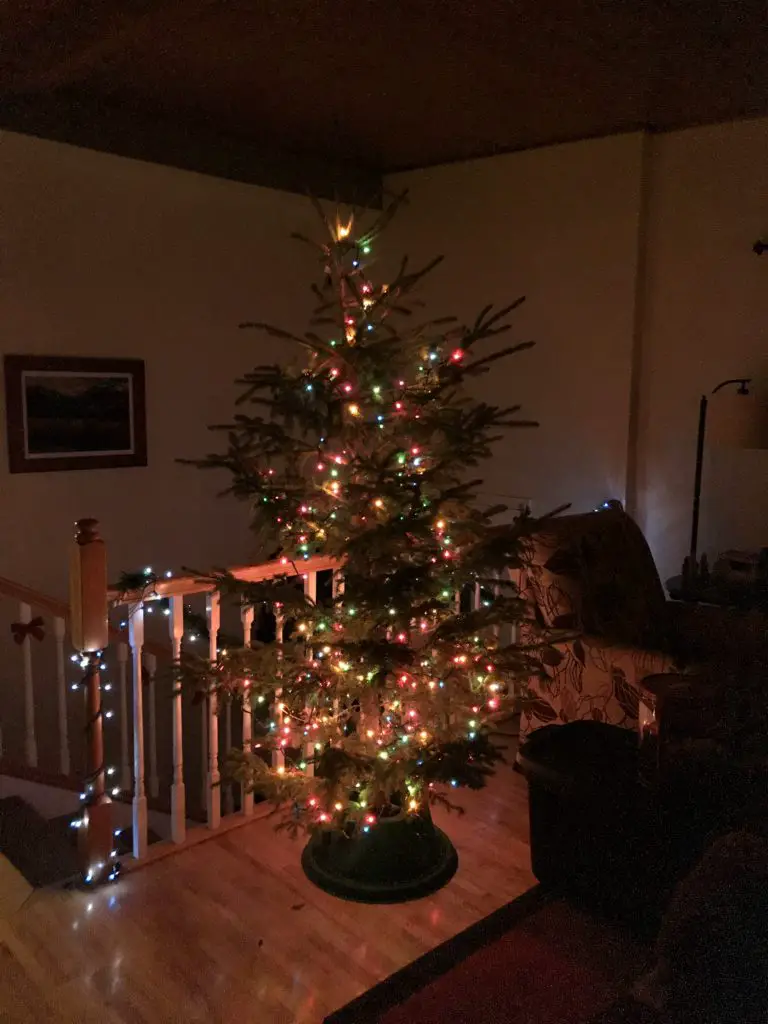
In this post, I discuss a delightful holiday pastime, Christmas tree hunting in the Black Hills National Forest.
Well, kids, it’s that time of year again! Thanksgiving is over, the turkey has been eaten, you may have gotten some good deals on holiday shopping…or better yet, you said, “FORGET THAT!” and chose to #optoutside to enjoy some fresh air and work off those Thanksgiving Dinner calories instead. Either way, it is now, FINALLY time to enjoy the Christmas season!
The tree is decorated, the lights are sparkling (both inside and outside the house), and Trans-Siberian Orchestra is booming from the speakers. Christmas has now been fully embraced by the Trekker household!
This time of year the Trekkers take part in what has become an annual tradition: Christmas Tree Hunting in the Black Hills National Forest for the Trekker Family Christmas Tree!
Some years, thigh-high snowdrifts can make the hunt exceptionally challenging (Mr. Trekker plays lumberjack, carrying the tree and saw. 😮)
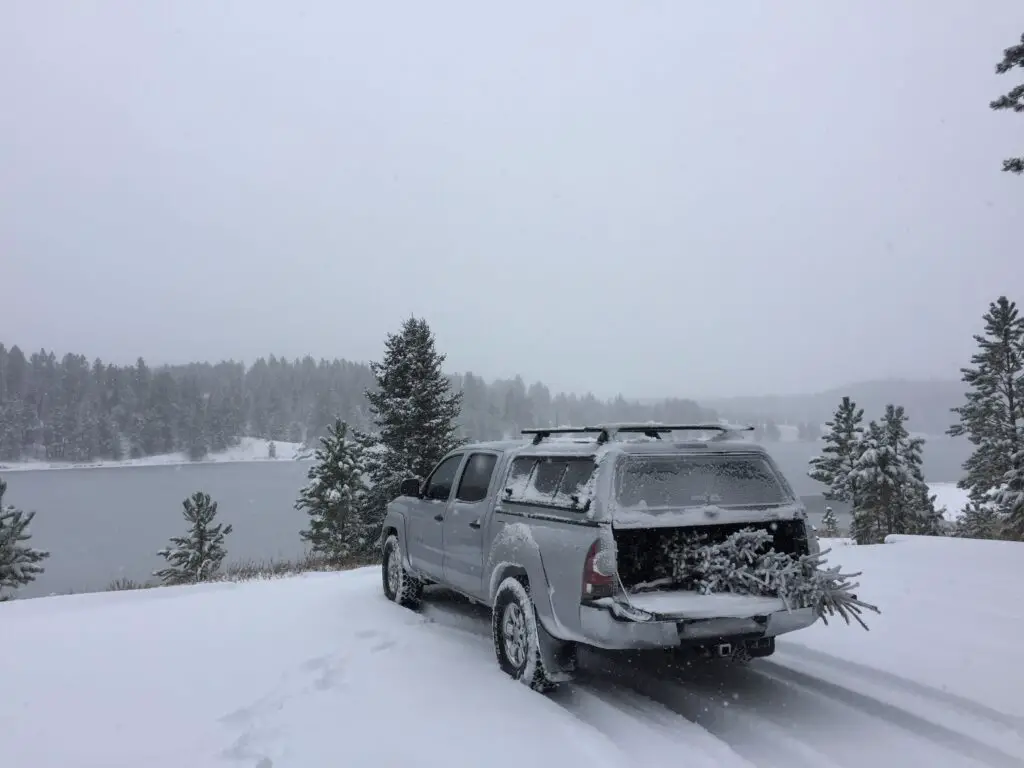
We load up the “old family sleigh” (otherwise known as Mr. Trekker’s 4WD truck) and head out to our favorite, tree cutting spot (no, I’m not going to tell you exactly where it is. We’ve got our eyes set on other trees up there for future years! 😉)
A Trekker Family Christmas Tree in its natural environment
Where do I get a permit for hunting Christmas trees in the Black Hills?
The Forest Service encourages the practice of hunting Christmas trees in the national forest to assist them in maintaining healthy forest spaces. Also, there is nothing better to compliment the Christmas Season than the smell of pine in your living room!
You do need a permit to cut a Christmas tree in these areas. They are $10 each (max 5 per person) and you have to go to a Forest Service office or certain private vendors to obtain one.
For information on how to go about acquiring these, check the Forest Service website (where you can buy and download a pass online).
There are some restrictions on which parcels of land you can acquire the trees from and all usual restrictions pertaining to vehicle travel still apply. Also, be sure you are on public, Forest Service land and not Private Property when tree hunting.
Something to be aware of if you’re going tree hunting in the national forest…these are not “tree lot” or “tree farm” trees. These are WILD, “free-range” trees. 😮 They haven’t been trimmed and shaped on a farm with others their size, placed a perfect distance apart for ultimate fullness. They’ve been forced to fight for sunlight and nutrients among others of their kind, some that are MUCH bigger.
They may have had to grow around other trees or obstructions or had to survive vicious storms and wind, or the damage caused by animals. Basically, these trees look how they are SUPPOSED to, without human intervention. 😁 The chances of finding “the perfect tree” are pretty slim, but you’ll know when you find the “right” tree. It calls to you. 😉
Where are good places to hunt for Christmas trees in the Black Hills National Forest?
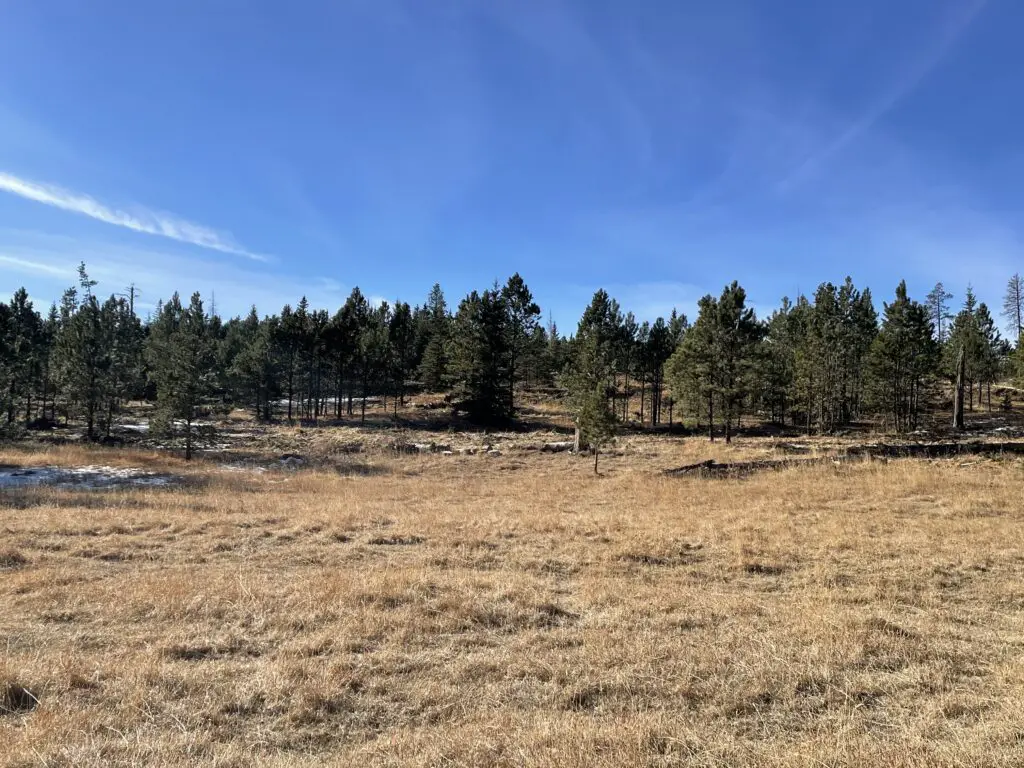
There are a variety of pine trees available in the Hills for this purpose, ranging from the stereotypical, Christmasy, spruce tree to ponderosa pines. I personally recommend the Black Hills Spruce which is usually found on north-facing slopes of hills and wetter, lower-lying areas. We tend to favor the central to northern Black Hills in our searches.
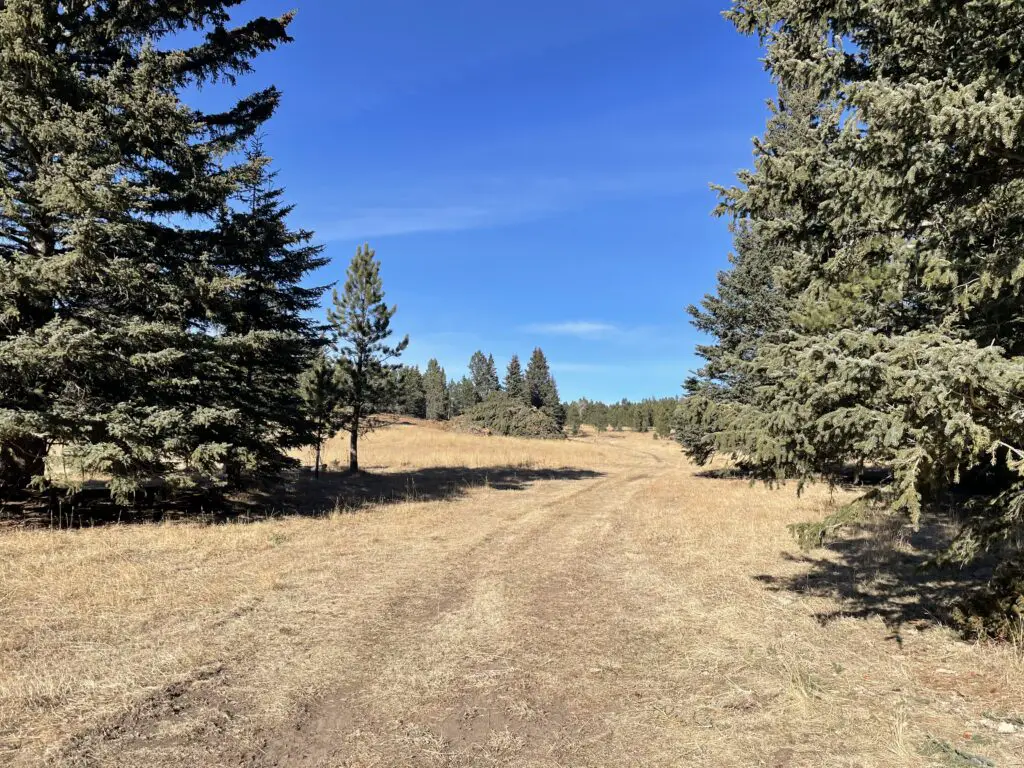
Be warned, many roads in the Hills are Forest Service roads (or old logging roads) which means they are dirt, rutted, and not maintained AT ALL for winter travel. Conditions in this area this time of year can range from dry, dusty forest roads, to mud, to–frequently–several inches or even feet of snow!
I would not recommend driving on them without a four-wheel-drive/high-clearance vehicle. Some of the roads don’t require this but much of it depends upon current conditions and varies year-to-year (or even week-to-week and day-to-day. Heck, let’s face it, in the mountains, it can vary hour-to-hour!)
Usually, the roads are snow-covered, sometimes deeply. Some years (moreso recently) there is little snow and the roads aren’t muddy, so even my all-wheel-drive CRV could suffice, though these are not normal years. Also be aware, as with many places in the Hills, if you were to become stuck or mired…it will likely be quite a hassle (and quite expensive!) to get out–and that’s once you hike somewhere you can get a cell signal to call for a rescue!
Lunch, by Deerfield Lake, after a successful hunt, on a snowy Saturday!
We have a favorite area we frequent (nope, still not going to tell you where it is!) I will tell you this much, the mountains west of Deerfield Lake have an abundance of spruce trees (assuming that’s the type you’re searching for.) Flag Mountain Road is one of our favorite routes that takes you to some good hunting spots. (That’s ALL the helpful info you will get from me!)
The difficulty with this location is that it usually receives some of the heavier snowfall in the Hills. Even if there is little to no snow in the lower elevations, what falls as rain lower down often falls as snow in the higher portions of the Hills. And, as I mentioned previously, as is true throughout the Black Hills, cell service in this area is often spotty (if it exists at all). So if you do get stuck and/or your vehicle becomes disabled, you may have a lengthy walk–possibly in deep snow–before you can call for help. Also, watch your step when you venture off the roads. The deep snow can easily hide stumps, downed trees, and other deadfall that can trip you up.
Our favorite Christmas tree hunting area in less snowy yearsUsually, there are inches to feet of snow in this area.
Mr. Trekker and his truck usually handle the conditions well, we’ve only gotten stuck…a few times. 😇 Mr. Trekker didn’t mind too much though, it gave him a chance to expand his trail, snow-driving skills (and the opportunity to play with his tire chains. 🙄)
To be clear, we know this area well, such as which parts to avoid as the road winds through gullies that tend to drift. We always carry numerous options of recovery gear with us–and yes mom –we always bring extra clothing in case we get stuck out for a lengthy period of time or need to hike out to call for help. We also have bug-out plans if the conditions prove worse than we had anticipated. Click herefor a short video of one wintery trip in the forest!
The truck stalks its prey (said in my best, nature documentary-narrator voice 😉 )
Our usual MO is to wander around one of our favorite hunting sites for a while…until both of us look across the meadow…and see IT, standing on the border between meadow and forest, with its much larger brothers towering in the background. You always have to wait for that “Griswold Family Christmas Tree” moment (and yes, Trekker family tradition dictates we watch that moviethe night we go tree hunting as a necessary part of the Christmas season. )
If you’re really lucky, as you begin the search for the perfect tree it may start to snow gently…then it looks like a Norman Rockwell painting! A word of advice, we’ve learned the trees look smaller in their “natural habitat”, surrounded by their MUCH larger brothers. More than once we’ve had to cut a tree more drastically than we initially thought was needed once we got home and tried to fit it in our living room. We’ve learned if Mr. Trekker’s 6’4 frame can reach the top of the tree…it should fit in the house!
To Conclude
So, if you’re looking for a great place to cut down your own tree, while also helping the local forest stay healthy, don’t be afraid to get your hands a little dirty. Get out to your nearby national forest and get yourself a “free-range” Christmas tree. (It’s more organic than those tree-farm trees! 😉)
Christmas Tree Hunting in the Black Hills (or anywhere really) is an enjoyable, family-friendly experience. I encourage everyone to try it out and as always, be safe and smart when venturing out. The experience of trekking out to the wilds to acquire a tree from its natural habitat is incredibly exhilarating. It speaks to the instinctual lumberjack who’s hiding in the deepest, darkest depths of all of us. It’s also a fun, family activity. As I mentioned earlier, there’s little cell service out there, so gather the kids up in the “old family sleigh” and head out for some good, old fashioned–sans-technology–family time!
…just don’t forget the saw! 🙃
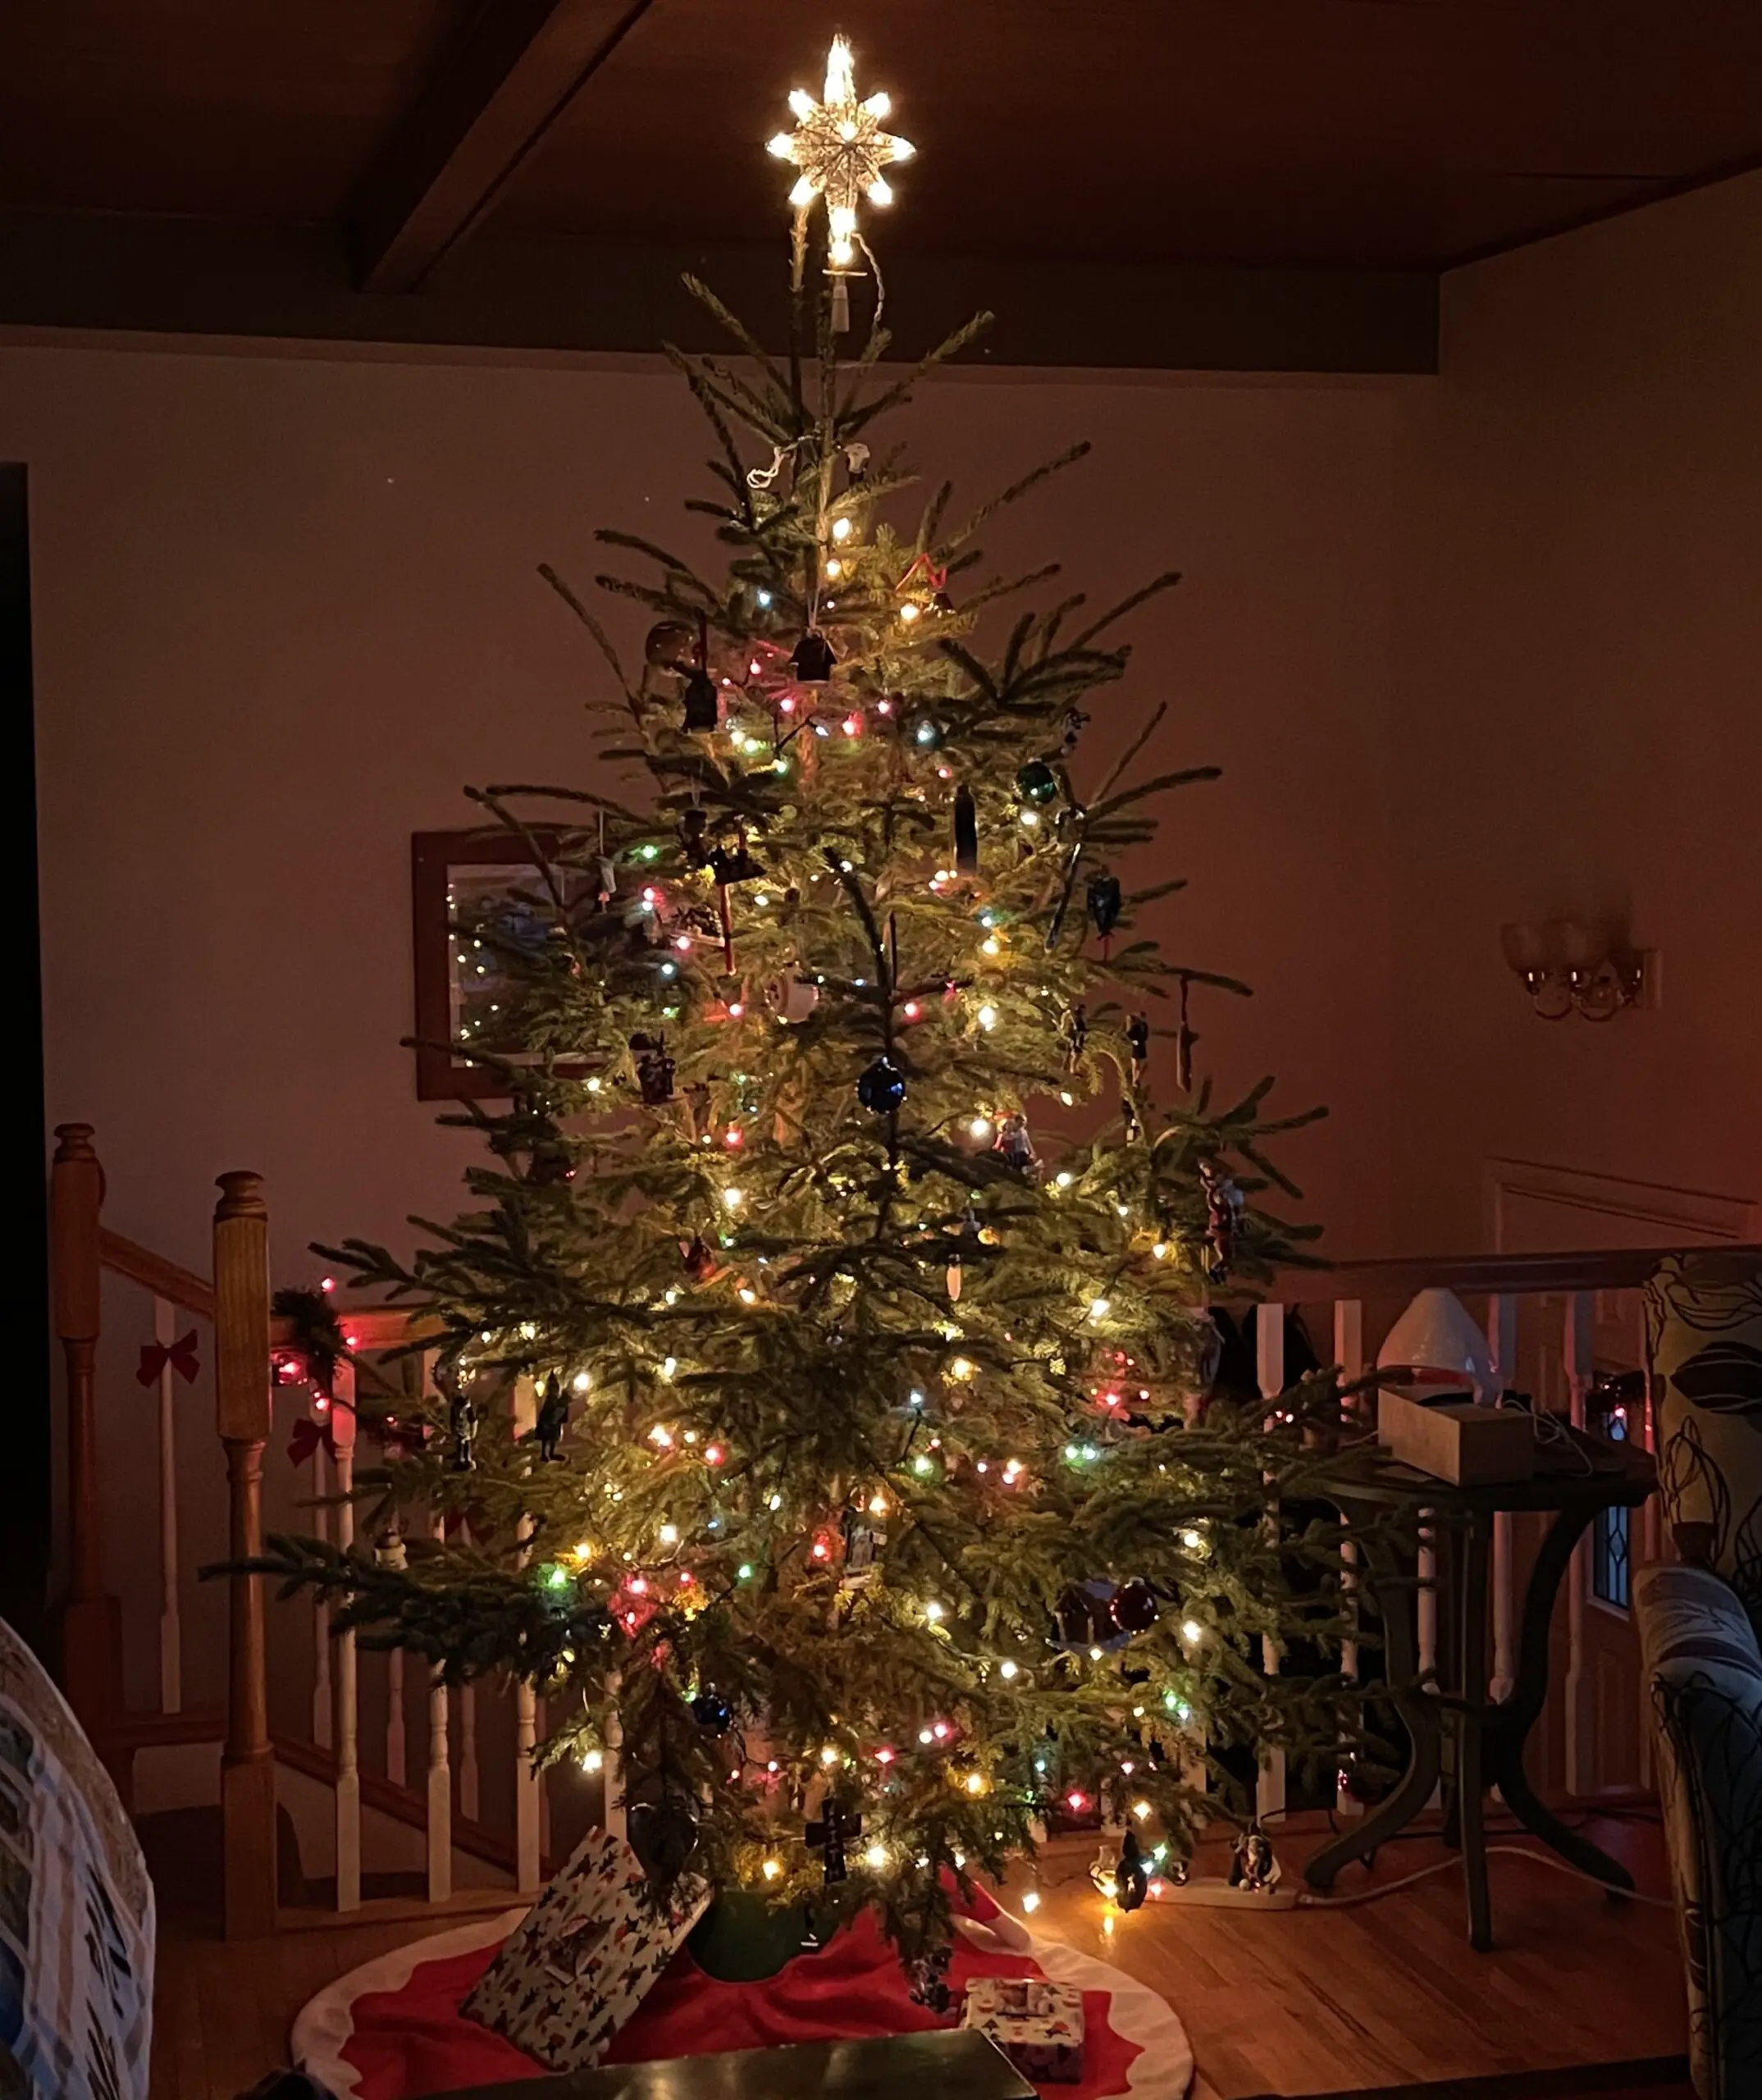
The final product!
Have you ever ventured out to cut down your own family Christmas tree? Tell me about your experience in the comments!
Did you enjoy reading this post? Pin it!
Like what you read here today? Please feel free to leave a comment, like or share this post! Want to be notified when a new post is published? Add your email and click the “Follow” button at the bottom of the page or the sidebar to the right. By signing up for the email list, you will also receive a free copy of the Tranquil Trekker’s Top 10 Tips of Trekking Do’s and Don’ts!
You can also follow the blog on social media by clicking the links below!
In this post, I review this great, fairly easy trail that’s found not far from Rapid City.
Little Elk Creek Trail is another great, local trail that is near Rapid City.
Where is the Little Elk Creek Trail?
You can reach the trailhead from Exit 44, off of I-90, for Deerview Road. Take this road to where it crosses Sturgis Road (which runs parallel to I-90 in this area) and then head north on Sturgis Road. After about 1/2 mile take a left at Little Elk Creek Road. You will find a parking lot at the trailhead, where the road ends.
What you will see on the Little Elk Creek Trail
The trail is around five miles long, one-way, though we’ve never actually hiked the whole thing. If you follow it far enough, it eventually joins up with a Forest Service road that will take you to Dalton Lake.
You will see cool, “tree tunnels” like these, along the path.
At one point, the trail splits into two routes. They both go to the same place, and after about a mile they end up joining back together again. One of the trails stays “low”, and I think it is actually a bit more challenging, as it runs right along the creek bed. With this option, you will need to scramble over a few boulders along the way, and it can be made more difficult if the creek level is high, or if conditions are icy.
There are also a few scrambles up a short, steep hill or two if you choose the “high” route. However, to me, the most challenging part of this option is that it runs right along a ridge. The drop-off isn’t quite steep, or high, enough to consider it as being a “shelf”, but it has gotten my acrophobic heart pumping a time or two. (This is especially true when you’re walking with a rambunctious pup who is not apprehensive about heights in the least. 😝)
Doggo #1 and I on the trail several years ago
This route is pretty any time of the year, but especially in the fall, which is when we usually go. The aspen trees that edge the trail turn a vibrant orangish-gold, and contrast well with the ever-green pines that make up much of the rest of the surrounding forest. As it is much closer to Rapid City, this is one of the better places to see leaf colors without having to drive all the way to Spearfish Canyon or deal with the fall traffic that is common there.
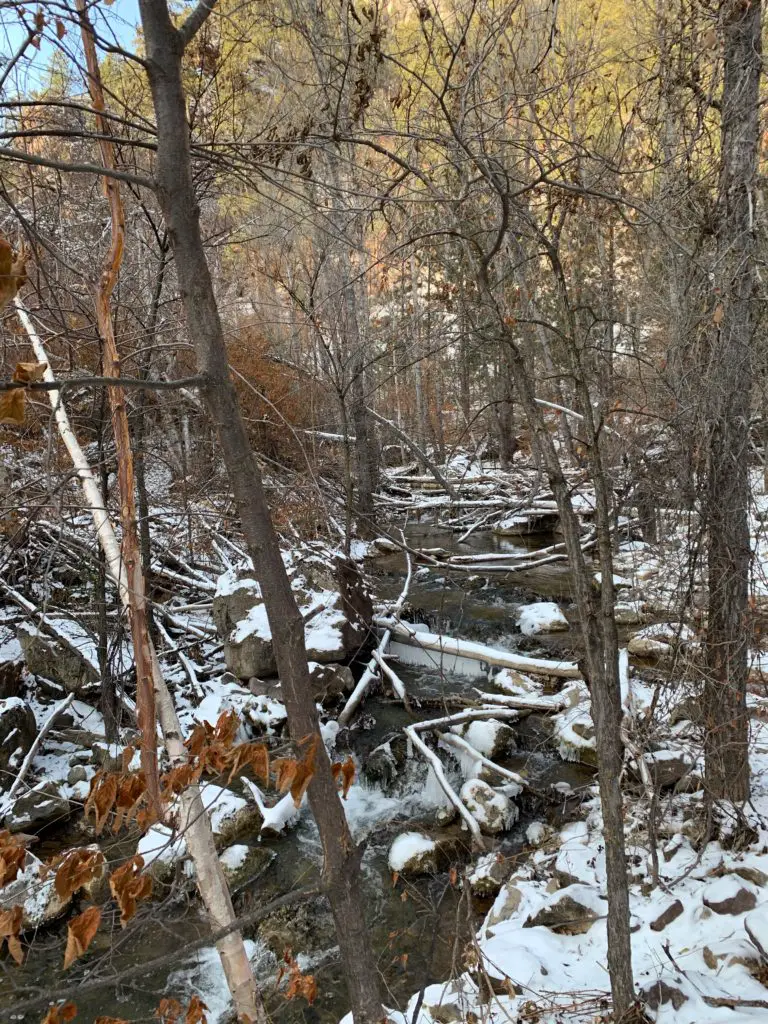
During the summer this area can get pretty crowded. It runs right along the creek, which can be accessed many places throughout the route. It is also fairly shaded, so it makes for a cooler option when the weather is warm. During the winter months, this canyon doesn’t receive much sunlight, so be prepared for icy conditions (especially in the areas where the creek runs very near the trail). Yaktrax are highly recommended when attempting this trek during that time of year.
Little Elk Creek in the snow!
If you’re looking for a good, family hike, that’s easy to reach and close to Rapid City, check out Little Elk Creek Trail, near Piedmont!
Have you hiked the Little Elk Creek Trail? Tell me about your experience in the comments!
If you’d like to read about the other trails in this series, you can click the links below:
Like what you read here today? Please feel free to leave a comment, like or share this post! You can also follow the blog on social media by clicking the links below!
In this post, I discuss the Flume Loop Trail, found in the central Black Hills.
The Flume Loop Trail is another in my series of trails that are found close to Rapid City.
Where is the Flume Loop Trail?
This trail is found off Boulder Hill Road west of Rapid City. You can reach that road from both US 16 (a little way south of the Rockerville area) as well as off of Sheridan Lake Road. Either direction works, though the Sheridan Lake Road entrance is closer to the trailhead.
This is a dirt road, though it is usually in very good condition and can be managed by any 2WD car. (The exceptions to this would be in snow, or occasionally, due to heavy rain.) The parking lot where the trailhead is found is the same one you use for the Boulder Hill Trail.
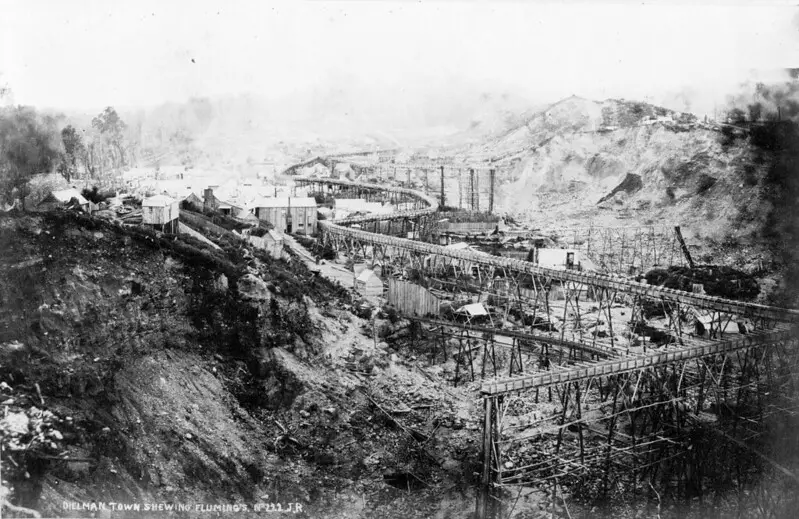
What is a flume?
A flume is a chute, generally built out of wood, used to transport materials (such as logs or gold) using water. This trail in the Black Hills travels along a former flume route from more than 100 years ago, during the gold rush. Today, it is mostly comprised of a wide, grassy, leveled grade along the hillside, where the original structure once stood. In a few areas, the rotting ruins of the original flume can still be spotted. (On other portions of the trail, you can actually travel through old tunnels in the rock that were created for use by the flume.)
The picture at the top of the post is an example of what a flume would have looked like, NOT specifically of the one in the Black Hills.
This is actually another part of the Flume Trail, but it shows the flume bed well. You can see how flat and wide much of it is.
The entire flume trail runs for more than 15 miles throughout the Black Hills from Rockerville, south of Rapid City, to Sheridan Lake, west of town. Near Boulder Hill, the path forms a loop, and it connects to other portions of the trail.
What is the flume loop trail like?
This is a great trek! It can be completed in either direction, though we usually travel it counterclockwise. (My following description of it will follow that route.)
The Flume Loop Trail starts by traversing some lower-lying meadows through the oak and cottonwood trees that grow along the nearby creek . Watch out for cows in this area during the summer months (or more importantly, what they leave behind. 🤥 This is national forestland, and open grazing is allowed here.) Also, during hunting season, I strongly encourage people to wear bright colors when enjoying this area as you’ll be sharing it with hunters.
As you continue down the trail you’ll pass a small, dank-smelling pond that is often covered in green scum during the warmer months. 😝 There are some logs you can use to cross the small stream that feeds from it. Be aware, this area can get VERY mucky in wet times of the year.
After crossing Boulder Hill Road, you then make a short climb up a nearby hillside. You are now on the flume bed itself. From here on out, the trail is fairly level, with a few short climbs and descents, and the occasional clamber up some boulders. The remainder of the trail traverses the pine forest that is more common in the Black Hills.
Sometimes, as you leave the brighter, open spaces behind, walking into these darker, pine tunnels, can seem almost spooky. Not to worry though, the scariest sites we’ve seen here are the local mule deer and rabbits who frequent the area.
This trail is nice because much of it is shaded and in the trees, regardless of the time of day you visit. We have often used it for a quick, evening escape after work, or when it’s too hot to attempt more difficult, or more exposed routes. The early portion of the trek is great in the fall, as this is a more leaf-prone part of the forest. The dusty smells of dried leaves underfoot, mixed with the sounds from the ones still clinging to the trees, that rattle in the wind, with the gurgle of the small creek nearby, make for quite the bucolic, autumn setting.
Is the Flume Loop Trail hard?
I would rate this trail as “easy” as it encompasses very little elevation gain. It can be completed in 1 – 2 hours, depending on your speed and ability level, how many stops you make, etc. It is appropriate for children of almost any age, and dogs.
Our previous dog enjoyed it, arthritis, bad hips, and all, well into the final year of her long life. Puppers has put her stamp of approval on it as well.
So the next time you’re looking for a family-friendly trail near Rapid City, consider the Flume Loop Trail!
Have you hiked the Flume Trail? What did you think? Tell me about it in the comments!
If you’d like to read about the other trails in this series, you can click the links below:
Like what you read here today? Please feel free to leave a comment, like or share this post! You can also follow the blog on social media by clicking the links below!
In this post, I review a great, moderate trail found off the Wildlife Loop Road in Custer State Park.
The Prairie Trail, in Custer State Park, is one the Trekkers really enjoy and have hiked on multiple occasions! It is a loop trail that is around three miles in total length.
This trek traverses multiple ecosystems throughout its duration. From cottonwoods and oaks that line the lower creek beds, to the higher, pine-forested hillsides and rolling prairies, this trail has it all! It’s crazy how you can experience multiple habitats in just a matter of minutes by ascending or descending just a few hundred feet.
Where is the Prairie Trail?
The trailhead is located on the south side of the Wildlife Loop Road, around six miles from the Blue Bell Campground, or 13 miles from the State Game Lodge, in Custer State Park. It consists of rolling hills, bits of pine forest, and grassland areas. The hike can get pretty steep in a few spots, while you climb or descend the next hill. Fortunately, none of these rises is overly lengthy.
What animals you will see on the Prairie Trail
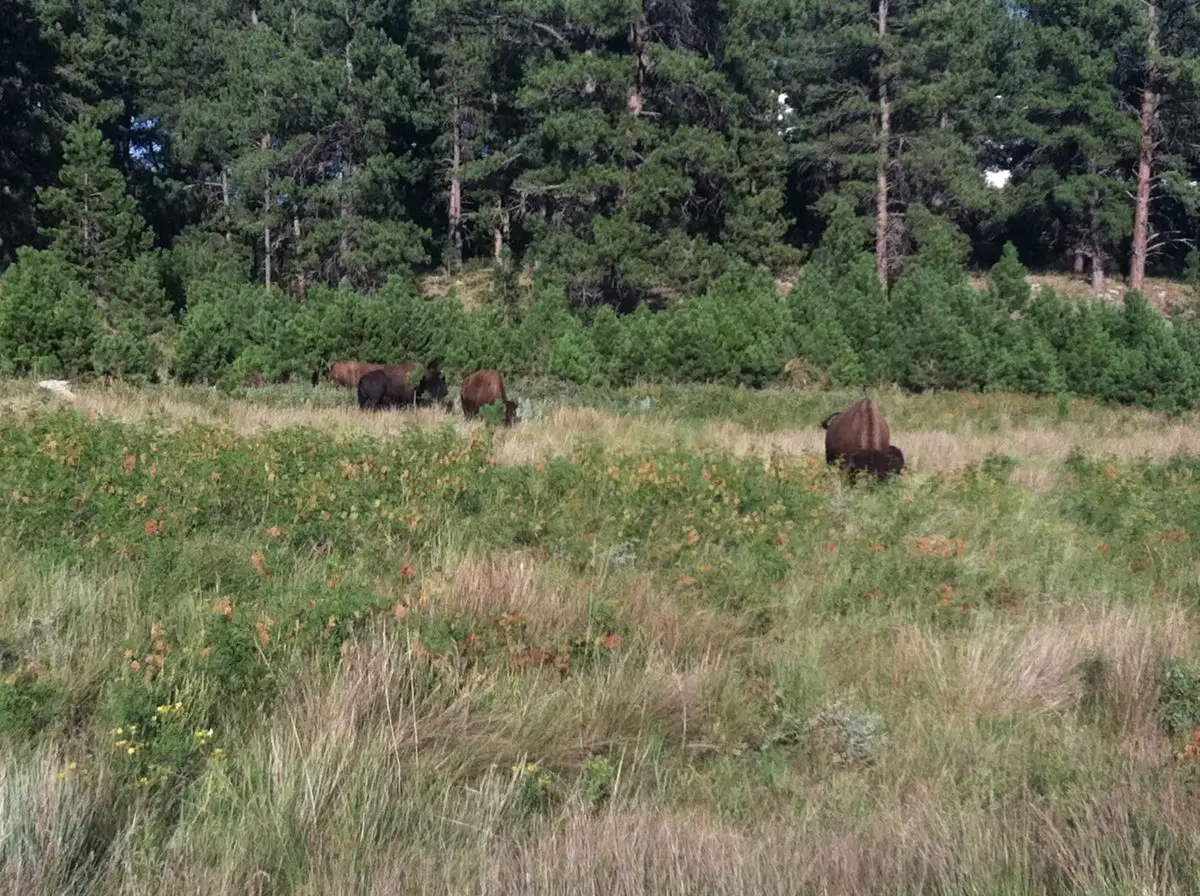
You’ll see all sorts of critters on this trail, namely prairie dogs, turkeys, and buffalo.
This path actually has some of the busiest and most regular buffalo activity we’ve experienced in the Black Hills. They seem to enjoy lounging along the trail itself, so you should always be ready to turn around or alter your course if you come near them. We have hiked here on several different occasions, and rarely haven’t had to skirt a herd of bison. Dogs are allowed (and both dogs we’ve taken on it thoroughly enjoyed themselves). I would STRONGLY encourage you though, unless you have your pup under ABSOLUTE voice control, to keep them on a leash so they can’t antagonize the buffalo.
A few water crossings may be required depending on the level of the creek, and recent snowmelt or rainfall. Depending on its height, you may be able to cross it by jumping rocks or using the well-placed logs. There can also be times, during dryer spells, when the creek will almost run dry.
Hikers should also be watchful for rattlesnakes along the route. They are especially active during the summer months and tend to frequent the tall grass that flanks both sides of the trail.
What sites you will see on the Prairie Trail
Great views of the surrounding prairie and park are available from the tops of the hills. You may even be able to see the Badlands, far to the east, on a clear day.
Much of the trail crosses the open prairie, so be prepared for lack of shade when it’s warm out. This is supposed to be a prime area for spotting wildflowers in the summer (though I can’t speak to this personally. As the park tends to be pretty busy that time of year, we often avoid it, so we’ve never actually tried this trail during the summer).
We can complete the entire loop in about an hour, though this will vary on your speed, ability level, and if you choose to take any breaks or not (or if you’re required to take a detour around a buffalo herd). There are plenty of scenic spots that would be good for a picnic lunch, or just to view the surroundings and critters found nearby.
If you’re looking for a fun trail to hike in Custer State Park, that the whole family can enjoy, check out the Prairie Trail! In a short amount of time and space, you can experience much of the flora and fauna that is offered throughout the park!
Have you encountered buffalo on the Prairie Trail? Tell me about your experience in the comments!
Like what you read here today? Please feel free to leave a comment, like or share this post! You can also follow the blog on social media by clicking the links below!
In this post, I discuss the Colorado side of Dinosaur National Monument.
**Author’s note: Just a word of warning, as this is a federal, National Monument, no dogs are allowed on any trails (exceptions for Service Animals). They are only permitted in the campgrounds and parking lots.**
In this post, I reviewed the Trekkers’ visit to the Utah side of Dinosaur National Monument. In this post, I’ll be discussing the Colorado side (as the park spans both states).
Scenic Drives on the Colorado Side of Dinosaur National Monument
One of the main things we enjoyed on the Colorado side of the monument was the scenic drives. There are several found throughout this portion of the park, though all but Harper’s Corner Road are suggested for high-clearance vehicles only.
As I mentioned in Part 1, under good conditions most of these roads are great to drive (honestly several of them were less bumpy than some of the paved, county roads we drove on). I would have felt comfortable taking any vehicle with a higher wheelbase on these (such as an Outback), and we saw several SUVs.
I cannot stress enough though, that we were there in the most ideal weather possible. According to the park, several of the roads are completely impassable when wet. This seemed likely as we crossed many dry stream beds that could easily fill with stormwater runoff. It also makes sense that the powdery dirt that covers the surface of many of these routes could quickly turn into slippery ooze when wet. Many of the roads also only have one way in or out, so, if you reach the end, and then a rainstorm comes…you may not be able to get back out again. Several also lead through low-lying canyons which are likely to flood quickly in a heavy rain event. So please, be wary before attempting these roads if any bad weather conditions are present or expected.
Click here for the NPS website for the park which will have up-to-date info on current road conditions.
Harper’s Corner Road
This is the main road through the Colorado section of Dinosaur National Monument. You access it near Dinosaur, Colorado. This is also one of the only paved roads in the park. At the end of it is the Harper’s Corner Trail which offers INCREDIBLE views.
Hiking on Harper’s Corner Trail
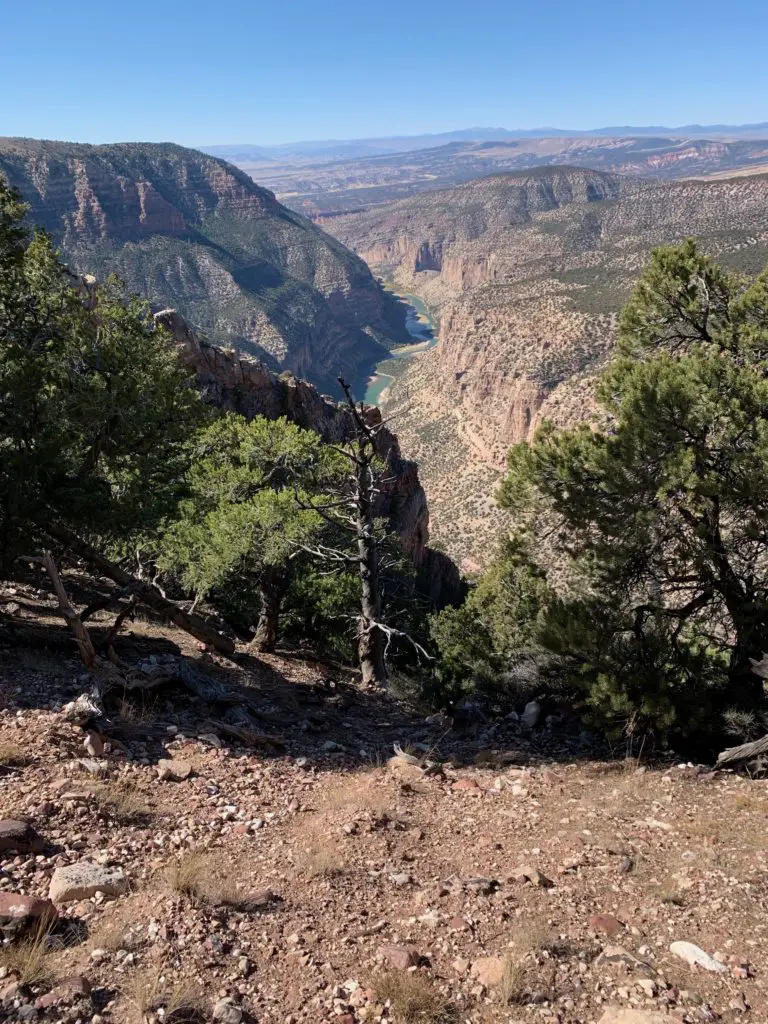
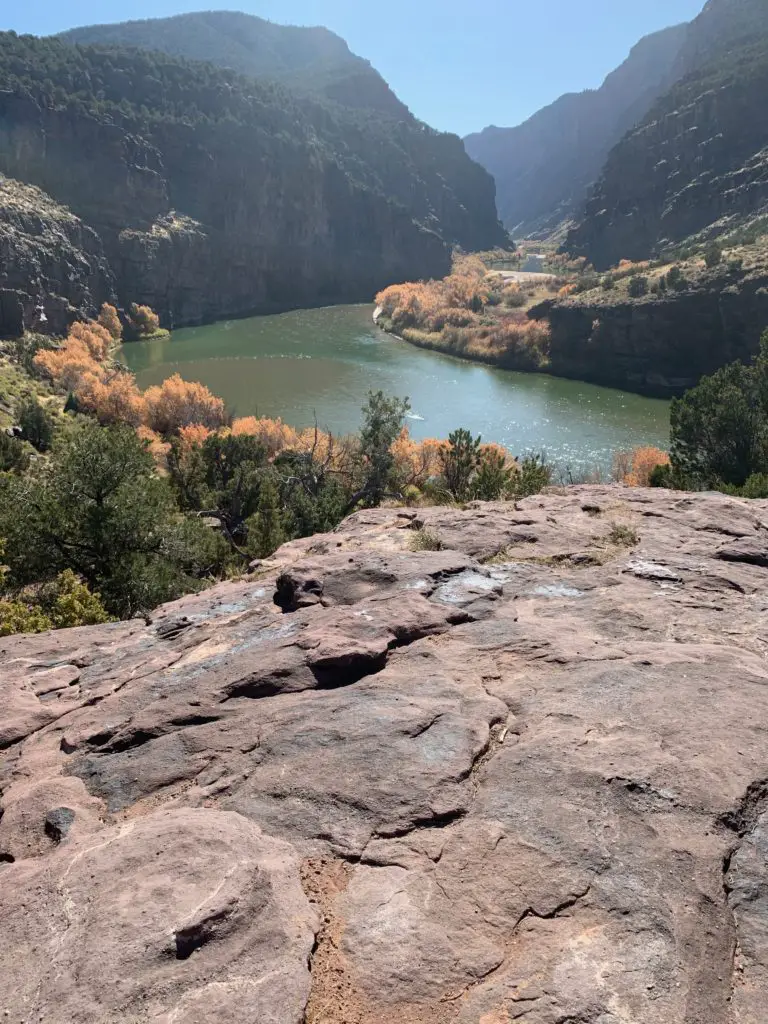
This trail is beautiful! At times you are hiking on an almost knife-edge of rock, with the Green River winding along beside you on one side, and the Yampa River on the other. Did I mention you are up to 2500 feet ABOVE these waterways throughout the hike? 😮 It got my acrophobic-heart pumping a bit! (It really wasn’t too bad. I only felt nervous in one spot where you get a healthy view of a chute, down a cliffside. 😋)
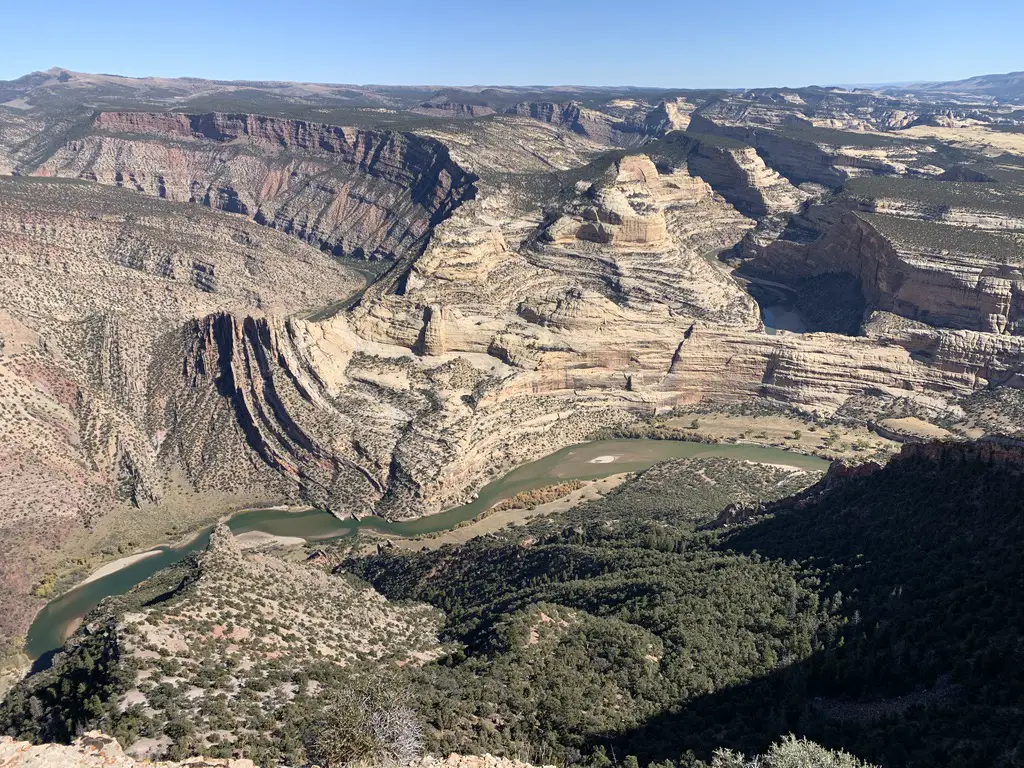
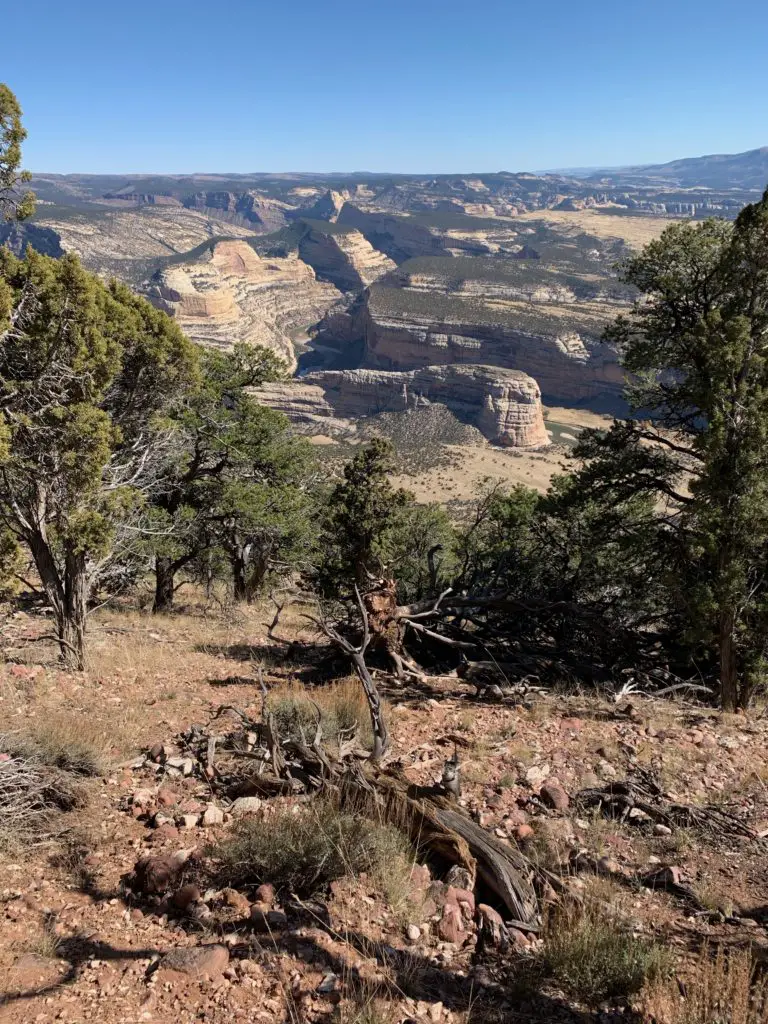
I would rate this trail as “easy”. It’s about three miles in total length (out and back) and it doesn’t have much elevation gain. Just about anyone wearing tennis shoes should be able to handle it (though I should note the park is at an altitude of over 5000 feet, so “flatlanders” may want to take it slow. 😉) At the end of the trek you are treated to an AMAZING view down the canyon, and of Steamboat Rock from above, behind which the Yampa and Green Rivers meet.
One of the incredible lookout points from the Harper’s Corner Trail. That’s the Green River far below, you can maybe see how it got its name.Steamboat Rock, from above…
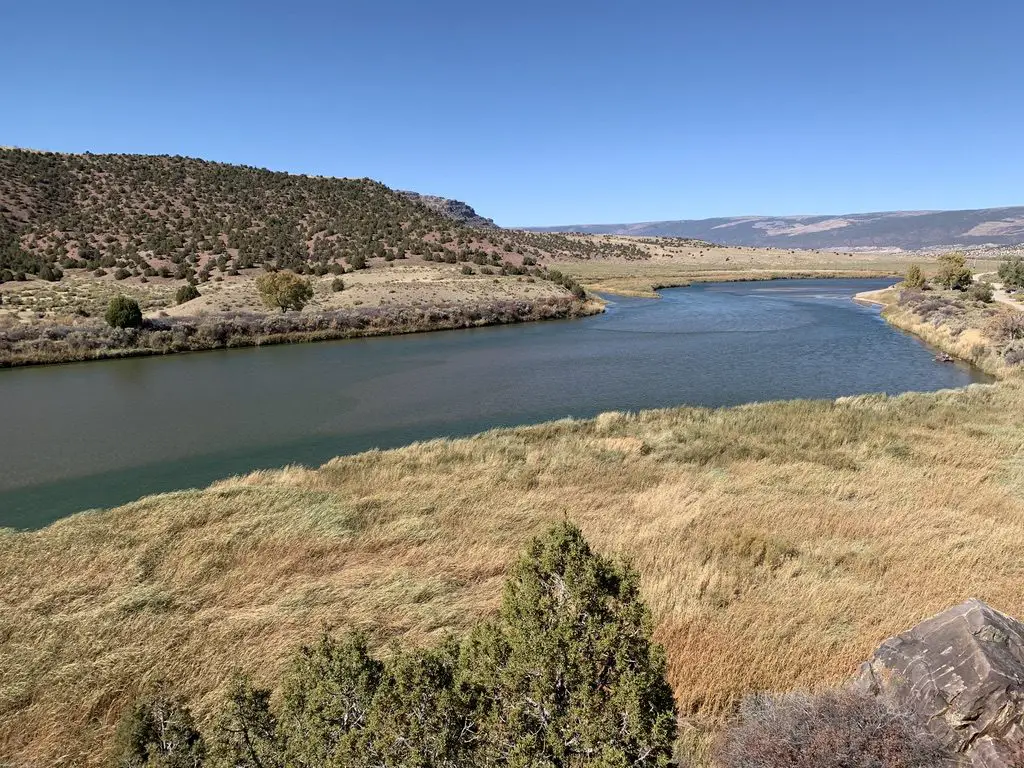
Echo Park Road
This route takes you from Harper’s Corner Road, east, to Echo Park and its campground. This area is called a “park”, like several other locations in Colorado. It is really just a flat, meadow-like area. It was cool! (Hint, it’s called “Echo Park” for a reason, I encourage you to experiment with this 😁.)
This route traverses the lower “benches” of land that can be seen from above when traversing the Harper’s Corner trail. They are called this as they are wide sections of terrain. They literally look like benches, or steps, that rim the lower, river canyons.
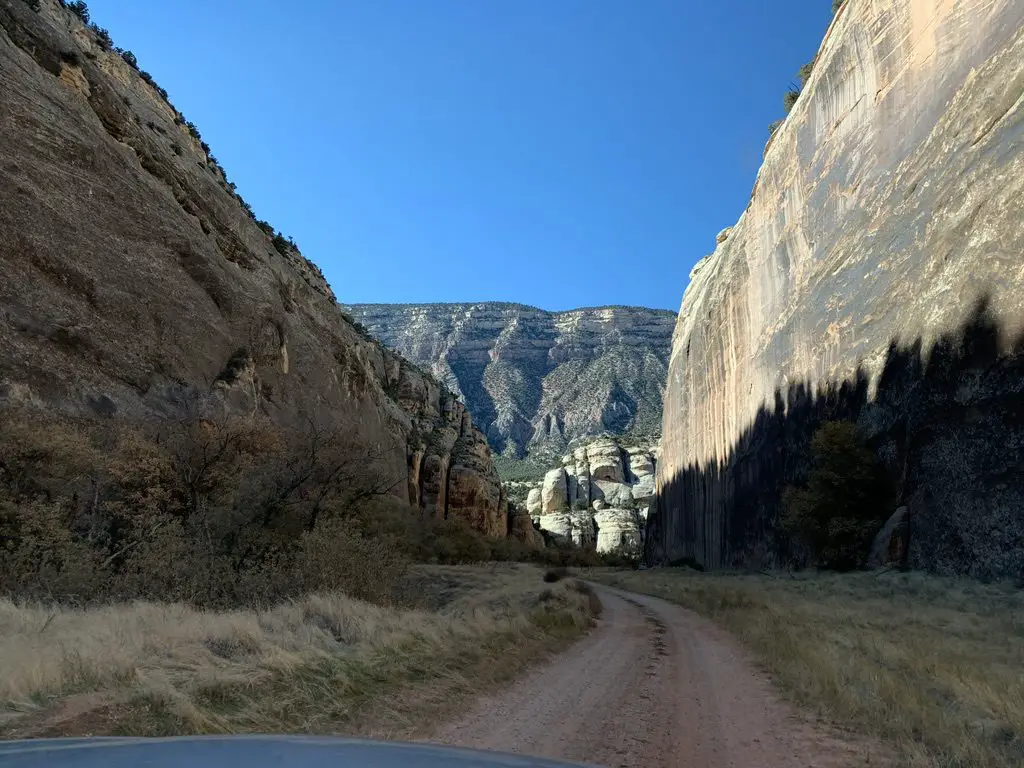
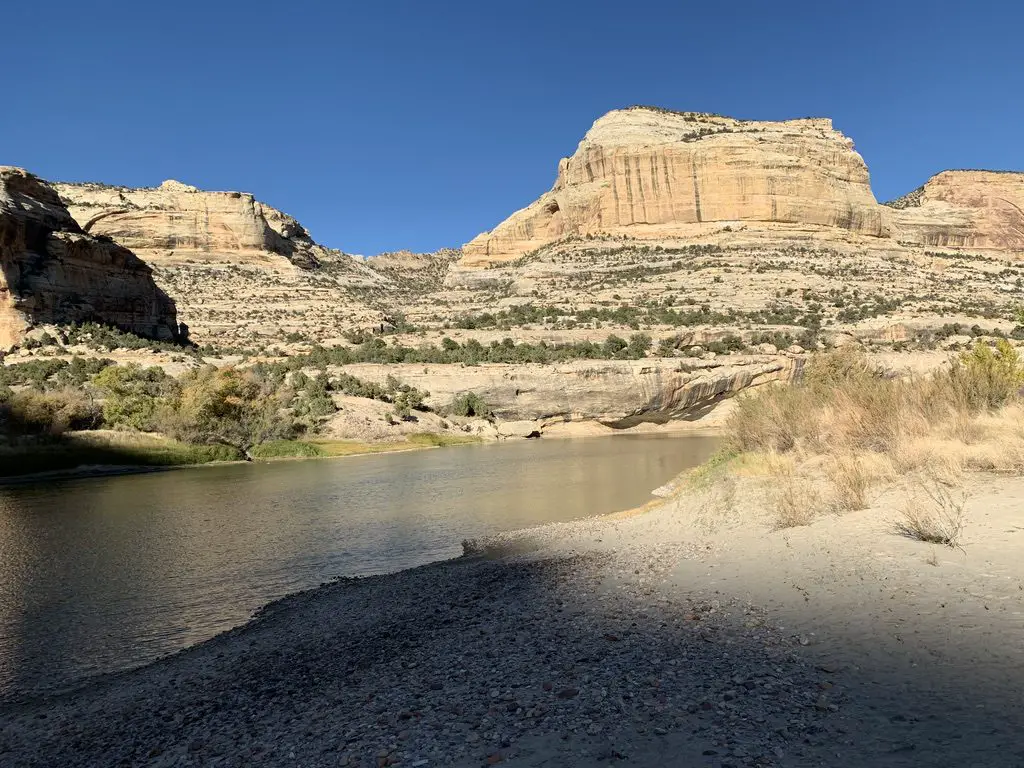
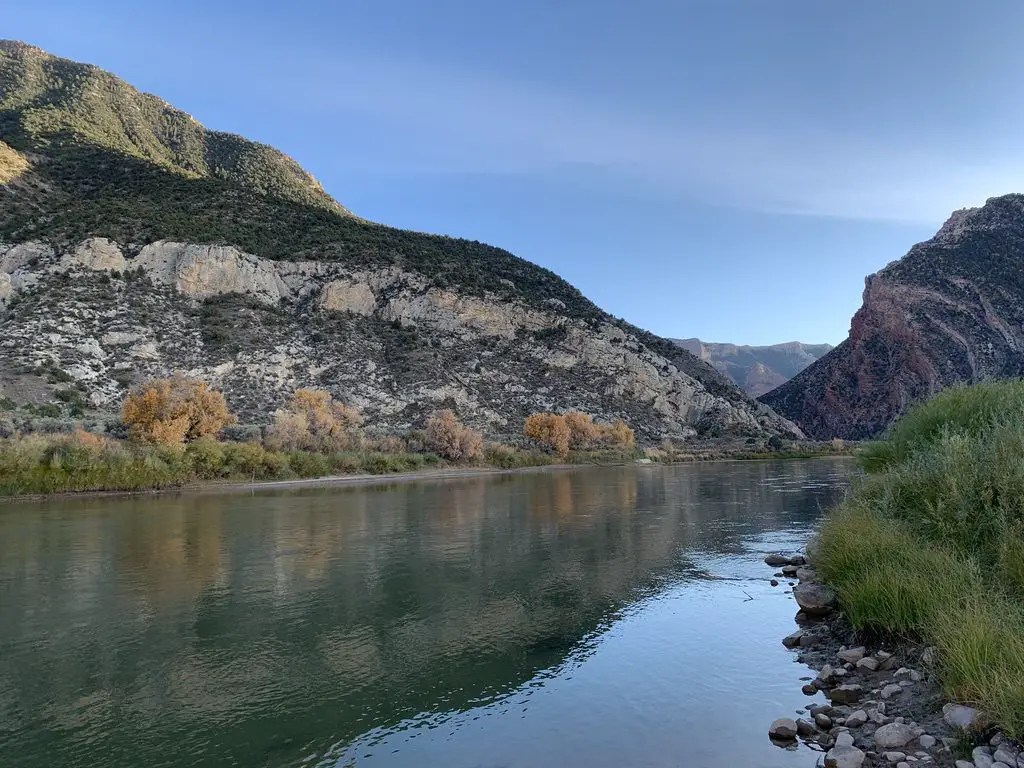
The road winds through an incredible canyon where sheer rock towers over you on both sides. From here you can see Steamboat Rock from the bottom, where it’s much more impressive.
There is a short hike along the river’s edge that is around two miles long (out-and-back). It takes you to the confluence of the Yampa and Green Rivers. There is also a place on this road called Whispering Cave. It appeared fairly unassuming, at first, as it’s just a vertical slit in the rock wall of the canyon, that you can stand in. This was until we figured out its secret (and how it got its name). If people stand at either end of this long slit and whisper REALLY quietly…you can hear each other VERY well (thanks to the unique acoustics of the rock structure). And it’s far more effective than if you try the same thing outside (we checked! 😉)
This route takes you from Echo Park Road, east, all the way to US 40 in Elk Springs (though there are a few places you can bug out before you get that far, dependent on road conditions). This was the most difficult route we encountered. The drive was beautiful though, with yellow grassland and scrub brush spread before you, all the way to the rock walls that rise above you on two sides.
Even this road wasn’t bad at this time of year, though I could see it being difficult if it was wet. It was the steepest drive we took and it had the sharpest turns. This was also the longest route we attempted, by far. It was fun, but we covered less than half of it (around 20 miles) and that took almost two hours. This did appear to be the most difficult part of the trek. According to the map, the rest of it looked flatter and easier (and some parts may have been roughly paved). We did finally escape, through a blessed hole in the rock wall called Thanksgiving Gorge (I think I know why they give it that name!) just as daylight was waning. We were rewarded with a herd of elk…and LOTS of cows! 😋
Sunlight is waning on the Yampa Bench Road
Beautiful Canyons in the Colorado section of Dinosaur National Monument
Flaming Gorge Reservoir
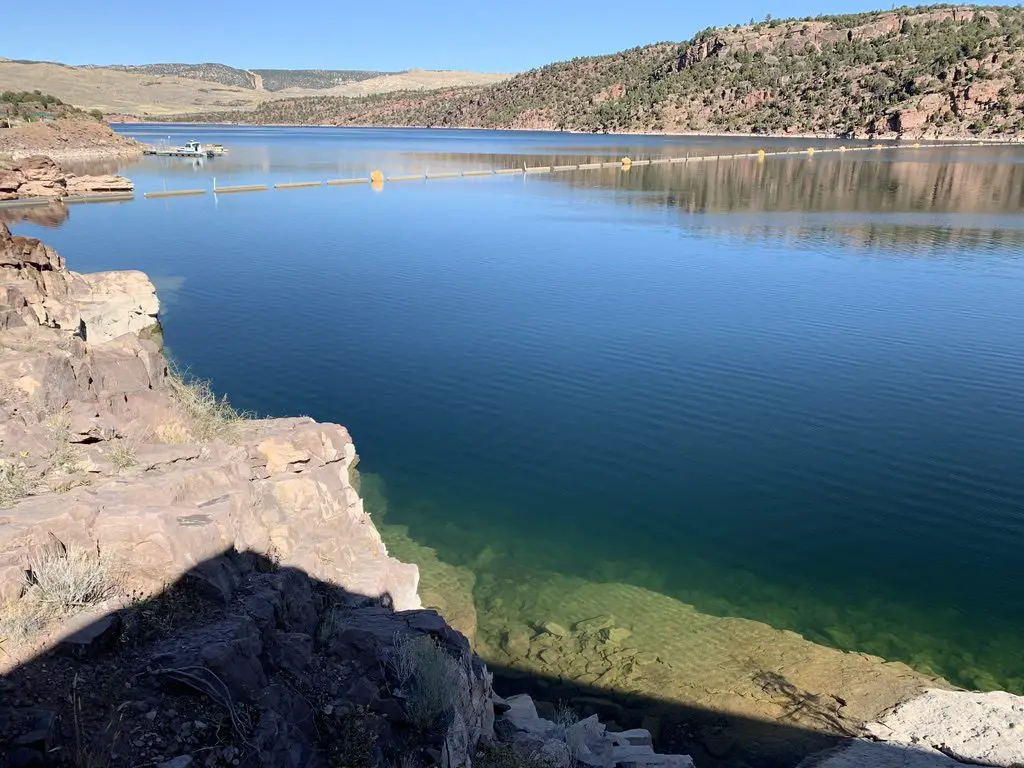
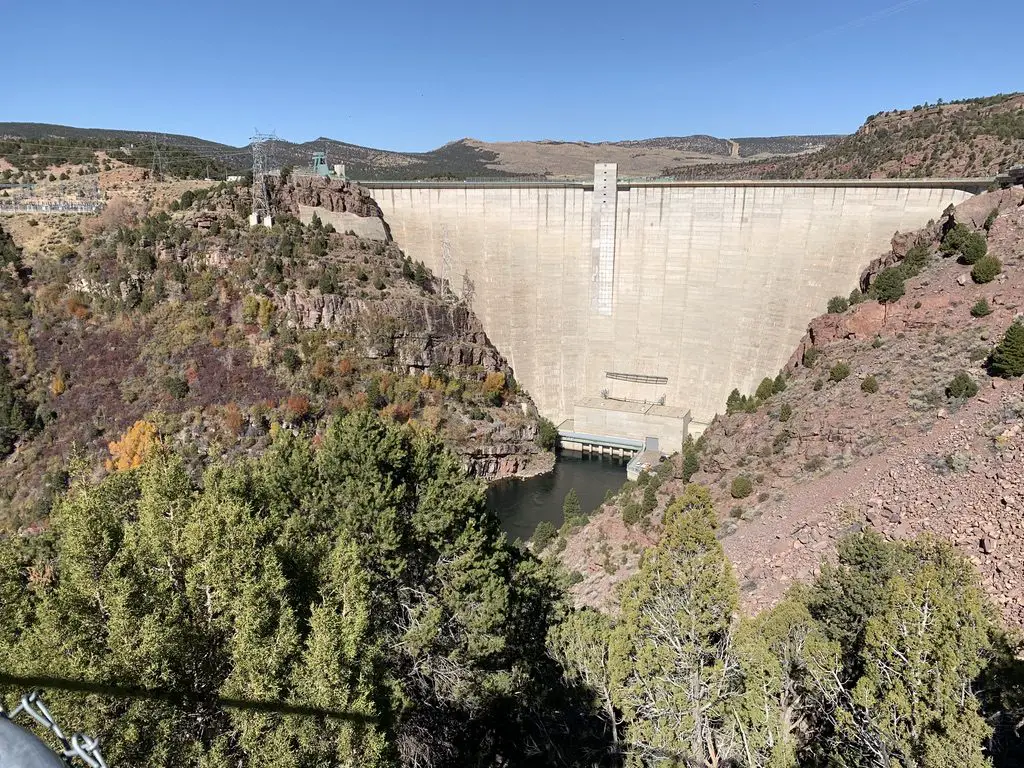
On Sunday we took US 191 north of Vernal, Utah, to the Flaming Gorge Reservoir. It was named for its vibrant, red cliffs that were cut by the Green River. The gorge spans both northeastern Utah, and southeastern Wyoming, just to the north. It is absolutely beautiful, and the dam that created the reservoir is pretty stunning, as well.
Flaming Gorge ReservoirThe Flaming Gorge Dam
Gates of Lodore
From the dam, we then continued north on Route 191, just across the Wyoming line, and picked up Brown’s Park Road. This we took east, back into Colorado. From here we followed signs to the Gates of Lodore, another INCREDIBLE canyon that was cut by the Green River. It sits on the northern tip of the monument. This route was a mixture of well-graded dirt and rough pavement, though any passenger car should be able to handle it, at least in good weather.
I was pronouncing this location like “Gates of Mordor”, from Lord of the Rings, but was quickly corrected by a local. Apparently, it’s supposed to sound more like “Gates of la-DOOR”. 😂
There’s an easy, and fairly short, hiking trail that leads to the mouth of the canyon, from the parking area. Due to its sheer, rock walls, there is no access through this rocky cleft, except by watercraft on the river itself.
Gates of Ladore!
Crouse Canyon/Brown’s Park Scenic Backway
We returned back to Vernal by way of the Crouse Canyon/Brown’s Park Scenic Backway. This is another route that cuts through a beautiful canyon, and then a meadowy area.
This road was one of the rougher routes we traveled on and was basically only one lane wide. This was unexpected as it was listed as a scenic drive in one of the local tour brochures, and wasn’t suggested to be high-clearance. Our truck handled it easily but had we known how rough it would be we would have aired the tires down, just for a smoother ride. In good conditions, any SUV with a higher wheelbase should be able to handle it (we passed a CRV or two) but I wouldn’t suggest attempting it in a typical passenger car (just because there were some rocks and ruts that had to be navigated). An Outback probably could have managed it, but we would have been extra cautious.
The drive was BEAUTIFUL though, with the yellow and orange leaf colors set against the red rock of the canyon walls, which contrasted with the blue of the sky above. Click here for a short video of it!
We returned home via US 40 east, through Craig, Steamboat Springs, and Rabbit Ears Pass. This is the one portion of northern Colorado we hadn’t been to yet.
Colorado is one of my favorite places to visit. Click here for more posts on this awesome state!
From there we took Route 14 north to Walden, then headed north to Laramie, Wyoming, and back to the Black Hills. FYI, this is a great way to avoid the traffic in the Denver area, and much of I-25, if you’re heading north from northern Colorado! It offers some great views too!
You won’t find a better time to visit this park than Fall. Tree colors are bright, crowds are light and temperatures are cool. So the next time you’re looking for a good autumn vacation spot, think of the out-of-the-way Dinosaur National Monument!
Have you visited this incredible place? Tell me about your favorite parts of it in the comments!
Did you enjoy this post? Pin it!
Like what you read here today? Please feel free to leave a comment, like or share this post! You can also follow the blog on social media by clicking the links below!
In this post, I give a review of the Utah side of Dinosaur National Monument.
**Author’s note: Just a word of warning, as this is a federal, National Monument, no dogs are allowed on any trails (exceptions for Service Animals). They are only permitted in the campgrounds and parking lots.**
To celebrate our 10-year anniversary, the Trekkers headed to Colorado! We started our trip in Boulder, as Mr. Trekker had some work-related meetings for a few days. Thanks to my flexible job I was able to work out on the balcony of our hotel room. 😋
We spent the remainder of our week at the Dinosaur National Monument, that spans the northern border between Utah and Colorado. This is a cool place that we hadn’t heard of until recently (you can learn more about it at the NPS website here.) It is in a very remote area. In fact, we think we may have finally found a place in Colorado where planes don’t constantly fly over!
Boulder, Colorado
Boulder is nice, for being a larger city. It reminds me A LOT of the place we used to live when we were in North Carolina. I don’t like all the bike lanes, especially when driving Mr. Trekker’s truck, these give me serious anxiety!
I felt like it was just an added stimulus I had to keep track of while trying to navigate the busy traffic and figure out where in the world I was going 😛. There were also A LOT of boulevards. While this is certainly aesthetically pleasing, I find it makes getting around town (or just simply turning around, or getting to a business that’s on the other side of the block) difficult.
I will say this, for a larger city and busier place, I have been pleased with how friendly people are here, especially when driving. I rarely ever get honked at and people are usually willing to let you into a lane quite regularly, even when traffic is heavy.
I hadn’t expected to miss seeing the mountains…being in a town that sits RIGHT NEXT TO the Rockies! 😛 Boulder might actually be closer to these peaks than we are to the Black Hills…and I can see those from our house! There were just so many taller buildings and trees that blocked the view. It seemed kind of sad to me, that people live in such a cool place and you don’t get to enjoy its natural beauty every day…
I can definitely understand why people live in Boulder. It’s very pretty and there’s a lot of culture, nice restaurants, etc. It seemed to cater more to those who ride bikes or walk, which is fine, I’m all about a green lifestyle that’s full of outdoor time and exercise.
It doesn’t help that Boulderites–whether on bikes or walking–don’t seem to understand the laws of physics. They barely watch for vehicles! Yes, I understand you may have the right of way in many situations. However, you should still navigate defensively. If someone in a half-ton vehicle hits you, your “Right Of Way” doesn’t offer any protection whatsoever! 🙄
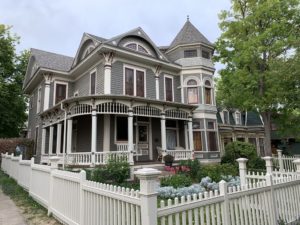
Boulder seems to be in an odd transition phase. Some parts of it are “old school” and charming, with Victorian-style homes (such as the one used in the tv show, Mork and Mindy, seen here!) There is also A LOT of new construction occurring, of very modern, industrial-looking, apartment, condo, and office buildings. While this type of architecture is cool too, I’m not sure about the mix of the two, especially when they’re squished together like sardines. It kind of felt like a smorgasbord of building design, and I’m not sure how I felt about it…🤔
Parking was definitely a problem though. I’m not sure if this may be due to the fact that the area has grown so quickly? Unfortunately, there were multiple times when I couldn’t get to a business or park that I wanted to visit due to there being no parking available nearby.
As I said, if locals mostly walk or ride a bike, maybe this isn’t a big deal. It doesn’t make a visitor feel very welcome though. I find it INCREDIBLY frustrating when I want to go to a place and all I see are “no parking” signs. 😡Do people just “Uber” everywhere these days? Yeah, I’m a child of the 80s folks, this old dog likes her car and likes to drive herself, thanks! 😉😜
The only real complaint I had about the town (other than the traffic 😇) was when Target charged me 10¢ per plastic bag (and Safeway charged 20¢!) I understand that the overuse of plastic is a problem, but don’t just start charging me for bags without any warning. I don’t even mind using reusable bags that I bring from home, but I wasn’t at home, was I? It just felt, unwelcoming, frankly.
As an example of why, after paying, I realized one of my bags was a little heavy and I would have preferred to double-bag it. So then I was faced with a dilemma…do I “steal” an extra bag? Do I go through the hassle of trying to pay an additional 20¢ for ONE MORE BAG? Or do I just risk there being a hole in my single-layer bag and dumping my glass bottles all over the parking lot? *sigh*
I had an interesting encounter with a Tesla…we were in a tight parking lot and I was getting back in our truck. I was being VERY careful to not bump the fancy, shiny car next to me, when all of a sudden, the computer screen on its dash “woke up” and started scrolling something about “security” (there was no one in the car, mind you).
I’m assuming the machine was “sensing” my presence? It was a little creepy! I felt like I was dealing with Kitt from Knight Rider! 😜 (Yes, that was a 1980s TV reference, I just dated myself again didn’t I? 😋) I may not be cut out for this “brave new world” ya’ll! 😋
Things to do in Boulder, including the Mork and Mindy House!
For those who don’t know, Mork and Mindy was a comedy show starring Robin Willaims as an alien that was on in the late 70s (Note: BEFORE my time folks! 😝)
The show was based in Boulder and the house Mork lived in is still standing. It is located at 1619 Pine St. (I’m telling you this because the info is LITERALLY available on Google. 😇)
And, because we apparently can’t ever go to Colorado for our anniversary without it snowing, this is the–admittedly beautiful–sight we woke up to one morning… 😋 (it was 80 the day before mind you! 😮)…
Dinosaur National Monument
On our route west, toward the monument from Boulder, we drove on I-70 through Glenwood Canyon. That route through the Colorado Rockies has to be one of the prettiest sections of interstate I’ve ever been on. Click here for a video of our trip through the canyon…
As long as you aren’t intending to go on a rafting trip on the river, fall is known as one of the BEST times to visit this park. For one thing, it’s in the desert-scrubland that comprises northeast Utah/northwest Colorado, so it gets HOT in the summer (and you all know how much I “love” the heat 😜). Also, it’s far less busy this time of year and the tree colors are lovely. We, actually, intentionally held off visiting here, until we could go in the Fall.
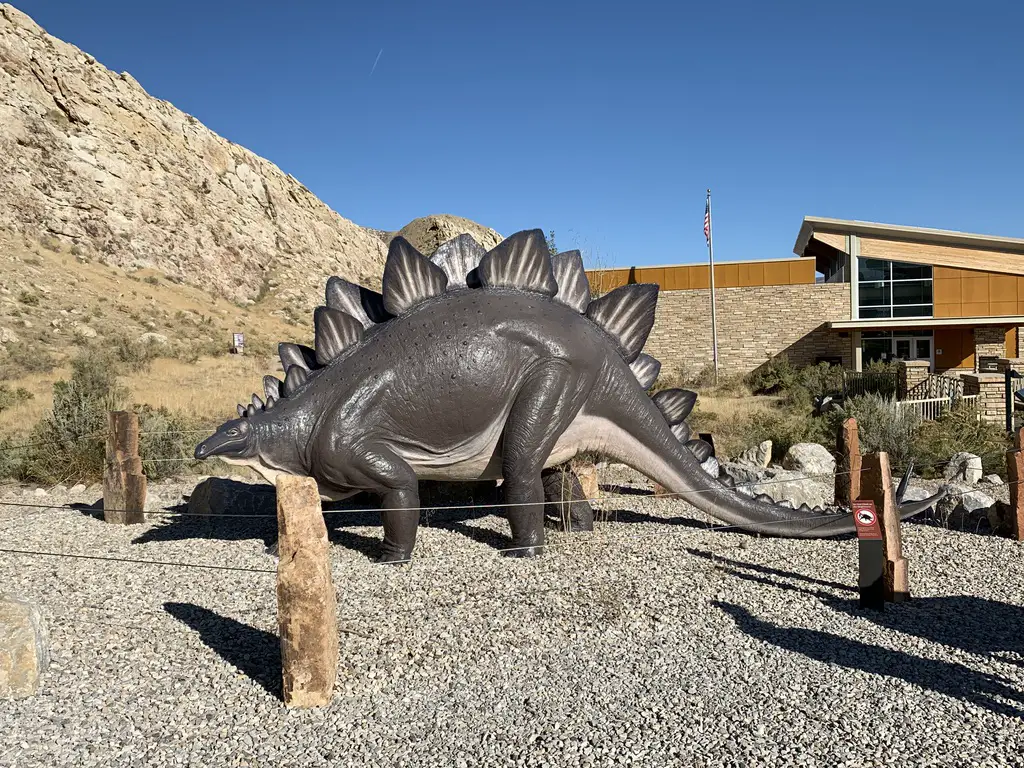
We spent our first day on the west (or Utah) side of the monument. Here you will find the larger–and in my opinion better–Visitor’s Center. Also, if you’re there for dinosaur bones (and why else would you be visiting?! 😉) this is the side to start on!
The Quarry Exhibit Hall at Dinosaur National Monument
This place was COOL! Just an FYI, there’s only a few established places where you can actually see dino bones at Dinosaur National Monument. The town that holds the name “Dinosaur” is on the Colorado side of the park…but there aren’t many bones actually viewable there. 😋 You have to go to the main entrance, which is found in Jensen, Utah (just a little east of Dinosaur, on US 40). If you’re there when its busy, there’s a free shuttle that takes you to the quarry from the Visitor’s Center. If you’re there on slower days (which we were) you can drive yourself.
We stayed at a lovely Air B&B in Vernal, Utah, which is about a 30-minute drive west of Dinosaur, Colorado. This is the largest town in the local area and we were glad we chose it. It offers easy access to any of the attractions in or around the monument, and also provides the most options for food and lodging. If you’re wanting to camp, there are several campgrounds within the monument itself, and there is said to be a nice RV park in Dinosaur (though I don’t have any personal experience with that).
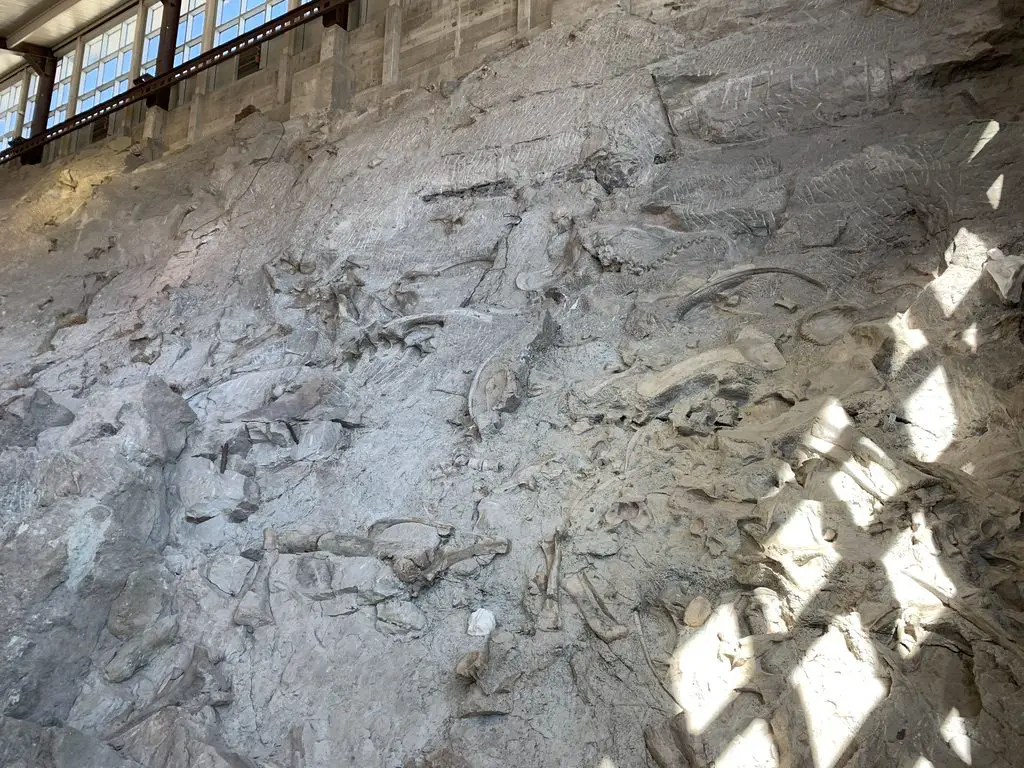
The Quarry is AMAZING! It’s an enclosed building that was constructed over the site of a former paleontological dig, that contains massive amounts of dinosaur bones. They were discovered in the early 1900’s. After much excavation it was finally decided to preserve the remaining bones as-is, and allow people to view them in their natural state. It’s thought that this was a place where large, flash floods occurred, helping to explain why so many bones ended up in such close proximity to each other. I could have stayed there all day!
At the Quarry. Those are all dinosaur bones from different species that were fossilized in the mud!
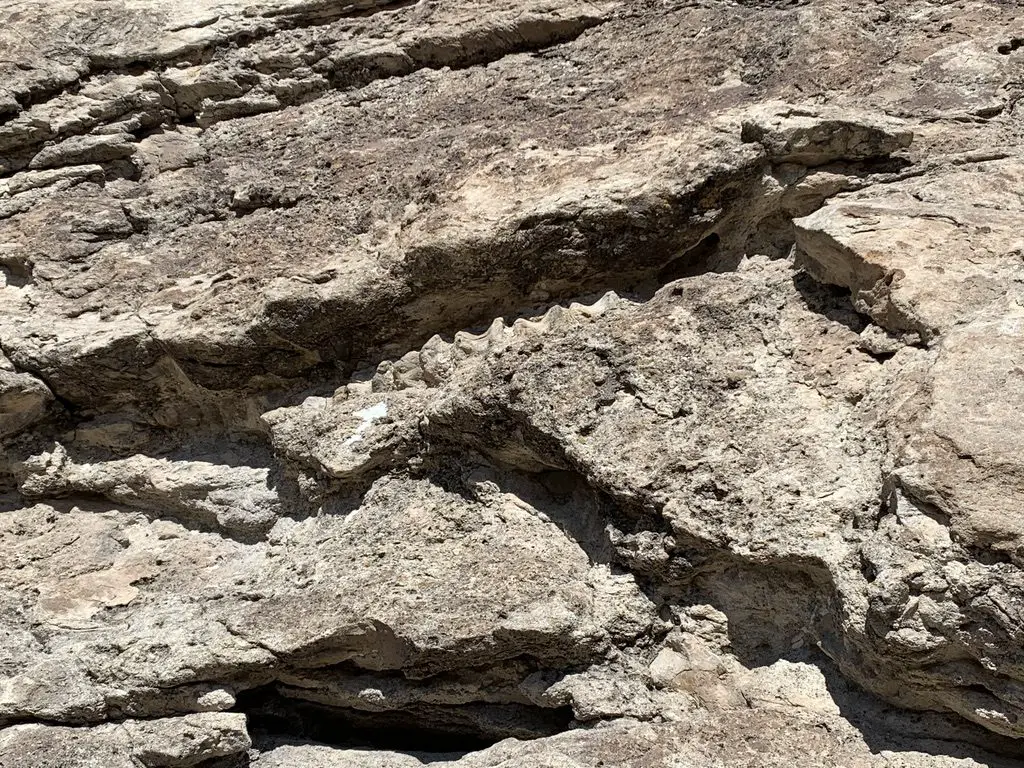
From here, you can also hike the Fossil Discovery Trail which shows some fossils that are still embedded in the rocks …
If you look closely, the white arrow is pointing to the fossilized spinal column of a dinosaur!
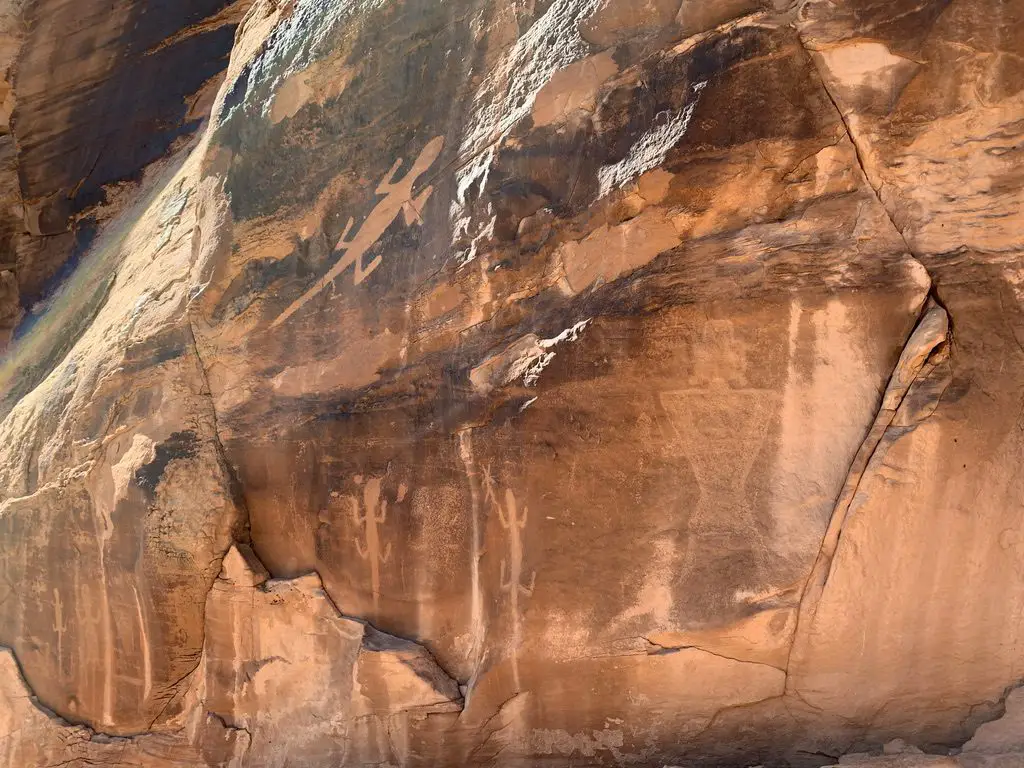
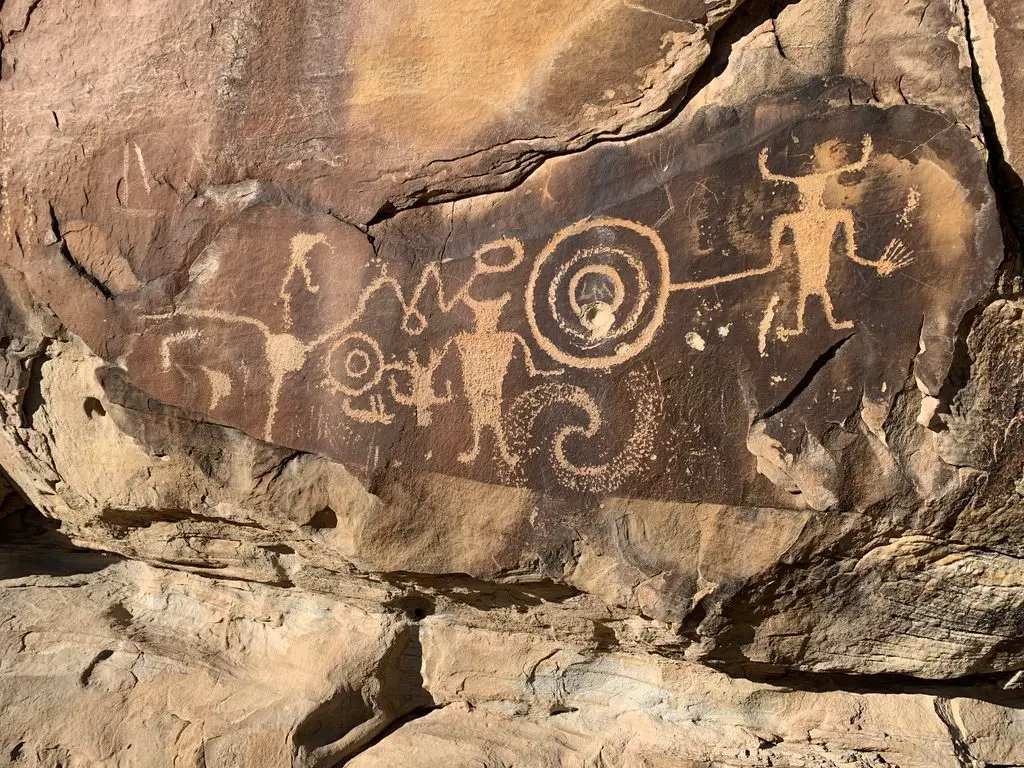
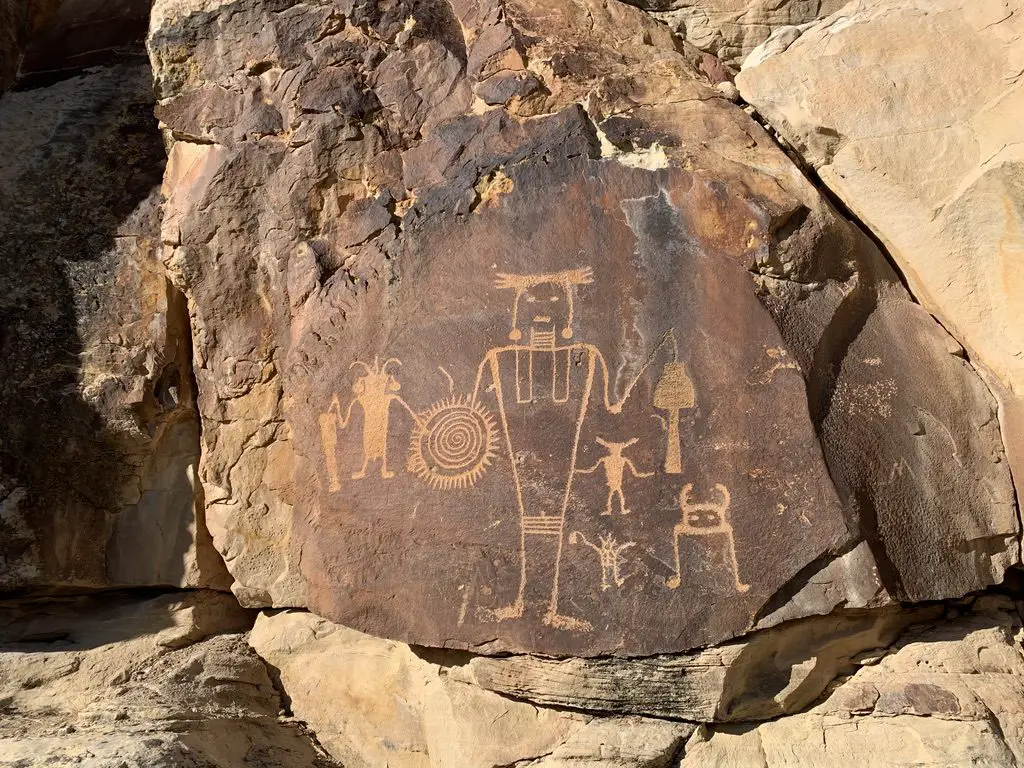
After leaving the Visitor’s Center, we took Cub Creek Road through the park. This is one of the only paved roads throughout the monument, and even it turns to dirt the final few miles. (This section is well-graded, though, and passable with any passenger vehicle under good conditions.) It offers several opportunities to view petroglyphs and pictographs (these are the drawings and etchings that were left on the rock by the ancient people who first tamed this wild land). I had seen pictures of these creations before, but had never viewed them in person. Some were absolutely AMAZING!
Aren’t these incredible?!
This is the only place in the park where you can see the lizards.
I’m sure they all had perfectly logical explanations (some of them can be found here) but some looked pretty “unique”…(I’m not saying it’s aliens but…😲😉👽🖖)
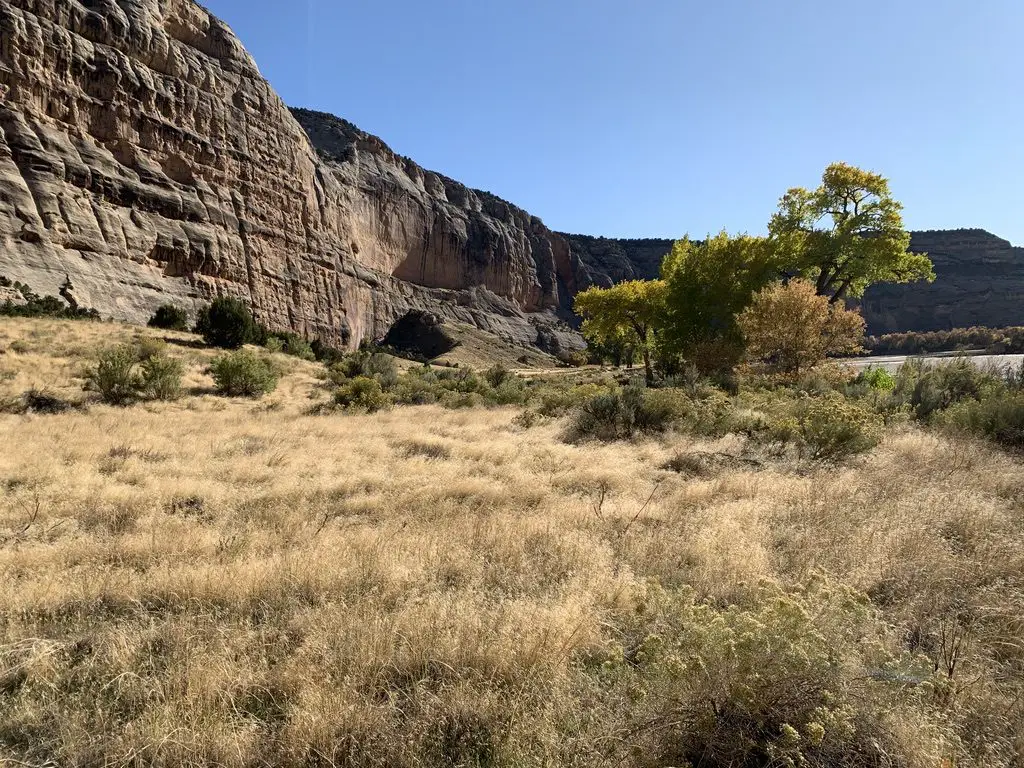
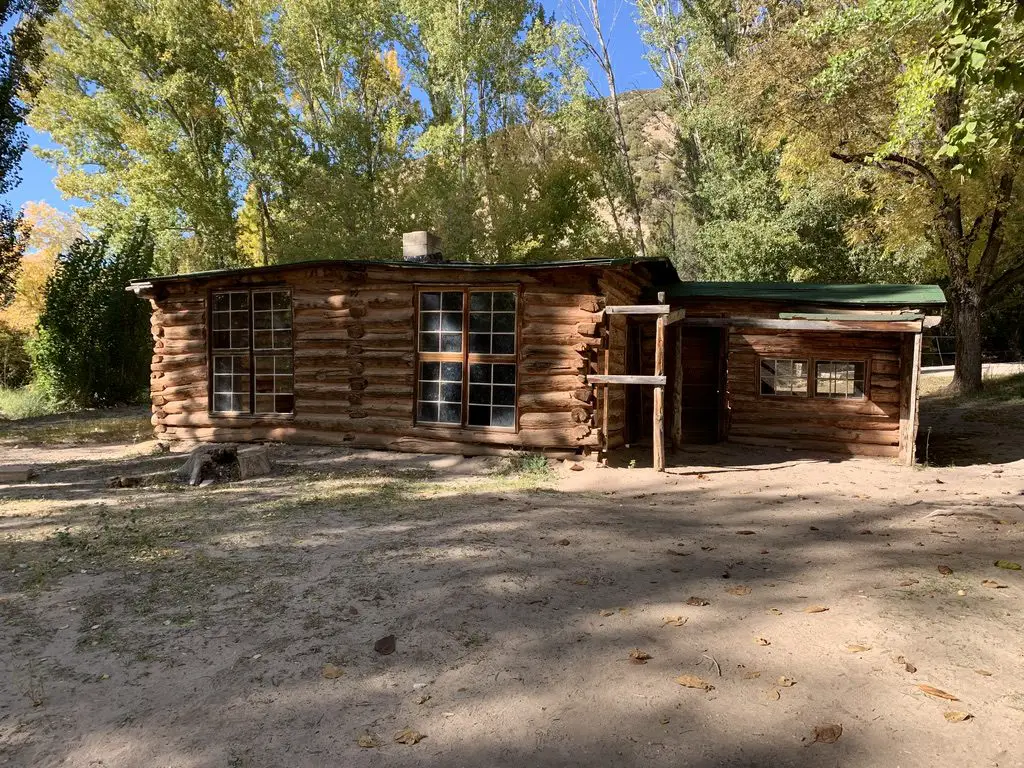
This road eventually takes you to Josie’s Cabin, where up until the 1960’s, a woman lived, by herself, until she was well into her 80’s. This was without electricity or running water, mind you! We saw a lot of lovely tree colors in this area. There were several easy hikes that ventured into box canyons that are known for being good for fall colors (they run right along rivers and streams and the cottonwoods that grow there are very pretty).
Josie’s CabinSome of the fall colors along the creekbed
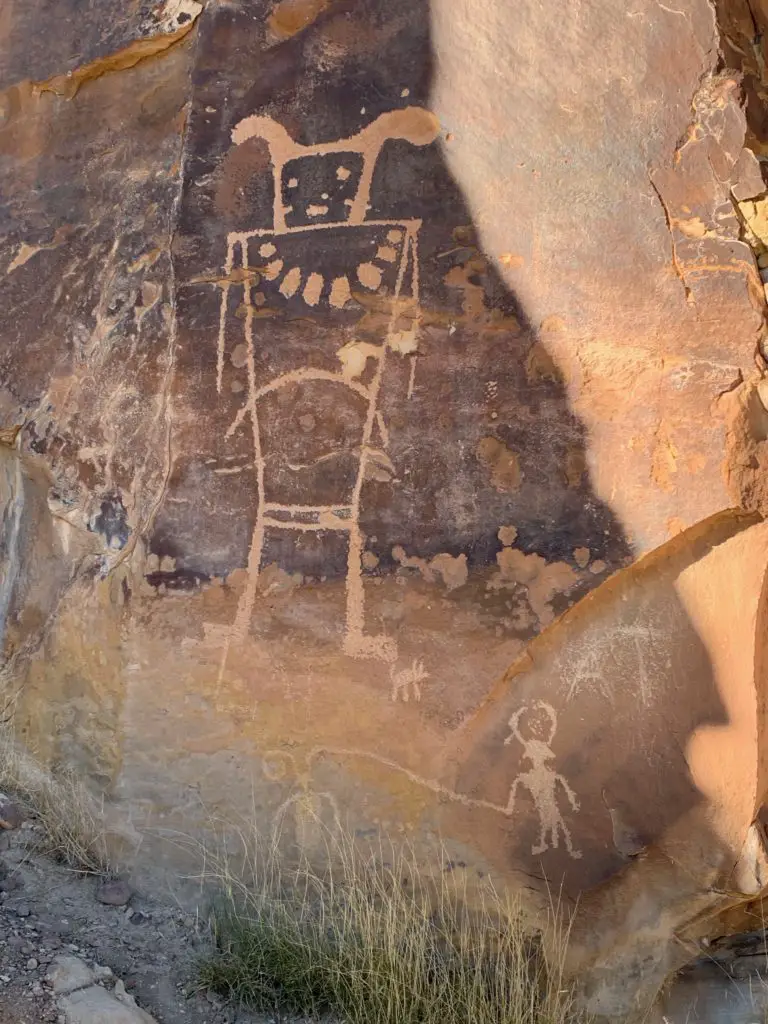
Island Park Road
This was another beautiful drive that is located on the Utah side of the park. I thought this area had the BEST petroglyphs that we saw throughout the entire monument.
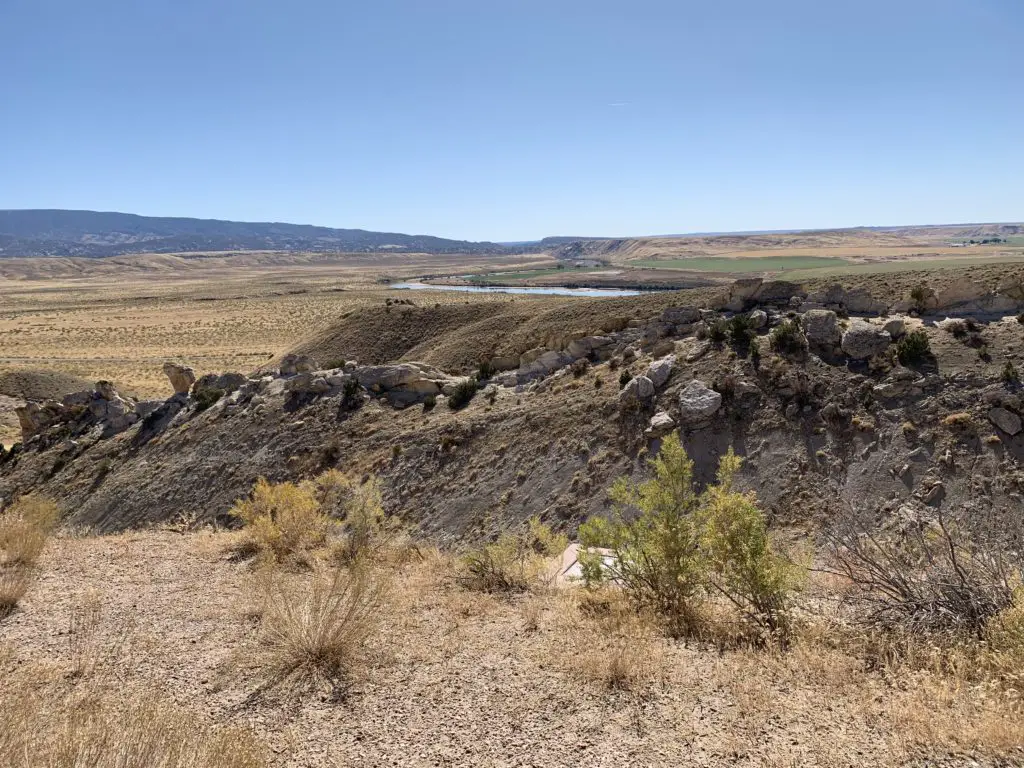
Island Park Road was dirt, and, according to the park office, is said to be “impassable” when wet. (It is suggested to only take high-clearance vehicles on this route, but, when we were there, any vehicle could have handled the drive).
We got lucky, as conditions were absolutely perfect throughout the duration of our trip, with clear skies. So we were visiting under the most opportune conditions. There were several areas we drove through that appeared to be dry creek beds, and looked like they could flood easily during wet conditions. This is also an area that only has one way in or out, so if you drive in under dry conditions, and then a summer thunderstorm pops up…you could find yourself trapped!
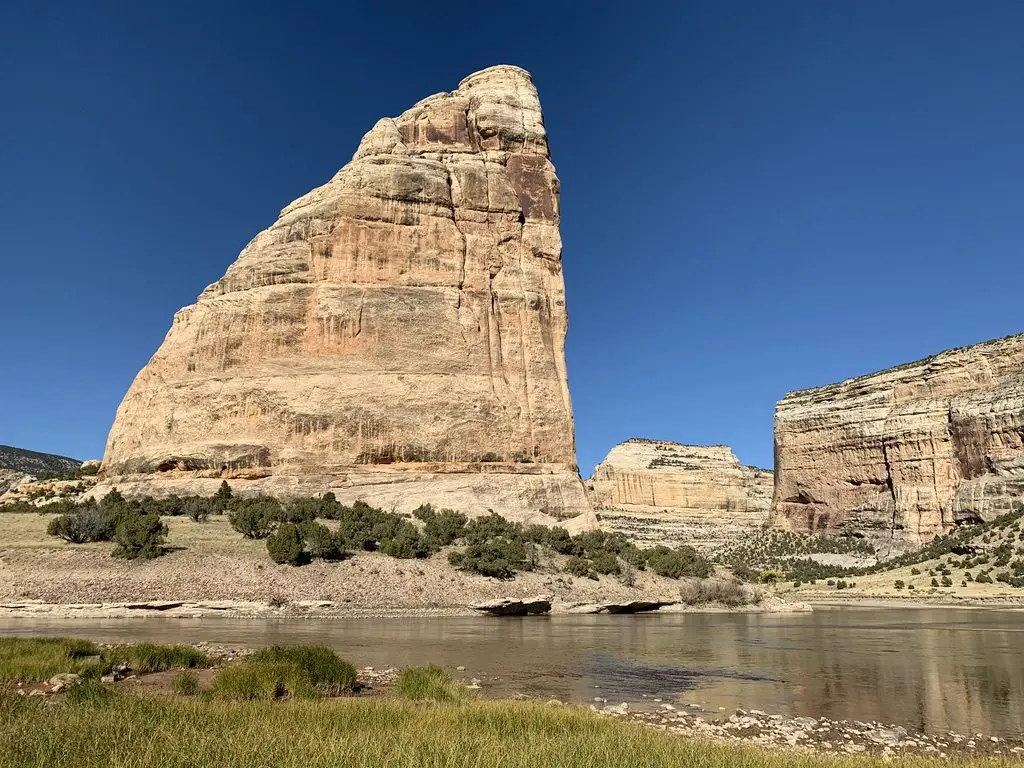
Below are a couple of pictures of the Green River as seen from this road…
…and some of the scrubland around the monument (and thanks go out, as usual, to Mr. Trekker for most of these pics!)…
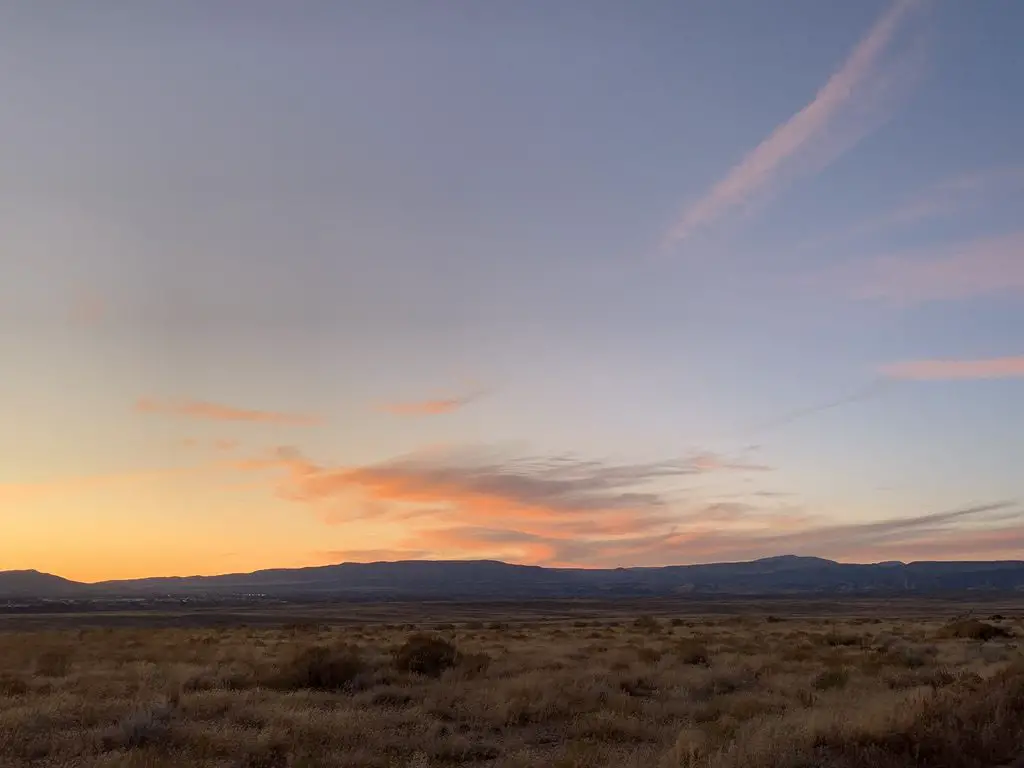
Sunset over the monument!
Have you visited this incredible place? Tell me about your favorite parts of it in the comments!
Like this post? Pin it!
Like what you read here today? Please feel free to leave a comment, like or share this post! You can also follow the blog on social media by clicking the links below!
In this post, I review Old Baldy, a trail loop near Spearfish, South Dakota that the Trekkers frequent.
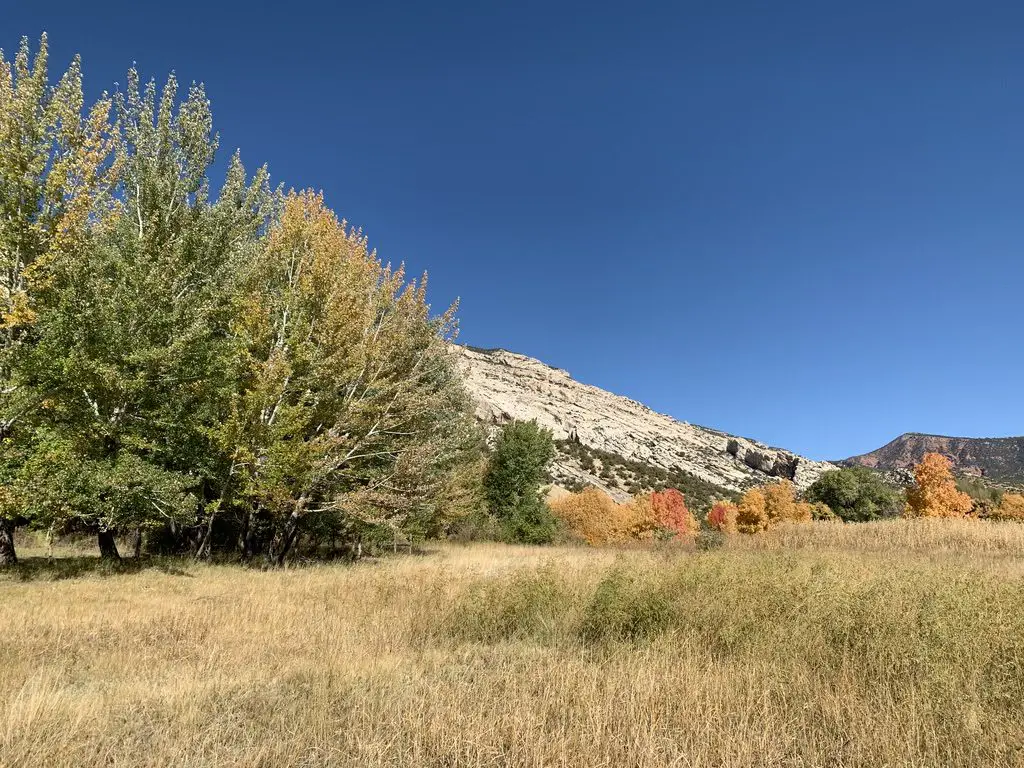
There is a great, under-appreciated place to view fall colors in the Black Hills, Old Baldy, near Spearfish, South Dakota! While it’s beautiful in the fall, the Trekkers enjoy it throughout the year as it’s never crowded.
Where is the Old Baldy Trailhead?
The Old Baldy trailhead is on Tinton Road, about halfway between Spearfish and Lead. You can get there from either town.
From Spearfish, the easiest way is to take Exit 8 off of I-90, for McGuigan Road. Take this south to the T-intersection with Tinton Road, and then turn right towards the forest. Take Tinton Road about 10 miles to the trailhead.
If you’re coming from Lead, take US 85 west (towards Wyoming) for about 18 miles out of Lead, until you reach the turnoff for Tinton Road. Take Tinton Road about 18 miles to the trailhead.
The road is gravel, however, it is well-graded. As long as you don’t mind your car getting dusty, any passenger vehicle can handle it under good conditions. In the winter, though, it is rarely plowed past the Iron Creek Lake turnoff when coming from Spearfish. A high-clearance, 4WD vehicle is often needed to drive this road under those conditions, and even then it is often impassable unless you’re on foot, skis, or are powered by a snowmobile.
I’m not sure if this area has been getting more snow in recent years (this part of the Hills receives some of the largest amounts of snow during the winter); or if the Forest Service just isn’t maintaining Tinton Road past the Iron Creek Lake turnoff; or if they’re intending it more for snowmobile usage. But whatever the reason, the road has been almost impassible for much of the winter, lately. One time, we got pretty stuck attempting to reach the trailhead (we were VERY fortunate we carry recovery gear).
What you will see on the Old Baldy Trail
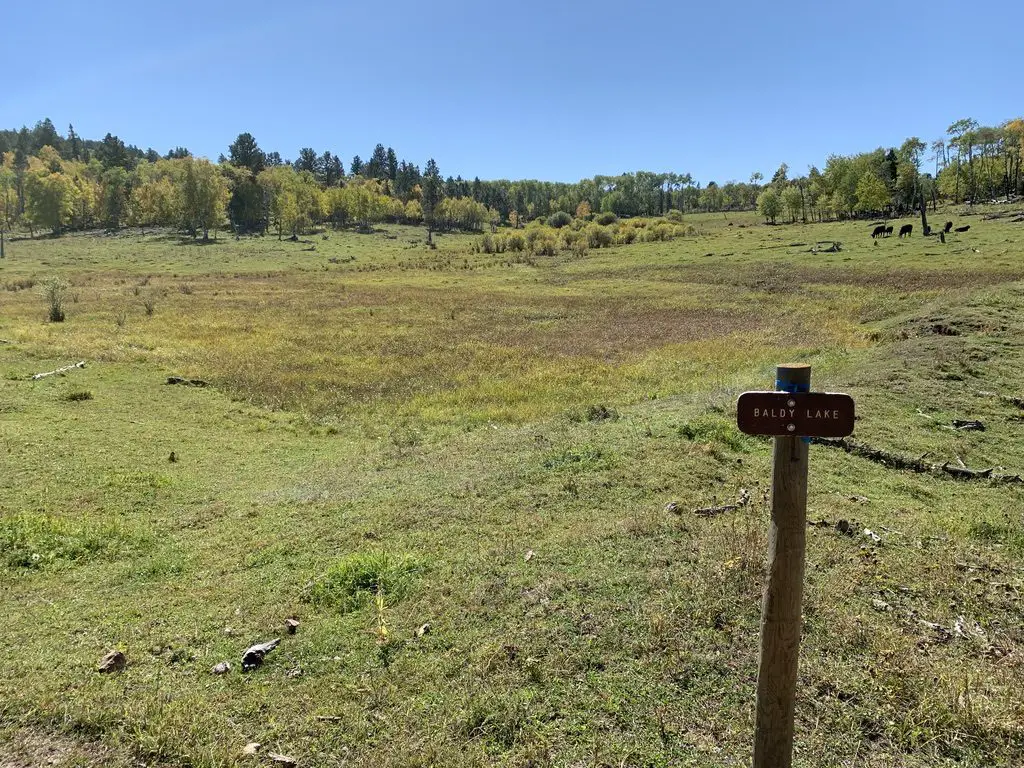
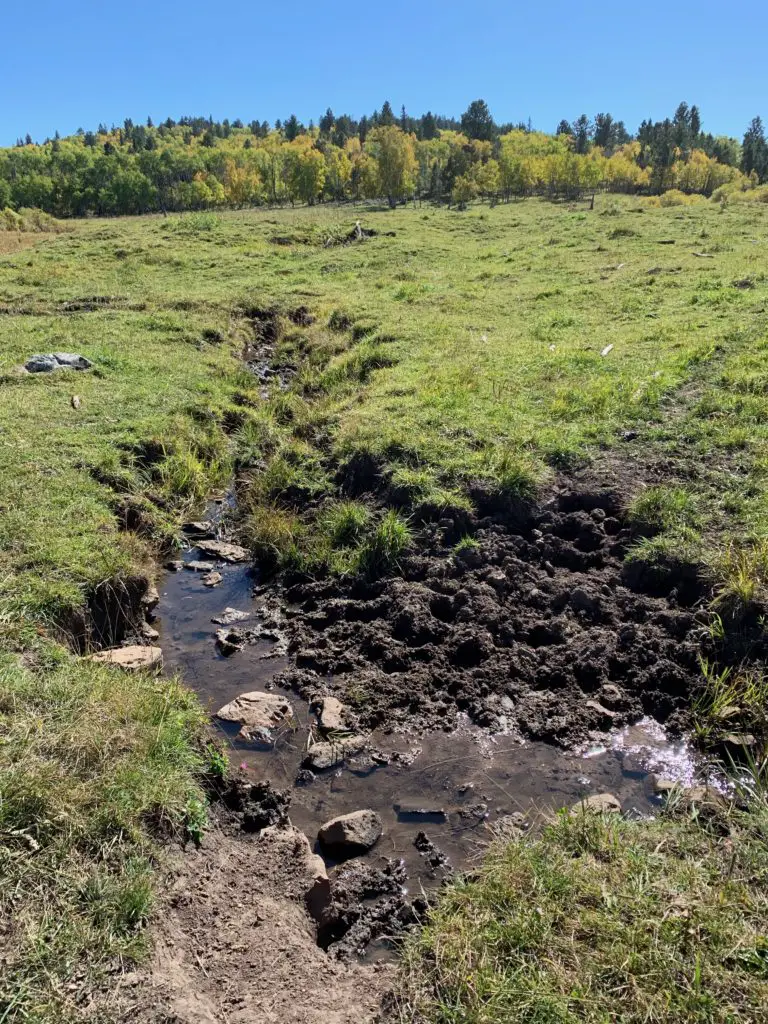
This loop trail is around six miles in total length, with an additional spur to the Mt. Baldy summit that adds a little over 1.5 miles to the total hike. There is a “lake” that is signed, though I use that term VERY loosely. We’ve never actually seen any water in it. It should be called “Green Lake” because it looks like a meadow! There is a small stream that runs through the “lakebed”, but mostly you only see grass and cows near here. 😋
A word of warning, beware of the cows, as well as their “leavings”. 🤥 The National Forest leases this area to local ranchers, so you can find cows anywhere and everywhere near here during the summer.
The “lake” (yes, really!)Hey look, we found some water!
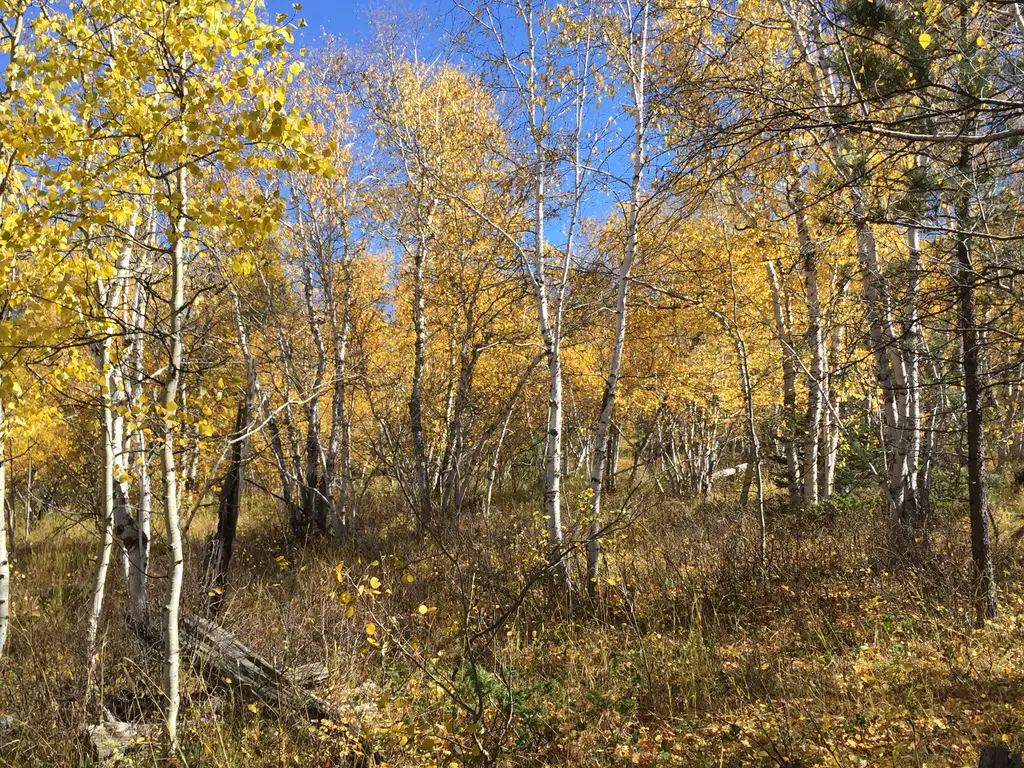
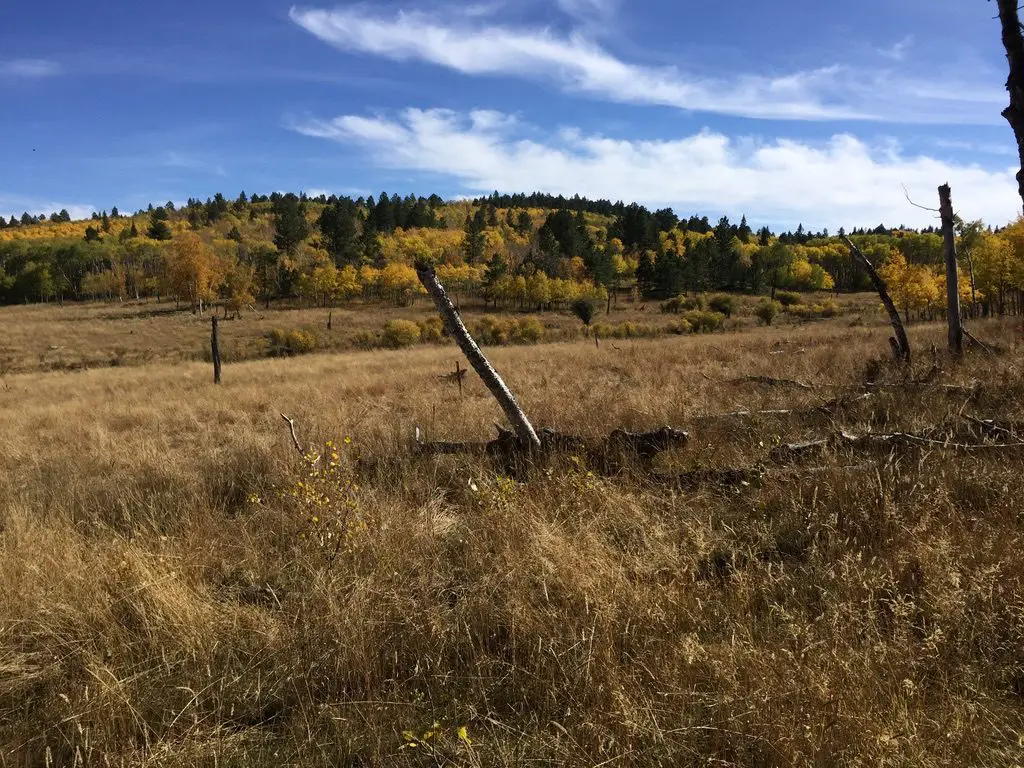
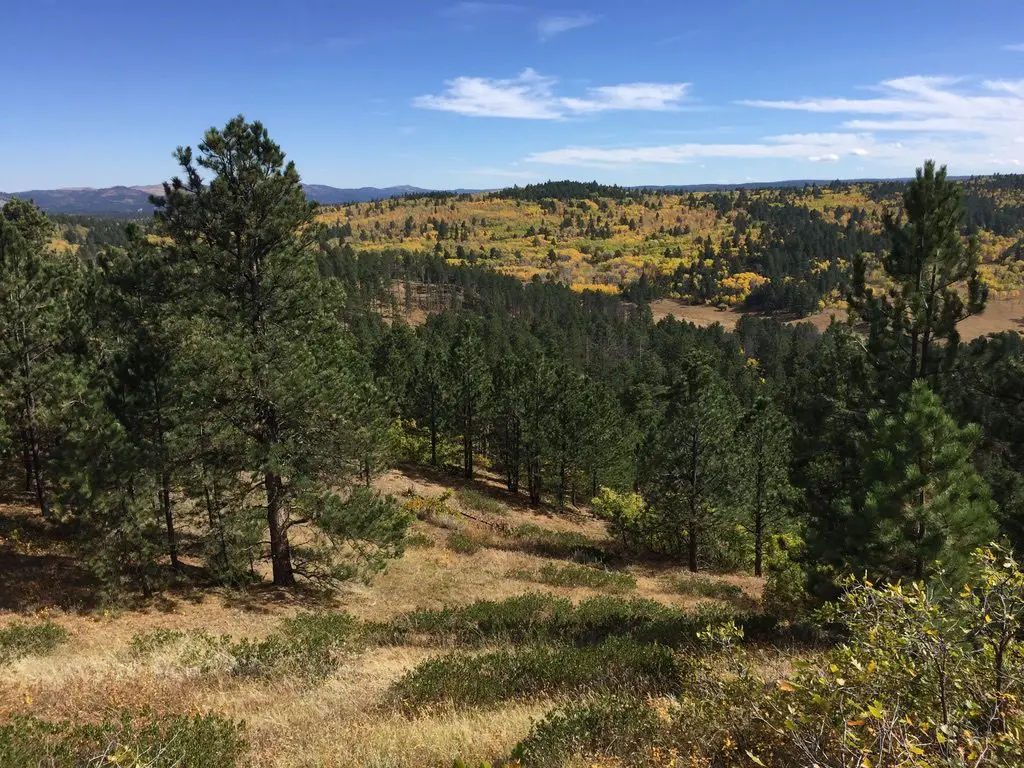
The trail winds through pine forests with aspen glens dispersed amongst them. It also traverses the edges of a few meadows and offers spectacular views of the surrounding landscape. This area is especially pretty in fall when the yellow of the aspen and green of the pine complement each other beautifully, especially as contrasted against the clear blue, Black Hills sky!
Besides the main loop, there is a spur of the Rimrock Trailthat can be accessed from here, as well. This side trail will take you to the rim of Spearfish Canyon. These are all prime places to enjoy the fall colors the Northern Hills are known for, without having to deal with the crowds you’ll find in the Canyon below.
The trail options here are really just one loop (other than the spur to the Rimrock Trail). If you go right at the fork, heading counterclockwise, you’ll hit the GORGEOUS aspen glen first, traversing the only real switchbacks found on the trail on the downhill.
If you do choose this route, the return trip is a little steeper, but I think it’s easier. There is more open space, so there is also more breeze if you’re warm. The open areas also provide you with INCREDIBLE views of the surrounding mountains and prairie. However, if it’s sunny in the summer, this area could be hotter as there is less shade…
Regardless of which fork you choose, the “lake” and the turnoff to the summit of the mountain are at the bottom of the hill. You know what this means! No matter which fork you pick, you have to climb back up the WHOLE return trip! 😛
If you start off on the left branch of the trail, going clockwise, you’ll hit the more open area of the loop on your descent. Facing this direction, you’ll actually be provided with more expansive views of the surrounding countryside.
Unfortunately, this will mean you have to face the “spirit-crushing switchbacks” (I HATE switchbacks!) through the aspen glen, on the way back up the hill. Because the trees in this area are thicker, it is also more shaded during the summer months. HOWEVER, the denser foliage also means there is less of a breeze…phew! Decisions, decisions!
Either way the aspen glen, especially, is INCREDIBLY beautiful in the fall months, not to mention the surrounding hillsides that are ablaze with yellow from all the aspen trees. The aspen glen is my favorite of the whole trail in the fall.
Author’s note: the American Indians who originally gave the Black Hills their name called them this because the pine forests made the Hills look dark from afar. In recent years, the pine trees have been decimated by pine beetles and some wildfires. Aspen trees grow EXTREMELY WELL in their wake. One wonders if a few hundred years from now, a more appropriate name for these hills may be the Aspen Hills, or the Yellow Hills–the color all the aspens turn in the fall…
This view is from one of the lookout points on the western edge of the loop
These days, if you visit this location, you will see some extensive storm damage. Multiple tornadoes actually went through here in recent summers! That’s a rare occurrence in the Black Hills!
One of the storms was especially nerve-racking for me, as the Trekker Parental Units (and Extended Family) were staying at a rental house near Lead at the time. They were outside the tornado’s track–thankfully–but only by about a mile. 😮 Fortunately, the baseball-sized hail that the storm dropped missed them as well! Helplessly watching that tempest on the radar, while I was sitting in the sunshine over an hour away, was enough to give me a few gray hairs!
When is the best time of year to visit the Old Baldy trail?
The trails are perfect for both summer and winter recreation IF you can reach them in the winter. If Tinton Road is passable as far as the trailhead when there is snow on the ground, the actual site can be hard to find as the sign is often buried by snow. Also, there is usually very little parking as the lane to the parking lot is not plowed.
So, you must make do with parking along the side of the road. In the past, we have come here multiple times to snowshoe or ski. Unfortunately, we haven’t been able to reach the site the last several years.
The difficulty in accessing the trailhead during the winter months is really a shame because it is GORGEOUS under the cover of snow. The sunbeams shine through the bare branches of the aspen trees while the pristine, white snow, and dark-brown bark, contrast perfectly with the dark green pine trees and blue sky. Make sure to wear layers, as it can get pretty windy up here since it’s near the top of the mountain.
This is a fun trail for mountain biking as well, heading downhill. 😋 Going back up can be a bit of a pain, especially if you ascend via the eastern leg of the loop, through the switchbacks. Both hikers and bikers need to be watchful for each other as there are several blind curves and collisions can happen if the bikes round them too quickly.
Horses are also allowed on this trail. It is imperative that bikers watch for these equines, who could shy and throw a rider, or hurt themselves (or the biker) if a bike came racing around a corner and startled them.
If you’re looking for a fine place to view fall colors in the Black Hills, and you’d like to avoid the usual crowds, check out Old Baldy! You’ll be glad you did!
Have you ever tried this trail in any season? Tell me about your experience in the comments!
Did you enjoy reading this post? Pin it!
Like what you read here today? Please feel free to leave a comment, like or share this post! Add your email at the bottom of the page, or the sidebar to the right, to be notified when a new post is published. By signing up for the email list, you will also receive a free copy of the Tranquil Trekker’s Top 10 Tips of Trekking Do’s and Don’ts!
You can also follow the blog on social media by clicking the links below!
We try to camp in the Bighorns, in northeastern Wyoming, at least once a year!
The Trekkers have a tradition of camping in the Bighorns each Labor Day Weekend! Puppers has been a trooper on our camping trips. She enjoys riding in the truck (she doesn’t even mind the BUMPY, jarring journeys we’ve taken her down a few 4×4 roads…too much! 😉) She can keep up with us on the hiking trails and she even handles the tents like a champ (though she needs a little assistance getting in and out of the rooftop tent).
You do have to wonder about people who drive 3+ hours to the wilderness, where they proceed to pee in a bucket and not shower for three days…and call that fun! 🤔😉😎
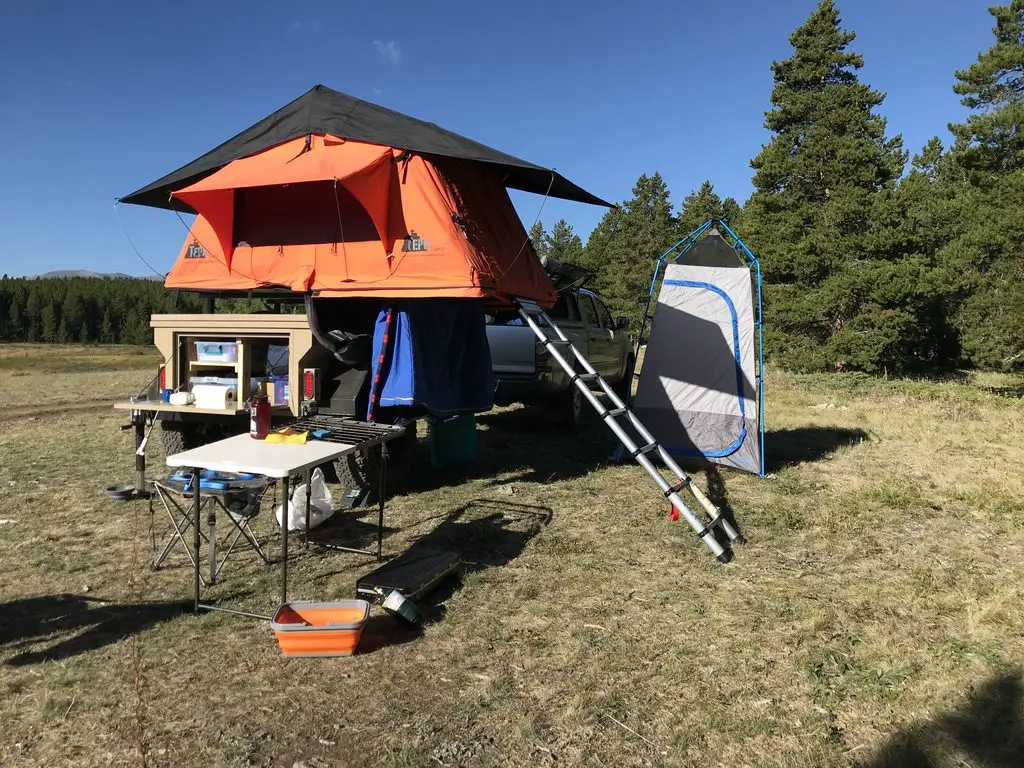
One of our camp setups
We finally caved and bought a privacy shelter for this trip, and we were SO glad we did. It made life SO MUCH easier. In the past we’ve used the vestibule that came with the rooftop tent, this worked ok, but even I couldn’t stand up straight in it (not to mention Mr. Trekker’s 6’4 frame). This could be because we have the tent on the trailer rather than on top of the truck, the vestibule likely works better in that situation. But the shelter worked great for changing, for a bathroom along with our Luggable Loo†, and for a shower using the solar shower. It was so cool to look up at night and see the Milky Way shining over you while you were changing or “taking care of business”. 😇
The Bighorn Mountains
I know I’ve said this before, and I hate to sound like a broken record, 😇 but I LOVE the Bighorns. I always forget we aren’t in the depths of the Colorado High Country when we visit there. I love their stony summits, some still sporting spots of white leftovers from last winter’s snowpack, just above the treeline far below.
I always think of them as their own tiny island of mountains that rises out of the high prairie of northeastern Wyoming, but according to Wikipedia, they’re actually a spur of the Rockies separated from the main mountain chain by the Bighorn Basin.
Though this area is just as beautiful as the Rockies, it is FAR less crowded, which makes it so much more pleasant to visit. 😋 There are no lines of people hiking in the Bighorns like we’ve experienced in various places around Colorado. Also, oftentimes, the lower-elevation plains may be baking in 90-degree weather, while it’s in the 60s-70s, and breezy, in the mountains!
It doesn’t hurt that, depending on which area you are heading to, the Bighorns are a shorter, 3 – 4-hour drive from the Black Hills, rather than the 6 – 8+ hours required to reach the mountains in Colorado ( and that’s just the Front Range, in the east-central portion of the state). You will still have to drive through rural Wyoming whether you’re going to Colorado or the Bighorns. However, to reach the mountains in Wyoming, you drive on I-90 the whole way. It’s a little easier if weather is bad, and you don’t have as much trouble with the Wyoming drivers who like to pass on two-lane roads leaving little room for oncoming cars…(ahem!🤬🤯) ( Of course, all that being said, no one should visit here, ever, it’s just a terrible place to be. 😮😇🙃)
The Bighorns aren’t to be trifled with though. These mountains are rugged, with little accommodations by way of gas, food, and supplies. Small towns, such as Buffalo, Ten Sleep, Greybull, and Sheridan dot the area. But these are few and far between (not to mention pretty tiny, by the standards of “normal” people who aren’t used to the small settlements that are common in the West). 😉 This is a national forest area, not a national park, so even camping accommodations are rustic, rarely offering more than potable water and a pit toilet (and those are the fancy ones)! 😮 So, if you’re looking to visit this area, be prepared to be self-sufficient. The views will make it worth the trial, though!
The night sky in the Bighorns
There isn’t a lot of light pollution in the Bighorns, so on clear nights, you are treated to an INCREDIBLE light show! Once the sun sets, the stars and planets come out in abundance. My whole life, I’ve never seen a night sky that is comparable to what you find in the crisp coolness of the high mountains. The sky actually looks like it has the measles, as there is almost a rash of stars that covers it. The cloudy ribbon of the Milky Way is often clearly visible as it stretches across the expanse of darkness. You can almost sense it glowing from within. It is truly an incredible sight.
Silent Night in the high mountains
Our campsite was at about 7500 feet on this visit (oftentimes we stay much higher, closer to 9000-10,000 feet). We’ve noticed something odd at these high altitudes that we have also experienced in Colorado’s High Country. There is a distinct lack of “night sounds”. You don’t hear the chirping of crickets or croaking of frogs in that thinner air, even on warmer nights, and I don’t know why. Nights tend to be pretty cool in those places, so it may be due to this, or just that there is a very short season where the night air would even be warm enough for the creatures to survive. But whatever the reason, when we’re up so high I do miss the “chirping” sounds of a summer night.
Dispersed camping in the Bighorn National Forest
Sometimes when we head out we Disperse Camp. This is also known as “dry camping”, where you just set up your camp somewhere in the national forest, outside of an established campground. We tried this for the first time in Colorado, at both State Forest State Park and near Crested Butte. On both occasions, we did stay at an actual, numbered campsite, it was just away from any campground and we weren’t able to see our neighbors.
On this trip, there were no numbered sites, but they did request that you stay at an already established campsite (designated by fire rings). I have never experienced such a busy weekend in the Bighorns! We stayed near Circle Park (there are a lot of “parks” in this region, they are basically just large, meadowy areas amongst the forests). It was a lovely site with views of the surrounding mountains, but we could see three other campsites from ours (one had a large group in it). We could hear even more campers, just on the other side of the copse of trees we were camped near. Next time, we’ll have to try going even farther out if we hope to have more privacy! 😉
Moose in the Bighorns!
Ladies and gentlemen, Martin the Moose!
I wasn’t sure if we’d see any moose on this trip since we were sticking mainly to the southern portion of the Bighorns and I wasn’t aware of any waterways running near our campsite (which moose favor). We lucked out though. It only happened one time, but at about 6:30 one morning, as the Pup and I were enjoying her “morning constitutional”, I spotted Martin the Bull Moose sauntering through the “park”, down the hill from our campsite! SUCCESS!!! Puppers wasn’t sure what to make of that LARGE, funny-looking thing!
Hiking Trails
Circle Park Trail:
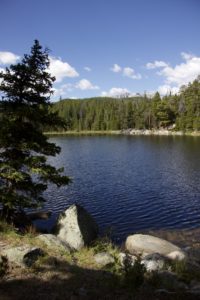
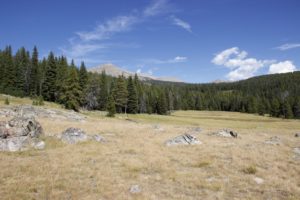
Sherd Lake
We did this same trail on our first trip to the Bighorns, several years ago, in October. It’s a nice hike, fairly wide and graded, and not terribly steep (though it is quite rocky in several places). We walked to Sherd Lake, which is absolutely GORGEOUS! There are views of several nearby mountains, such as Bighorn and Darton Peaks, from here. This trail is around four miles total, so it’s perfect for a day hike (especially with a not-quite-full-stamina, juvenile, canine friend). 🐶
The trail continues on to several other lakes from there. It also connects with an 8-mile loop that snakes around the nearby mountain peaks, if you’re looking for a lengthy hike (or a good backpacking trip).
Maybelle Lake Trail (off Forest Road 430):
This hike was deceptively tough. It’s only about three miles in total length, but it’s overgrown in many spots, very rocky and there are lots of downed trees. We actually lost the trail several times and had to root around to locate it again. Other parts of it are PERFECT though. They feature a flat, graded path through a moist, pine forest, that is surrounded on both sides by a green carpet of ferns, moss, and soft undergrowth. It almost felt like hiking in the cool rainforests of the Pacific Northwest. It was such an idyllic sight!
The other difficulty is in reaching this trail. You have to drive about 45 minutes (one way) on a rugged, 4×4 road to get to the trailhead. We had done this route several years ago, so we knew what to expect, but this would NOT be appropriate for a normal car, or even just a high clearance vehicle. If you don’t have a 4×4, with gear intended for off-road purposes, you should NOT attempt this road. (As an example, after trying this route a few years ago, we decided skid plates would be an important addition to the truck.) After completing the road on this adventure, there is some paint hanging from the skid plates in a few spots (we sure were glad they were there!) 😋
Maybelle Lake
Tensleep Canyon
I’ve mentioned this canyon before, but this is one of the most beautiful places in the Bighorns. If you are anywhere near this national forest and you have the chance to drive the canyon, you absolutely MUST put it on your list. It is NOT to be missed. This is one of our favorite areas in this national forest, and we try to enjoy it whenever we’re nearby.
The canyon is surrounded by arid, rocky cliffs on both sides, and is located on the southwest side of the Bighorn mountains. One great thing about it is that EVERYONE can experience it. US 16 is the main road that runs through the middle of the canyon. It’s an easy-to-drive, paved byway.
For the best views, I would travel down the canyon, from east to west, on Route 435. This is actually a dirt road that runs parallel to US 16 on the canyon’s southern side. It’s a very well-graded route though, so as long as you don’t mind your car getting a little dusty, any 2WD vehicle can handle it in good weather (beware, the road may be impassable during snowy or muddy conditions. The road is also closed to vehicles November – June).
It’s a two-way road, but it’s fairly narrow, so take your time and be cautious. There is room to pass a vehicle coming the other way but both drivers need to be aware as the lane gets tight.
This route provides better views down the length of the canyon into the dry expanse of Bighorn Basin, that opens up between the western slopes of the Bighorns and the eastern slopes of the Absarokas (near Yellowstone National Park). While the Bighorns provide cooler conditions, even on the hottest days of the summer, the Basin sits on a high prairie that lies in the rain shadow of the larger mountains, to the west, and bakes under the heat waves of the summer sun.
On your return trip up the canyon, take the paved, US 16 for incredible views of the dun-colored rock and sparse, short, green trees and bushes that comprise the canyon walls. They stand out in contrast to the deep blue of the sky above. These views are SO beautiful!
You aren’t very likely to see moose in this area, it’s too dry and hot for the vittles they enjoy dining on. The northern side of the Bighorns, near routes like US 14 and 14A, are prime spots for spotting these ungulates.
For the best light, it’s best to drive up the canyon, west to east, in the afternoon when the sun is at your back! Here is a link to a video I made of our drive up the canyon.
We were glad to enjoy another successful, Labor Day, camping trip to the Bighorns. We really enjoy returning to this area year after year. There are so many things to see here, it can’t all be done in one weekend!
Have you hiked to Sherd or Maybelle Lakes? What did you think of the trails? Tell me about your experiences in the comments!
Did you enjoy reading this post? Pin it!
Like what you read here today? Please feel free to leave a comment, like or share this post! Add your email at the bottom of the page, or the sidebar to the right, to be notified when a new post is published. By signing up for the email list, you will also receive a free copy of the Tranquil Trekker’s Top 10 Tips of Trekking Do’s and Don’ts!
You can also follow the blog on social media by clicking the links below!
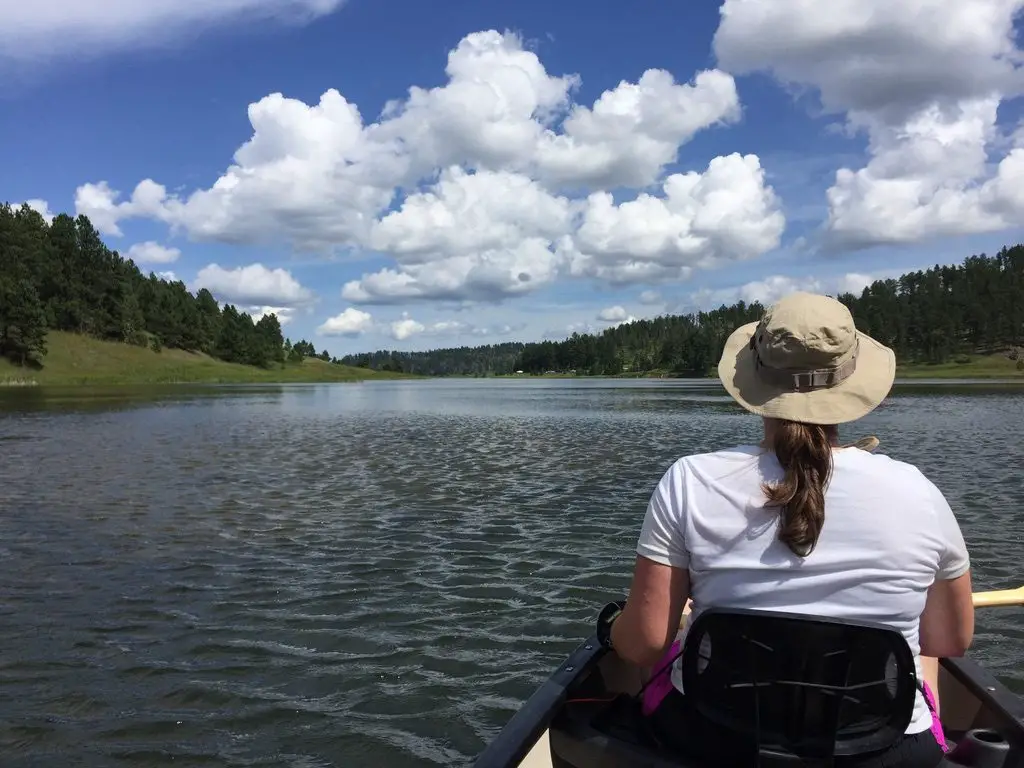
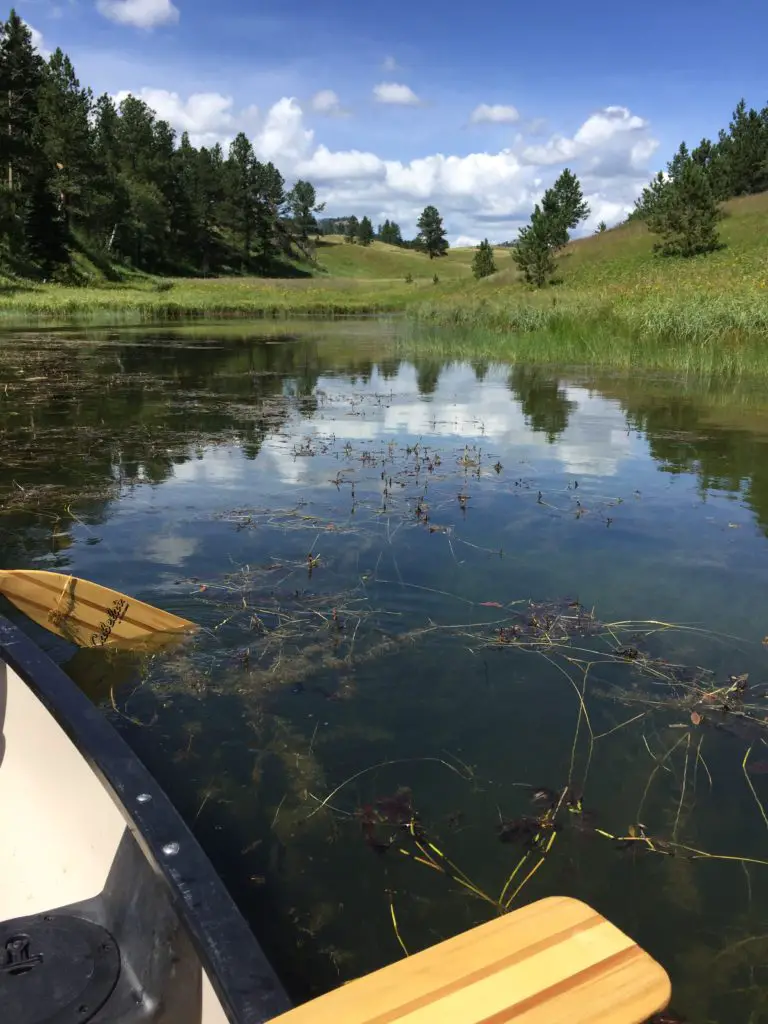
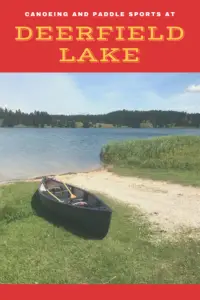
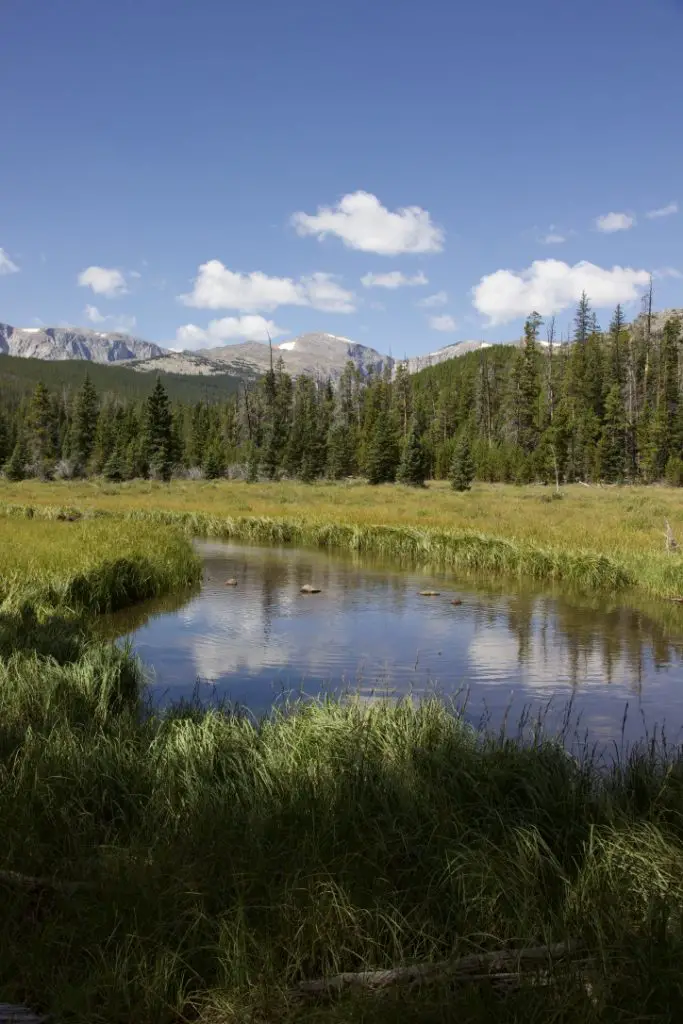
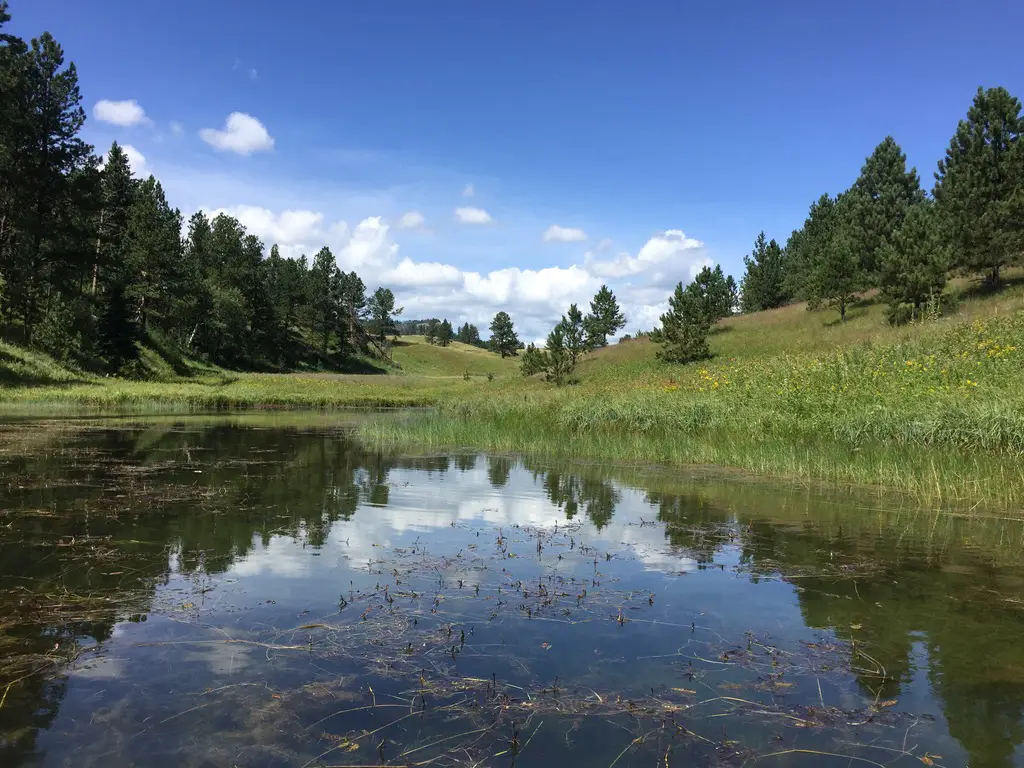
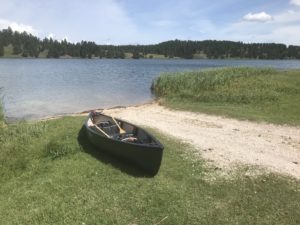
In this post, I review one of our favorite canoeing sites, Deerfield Lake, in the Black Hills of South Dakota.
Deerfield Lake is one of the Trekkers’ favorite spots for canoeing in the Black Hills (another is Jenney Gulch, on Pactola Lake.) This site is the terminus for the lengthy Deerfield Trail, that I’ve mentioned in another post. There are many things to enjoy about this part of the Black Hills. It’s a little more remote, so it does take a little longer to reach, but it’s also higher in elevation so it tends to be cooler. In the winter, this may not be as pleasant, but in the summer, when you are roasting in Rapid City, you can head to the Deerfield area for a less oppressively warm, far more enjoyable day.
Where in the Black Hills is Deerfield Reservoir?
This body of water is easy to reach, just take Deerfield Road west, from Hill City, for about 15 miles. You drive right past it so you can’t miss it! 🙃
What fun things can you do at Deerfield Lake?
There is a hiking trail, that circumvents the lake, which is also good for cross-country skiing and snowshoeing in the colder months. There are several campgrounds available around the lake, as well. You should be aware these are National Forest campgrounds, which we always love,but they usually have very sparse accommodations. Potable water and vault toilets are about all you can expect at these campsites (though they are usually quiet and some spots have WONDERFUL views). This is also one of our favorite areas for acquiring Christmas trees in the Black Hillsif you know where to look…
What makes Deerfield Reservoir so great?
One of the best things about this lake is that it is fairly large in size (comparable to Sheridan Lake farther to the east) but it has a no-wake rule. So, while people can bring motorized boats if they wish (and some do, to fish) they aren’t allowed to go very fast. This regulation makes Deerfield Reservoir an opportune site for the slower, water sports such as canoeing, kayaking, and paddle-boarding.
We are especially thankful for the peacefulness of this place as there was a measure put forth to the State Legislature to drop the no-wake rule. This would have allowed boats to travel at wake-speed which would likely have increased the frequency and amount of larger boats using the lake. Fortunately, after a STRONG public outcry from locals, it was defeated. We were SO glad! This is truly one of the best places to canoe or kayak in the Black Hills (in my opinion). There are other nice lakes around Custer State Park, but they aren’t nearly as large. They don’t offer as nice of views of the surrounding mountains either. (With all that being said, this is a horrible place to visit and everyone should stay away! 😮😉)
More pictures of our canoe day are below, courtesy of Mr. Trekker!
Just two canoe paddles, in love! 😉
With all this talk of canoeing, I would be remiss not to mention the rack system that we use to safely transport our mighty vessel. 😉 We really like the Yakima KeelOver Rooftop Canoe Rack†. It installs INCREDIBLY easily–and quickly–on the luggage rack on top of your vehicle. It also both protects the canoe from damage and holds it in place very well. Basically, the way it is designed, there are four separate, cushioned feet that attach to the already-installed luggage rack. If the canoe starts to slide to the left or the right, it is held in place by the feet on the opposite side. The kit also comes with tie-down straps that are used side-to-side and front-to-back to strap the canoe to the vehicle. It should be noted that this system is specifically intended for canoes only.
The next time you’re looking to escape the heat of a summer day in Rapid City, check out Deerfield Lake. It makes for a quiet retreat from the hustle and bustle of the busier, tourist towns, and offers scenic views as well. Go out and enjoy it!
Have you canoed at Deerfield Lake? Tell me about your experience in the comments!
Did you enjoy this post? Pin it!
Like what you read here today? Please feel free to leave a comment or share this post! You can also follow the blog on social media by clicking the links below!
†As an Amazon Associate I earn from qualifying purchases
This website uses cookies to improve your experience. We'll assume you're ok with this, but you can opt-out if you wish. Cookie settingsACCEPT
Privacy & Cookies Policy
Privacy Overview
This website uses cookies to improve your experience while you navigate through the website. Out of these cookies, the cookies that are categorized as necessary are stored on your browser as they are as essential for the working of basic functionalities of the website. We also use third-party cookies that help us analyze and understand how you use this website. These cookies will be stored in your browser only with your consent. You also have the option to opt-out of these cookies. But opting out of some of these cookies may have an effect on your browsing experience.
Necessary cookies are absolutely essential for the website to function properly. This category only includes cookies that ensures basic functionalities and security features of the website. These cookies do not store any personal information.

 –we always bring extra clothing in case we get stuck out for a lengthy period of time or need to hike out to call for help. We also have bug-out plans if the conditions prove worse than we had anticipated. Click
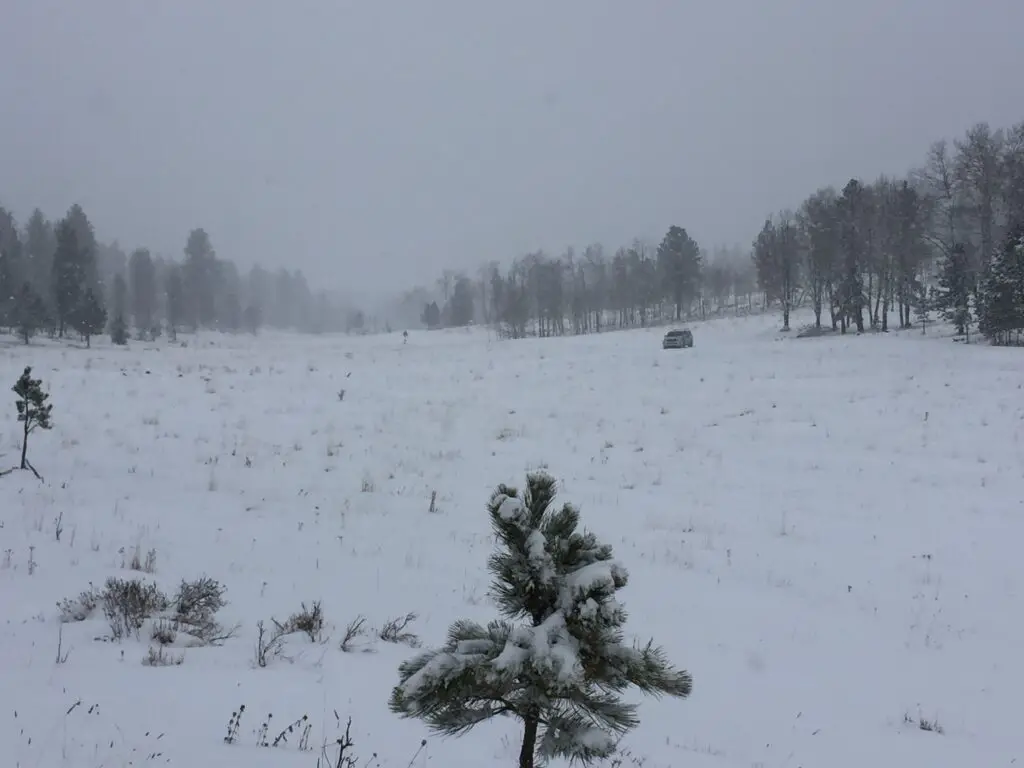


 Though this area is just as beautiful as the Rockies, it is FAR less crowded, which makes it so much more pleasant to visit. 😋 There are no lines of people hiking in the Bighorns like we’ve experienced in various places around Colorado. Also, oftentimes, the lower-elevation plains may be baking in 90-degree weather, while it’s in the 60s-70s, and breezy, in the mountains!
 Our campsite was at about 7500 feet on this visit (oftentimes we stay much higher, closer to 9000-10,000 feet). We’ve noticed something odd at these high altitudes that we have also experienced in
 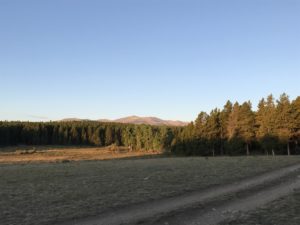 Sometimes when we head out we Disperse Camp. This is also known as “dry camping”, where you just set up your camp somewhere in the national forest, outside of an established campground. We tried this for the first time in Colorado, at both State Forest State Park and near Crested Butte. On both occasions, we did stay at an actual, numbered campsite, it was just away from any campground and we weren’t able to see our neighbors.
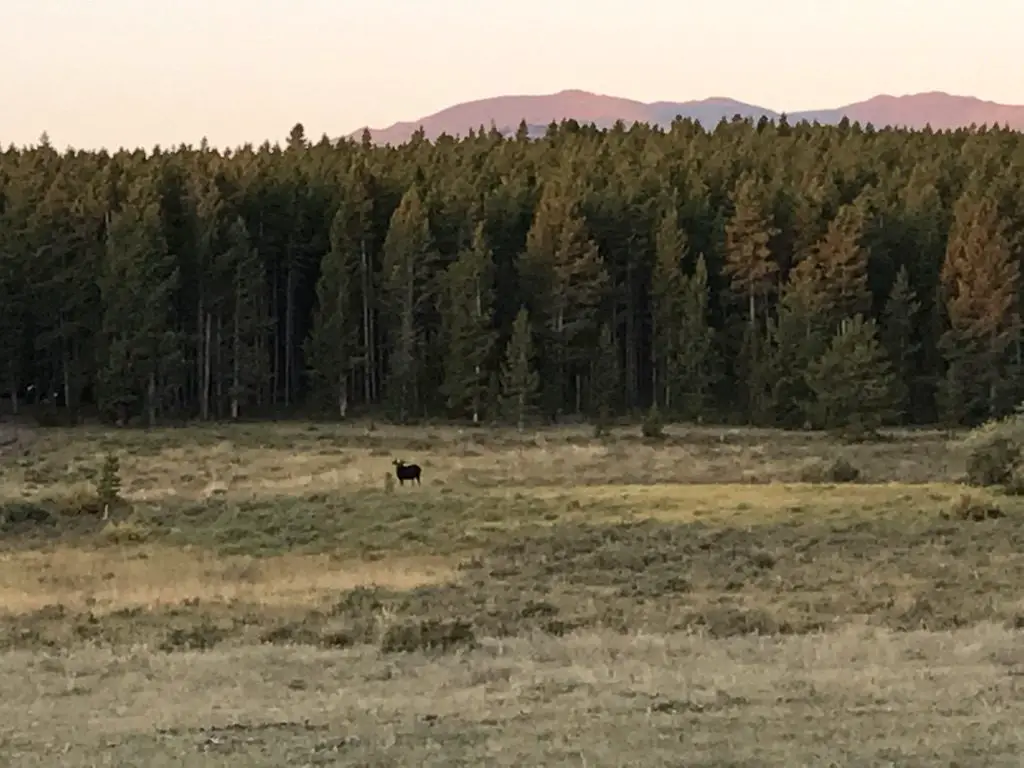
 This hike was deceptively tough. It’s only about three miles in total length, but it’s overgrown in many spots, very rocky and there are lots of downed trees. We actually lost the trail several times and had to root around to locate it again. Other parts of it are PERFECT though. They feature a flat, graded path through a moist, pine forest, that is surrounded on both sides by a green carpet of ferns, moss, and soft undergrowth. It almost felt like hiking in the cool rainforests of the Pacific Northwest. It was such an idyllic sight!
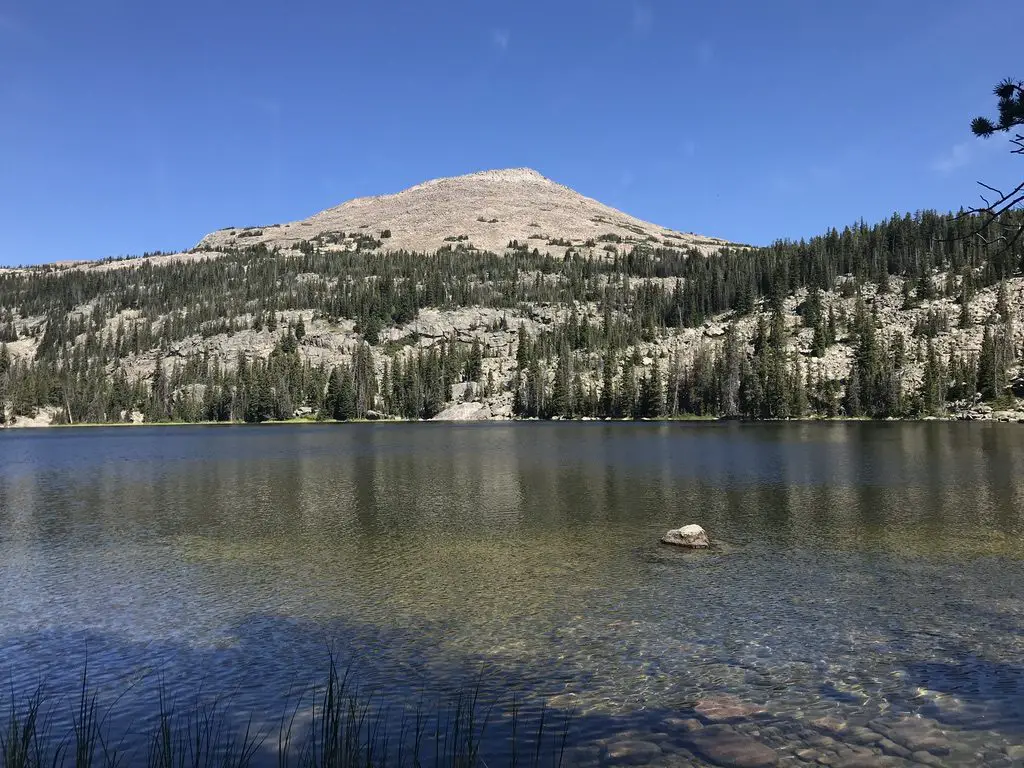
 Deerfield Lake is one of the Trekkers’ favorite spots for canoeing in the Black Hills (another is
 There is a hiking trail, that circumvents the lake, which is also good for cross-country skiing and snowshoeing in the colder months. There are several campgrounds available around the lake, as well. You should be aware these are National Forest campgrounds,